Samsung Galaxy Fame S6812i LCD Screen Replacement Guide: DIY Fix and Repair Tips
Duration: 45 minutes
Steps: 6 Steps
Step 1


– Find the tiny notch at the top of your device and gently use your nails or a plastic opening tool to pop the cover away from the mid-frame. You’ve got this!
Step 2


– Let’s get started by finding the indent on the bottom left corner of the battery compartment. Gently use your fingers or a plastic opening tool to pry the battery loose from the device. If you need help, you can always schedule a repair
Step 3
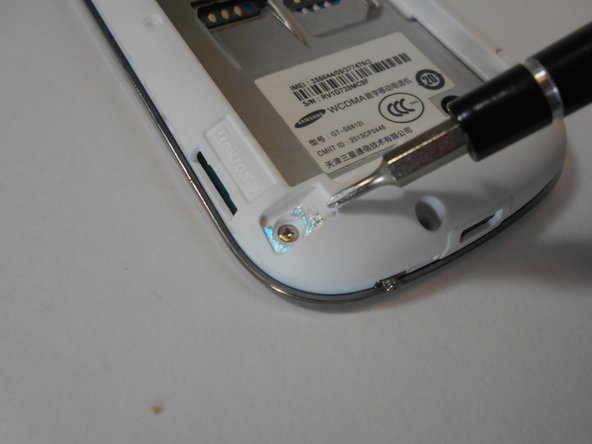

There’s a sneaky one tucked under some shiny foil. If you mess with it, the warranty goes poof! If you need help, you can always schedule a repair
Take your time with this part—slowly working around the edges can help you avoid any mishaps. You’ve got this!
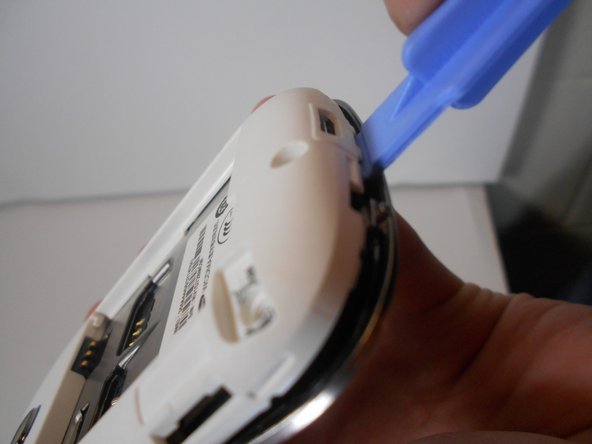
– Let’s get started by removing the five 3mm screws from the top and bottom edges of your device using a trusty Philips #00 screwdriver.
– Next, use a plastic removal tool to carefully pry the mid-frame away from the device. If you need help, you can always schedule a repair
Step 4
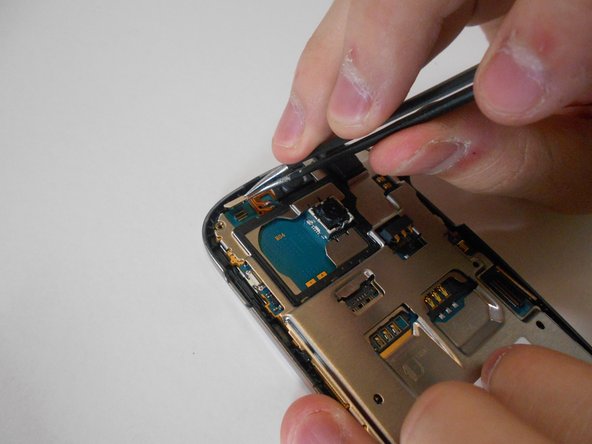

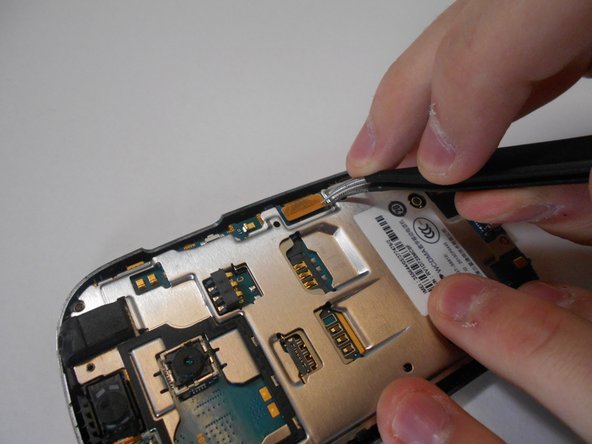
– Gently use the pointy end of the spudger to pop those ribbon connections off the motherboard. If you need help, you can always schedule a repair.
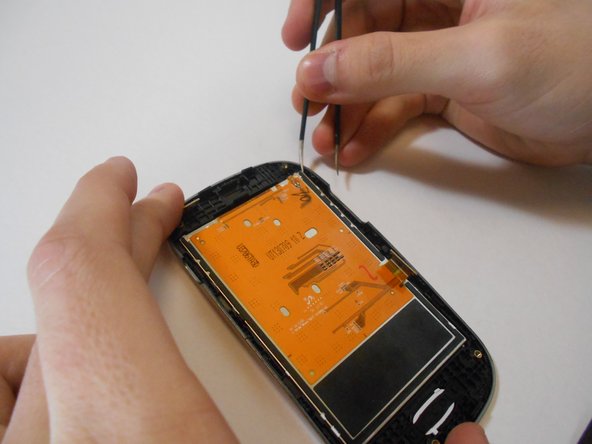
Step 5

– Let’s get this motherboard outta here! Use your trusty plastic opening tool to gently wedge between the motherboard and the front plate. This will separate the motherboard from the chassis. You got this!
Step 6

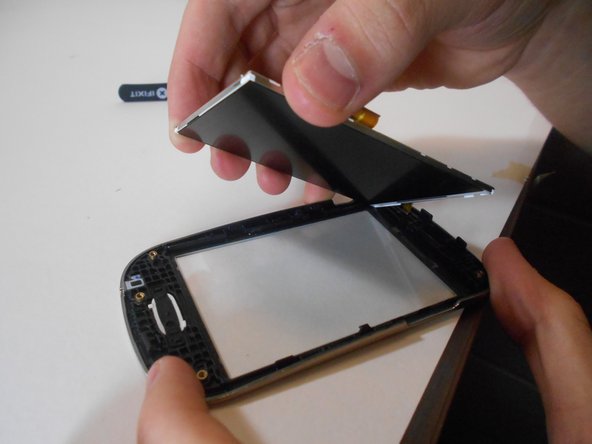
Keep things clean and tidy, and don’t touch the inside of the plastic screen cover or the new LCD Screen. They’re super delicate and can’t be cleaned once the device is back together. No worries though, if you need help, you can always schedule a repair.
– Now it’s time to carefully pry the LCD off the front plate of your phone – use one side of those trusty tweezers to get the job done. If you need help, you can always schedule a repair
Tools Used