Samsung Galaxy J3 2016 Screen Replacement Guide
Duration: 45 minutes
Steps: 17 Steps
Ready to give your Samsung Galaxy J3 a brand new look? This guide walks you through replacing the whole shebang – the front glass, digitizer, and AMOLED panel. Just remember to power down your phone before you get started. This guide will completely remove the screen, so if you’re just looking to swap out the guts of your phone, this isn’t the fix for you. If you need help, you can always schedule a repair.


Step 2

– Let’s get that back cover off! Gently remove it, making sure you’re being careful.
– Now, to put it back on, line it up with the back of the phone and give it a good squeeze around the edges. Those clips will snap right into place, and you’ll be good to go!


Step 4


– Let’s pop that display connector cover off! Find the little divot on the cover, it’s on the left edge, above the battery recess. Slide the edge of your opening tool into that divot.
– Now, carefully pry the cover out of its recess. Be gentle, we don’t want to damage anything.
– Great job! The display connector cover is out. If you need help, you can always schedule a repair
Step 5


– Carefully slide the flat end of your trusty spudger under the display connector for a smooth operation.
– Gently pry upwards to disconnect that display connector like a pro!
– To get everything back in place, align the connectors just right and press down on one side until you hear that satisfying click. Then, repeat on the other side. Remember, no middle pressing here! If you accidentally misalign it, you might bend those precious pins, and that’s a no-go. Let’s keep things damage-free!
Tools Used
Step 6

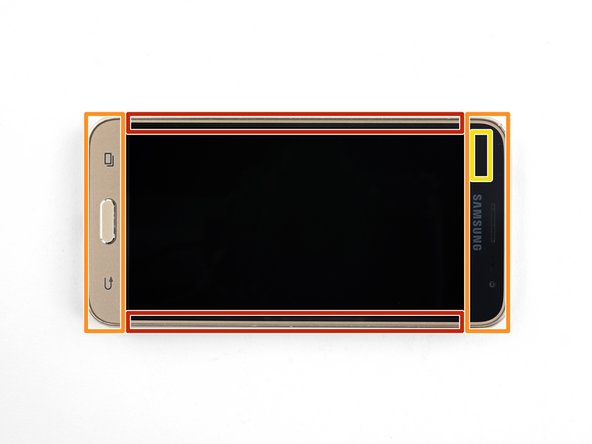
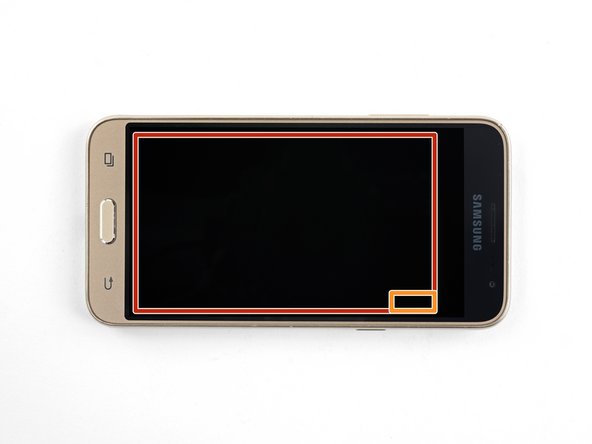
Alright, let’s get this phone’s top glass panel loosened up so we can reach that fancy AMOLED panel. Before we start slicing, just take a quick peek at these areas:
– Flip that phone over, you’ve got this!
– Time to warm things up! Grab your iOpener and give the right edge of the phone a minute of heat.
– Keep an eye out for that thin adhesive along the display panel.
– Then you’ll find thick adhesive holding the top and bottom bezels.
– And lastly, that digitizer cable… it’s a bit of a snag, but we’ll get through it!
Tools Used

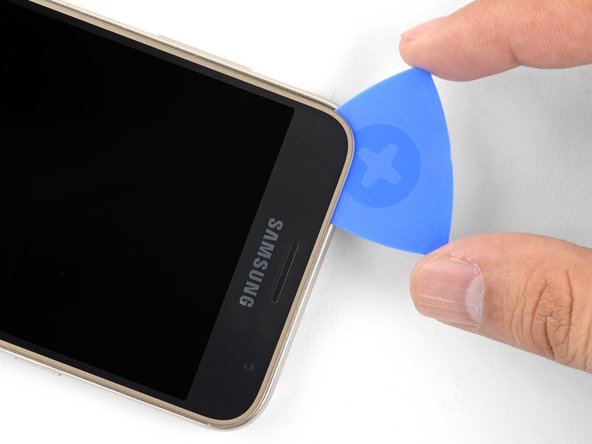
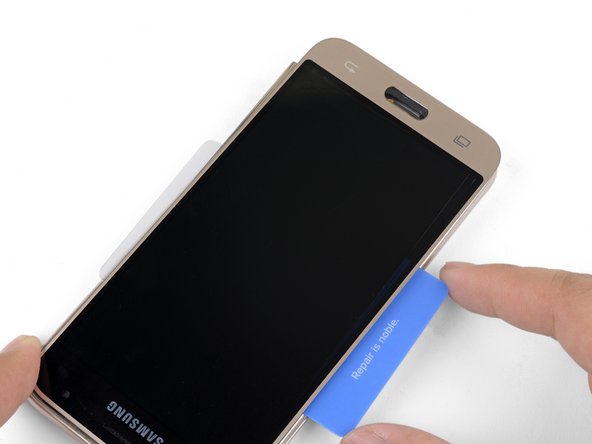
Step 7

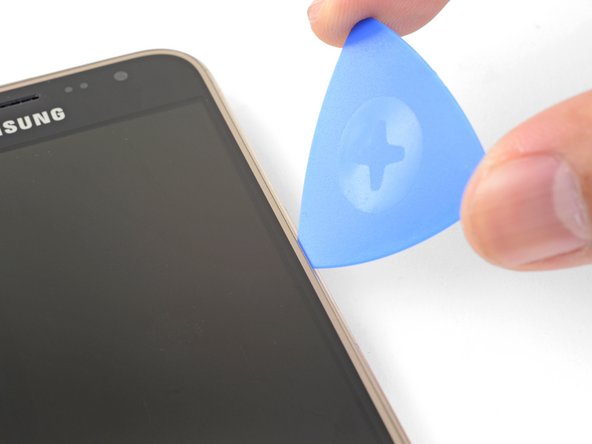
– Now it’s time to get this repair started. Firmly press an opening pick into the right edge seam of the phone, gently working it in until the point slides smoothly between the frame and the display glass. If you need help, you can always schedule a repair


Step 9

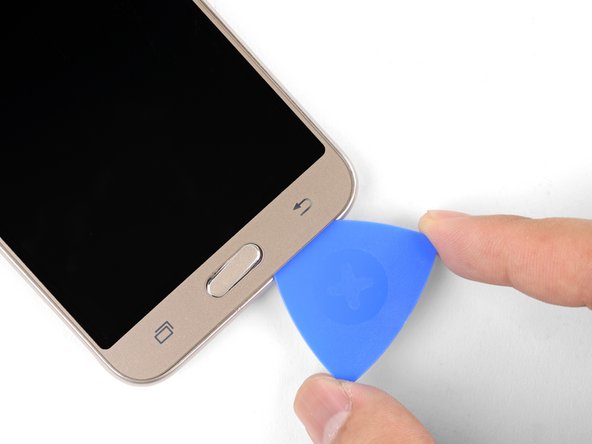

Having a tough time with that sticky adhesive? No worries! Just warm up an iOpener and give the bottom edge a minute of cozy heat before diving back in.
– Keep on slicing through that adhesive with your trusty opening pick! Gently curve around the bottom right corner and glide through the bottom bezel area like a pro.
Tools Used
Step 10

Having a tough time getting that top left corner? You might have bumped into the digitizer cable! Just gently pull the pick out a bit and give it another go. You’ve got this!
– Now, let’s repeat the heating and slicing steps for the left and top edges of the phone. Don’t worry, you’ve got this! Just like before, be gentle with the phone and you’ll be good to go. If you need a hand, you can always schedule a repair
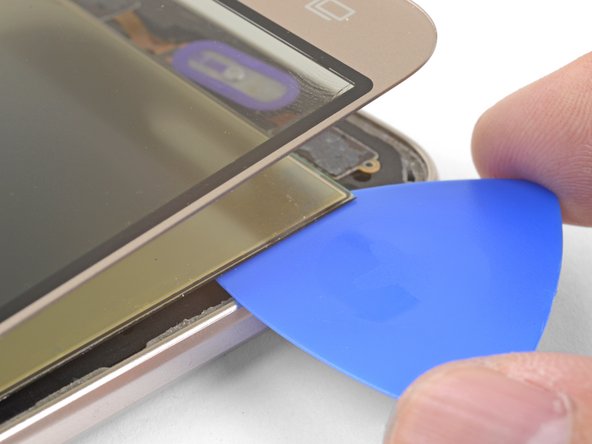
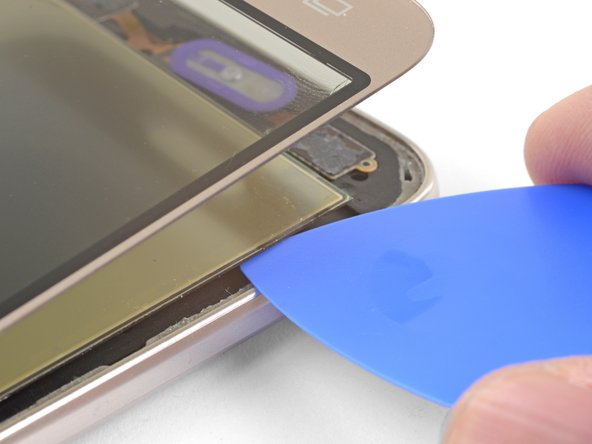
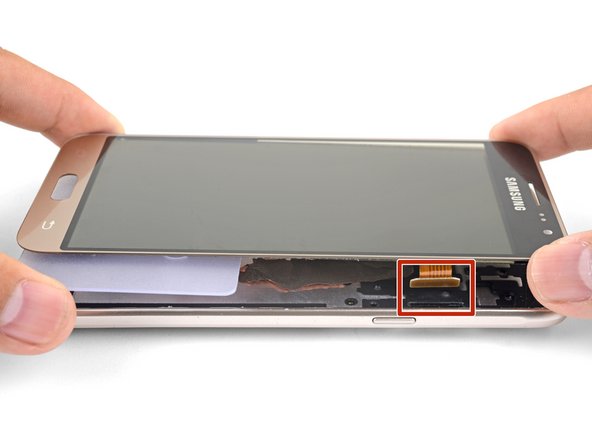
Step 11


Alright, let’s get that top panel loosened up so we can get to the AMOLED panel! It’s still connected to the display with a flex cable, so you can either carefully disconnect it or, if you’re feeling brave, give it a little snip with some scissors. Just remember, if you cut the cable, you won’t be able to use your old display anymore. If you’re not feeling confident, you can always schedule a repair with us!
– Grab those corners and gently lift the top panel, like you’re opening a secret treasure chest!
– Wiggle that panel a little, then use the opening pick to slice through any sticky goo holding it down.
– That home button might take a little trip, so hang onto it – you’ll need it for putting everything back together. Keep it safe and sound!
Step 12

– Grab your trusty iOpener and give it a good heat-up. Hold it against the front of the phone for a minute or so, making sure you get as much of the screen covered as possible.
– Alright, time to get a little sneaky. When you’re working on the AMOLED panel, there’s a couple things to keep in mind.
– First, this panel is stuck on with some seriously strong adhesive. So be careful, ok?
– And second, there’s a display flex cable hiding in there. If you hit that while you’re working, you could get a little slicing action. We don’t want that, do we?
Tools Used
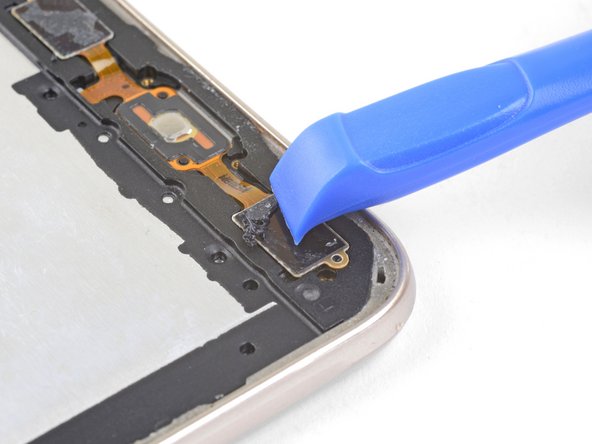
Step 13

Having a little trouble with that pick? No worries! Just heat up an iOpener, pop it on the area for about a minute, and give it another shot. You’ve got this!
Need a hand getting the pick in there? Check out the indent on the frame edge—it’s your buddy for making that insertion a breeze.
– Let’s get this AMOLED panel off! Gently slide the tip of your opening pick under the bottom left corner of the AMOLED panel.
– Now, give that adhesive a little nudge! Carefully and steadily push the pick in to separate the adhesive holding the AMOLED panel in place.
Tools Used
Step 14


The mission here is to gently free the AMOLED panel from its frame. No pressure, just a little finesse!
– Time to get started – insert a plastic opening card under the AMOLED panel, using the gap you created with the opening pick to help the card slide in.
– Now, gently but firmly press the card inwards, wiggling it a bit if needed, until it makes its way through to the other side. If you need help, you can always schedule a repair
Tools Used
Step 15


– Once your trusty plastic card has made its way through the width of your phone, give it a gentle nudge towards the top, adding a little wiggle if it needs some encouragement.
– Keep going until you set that AMOLED panel free from its frame. You’re almost there!
– Grab a heated iOpener to help tackle any stubborn adhesive that just doesn’t want to let go.
– Use those opening picks to slice through any leftover adhesive spots. You’re doing great!
Tools Used
Step 16


– Gently pry the AMOLED panel and digitizer away from the frame – use a plastic card to give it some extra support, just in case.
– As you carefully lift the screen, take a moment to thread the display flex cable out of its cutout, nice and smooth.
– Now it’s time to remove the screen – you’re making great progress! If you need help, you can always schedule a repair
Step 17

– Alright, let’s get this screen installed! Follow these steps to get your phone looking brand new.
– First things first – clean up that sticky mess! Scrape off any old adhesive from the frame using a tool, and wipe it down with high-concentration isopropyl alcohol (90% or higher). A clean surface makes for a happy screen. 😉
– Next, use an opening tool to gently scrape the adhesive off those capacitive buttons. We want to make sure they’re working smoothly.
– Time to connect your new screen! Carefully thread the display cable through the cutout and connect it to the phone. Turn on your phone to make sure everything is working before you stick it back down.
– Don’t forget about your Home button, champ! Make sure you pop that back in place during reassembly.
– Keep the screen connected while you’re re-adhering it to make sure it’s lined up perfectly. It’s all about that smooth look.
– And one last step – make sure you peel off any plastic liners on the back of the new screen before you stick it down. We want it to be a clean, smooth, and secure install. If you need help, you can always schedule a repair
