Samsung Galaxy J7 Earpiece Replacement Guide – DIY Repair Tutorial
Duration: 45 minutes
Steps: 9 Steps
Let’s get that earpiece speaker swapped out, friend! This is a step-by-step guide to replace a busted earpiece speaker in your Samsung Galaxy J7 V. If you’re struggling to remove those 14 screws, don’t sweat it. Just flip the phone over, and those screws will practically loosen themselves. Once they’re loose, use that handy magnet tool to finish the job. Need help with any of this? You can always schedule a repair.
Step 1

– Time to get started. Insert a Jimmy tool under one of the corners of the display and carefully lift it up. If you need help, you can always schedule a repair
Tools Used


Step 3

Handle those display ribbon cables with care—they’re a bit delicate and need your gentle touch!
– Gently raise the display to set it free!
Step 4

– First, find the home button’s socket – it’s where all the magic happens.
– Next, carefully insert the metal spudger between the socket and the home button, making sure not to damage anything. If you need help, you can always schedule a repair
Tools Used

Step 5

– Grab your trusty metal spudger and carefully slide it under the home button – it’s time to set it free from its socket.
– Gently lift up until the home button pops out of its spot, and you’ll be one step closer to a successful repair. If you need help, you can always schedule a repair
Tools Used
Step 6

– Prepare yourself for a mini-screw fiesta! Grab your trusty Phillips #00 screwdriver and remove the fourteen screws from the midframe. If you need help, you can always schedule a repair.
Tools Used

Step 7

– Turn the phone over to where you took out the battery.
– Give the midframe a good push with your hands to pop it off.
Step 8
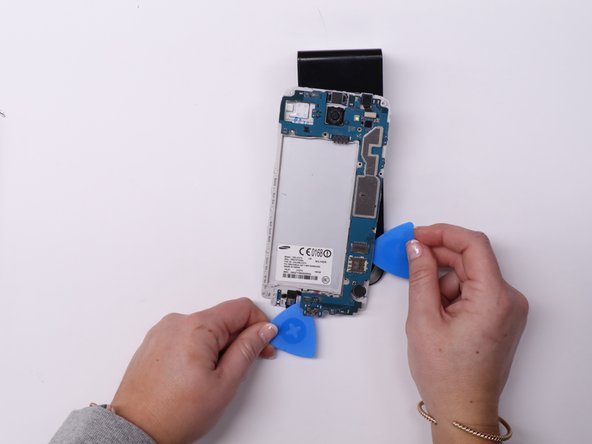

Distribute the opening picks around the motherboard to keep it stable and prevent bending as you carefully remove it. If you need help, you can always schedule a repair
– Turn the phone over so we can get busy!
– Grab a Phillips #00 screwdriver and carefully remove that single black screw from the motherboard.
– Slide a couple of iFixit opening picks underneath the motherboard to help lift it up.
– Using those handy iFixit opening picks, gently lift the motherboard out.
Tools Used
Step 9

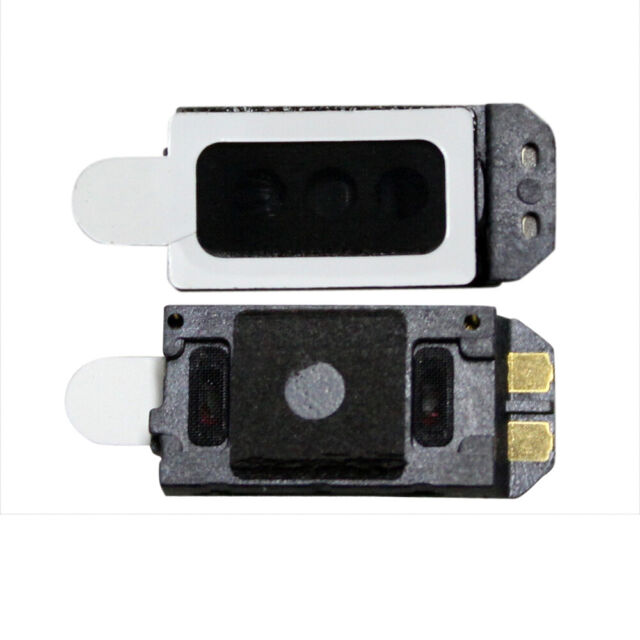
– Grab those tweezers and gently pry off the back of the earpiece speaker. You’ve got this!
Tools Used