Samsung Galaxy J7 Screen Replacement Guide: Step-by-Step DIY
Duration: 45 minutes
Steps: 7 Steps
To get the best outcome, ensure your device is switched off and try to work in a tidy, static-free zone. You’ve got this!
Hey there, tech warriors! This guide is for anyone dealing with a cracked or unresponsive screen on their Samsung Galaxy J7 (2015). A busted screen can totally mess with your phone’s mojo, but this replacement will bring it back to life! It’s a super straightforward fix, but remember, we’re dealing with some delicate parts, so take your time and follow each step like a pro. Keep your phone off and work in a clean space to get the best results. If you need a helping hand, you can always schedule a repair.
Step 1


If the cover seems a little stubborn, don’t sweat it! Instead of wrestling with it, grab a plastic opening tool to gently coax it open and keep that case looking sharp. Remember, patience is key!
– Spot the Tab: Look for the tab at the top left corner of the back cover (marked with a red square).
– Slip in the Tool: Use your fingernail or a plastic opening tool to gently lift the tab.
– Pop the Cover: Carefully work your way around the edges to completely remove the back cover.
Step 2


– Find the Battery Slot: Check out that little groove at the bottom right corner of the battery (it’s waving at you with a red square)!
– Remove the Battery: Give the edge a gentle nudge and carefully slide the battery out.
– Tip: Make sure the battery is totally disconnected from the motherboard before you go ahead and remove it.
Step 3

– Let’s get started by removing the ten 4.2 mm screws around the edge of the midframe using a Phillips #000 screwdriver. If you need help, you can always schedule a repair
Tools Used

Step 4


If you’re struggling to get that back panel off, don’t fret! Just gently warm up the edges with a hairdryer or heat gun. It’ll help soften the adhesive and make things a little easier. If you need help, you can always schedule a repair
– Let’s get this party started! Grab your iFixit opening tool and gently lift up the back of your device. It’s like giving your phone a little hug, but with a tool. Once you’ve got it lifted, disconnect it from the front. We’re almost there!
Tools Used

Step 5
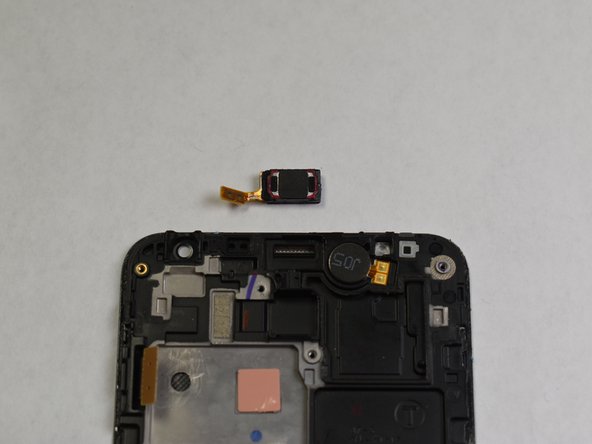

– The speaker component is just a little stuck. Grab a plastic pry tool and gently lift it up to disconnect the cable with ease!
Step 6

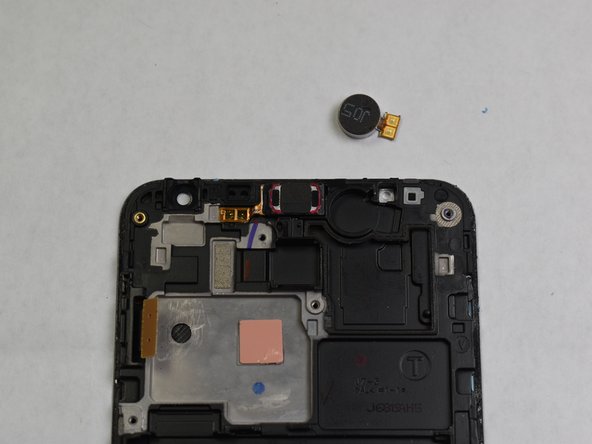
– Carefully lift the motor tab with a gentle touch. You’ve got this!
– Take the motor out of the panel entirely to unplug it like a pro.
– By removing the motor, you’re opening up the path to easily swap out the screen assembly. Just remember to handle the motor and its connectors with some TLC!
Step 7

– Now, just retrace your steps and put your new screen back in, like putting together a puzzle, but way cooler. 😎
– Once you’ve got everything back in place, give your new screen a tap test and make sure everything’s looking sharp. If anything seems off, you can always schedule a repair.