Samsung Galaxy M31 Battery Replacement
Duration: 45 minutes
Steps: 15 Steps
Let’s get that battery power down to 25% or less. It’s like giving your device a little power nap before we get started.
Hey there, phone repair enthusiast! Let’s give your Samsung Galaxy M31 a new lease on life with a fresh battery. If your battery is feeling a little puffy, take it easy and be careful, okay? For your safety, make sure the battery’s charge is below 25% before we dive into the phone. This keeps things cool and helps us avoid any surprises. Oh, and don’t forget, you’ll need some fresh adhesive to stick everything back together when you’re done. Ready to roll? Let’s do this! If you need help, you can always schedule a repair.
Step 1


– Ready to get your SIM card out? Let’s do it! Find the tiny hole on the side of your phone, near the SIM tray. Grab your SIM card tool (or a paperclip in a pinch) and gently push it into the hole. You’ll feel the tray pop out a little. Awesome!
Tools Used

Step 2


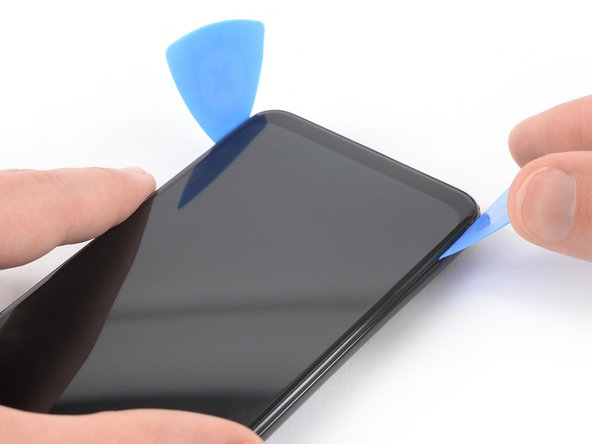
– Let’s get started by inserting an opening pick between the phone assembly and the back cover at the bottom edge of the phone – it’s the first step to freeing your device from its casing.
– Now, gently slide the opening pick around the bottom right corner to release the clips holding the back cover in place. If you need help, you can always schedule a repair
Step 3

– Alright, let’s get this back cover off! Grab your opening pick and slide it between the back cover and the phone assembly near the bottom edge.
– Now, slide that pick around the bottom left corner, loosening up those clips holding the back cover in place. You’re doing great!
Step 4
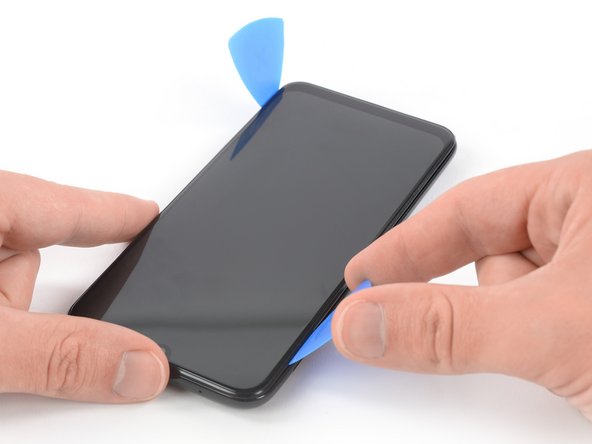

– Alright, let’s get this party started! Slide the opening pick along the left side of the phone to release those plastic clips holding the back cover on. It’s like giving your phone a little high five, but with a tool instead of your hand.
Step 5


– Let’s get this party started! Slide that opening pick along the right side of the phone to release those plastic clips holding the back cover in place.
Step 6
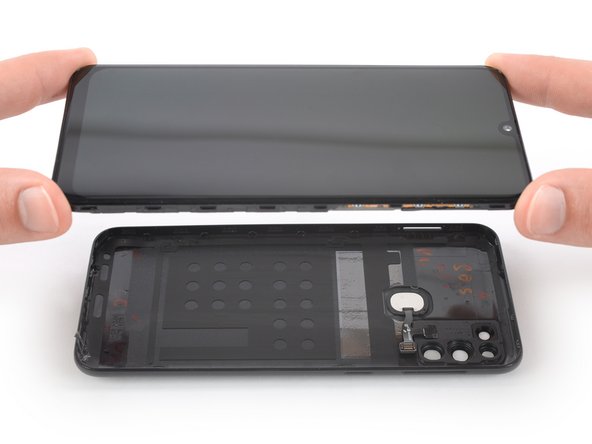


Heads up! The flex cable for the fingerprint sensor is a bit on the short side, which means it might decide to take a little vacation during the removal process. To keep it happy and intact, take your time when removing the back cover—no need to rush!
– Gently lift the phone assembly out of the back cover. Think of it as giving your phone a little hug!
– Before you seal everything up, why not turn your phone on and give it a quick test run? Make sure all the functions are dancing along nicely! Just remember to switch it back off completely before diving back into the assembly.
Step 7

– Unscrew those seven Phillips #00 screws (3.9 mm length) and let the adventure begin!
Step 8

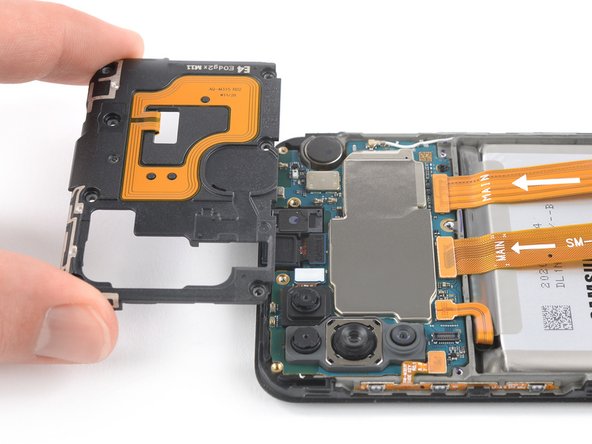
– Slide the tip of your trusty opening pick under the top edge of the motherboard cover.
– Gently nudge the motherboard cover upwards with the opening pick.
– Carefully lift off the motherboard cover and set it aside.
Step 9

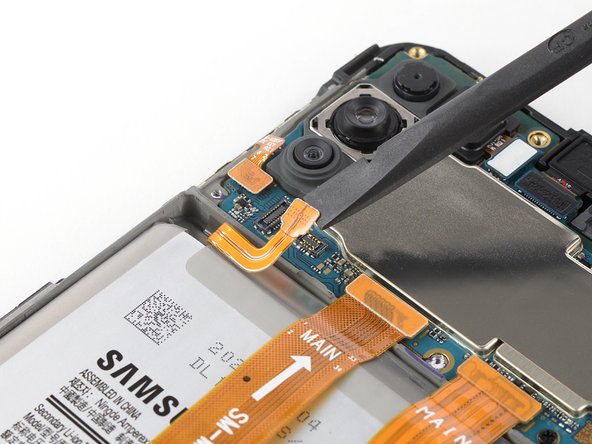
– Alright, let’s get this battery flex cable disconnected! Grab your trusty spudger (the flat end, of course) and gently pry up the cable. It’ll come right off. If you’re feeling a little unsure about any of this, remember, you can always schedule a repair.
Tools Used

Step 10
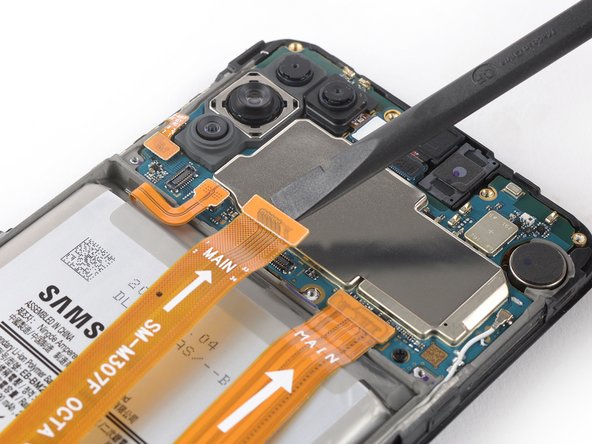

– Now, grab that trusty spudger (you know, the flat end) and gently pry up that display flex cable. You’re almost there! Don’t worry, it’s all about a little finesse. If you need help, you can always schedule a repair.
Tools Used
Step 11

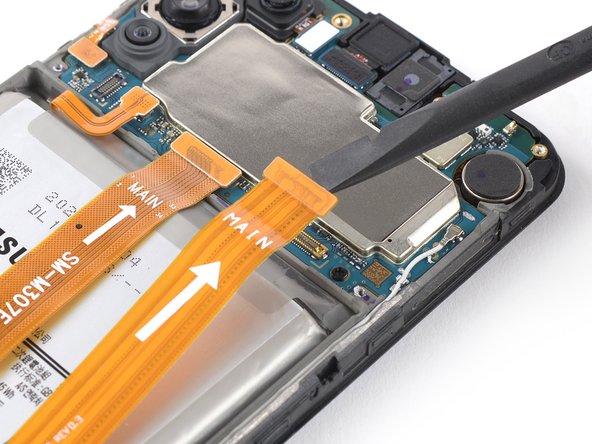
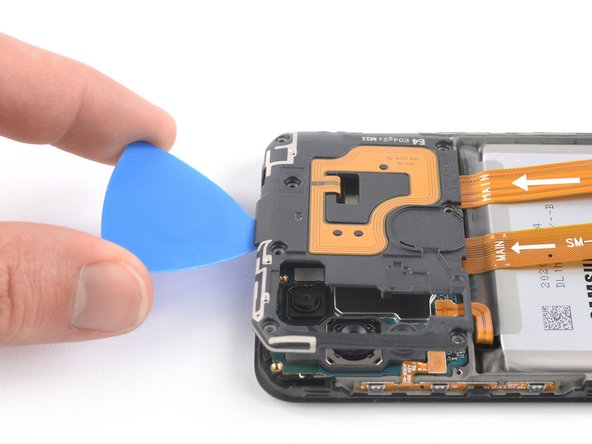
– Time to get started. Use your trusty spudger to carefully pry up and disconnect the interconnect flex cable – it’s like freeing a tiny cable from its cozy home.
– Now, gently fold both cables down towards the bottom edge of your phone. This will give you the room you need to access the battery and get the job done. If you need help, you can always schedule a repair
Tools Used
Step 12

– Time to get this repair started. Apply a heated iOpener to the screen for at least two minutes to loosen the adhesive underneath the battery. This will make the removal process a whole lot easier. If you need help, you can always schedule a repair
Tools Used

Step 13
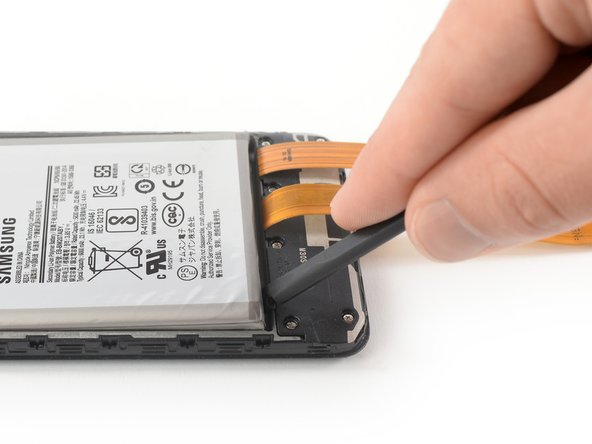

Alright, let’s get this battery out! Be careful not to bend it, though. These batteries can get a little squirrely if they get messed up. No prying with metal tools, just gentle persuasion. If you need help, you can always schedule a repair
– Gently slide a spudger into the little gap between the daughterboard cover and the battery at the bottom left corner. It’s like giving your device a friendly nudge!
– Now, use that spudger to lift the battery up just a bit until you’ve got a cozy little gap underneath. You’re doing great!
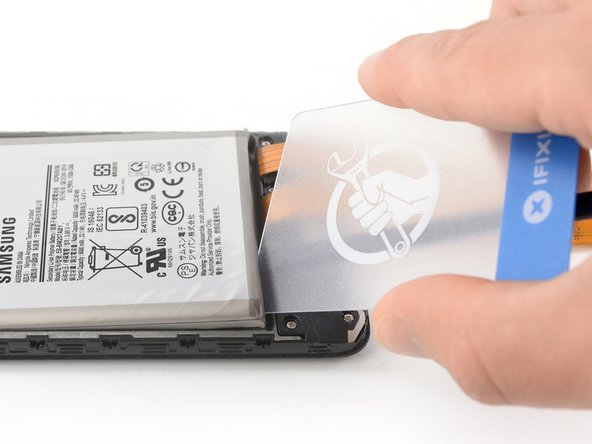
– Next, grab a plastic or playing card and slide it into the gap you just made with the spudger. You’re almost there!
Tools Used
Step 14


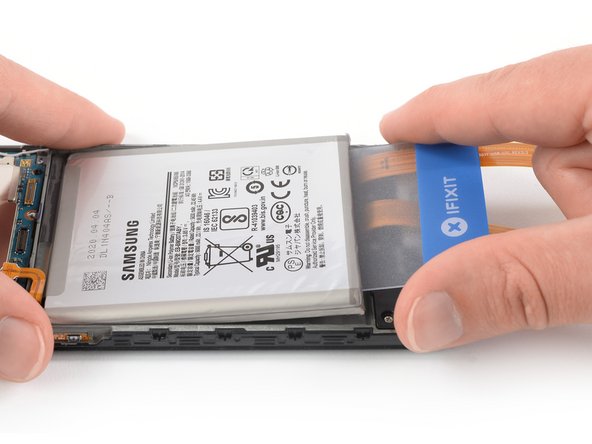
– Time to free that battery! Slide the plastic card under the battery and use it to gently cut the adhesive. You got this!
– Now, it’s time to pop that battery loose! Carefully use the plastic card to pry up the battery. Don’t worry, you’re almost there!
Step 15
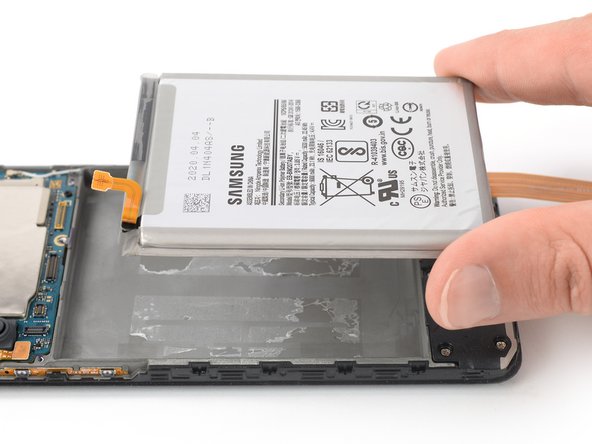

Refrain from reinstalling a battery that looks a bit worse for wear—it’s not just a bad idea, it’s a safety no-no!
– Pop out the battery.
– Before sticking the battery in place, give it a quick temporary connection to make sure it’s lined up right. Stick it in, then disconnect and keep reassembling your phone.