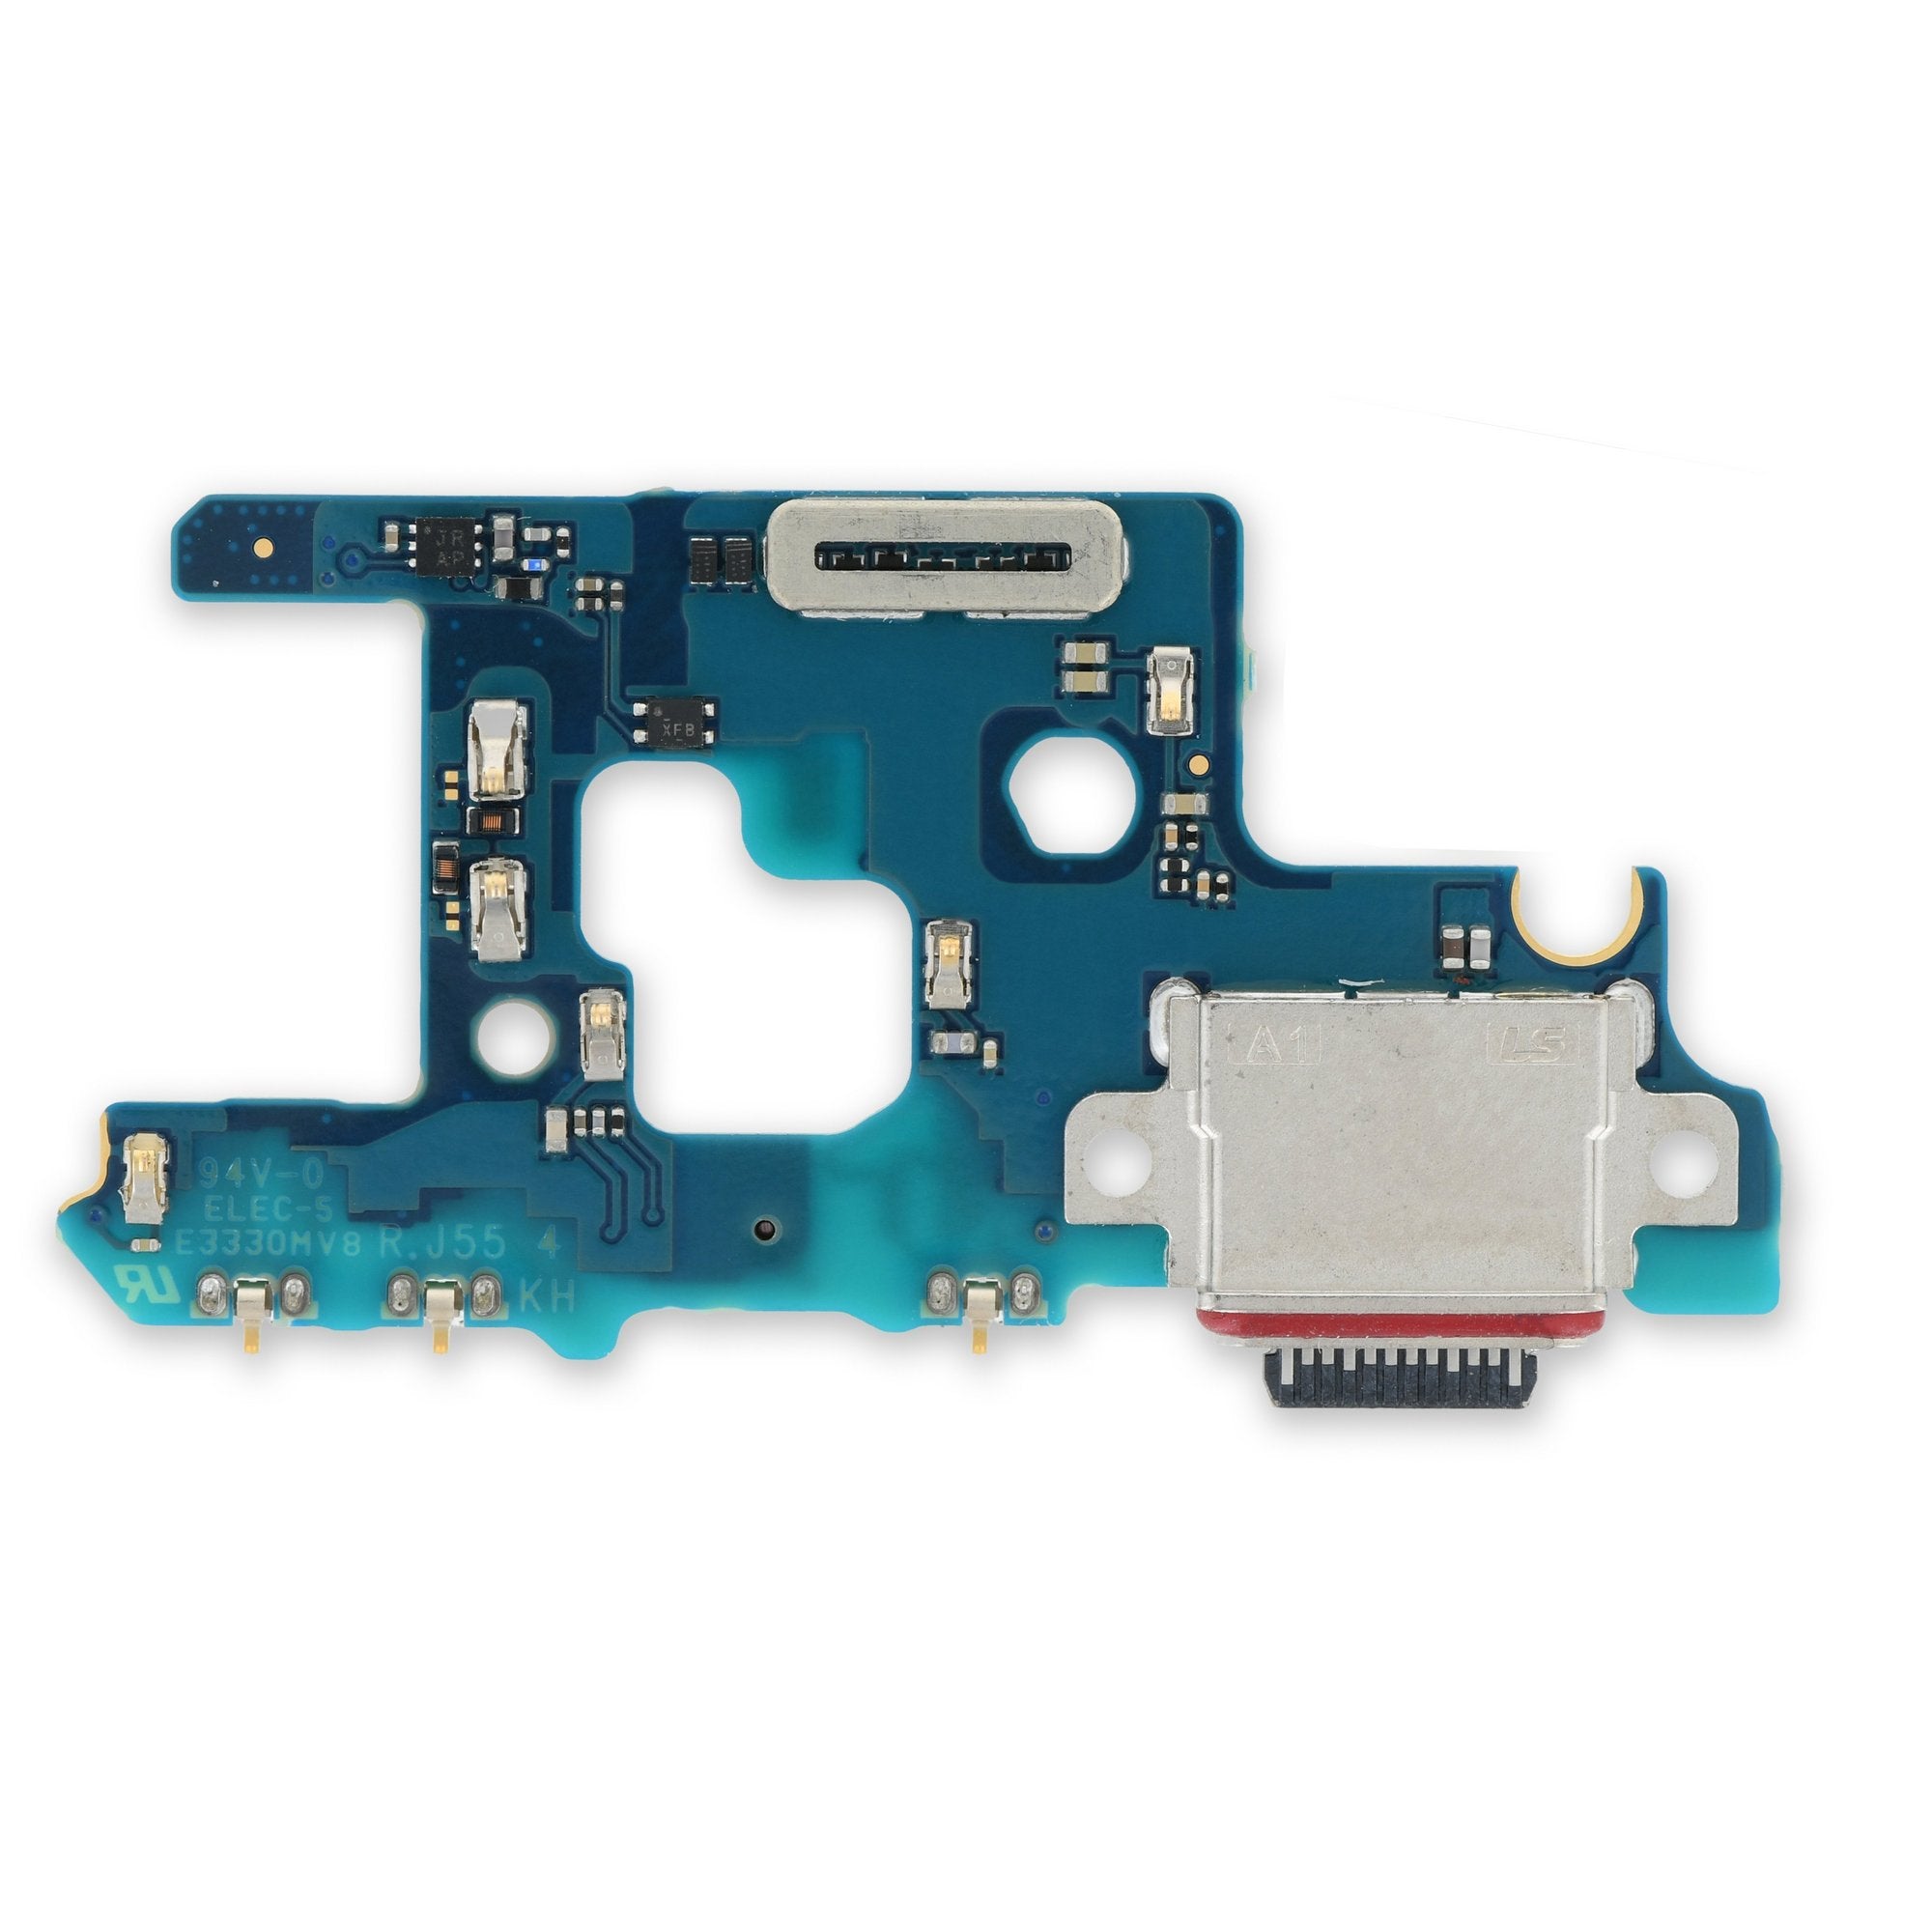
Samsung Galaxy Note10 Daughterboard Replacement Guide
Duration: 45 minutes
Steps: 21 Steps
Let’s get this Note10 back in tip-top shape! This guide will help you swap out the daughterboard, which includes the USB-C charging port. It’s like giving your phone a brand new lease on life. If you get stuck, don’t sweat it. You can always schedule a repair.
Step 1

Alright, before we get started, make sure your phone is completely powered off. This is important for safety and to prevent any accidental damage. You got this!
If you’re using a hairdryer, heat gun, or hot plate to loosen the adhesive, be careful not to get things too toasty. The display and battery don’t love extreme heat, so keep an eye on things! If you’re feeling nervous about the heat, you can always schedule a repair.
– Get your iOpener ready and place it on the left edge of the back panel for about a minute. You’re doing great!
Tools Used

Step 2


If your back glass is seriously cracked, sticking a layer of clear packing tape on it can help the suction cup stick better. Got some super strong tape? That might do the trick instead! And if you’re really in a bind, a little super glue on the suction cup could save the day.
Depending on how long you’ve been rocking that phone, getting the glass off might be a bit tricky. If you’re struggling, give the edge a little more heat and have another go!
– Grab a suction cup and stick it to the warm edge of the back panel, getting as close to the edge as you can.
– Give that suction cup a solid pull with some steady force to open up a little gap between the back panel and the frame.
– Now, slide the tip of an opening pick into that gap you’ve created.
Step 3


Hey there, champ! Don’t go crazy with that opening pick, okay? Just slide it in about halfway – you don’t want to accidentally bump into any of the important bits inside your phone. If you need help, you can always schedule a repair.
– Gently glide that trusty opening pick along the left edge, heading towards the bottom left corner to neatly slice through the adhesive like a pro.
– Once you reach the bottom left corner, just leave the pick right there to keep that adhesive from making a comeback.
Step 4


– Now, let’s get that adhesive loosened up! Insert a second opening pick and slide it across the left side towards the top left corner. You’re basically cutting through that sticky stuff.
– Keep that pick in the top left corner. This will help keep the adhesive from sealing back up. It’s like a little adhesive bodyguard.
Step 5

– Get your trusty iOpener warmed up and ready to go. Press it against the top edge of your phone for a full minute. That’s it! We’re warming things up for an awesome repair. If you need help, you can always schedule a repair
Tools Used
Step 6


– Slide a third opening pick into the gap on the top edge of the phone. It’s like a tiny, friendly helper.
– Slide the opening pick to the top right corner, slicing the adhesive. Think of it as a little dance move for your phone.
– Leave the pick inserted in the top right corner to prevent the adhesive from re-sealing. It’s like holding the door open for your phone’s secrets.
Step 7

– Let’s get this party started! Grab your iOpener and heat up the right edge of your phone for a minute. We’re going to loosen things up in here.
Tools Used
Step 8


As you continue working your way to the bottom, you’ll witness the back cover pulling away from your device in one slick motion. How cool is that? It’s like unzipping your phone’s jacket!
– Let’s get that last bit of adhesive freed up! Slide a fourth and final opening pick into the gap on the right side of the phone, moving it smoothly towards the bottom right corner. You’ve got this!
– Now, let’s make sure that adhesive is totally toast! Slide an opening pick back and forth along the entire edge of the phone, gently releasing any stubborn spots. If you find some extra-tough adhesive, just give it a little heat with your trusty hairdryer and it’ll loosen right up. You’re almost there!
Step 9


– Gently lift and take off the back panel.
Step 10

– Alright, let’s get this party started! Grab your trusty Phillips screwdriver and give those five 4mm screws holding the wireless charging coil in place a little nudge. You got this!


Step 13


– Alright, champ! Let’s pop that wireless charging coil connector off the motherboard. Grab your spudger (the pointed end, of course) and gently pry that connector loose. You got this! If you need help, you can always schedule a repair
Tools Used
Step 14


Hey, good news! The wireless charging coil is all cozy and cute in its hiding spot, held down light and easy with some barely-there glue. But if you have any doubts, just glide on over to our page and let’s talk about how to bring this baby back to life – care of the hip and friendly peeps at Salvation Repair.
– Give that metal shield a little nudge upward, and get a good grip on it with your fingers.
– Now, gently peel the wireless charging coil up and away from the device.
– Alright, you’ve got it! Remove that wireless charging coil and set it aside.
Step 15

– Grab your trusty Phillips screwdriver and let’s tackle those five 4 mm screws holding the loudspeaker in place! You’ve got this!
Step 16


– Time to get a little handy – use a pair of tweezers to carefully remove the loudspeaker. If you need help, you can always schedule a repair
Tools Used
Step 17


– Time to disconnect the main interconnect cable from the motherboard. Use the pointy end of your spudger to gently separate them. You got this!
– Now for the secondary interconnect cable. Disconnect it from the motherboard. You’re doing great!
Tools Used
Step 18


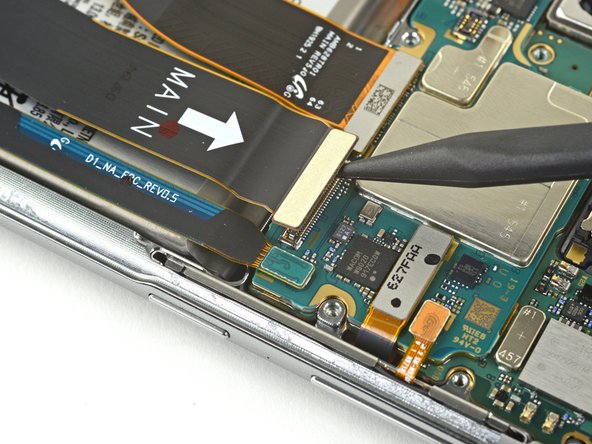
– Let’s get started by using the pointed end of a spudger to carefully disconnect the main interconnect cable from the daughterboard – take your time and make sure it’s fully released.
– Next, locate the secondary interconnect cable and gently disconnect it from the daughterboard. If you need help, you can always schedule a repair
Tools Used
Step 19


– Go ahead and disconnect both interconnect cables with confidence!
Step 20

– Grab your trusty Phillips screwdriver and tackle those three 4 mm screws holding the charging assembly in place. You’ve got this!
Step 21

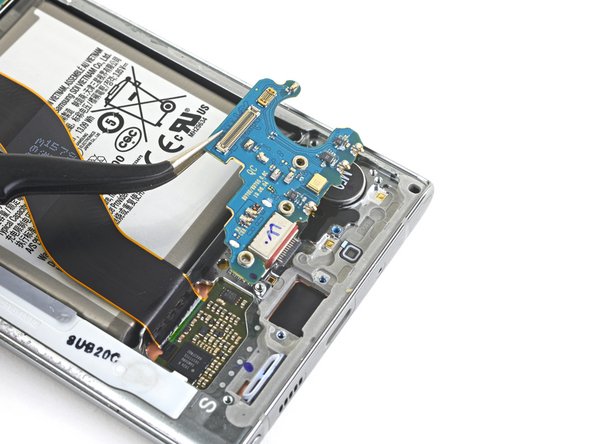
– Time to get a little delicate – use a pair of tweezers to carefully lift and remove the daughterboard. If you need help, you can always schedule a repair
Tools Used
