Samsung Galaxy Note10 Motherboard Replacement Guide
Duration: 45 minutes
Steps: 28 Steps
Let’s get this motherboard swap done! This guide will walk you through removing or replacing the motherboard on your Samsung Galaxy Note10. If you get stuck or need a helping hand, you can always schedule a repair with us.
Step 1

Make sure your phone is completely powered down before diving into the disassembly process.
A hair dryer, heat gun, or hot plate can also be used to loosen up that stubborn adhesive. But be careful not to overheat things! The display and internal battery can’t handle the heat. If you need help, you can always schedule a repair.
– Ready to get this show on the road? Let’s warm up that back panel! Grab an iOpener and give the left edge a nice, warm hug for about a minute. It’s like a spa treatment for your device – just a bit more focused! If you need a hand, you can always schedule a repair.
Tools Used

Step 2


Oh no, cracked back glass?! Don’t worry, we’ve got your back! Covering it with tape might just do the trick to help our magical suction cup adhere. If that doesn’t work, let’s channel our inner superglue wonder and stick that cup right on! Don’t forget, if this screen scrape has got you scratching your head, you can always schedule a repair to save the day!
Heads up, you might be in for a time-traveling challenge with this one, depending on your device’s age. No worries, just apply that heat some more and we’ll hotwire this laptop like a boss!
– First, attach a suction cup to the heated edge of the back panel – get it as close to the edge as you can for the best results.
– Now, pull up on that suction cup with some steady force to create a gap between the back panel and the frame. You got this!
– Next, take your opening pick and carefully insert the point into the gap you just created. If you need help, you can always schedule a repair
Step 3


Keep your opening pick on the lighter side—don’t go more than halfway into your phone, or you might accidentally poke something you don’t want to!
– Gently glide the opening pick down the left edge, heading towards the bottom left corner to cut through that pesky adhesive.
– Keep the pick snugly in the bottom left corner to stop the adhesive from sticking back together.
Step 4


– Let’s get this party started! Insert your second opening pick and gently glide it across the left side, aiming for the top left corner. Think of it as a little dance party for your phone! 😉
– Keep that pick in the top left corner, like a trusty dance partner. This’ll keep the adhesive from sealing itself back up and ruining our fun. 🕺
Step 5

– Ready to get this party started? Let’s heat things up with an iOpener! Apply it to the top edge of your phone for a full minute. You’ll be glad you did!
Tools Used
Step 6


– Now it’s time to bring in the third opening pick – insert it into the gap on the top edge of your phone.
– Gently slide the opening pick towards the top right corner, carefully slicing through the adhesive as you go.
– Leave that pick right where it is, in the top right corner, to keep the adhesive from sealing back up – you’re making great progress!
Step 7

– Grab your trusty iOpener and place it snugly against the right edge of your phone for a delightful minute. Let the warmth do its magic!
Tools Used
Step 8


Keep going! You’ll feel the back panel start to loosen up as you get close to the bottom edge. You’re doing great!
– Grab that trusty fourth opening pick and slide it into the gap on the right side of your phone. Wiggle it down towards the bottom right corner to help cut through any sticky adhesive holding things together.
– Now, take your opening pick for a little tour around the entire edge of the phone. Give it a gentle back and forth, releasing any adhesive that may have been a bit shy. If you encounter some stubborn spots, don’t hesitate to warm things up a bit and try again.
Step 9


– Time to get started – carefully lift up and remove the back panel to begin your repair journey!
Step 10

– Grab your trusty Phillips screwdriver and loosen those five 4 mm screws holding the wireless charging coil in place. You’ve got this!


Step 13


– Alright, let’s get this wireless charging coil connector disconnected from the motherboard! Use the pointed end of a spudger, gently prying it free. It’s like giving the connector a little high-five, but with a tool! Don’t worry, it’s all part of the process. If you need help, you can always schedule a repair.
Tools Used
Step 14


Don’t worry, that wireless charging coil is just chillin’ there with a little bit of adhesive holding it down. It’s not going anywhere. Just be gentle, and you’ll be golden. If you need help, you can always schedule a repair
– Now, give that metal shield a little tilt. You’ll be able to grab it with your fingers.
– Time to peel that wireless charging coil away from the device, like you’re peeling a sticker off a banana!
– And last but not least, gently remove that wireless charging coil. You’re almost there!
Step 15

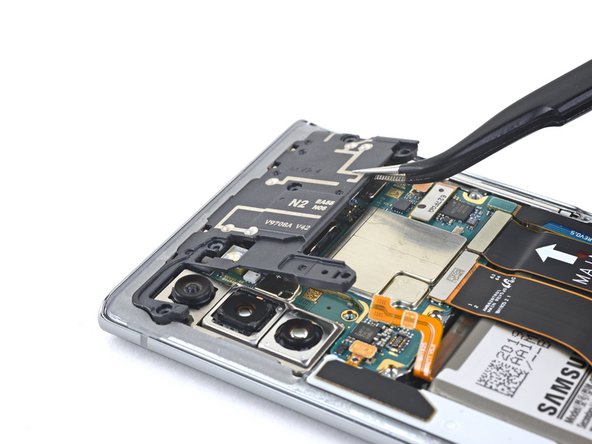
– Grab your trusty Phillips screwdriver and get ready to tackle those four 4 mm screws holding down the top plastic cover. You’ve got this!

Step 17

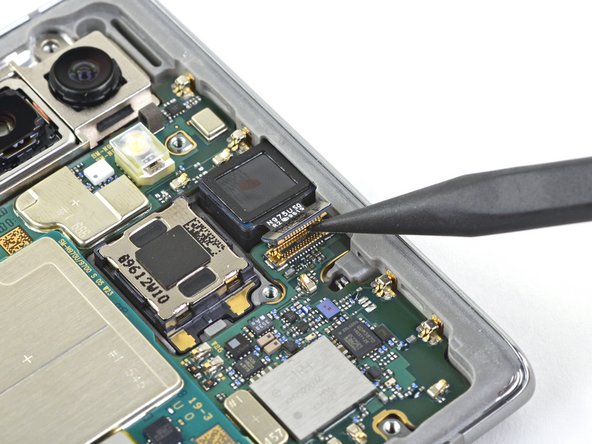
– Now, let’s get that front-facing camera connector out! Grab your trusty spudger and gently pry the connector straight up from the motherboard. It’s like giving the camera a little high-five, but with a tool. 😉
Tools Used
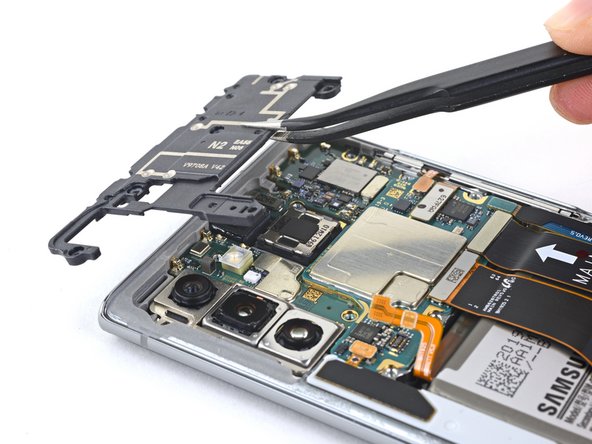
Step 18
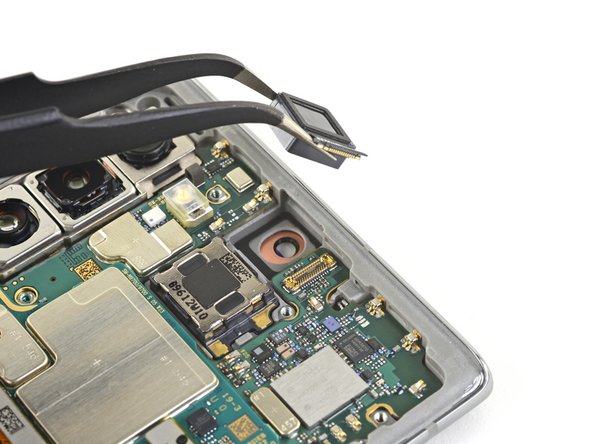

– Alright, time to give that front-facing camera a little vacation. Let’s gently remove it.
Step 19

– Grab your trusty Phillips screwdriver and unscrew the five 4 mm screws that are holding the loudspeaker in place. You’ve got this!


Step 21
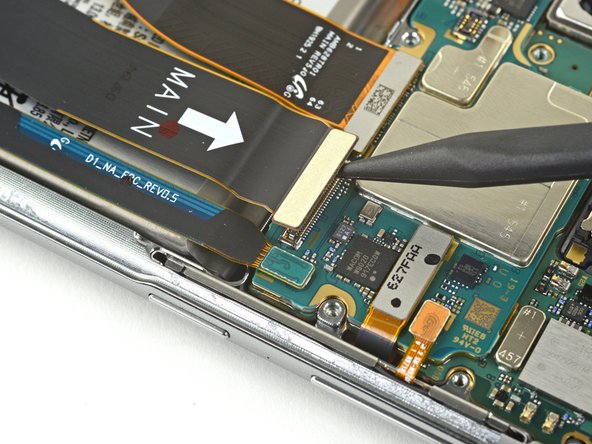


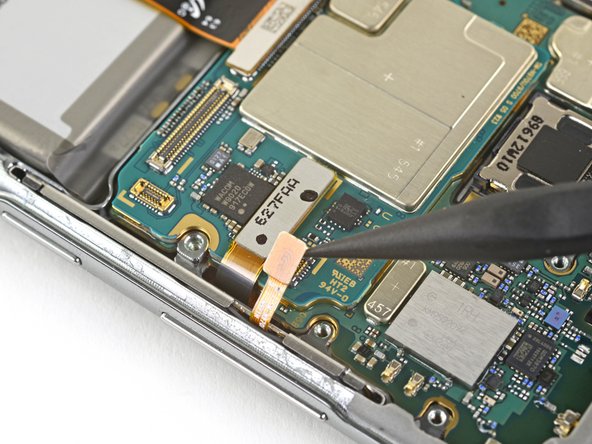
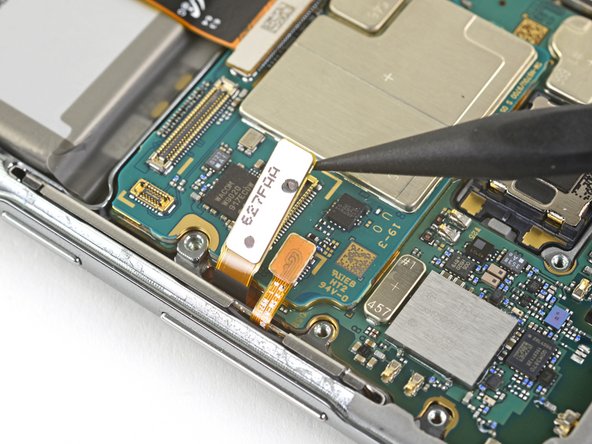
– Grab your trusty spudger and gently use its pointed end to unplug the main interconnect cable from the motherboard. It’s like giving it a little high five!
– Next up, let’s disconnect the secondary interconnect cable from the motherboard. You’re doing great—keep it up!
Tools Used


Step 23


– Let’s get started by removing both of those interconnect cables.
Step 24

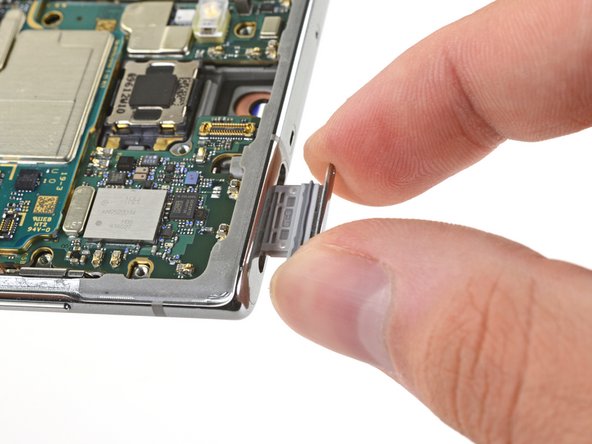
– Grab your trusty SIM eject tool, a tiny screwdriver, or even a straightened paper clip and gently poke it into the little hole on the SIM card tray at the top of your phone.
– Give it a confident push to pop that tray out.
– Carefully pull out the SIM card tray and set it aside.
Step 25
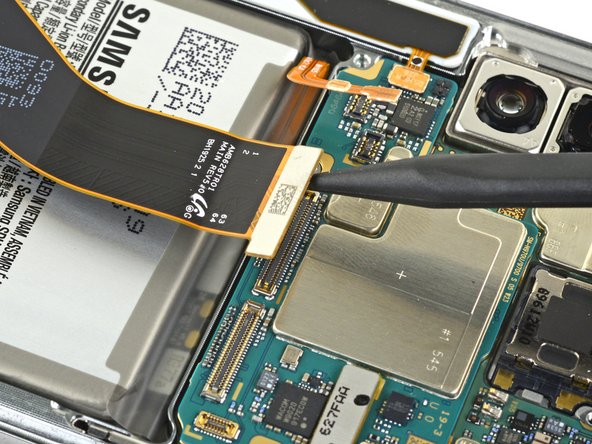

– Grab your trusty spudger and use its sharp tip to carefully detach the display cable from the motherboard. You’ve got this!
Tools Used
Step 26

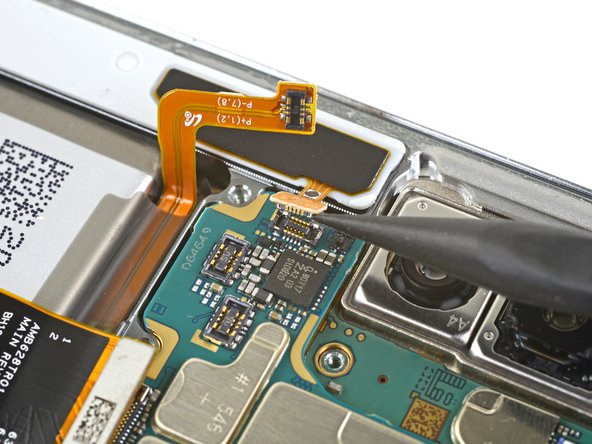
– Let’s pop that side button connector loose from the motherboard using the pointy end of your trusty spudger.
– Now, disconnect the touch layer connector from the motherboard. You’re doing great!
Tools Used
Step 27

– Now it’s time to carefully disconnect the S-Pen charging coil connector from the motherboard. Use the pointed end of a spudger to gently pry it loose. If you’re not feeling confident, don’t worry – you can always schedule a repair and let the pros at Salvation Repair handle it for you.
Tools Used
Step 28
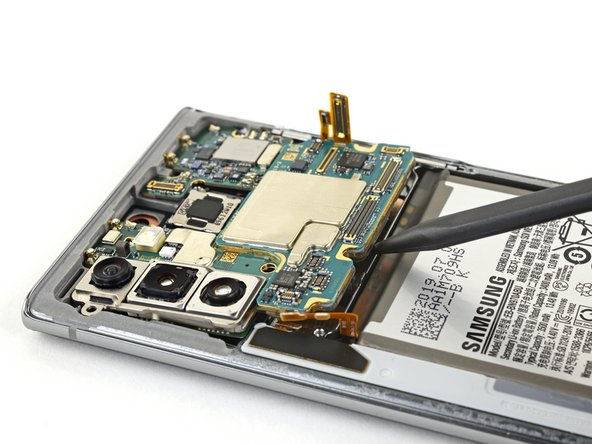

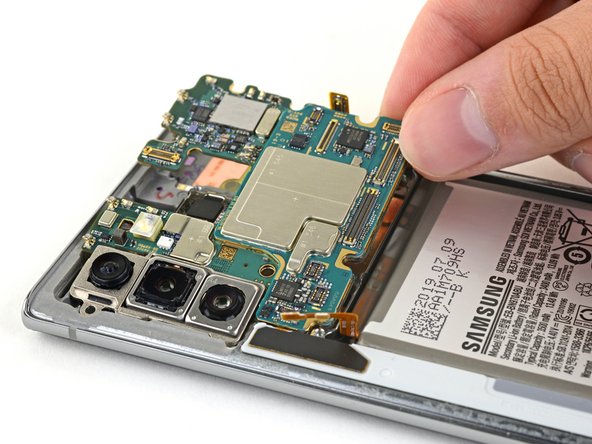
– Grab your trusty spudger and gently pry up the motherboard. It’s like giving it a little high five!
– Now, carefully lift that motherboard right out. You’re almost there!
Tools Used