Samsung Galaxy Note20 Ultra Vibration Motor Replacement
Duration: 45 minutes
Steps: 23 Steps
Hey there, techie! Let’s keep things safe. Before you start taking things apart, make sure the battery is charged down to 25% or less. It’s all about keeping those sparks at bay. If you need help, you can always schedule a repair
Ready to get your Samsung Galaxy Note20 Ultra buzzing again? This guide will walk you through the steps to remove or replace the vibration motor with ease! Before diving in, make sure to charge that battery below 25%—it’s all about keeping things safe! A little precaution can go a long way in preventing any thermal surprises if the battery gets a bit too friendly during the process. And hey, if your battery happens to be swollen, make sure to take the necessary precautions. Let’s do this!
Step 1

Alright, let’s give this phone a little power nap before we get started. Power it down completely.
You can use a hairdryer, heat gun, or hot plate if you need to warm things up a bit, just be careful not to cook the phone. We don’t want to melt the screen or fry the battery. If you need help, you can always schedule a repair.
– Let’s get this party started! Heat up an iOpener and give the left side of the rear cover a nice warm hug for about a minute.
Tools Used

Step 2


Alright, champ! Don’t go overboard with the opening pick – keep it under 5 mm to avoid any phone-related drama! You got this! If you need help, you can always schedule a repair.
Got a badly cracked back glass? No worries, just cover it with some clear packing tape and the suction cup should stick. Or, if you’re feeling extra handy, you can use some super strong tape instead. And if all else fails, a little superglue can work wonders to get the suction cup to stick to the broken panel.
Having trouble with this step? Don’t sweat it, it can be a bit tricky depending on your phone’s age. Just apply some more heat to the edge and try again. If you’re still having issues, remember that you can always schedule a repair with Salvation Repair for some expert help.
– Let’s get this party started! Apply a suction cup to the heated edge of the rear cover, as close to the edge as possible. Make sure it’s nice and snug!
– Now, pull up on the suction cup with some steady force. You want to create a little gap between the rear cover and the frame.
– Slide an opening pick into that gap. We’re making progress!
Step 3


– Let’s slide that opening pick along the left edge, heading towards the bottom left corner. This will help us break through that sticky adhesive.
– Keep that pick right there in the bottom left corner. This’ll stop the adhesive from getting all cozy and sealing itself back up.
Step 4


When you’re slicing through that sticky stuff, remember to keep your opening pick less than 5 mm deep into the phone to avoid any accidental damage to the internal parts. You’re doing great, just take it steady!
You can insert each new opening pick in the gaps created by the opening picks already in each corner. It’s like a little pick party!
– Keep heating and cutting that adhesive like a boss! Do it on all four sides of the rear cover.
– Now, slide an opening pick into each corner. This will keep the adhesive from getting all cozy and stuck back together.
– Time to give that phone a good wiggle! Slide an opening pick around the whole perimeter to loosen up any remaining adhesive. If it’s being stubborn, just give it a quick reheat.
Step 5


– Ready to give that rear cover a lift? Just gently pop it straight up and off. No need to be a superhero, just a little gentle persuasion! If you need help, you can always schedule a repair
Step 6


Be careful to pry only under the edge of the connector. This’ll prevent damaging the socket and any parts hanging out nearby!
– Grab your trusty spudger (that’s the pointy tool, folks!) and gently lift up the wireless charging coil press connector. It’s like giving it a little high-five, but with a tool instead of your hand.
– Now, to put it back, line up the connector carefully and press down on one side until it clicks. Then, do the same on the other side. Don’t press on the middle, or you might bend those tiny pins and that’s not a good thing! Remember, if you’re feeling a little lost, you can always schedule a repair with us at Salvation Repair. We’re here to help!
Tools Used

Step 7


– Grab your trusty spudger and use its pointed end to gently lift up and disconnect the white press connector nestled in the bottom right of the motherboard shield. You’re doing great!
Tools Used
Step 8

Hey, those screws might be a little stubborn if they haven’t been taken out before. It’s all good though, they have some sticky stuff on the threads.
While you’re working your magic, keep track of those tiny screws and put them back where they belong. Just like a puzzle, but with tiny metal pieces.
– Grab your trusty Phillips screwdriver and get ready to tackle those six 4.0 mm screws holding down the motherboard shield. Let’s get this party started!
Step 9


Heads up! The motherboard shield has some pretty sharp edges, so be careful when handling it.
– Let’s get this motherboard shield off! Use a pair of tweezers to gently lift it up.
– Now, grab the motherboard shield with your fingers and give it a little wiggle. It should come right off.
Tools Used

Step 10


The wireless charging coil is held in place with a little bit of gentle adhesive magic.
– Let’s get this party started! Gently peel up the wireless charging coil, like you’re peeling a banana, and lift it away from the device.
Step 11


– Let’s get started with the repair – use the pointed end of a spudger to carefully pry up the battery press connector, which will safely disconnect the battery. If you need help, you can always schedule a repair
Tools Used
Step 12

– Let’s get this speaker out! Use a Phillips screwdriver to remove the five 4.0 mm screws that are holding the loudspeaker to the frame.
Step 13


– Time to get started! Insert the pointed end of a spudger into the hole marked by a triangle on the left side of the loudspeaker – it’s a great first step in getting your device back up and running.
– Now, use that trusty spudger to carefully pry up and loosen the left side of the loudspeaker. Remember, if you need help, you can always schedule a repair with the experts at Salvation Repair.
Tools Used
Step 14


The loudspeaker is held tight to the frame with some trusty clips along its bottom edge.
– Let’s get this loudspeaker out! Find the little triangle on the right side of the speaker. You’ll see a hole there, stick the pointy end of your spudger into that hole.
– Now, gently pry up the loudspeaker using the spudger. It’s like giving it a little hug, but with a tool. Carefully detach it from the frame, and you’re on your way!
Tools Used
Step 15

– Grab your trusty tweezers and gently lift out that loudspeaker like a pro!
Tools Used
Step 16


– Grab your trusty spudger and use the pointy end to gently disconnect the secondary interconnect cable from the daughterboard. You’ve got this!
Tools Used
Step 17


– Grab your trusty spudger and give that main interconnect cable a gentle nudge to disconnect it from the daughterboard. You’ve got this!
Tools Used
Step 18

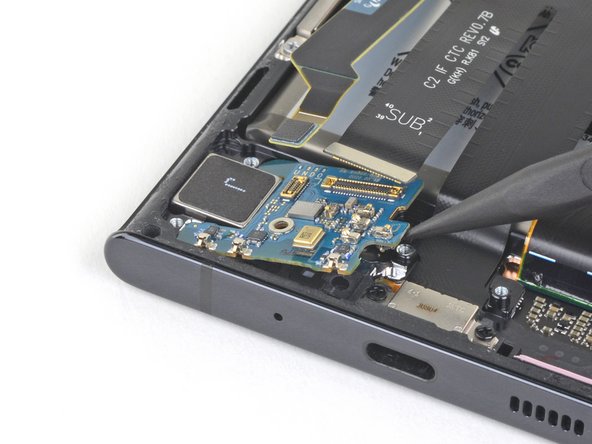
– Grab your trusty Phillips screwdriver and gently unscrew the 3.0 mm screw that’s holding the daughterboard snugly to the frame. You’ve got this!
Step 19

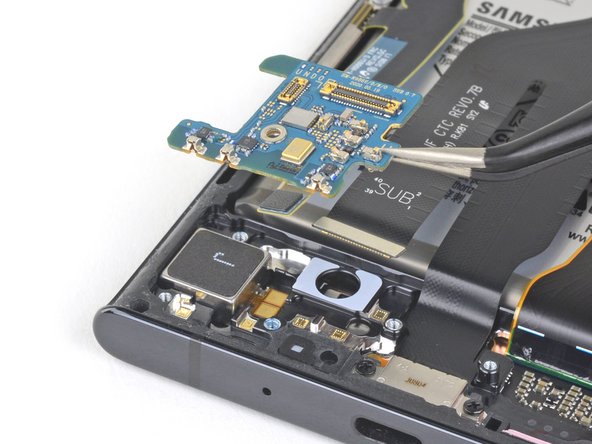
Watch out for those tiny surface-mounted components hiding beneath the daughterboard! Just insert the spudger as gently as possible to keep them safe and sound.
Those spring connectors holding the daughterboard to the frame? They’re like little helpers making sure everything stays in place. You’ll find them along the bottom edge of the board. Don’t worry, they’re pretty easy to spot!
– Slide the sharp end of your trusty spudger right under the side of the daughterboard, close to the screw boss. You’re doing great!
– Now, gently use that spudger to lift up and release the daughterboard from the frame. Keep it up!
Tools Used
Step 20

– Time to get a little delicate – use a pair of tweezers to carefully lift and remove the daughterboard. If you need help, you can always schedule a repair
Tools Used
Step 21

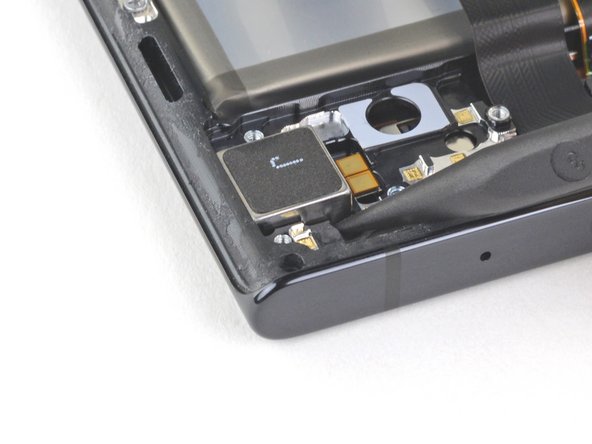
Those copper pads on the vibration motor are like the sensitive skin on your phone’s tummy. Be gentle! Scratching them could make your phone’s vibrate a little less excited.
The black stuff on top of the vibration motor is like a delicate layer of sunscreen for your phone. Avoid scratching it, or your phone might feel a little sunburned.
– Have some fun and give those vibrating motors a little alcohol detox break! Pop a little 90%+ alcohol nearby for about a minute to help break their sticky grip.
Step 22

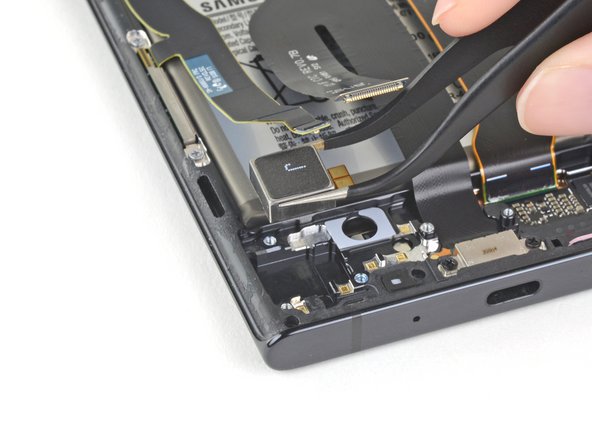
– Time to get this vibration motor out – start by sliding the pointed end of a spudger underneath it.
– Gently pry the vibration motor upwards to loosen the adhesive that’s holding it in place to the frame. If you need help, you can always schedule a repair
Tools Used
Step 23

Sometimes that vibration motor likes to hold on tight! Give it a little encouragement with a few more drops of isopropyl alcohol, and let it soak up the love. The adhesive should weaken and your motor will be ready to move on. Just keep giving it those little love taps, and you’ll be good to go! If you need help, you can always schedule a repair.
– Grab your trusty tweezers and gently lift the vibration motor out. It’s like a tiny dance party in there!
– If there’s any lingering alcohol solution, give it a quick wipe or let it air dry. We want a clean and happy new motor!
– When you’re putting things back together, use your pre-cut adhesive card to secure the new motor to the frame. It’s like a snug little hug.
Tools Used