
Samsung Galaxy Rush Display Replacement Guide
Duration: 45 minutes
Steps: 8 Steps
Ready to give your Samsung Galaxy Rush a brand new look? This guide will walk you through replacing the LCD screen or your motherboard, It’s a quick and easy fix, you’ll be rocking a fresh screen in about 30 minutes. Don’t worry if you’re a little nervous, we’ll be right there with you every step of the way. And if you get stuck, you can always schedule a repair.

Step 2


– Let’s get started by removing the battery to ensure your safety while working on the device.
Step 3

– Alright, let’s get this party started! Grab your trusty Phillips-head screwdriver and give those six screws holding the back panel in place a little twisty-goodbye. You got this!
Step 4
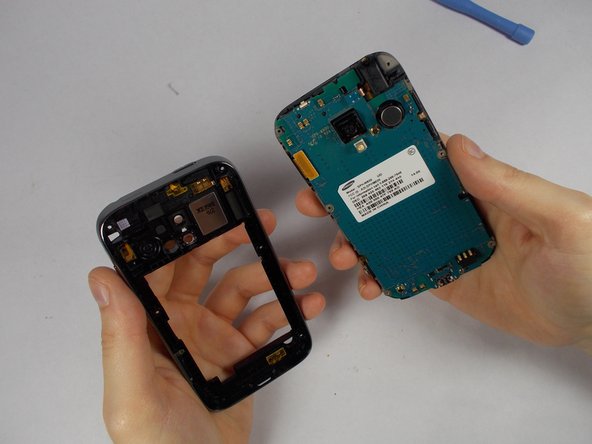

– Grab your trusty pry tool and gently ease off the back panel. Start at the edge nearest to the screen for a smoother ride. If you need help, you can always schedule a repair
Step 5


– Grab your trusty tweezers and with a gentle touch, lift those connectors off the motherboard like you’re performing a delicate dance.
– Keep your eyes peeled for the first connector hanging out on the upper left side, just waiting for your attention.
– The second connector is playing hide and seek towards the top of the phone, right above the camera. It’s super easy to pop off, so don’t be shy!
Step 6

– Time to get a little delicate – use your trusty tweezers to carefully pluck out the 2 adhesive orange ribbons.
– Remember, these ribbons are still attached to the motherboard, so be gentle to avoid any damage.
– You’ll find them hanging out on the side of the phone. If you need help, you can always schedule a repair
Step 7

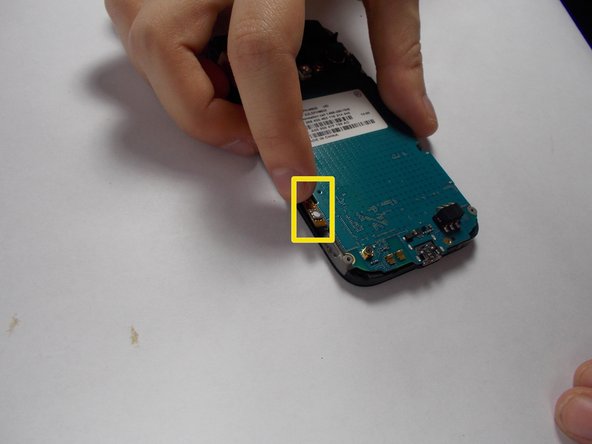
– Let’s get started by removing the single screw on the bottom of your phone – it’s located to the right of the charging port, and you’ll need a trusty philips-head screwdriver to do the job. If you need help, you can always schedule a repair
Step 8

– Gently lift the motherboard up, creating some space between it and your screen. You’ve got this!

