Samsung Galaxy Rush Motherboard Replacement Guide: Step-by-Step DIY Tutorial
Duration: 45 minutes
Steps: 10 Steps
Ready to give your Samsung Galaxy Rush a new lease on life? This guide will walk you through replacing the motherboard, and don’t worry, it’s a breeze! You’ll be rocking a fresh phone in about 30 minutes. If you need help, you can always schedule a repair.
Step 1


– Flip your phone over and give that back cover a gentle nudge with your finger. It should pop right off!
Step 2


– Hey, you Go-getter! Gather your tools and take the first step towards being a repair hero. Remove the battery, and you’ll be one step closer to a successful fix! If you need help, you can always schedule a repair.
Step 3

– Alright, let’s get this party started! Grab your trusty Phillips-head screwdriver and give those six screws holding the back panel in place a little nudge. They’ll be outta there in a jiffy!
Step 4
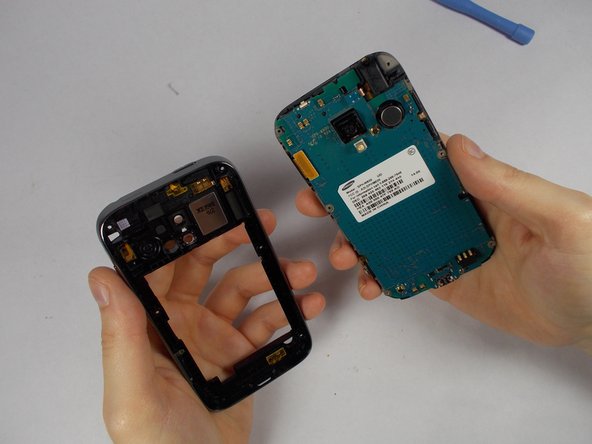

– Grab your trusty pry tool and gently work the back panel away from the rest of the phone. Start from the edge nearest the screen for the smoothest ride. If you need help, you can always schedule a repair
Step 5


– Whoa there, partner! Grab some tweezers and gently raise those connections away from your motherboard, just like plucking hairs off a blow-up doll.
– Oh, lookie! A connector sittin’ pretty on the top left, like a queen on her throne.
– Time for another one! Scoot up to the top of your device, near the camera, and you’ll spot another fella ready to jump off. It’s easier than paintin’ a moose in a boat!
Step 6

– Time to get a little delicate – use your trusty tweezers to carefully pluck out the 2 adhesive orange ribbons.
– Remember, these ribbons are still attached to the motherboard, so be gentle to avoid any damage.
– You’ll find them hanging out on the side of the phone. If you need help, you can always schedule a repair
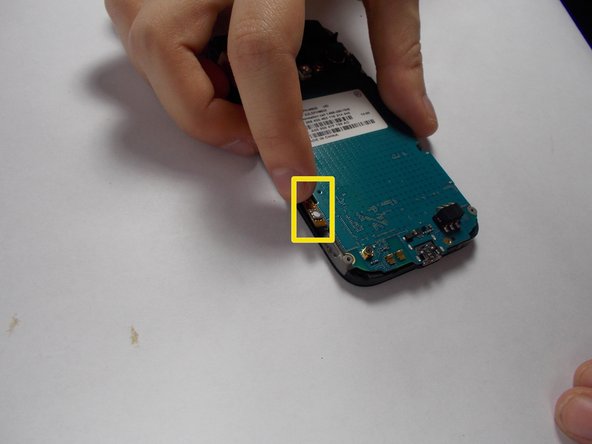
Step 7

– Let’s get started by removing the single screw on the bottom of your phone – it’s located to the right of the charging port, and you’ll need a trusty philips-head screwdriver to do the job. If you need help, you can always schedule a repair
Step 8

– Time to give that motherboard a little lift! Gently lift it upwards, separating it from the screen. You’re doing great!


