
Samsung Galaxy S10+ Front Facing Camera Module Replacement Guide – DIY Tutorial
Duration: 45 minutes
Steps: 15 Steps
Get ready to swap out the front-facing camera module on your Galaxy S10+! This module includes both front-facing cameras, so you’re getting a two-for-one deal. The trickiest part is peeling off that glass back, but don’t worry—I’ve got your back. If you need help, you can always schedule a repair.
Step 1


– First things first, unplug your phone and power it down. Safety first, right?
– Now, grab your trusty iOpener, heat it up, and apply it to the right edge of the back cover for a solid two minutes. It’s like giving your phone a warm hug!
– While you’re waiting, check out the image of the back cover we’ve removed. Take a moment to familiarize yourself with where the adhesive likes to hang out.
Tools Used

Step 2


Don’t worry if it takes a few tries, these things happen in the world of tight tolerances!
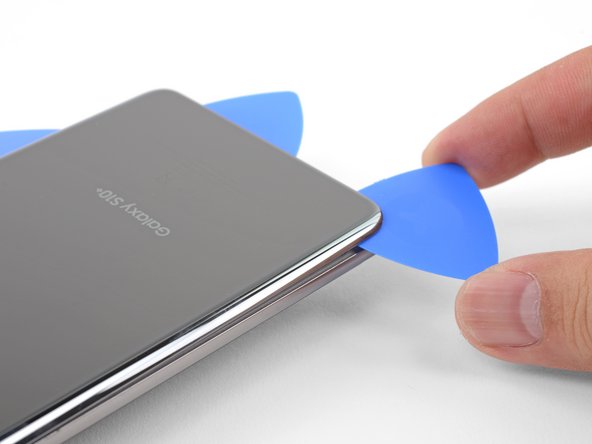
– Grab a suction cup and place it on the back of your phone, aiming for the center of the right edge where the adhesive is the thinnest. You’ve got this!
– Give that suction cup a strong, steady pull to create a little gap between the back cover and the frame. Feel the power!
– Slip the tip of an opening pick into that gap you just made. You’re making progress!
Step 3


– Heat up the right edge of your phone and rest it on something around 0.5 inches (13 mm) thick to get that perfect angle for the opening tool.
– Hold the left edge with your fingers to keep the phone steady and give that suction cup a good pull with some firm pressure.
– Now, take the opening tool and press it into the seam between the back cover and the frame.
– Slide the opening tool back and forth along the seam a few times. If you need help, you can always schedule a repair.
Step 4


– Gently glide the trusty opening pick along the phone’s edge, smoothly cutting through the adhesive.
– Pop a pick into the seam to keep the adhesive from sneaky resealing.
Step 5

– Heat up that iOpener and apply it to the bottom edge of your phone for a couple of minutes.
Tools Used
Step 6


– Gently slide an opening pick into the right edge, aiming for that cozy bottom right corner.
– With a steady hand, glide the pick around the corner and keep slicing along the bottom edge, making your way around the bottom left corner like a pro.
– Once you’re in there, leave that opening pick in the seam to keep the adhesive from being a party pooper and re-sealing itself.
Step 7


When shaping those corners, make sure they’re getting toasty warm.
– Keep that heat going and glide around those final edges of your phone!
Step 8


– Phew! You’ve done the hard part, slicing around your phone like a pro! Now it’s time to twist and separate that bad boy with an opening pick. Almost there, champ!
– Gently lift the back cover, let the sunshine in! Use those opening picks to slice up any remaining adhesive. Almost finished, you rock star!
– Take that back cover off, nice and proper! Give a cheer, but hold off on wild dancing, we’ve still got steps to complete.
– Turn on your phone and test all the functions. Power it down properly and let’s keep this show on the road! Be a smart cookie, okay?
– Aha! Time to reinstall the back cover in style, transfer the camera bezel like a boss, and slap on some fresh adhesive. You’ve got this! Schedule a repair if you need help!
Step 9

– Let’s get down to business! Carefully take out the nine 4 mm Phillips screws holding the top midframe to your phone.
Step 10


Time to show those plastic clips who’s boss! The midframe is still snugly held in place by a few of them along the edges.
– Slide the spudger’s point into the little groove on the right side of the midframe, just by the Bixby button. You’re doing great!
– Gently pry upwards to detach the midframe from the phone. Keep it steady, you’ve got this!
Tools Used

Step 11


– Gently insert the tip of your spudger into the little notch on the left edge of the phone, right by the power button. It’s like giving your device a friendly nudge!
– Once you’ve got that spudger in there, give it a little pry to help loosen the midframe from the phone. You’re doing great!
Tools Used

Step 13


– Slide the flat end of a spudger right under the battery connector, which is cozily tucked away beneath the rear-facing camera on the motherboard.
– Gently pry upwards to give that connector a little nudge and disconnect it from its snug socket.
– Carefully push the battery’s flex cable away from the motherboard socket, making sure to keep it from accidentally bumping into anything.
Tools Used
Step 14

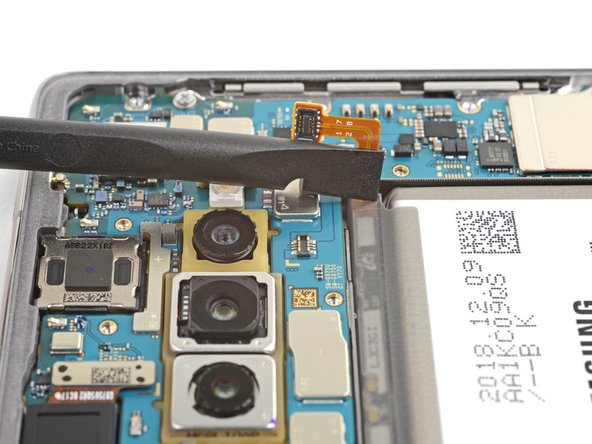
To re-attach press connectors like this one, line them up and press down on one side until it clicks into place, then do the same on the other side. Do not press down on the middle. Misalignment can bend the pins and cause damage. If you need help, you can always schedule a repair
– Grab your trusty spudger and gently lift up the front-facing camera connector from its cozy spot on the motherboard. It’s as easy as pie, and you’ve got this!
Tools Used
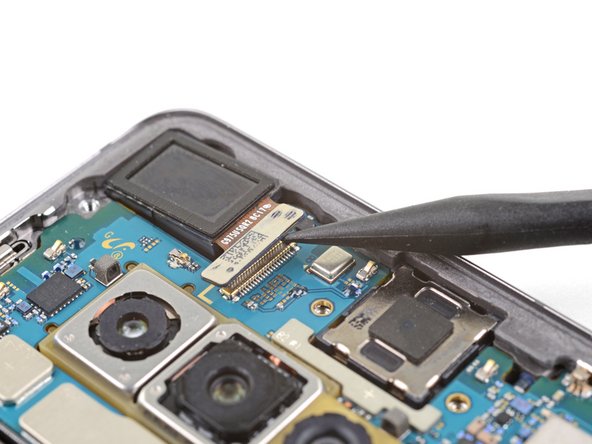
Step 15

– Let’s start by gracefully removing the front-facing camera module.


