Samsung Galaxy S10e Dual Rear Camera Replacement Guide – DIY Tutorial
Duration: 45 minutes
Steps: 35 Steps
Hey there! If you need a hand with your repair, you can always schedule a repair for some expert assistance. Don’t hesitate to reach out!
Hey there tech-savvy folks! Today, we’re going to tackle the task of removing and replacing the dual rear camera module for the Samsung Galaxy S10e. To get this done, we’ll need to bid farewell to the motherboard temporarily to disconnect the camera module. Don’t worry, it’s all part of the fun!
Step 1


– Get your SIM card eject tool, bit, or even a straightened paperclip – whatever works for you!
– Give that little hole in the SIM card tray a friendly poke.
– Press with a bit of oomph to pop out the tray – you’ve got this!
Tools Used

Step 2


– Gently pull the tray straight out to free it from its cozy spot.
Step 3

– First things first, let’s power down your phone completely before diving into this repair adventure.
– Next up, grab that trusty iOpener and warm up the back of your phone along the right edge for about two minutes. This will make the adhesive a little more forgiving when it’s time to remove the back cover.
Tools Used

Step 4


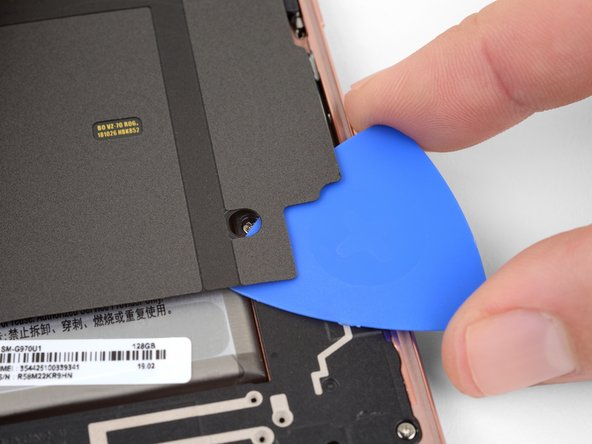
The adhesive layout is like a jigsaw puzzle piece—check out the first image to see how it fits inside the cover after removal.
– Next up, it’s time to carefully slice through the adhesive that’s holding that back cover in place. You’ve got this!
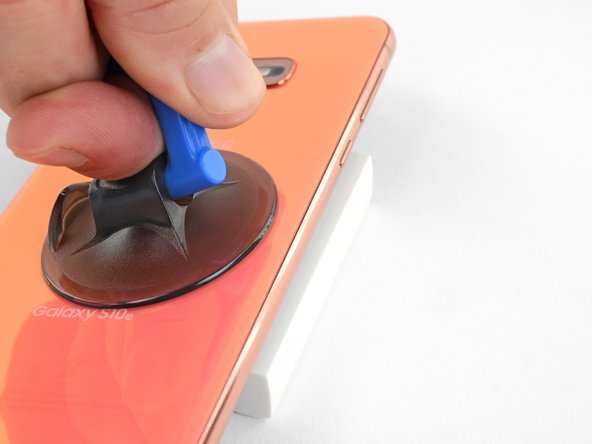
Step 5


– Stick that suction cup to the back cover, right by the heated edge, just below the Bixby button where the adhesive is weakest.
Step 6

Be gentle with that rear glass! Too much muscle or using metal tools might just turn it into a puzzle of shattered pieces. Take it easy and enjoy the process!
– Prop up the heated edge of your phone on something about 0.5 inches (13 mm) thick. This angles the phone to make the opening tool easier to insert.
– Lift the back cover’s right edge with your suction cup to create a small gap between the back cover and the frame.
– Press the edge of an opening tool into the gap.
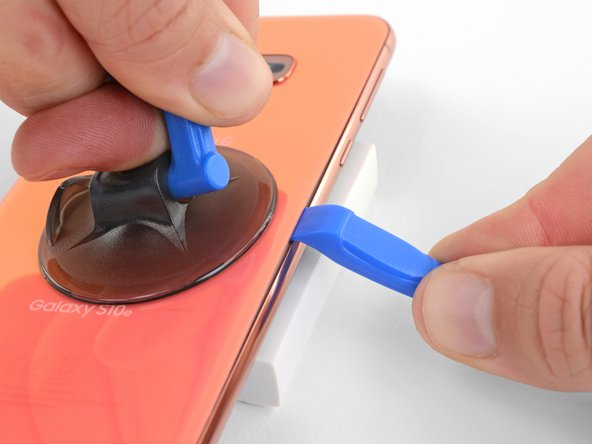
Step 7


– Gently glide the opening tool along the right edge of your phone to carefully cut through the adhesive that’s holding the back cover snugly in place. You’ve got this!
Step 8


– Slide an opening pick into the edge where your opening tool is hanging out. Just let that pick chill there to keep the glue from getting too cozy and re-sticking.
Step 9

– Heat things up a bit by applying a warm iOpener to the top edge of your phone for a cozy two minutes.
Tools Used
Step 10


– Get groovy with it by gently placing an opening pick near the top right corner of your device. Slide it around the corner and across the top edge like you’re dancing to your favorite tune.
– Keep that opening pick chillin’ there to make sure the sticky stuff doesn’t stick back.
Step 11

– Warm up your iOpener and give the left edge of your phone a cozy two-minute hug. You’ve got this!
Tools Used
Step 12


– Slide a fresh opening pick into that cozy little spot at the top left corner and gently glide it down the left edge of your phone. Smooth moves!
– Keep that opening pick in place along the left edge to make sure the adhesive doesn’t get any funny ideas about resealing.
Step 13

– Grab that heated iOpener and give the bottom edge of your phone a warm hug for two minutes.
Tools Used
Step 14


– Get ready to spice things up! Take that opening pick and give it a VIP tour near a bottom corner of your device. Then, show it some love by sliding it along the bottom edge to break the adhesive bond. You’re on fire! #RepairSuperstar 💪🔧

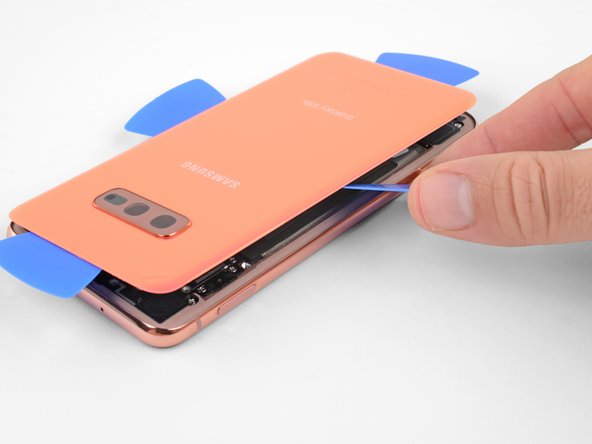

Step 16

Feel free to pop the back cover back on without swapping out the adhesive. Just make sure to clear away any big pieces of adhesive that could keep the cover from sitting snugly. Once you’ve got it in place, warm it up a bit and give it a gentle press to lock it down. While it might not be waterproof, that leftover adhesive usually has enough strength to do the job just fine.
– Ready to jazz up your device? Let’s groove and follow this guide to reinstall that back cover and replace the adhesive!

Step 18

– Sneak an opening pick into the bottom right corner of the upper midframe to loosen up the adhesive bonding it to the lower midframe.


Step 20

– Alrighty then, time to get your hands dirty and give that midframe a little introductory push. Carefully lift the plastic side and remove it from your device, giving it a high five as it leaves. Now, for reassembly, you’re going to take the top edge of the assembly and gently slide it back into your phone’s frame. Once that’s in, finish the job by giving the rest of the assembly a little press-down love to snap it into place securely. If you’re feeling a bit apprehensive, know that you can always schedule a repair! Don’t worry, you’ve got this!
Step 21


– Grab the flat end of a spudger and carefully lift the battery connector straight up from its socket to disconnect it. If you need help, you can always schedule a repair
Tools Used
Step 22

– Time to bust out your trusty Phillips driver and show those seven 3.9 mm screws who’s boss! Let’s start by securing the loudspeaker.


Step 24


– Gently lift the loudspeaker and remove it.
– To put it back together, press the loudspeaker edges until it snaps into place.
Step 25

When re-attaching press connectors such as this one, make sure to align them carefully and press down gently on one side until you hear a satisfying click, then repeat on the other side. Avoid pressing in the middle to prevent any mishaps. Remember, if the connector seems misaligned, avoid forcing it as this could lead to bent pins and potential damage. Need assistance? Feel free to schedule a repair for expert help.
– Grab that spudger and gently pop up the screen connector from its motherboard socket.
Tools Used
Step 26

While unplugging connectors, stay focused and make sure those tiny components around the socket don’t get knocked off.
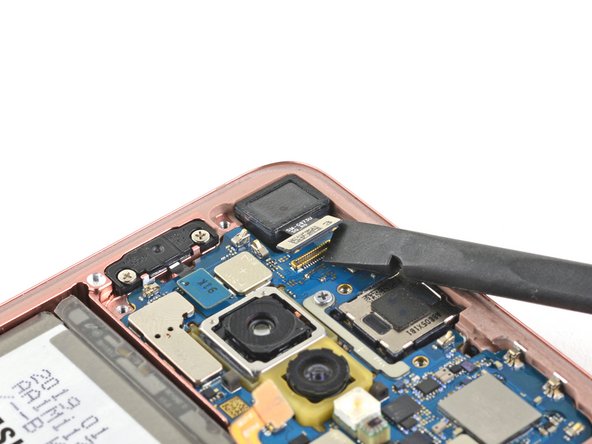
– Grab your trusty spudger and give that front-facing camera connector a gentle nudge to pop it out of its cozy little home on the motherboard. You’ve got this!
Tools Used
Step 27


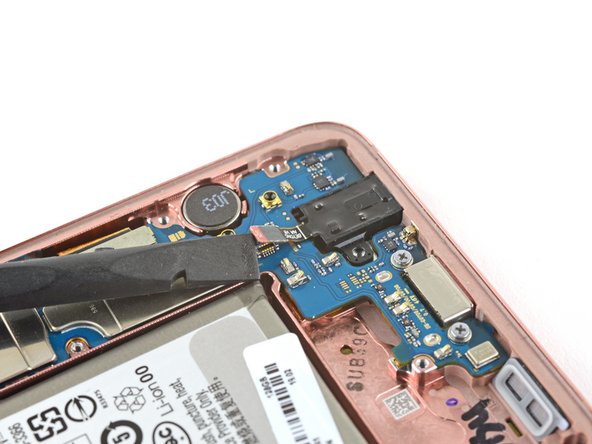
– Grab a spudger and gently pop the fingerprint sensor connector out of its motherboard socket. If you need help, you can always schedule a repair.
Tools Used
Step 28

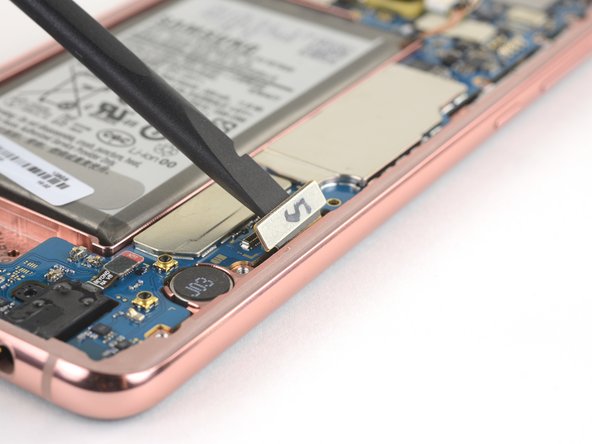
– Get your hands on a spudger and gently wiggle out the headphone jack connector from its cozy spot on the motherboard.
Tools Used
Step 29

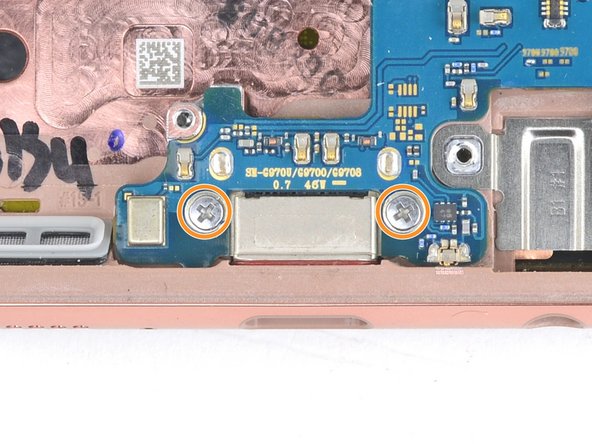
– Get out your handy Phillips driver and unscrew the three buddies keeping the motherboard in place:
Step 30

Before forcing that motherboard, take a moment to make sure you’ve popped out the SIM/Micro SD tray. We want to keep things smooth and easy!
– Get ready for some motherboard magic! Use the flat end of a spudger to gracefully lift and loosen the top portion of that trusty motherboard.
Tools Used
Step 31


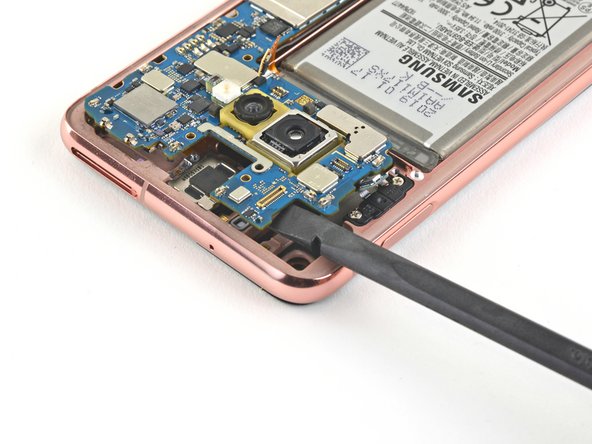
– Hey there! Time to show that motherboard who’s boss. Lift the top edge with your fingers – easy does it!
– Now, give that motherboard a gentle tug towards the top to unstick the USB-C port. It’s coming off!
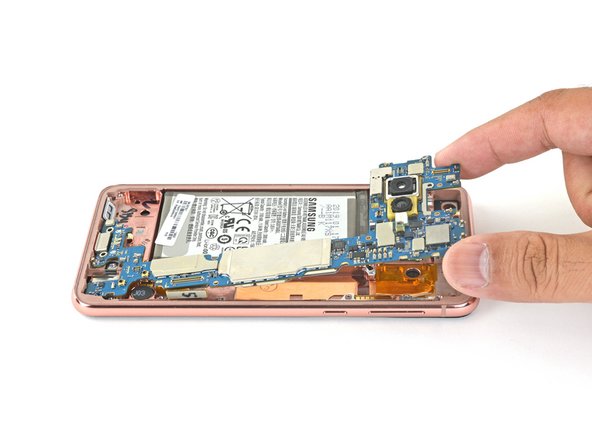
– Off goes the motherboard – say goodbye!
– Ready to put it all back together?
Step 32

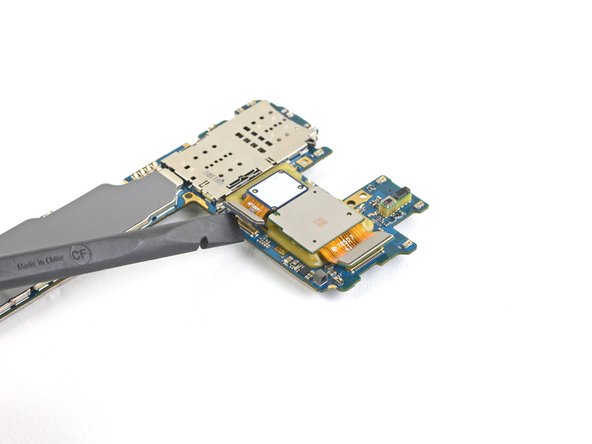
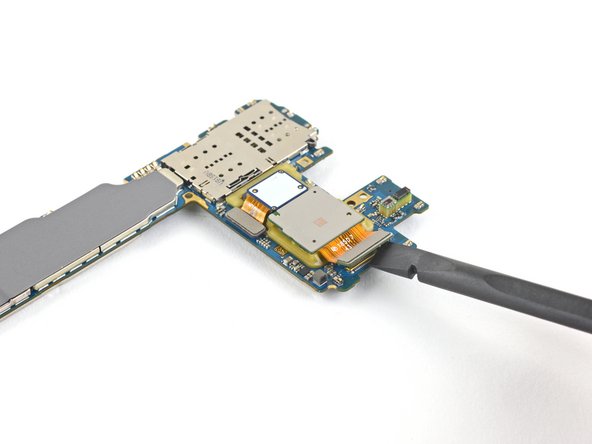
– Turn that motherboard over like a pro!
– Get your trusty spudger and gently pry up to disconnect those two camera connectors from their cozy spots on the motherboard.
Tools Used
Step 33

– Pop that heated iOpener on the camera module for a cool minute to loosen up that adhesive. If you need help, you can always schedule a repair
Tools Used
Step 34

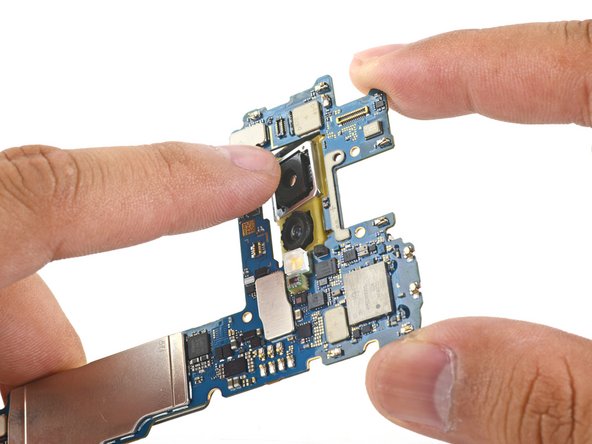
– Use your finger to apply firm, steady pressure to the camera module and pop it loose from the motherboard. If you need help, you can always schedule a repair