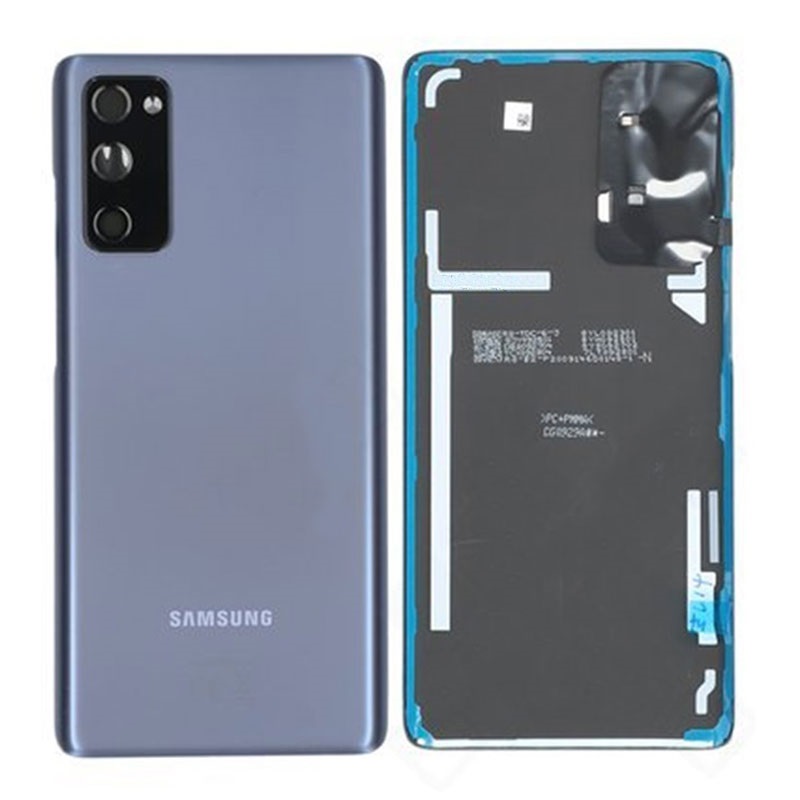
Samsung Galaxy S20 FE 5G USB-C Port and Charging Board Replacement
Duration: 45 minutes
Steps: 25 Steps
Ready to get your Galaxy S20 FE 5G charging again? This guide walks you through swapping out the USB-C port and charging board—perfect if your phone refuses to juice up even when plugged in. Before diving in, try clearing out any dust or lint from the port using compressed air and tweezers. Still no luck? Time to replace the whole charging board, since the USB-C port is soldered on and comes as one piece. When you put your device back together, fresh back cover adhesive is a must. If this feels like a big leap, you can always schedule a repair for backup.
Step 1

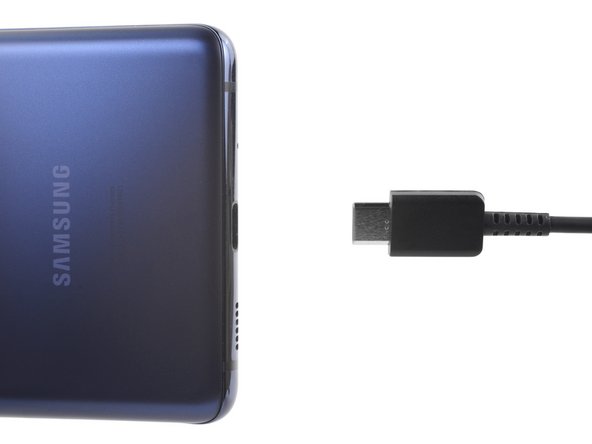
Before you start, let that battery go below 25%—a fully charged lithium-ion battery can be a bit of a wild card if it gets punctured. Keep it safe, keep it smart.
- Hit that power button to turn off your phone, and disconnect all the cables—let’s keep things chill and safe before you dive in!
Step 2

A hair dryer works too—just keep it on the cooler side, or your back cover might end up looking like a potato chip.
- Warm up an iOpener and gently press it onto the bottom edge of the back cover for about two minutes. This will help loosen things up and make the next steps smoother. If you need a hand, you can always schedule a repair.
Tools Used


Step 3


This step might take some elbow grease. If it's feeling stubborn, try adding a bit more heat and give it another shot.
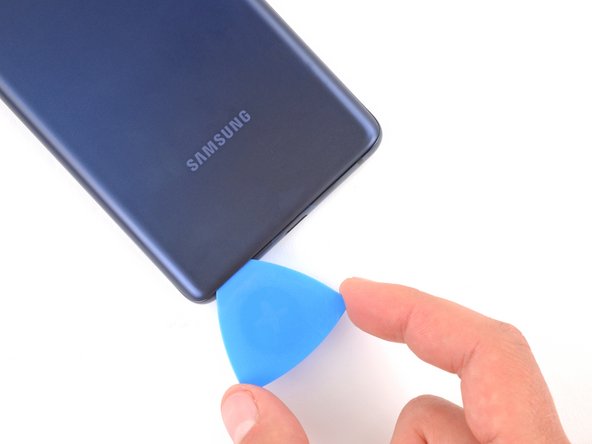
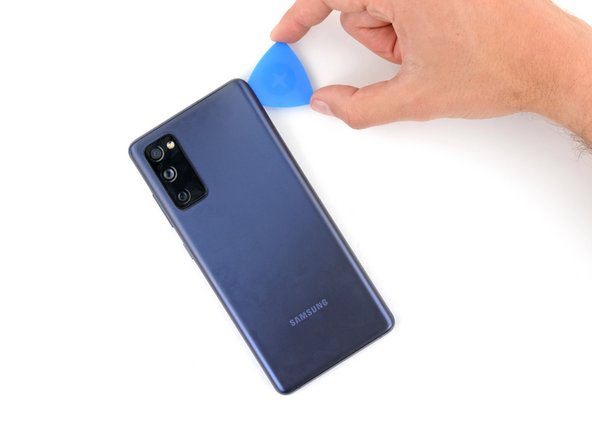
- Stick a suction cup right at the bottom center of the back cover, as close to the edge as you can get. Think of it as your tiny, friendly pry buddy.
- Pull up on that suction handle with steady, confident pressure—no need to go Hulk on it, just enough to loosen things up and create a small gap between the cover and the frame.
- Slide an opening pick into the gap you just made. Easy does it—this is your first step in gently separating the parts without any drama.
Tools Used

Step 4


- Glide the opening pick across the bottom edge to loosen up the sticky adhesive holding the back cover in place.
- Keep the pick chilling in the bottom right corner—this stops the adhesive from sneaking back together.
Step 5

A hair dryer will do the trick too—just keep it on the low side, because too much heat can turn your back cover into modern art.
- Warm up the right edge of the back cover with a heated iOpener for about two minutes. This gentle heat helps loosen the adhesive, making it easier to peel apart. Take your time and be patient—if you need a hand, you can always schedule a repair.
Tools Used
Step 6


- Gently slide that opening pick around the bottom right corner and up the right edge to cut through the adhesive like a pro.
- Keep that opening pick snugly inserted in the top right corner while you tackle the next step.
Step 7

You could also give a hair dryer a whirl — just watch out, because too much heat can make the back cover bend and warp.
- Warm up your iOpener and set it on the top edge of the back cover for a couple of minutes. Let the heat work its magic!
Tools Used
Step 8


- Gently wedge the opening pick into the top right corner and glide it along the top edge to cut through the adhesive. Keep the pick in place at the top left corner as you work. If you need help, you can always schedule a repair.
Step 9

A hair dryer works too—just keep it breezy, because too much heat can turn your back cover into a wobbly pancake.
- Give your iOpener a little love and warmth by applying it to the left edge of the back cover for about two minutes. Let it work its magic!
Tools Used
Step 10


- Glide your opening pick around the top left corner, then cruise down the left edge to slice through that last bit of adhesive.
Step 11


If the back cover is still clinging for dear life, grab your trusty opening pick and gently work your way around the edges to loosen up any stubborn adhesive.
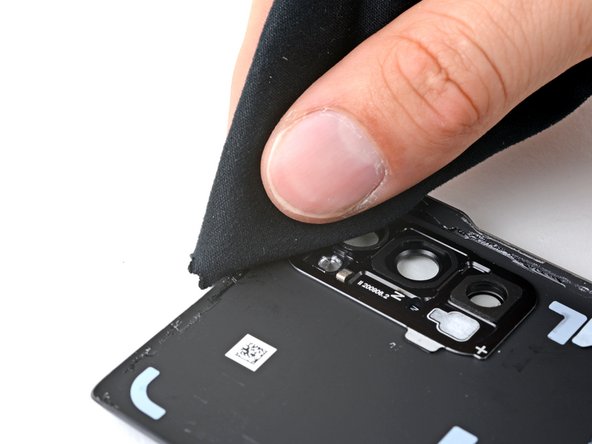
- Start by carefully removing the back cover to get to the internal components. Take your time and keep track of any screws or parts you take out. If you need a hand, you can always schedule a repair.
Step 12


- Now's a perfect time to power up your device during reassembly and test all functions. Just make sure to power it down completely before moving forward with sealing everything back up.
- If you're putting your old back cover back on:
- If you're working with a new back cover, just peel off the liners and press it down around the edges to make sure it sticks securely to the frame.
- Use tweezers or your fingers to carefully peel off any leftover adhesive from the back cover and the frame.
- Grab some highly-concentrated isopropyl alcohol (over 90%) and a microfiber cloth to wipe away any stubborn adhesive residue.
- Check out this guide to apply fresh, custom-cut adhesive to get things back to brand new.
Tools Used

Step 13

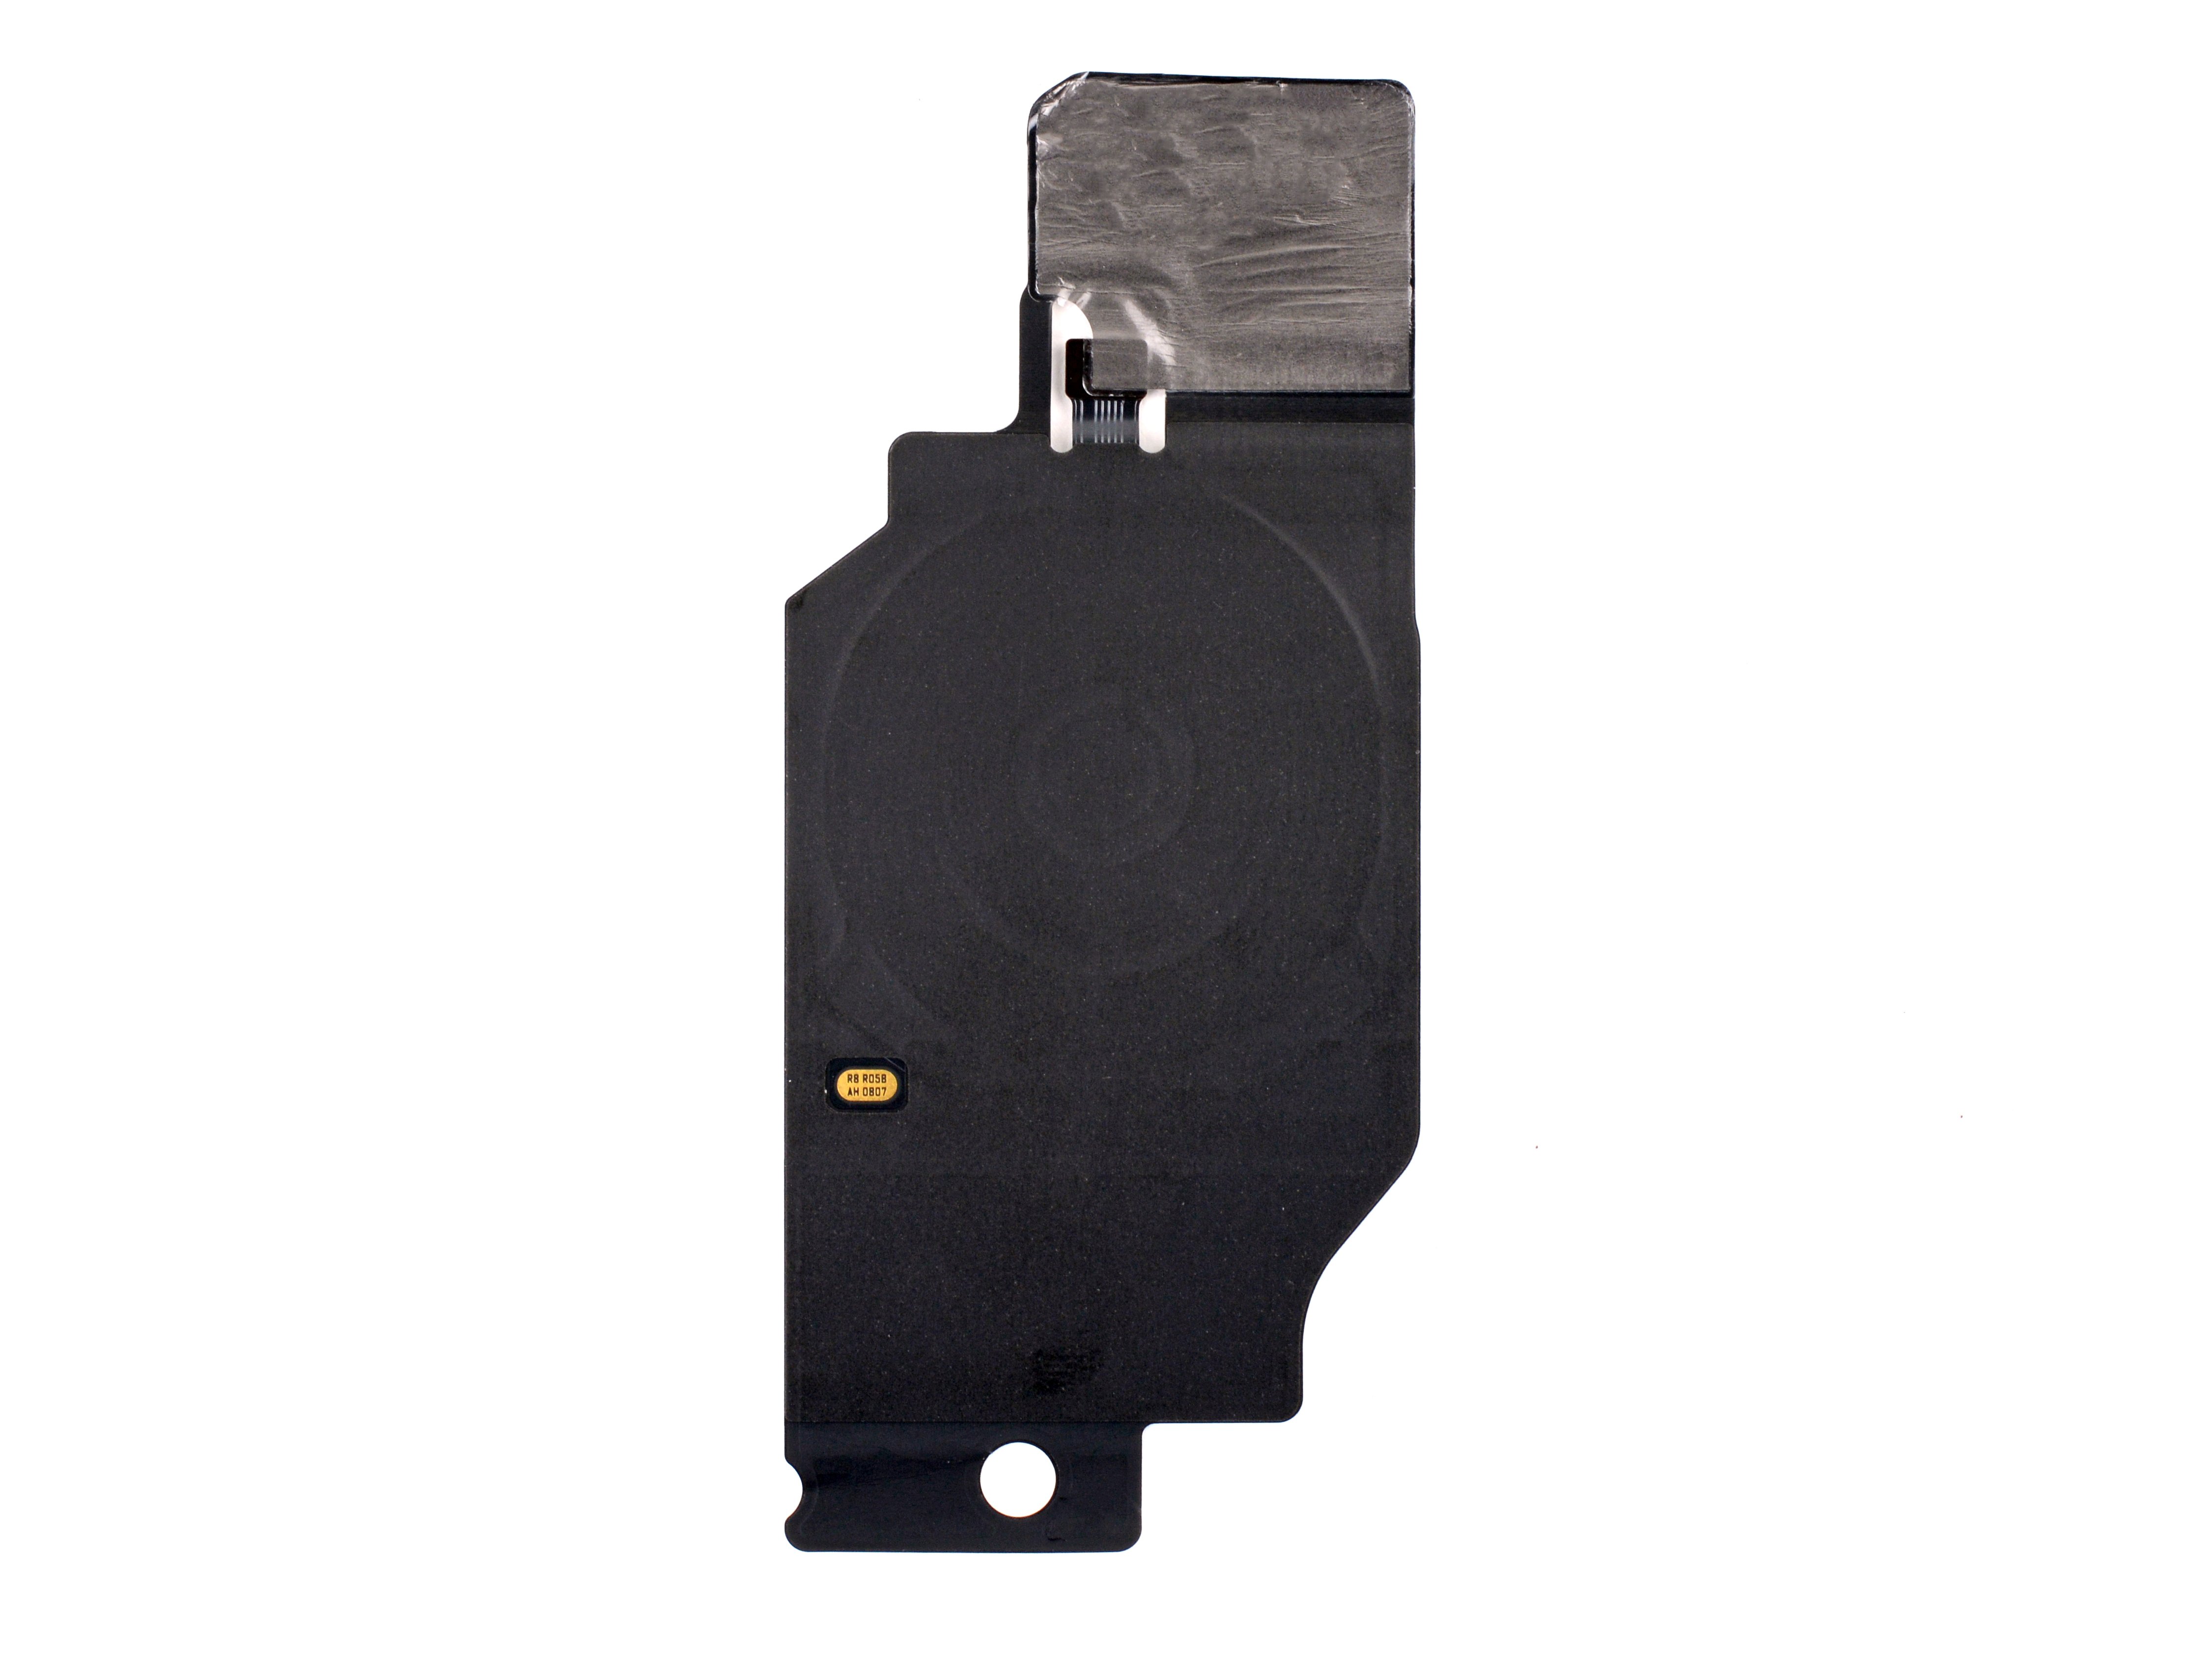
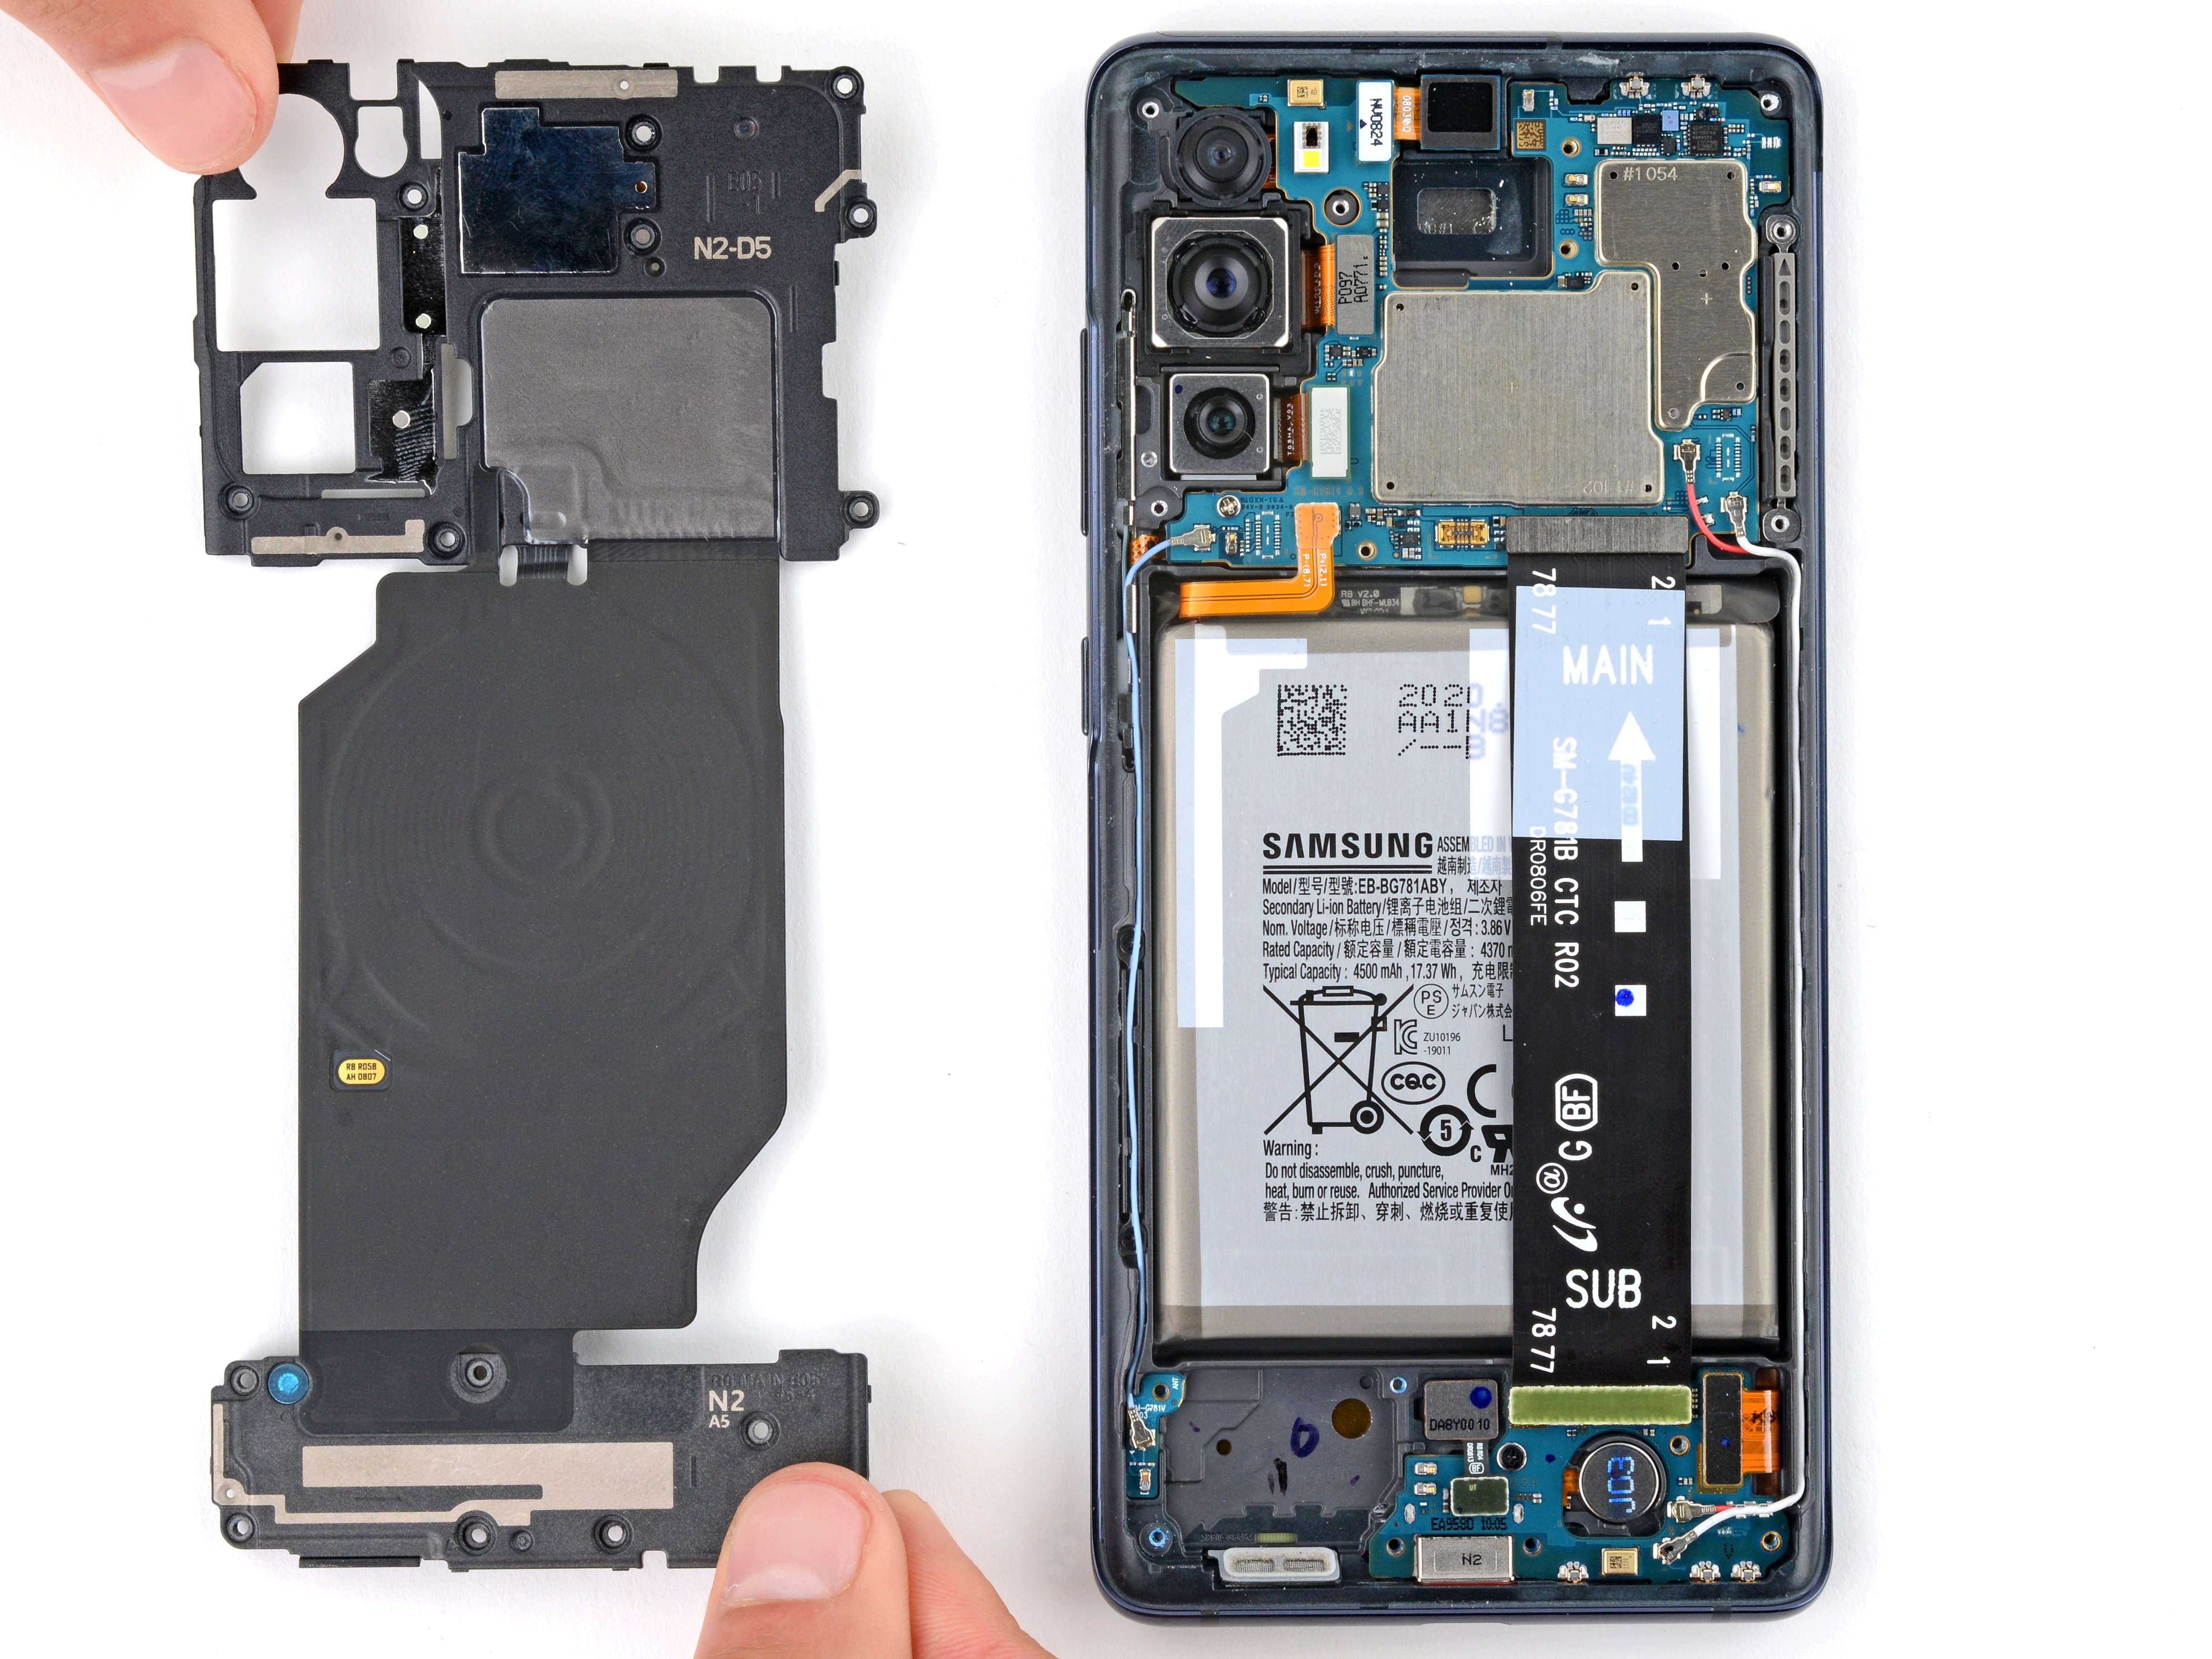
The wireless charging setup comes as a little squad: motherboard cover, wireless charging coil, and loudspeaker, all stuck together with graphite tape. Lift them out as a single unit for a smooth move!
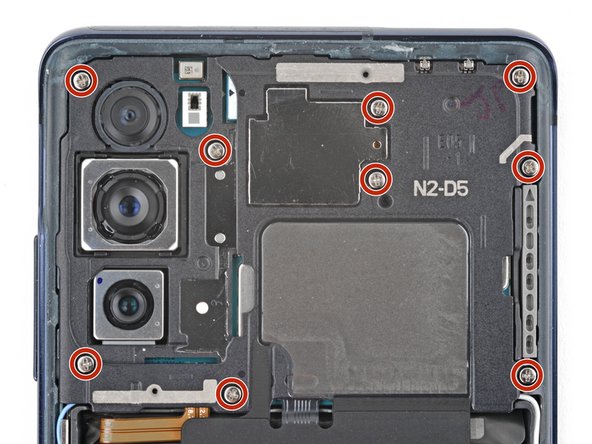
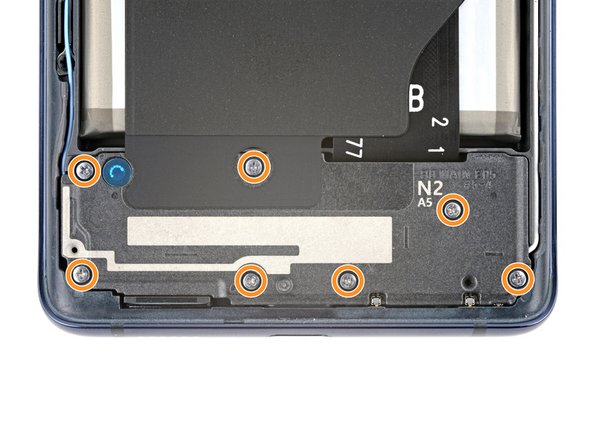
- Grab your trusty Phillips screwdriver and let's tackle those 16 screws holding the wireless charging assembly in place:
- First up, we've got nine 4 mm-long screws keeping the motherboard cover snug and secure.
- Next, don't forget about the seven 4.5 mm-long screws that are holding the loudspeaker down.
Step 14
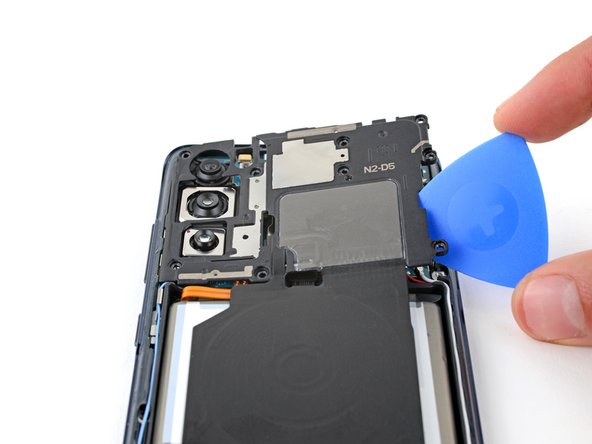

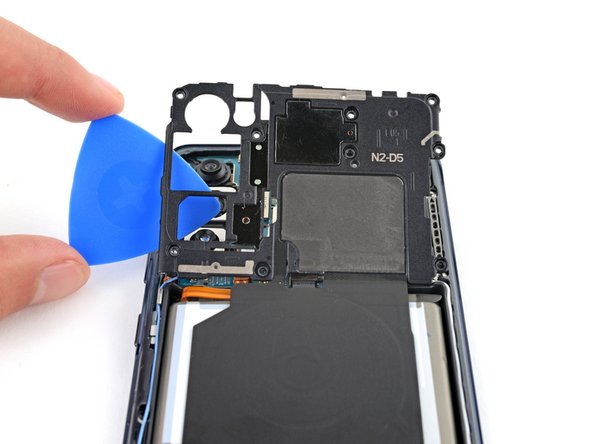
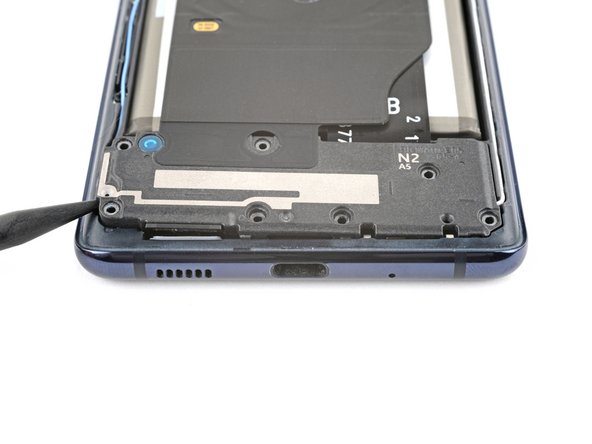
- Slide a pick under the bottom right side of the motherboard cover—like a secret agent sneaking in.
- Give the pick a twist to pop those clips loose. It’s less dramatic than a movie, but way more satisfying.
- Head to the bottom left edge and repeat the pick-twist move to free up the rest of the clips. You’re basically a clip ninja at this point.
- On your way back to reassembly, press down all around the cover’s edge. The clips will snap into place, no sweat.
Step 15

- Slide the motherboard cover aside to give yourself a clear shot at the battery and wireless charging press connectors along the bottom edge of the motherboard. Keep it easy, keep it friendly—you're just making space for the next step. If you need help, you can always schedule a repair.
Step 16

To reattach those connectors, give it a little love! Start by aligning one side and gently press down until it clicks. Then, show the other side some attention and do the same. Just remember, no pressing in the middle—let's avoid any pin-bending drama! A misaligned connector can lead to permanent damage, and we definitely don’t want that!
- Grab your trusty spudger and gently slide the flat end under the battery and wireless charging press connectors. Give them a little nudge to disconnect them from the motherboard. You've got this!
Tools Used

Step 17

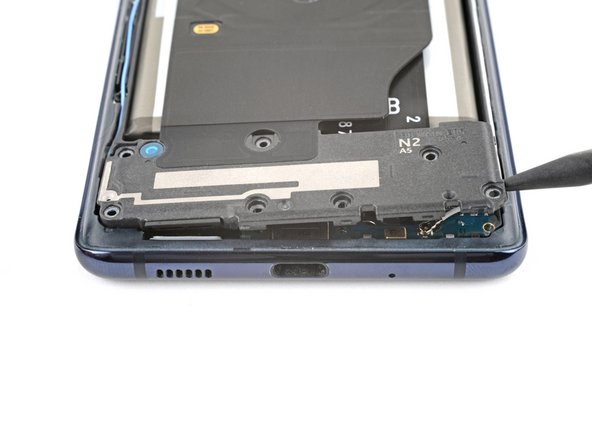
- Slide a spudger into the gap at the bottom left corner of the loudspeaker, where it meets the frame.
- Gently pry upward to pop the clips holding the left side of the loudspeaker in place.
- Same deal for the bottom right corner—lift it up to release those last clips.
- When putting everything back together, press down along the edges of the loudspeaker to click the clips into place. If you need a hand, you can always schedule a repair.
Tools Used
Step 18
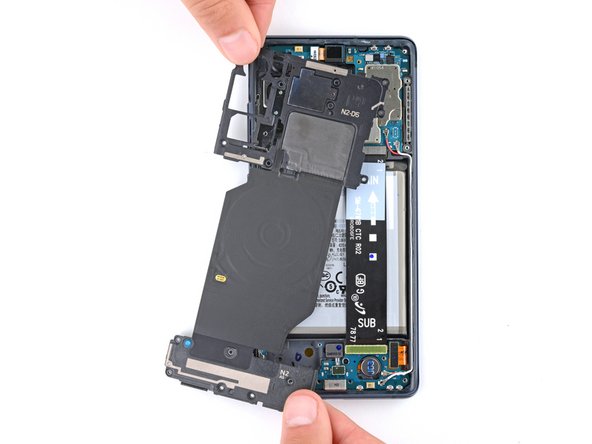
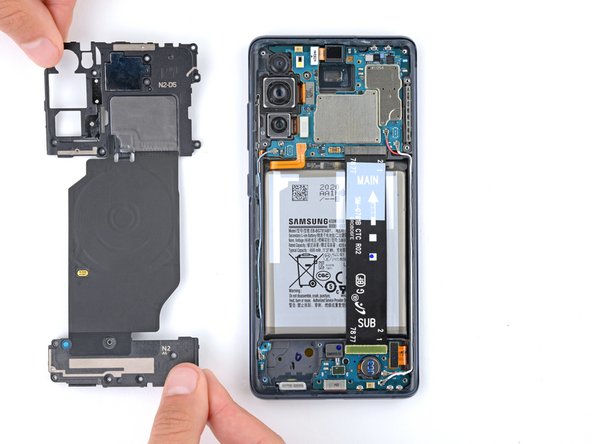

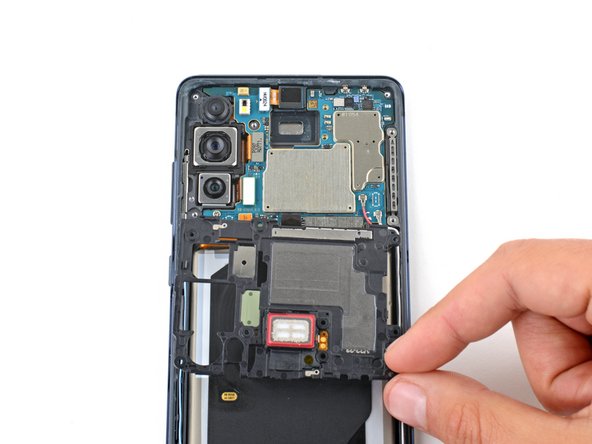
- Pop out the wireless charging assembly—easy does it, no wrestling required!
Step 19

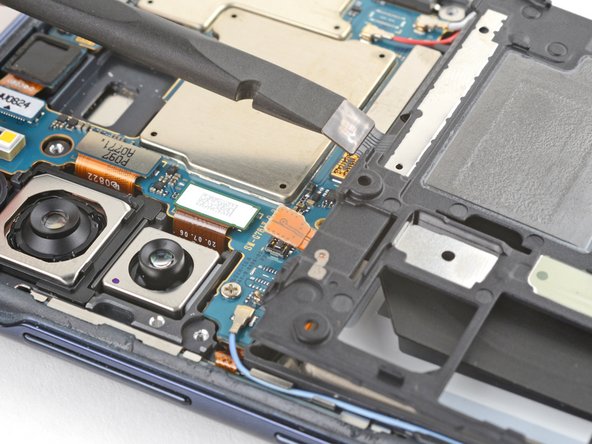
- Grab the flat end of your spudger and gently pop up the display cable press connector from the charging board. Nice and easy—no wrestling moves required!
Tools Used
Step 20

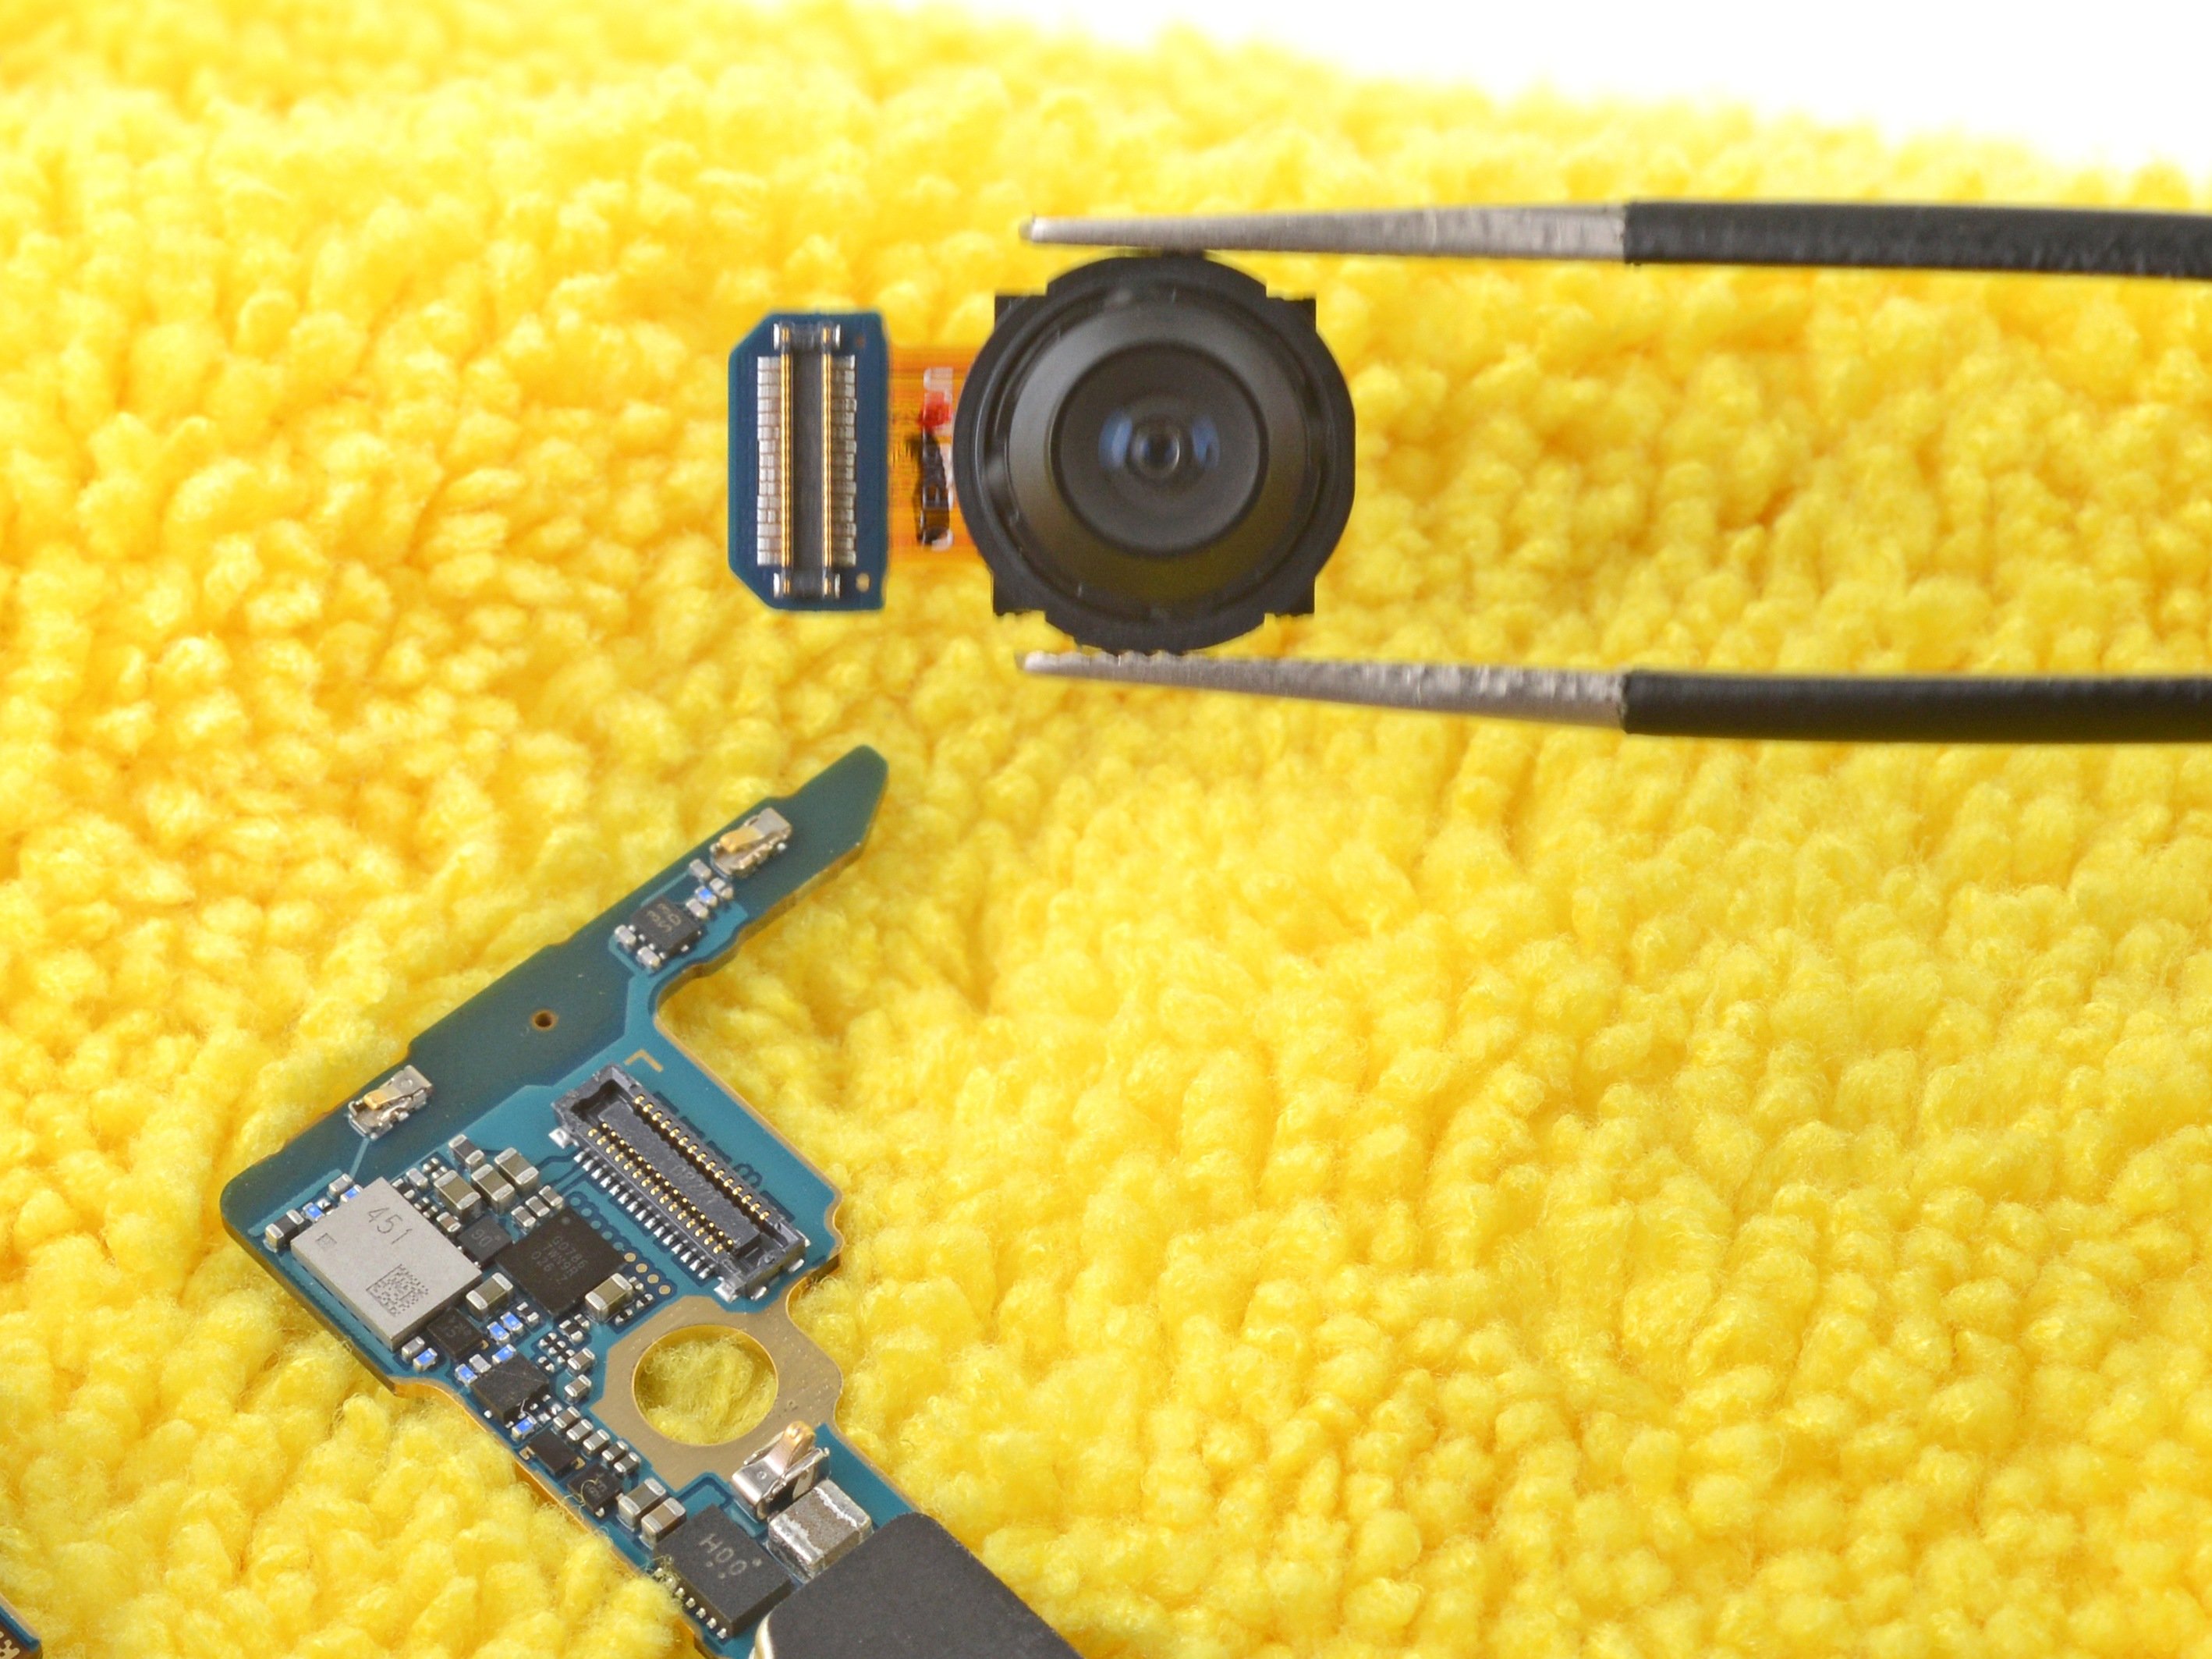
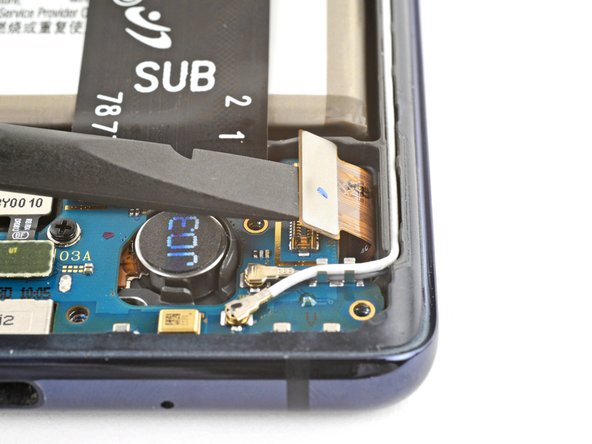
- Grab a spudger and gently disconnect the fingerprint sensor and its interconnect cable by pressing on the connectors. Easy does it—think of it as giving those connectors a little polite tug to free them up. If you need a hand, you can always schedule a repair.
Tools Used
Step 21

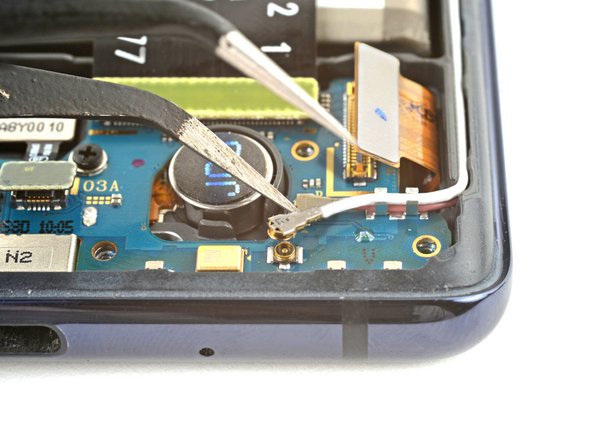
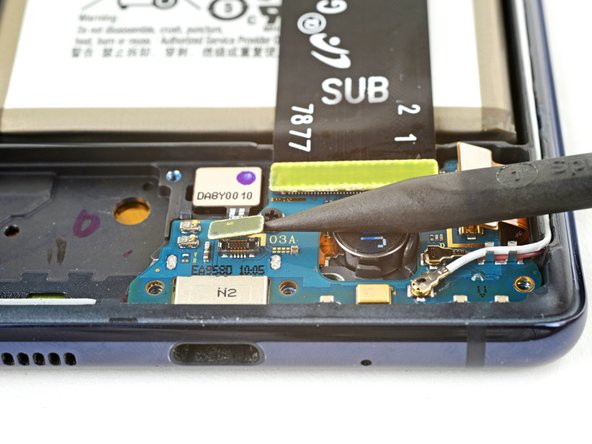
Getting these antenna connectors back in place is a bit of a balancing act. Line up the connector directly over its socket, then press down with the flat end of your spudger until you hear that satisfying snap. It might take a couple of tries—totally normal!
Step 22
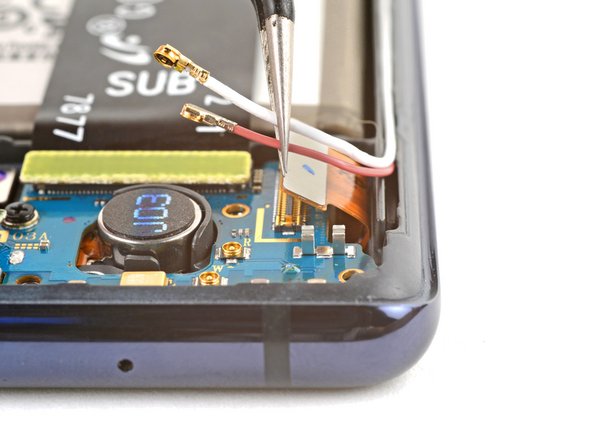

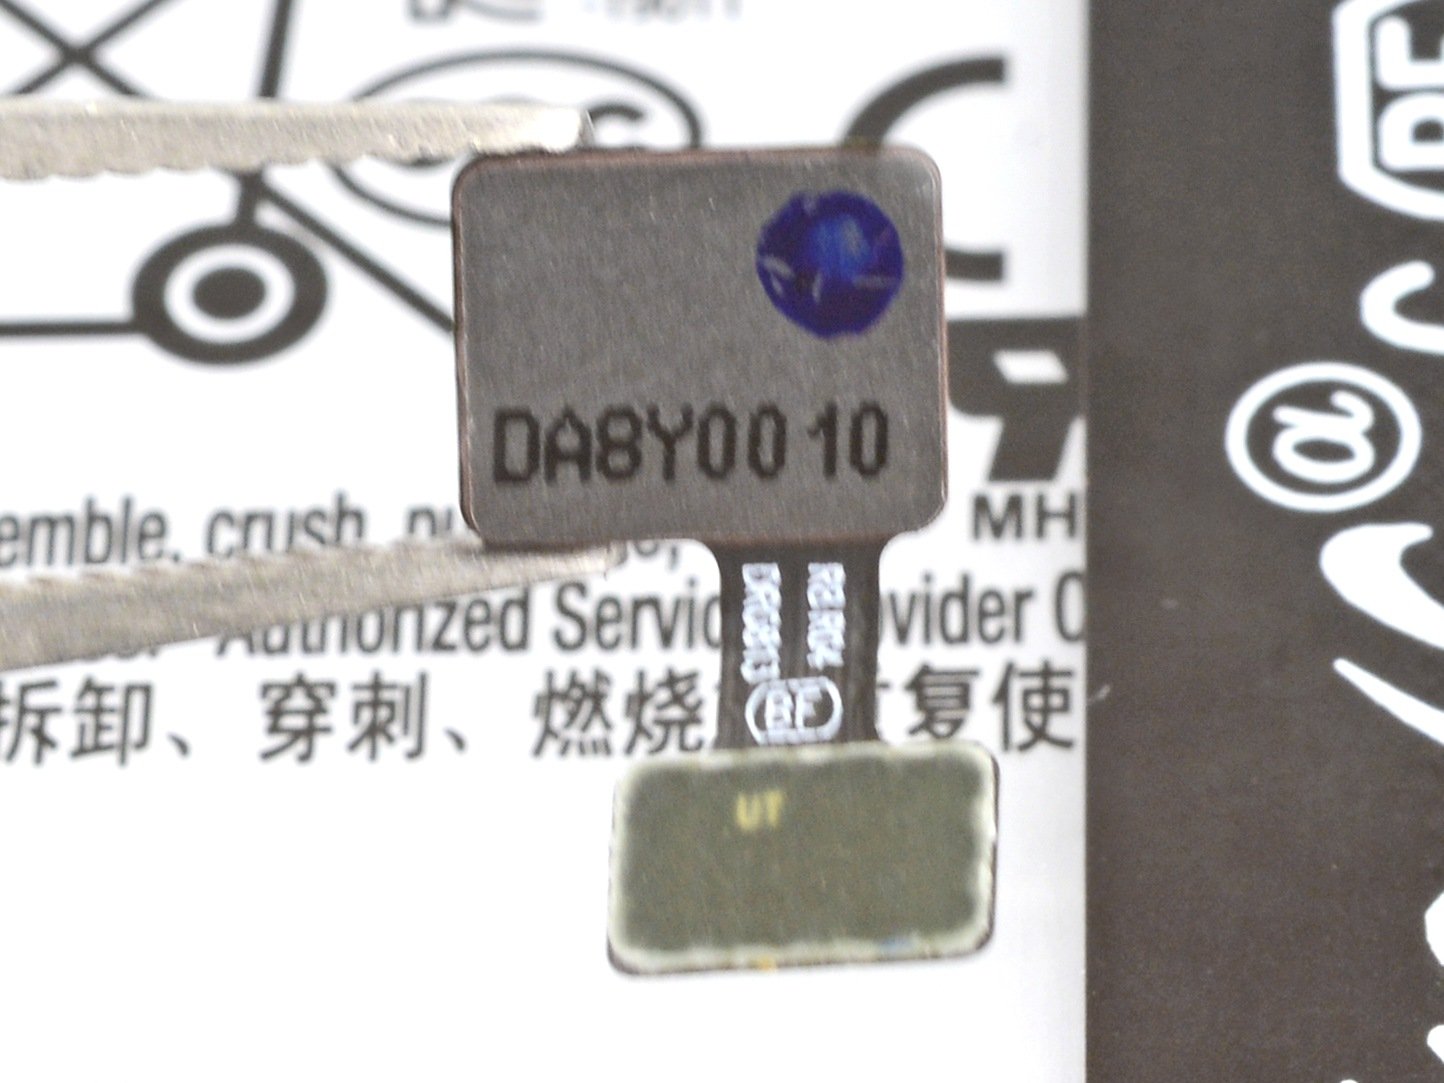
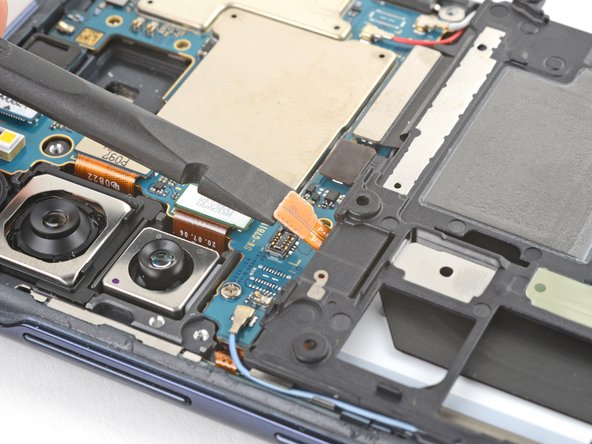
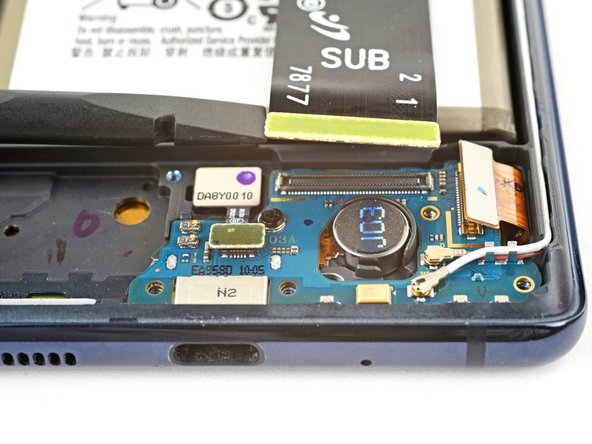
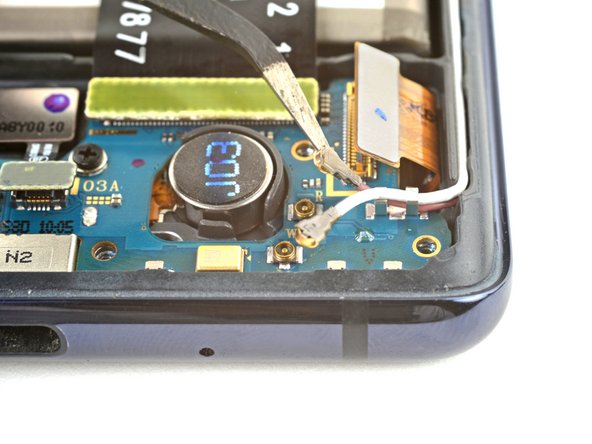
- Carefully pop the red and white antenna cables out of their snug little clips on the charging board. No need to wrestle—just lift them out gently.
- When you're putting everything back together, make sure those antenna cables are chilling in their channels along the right edge before snapping them into place. Smooth and simple.
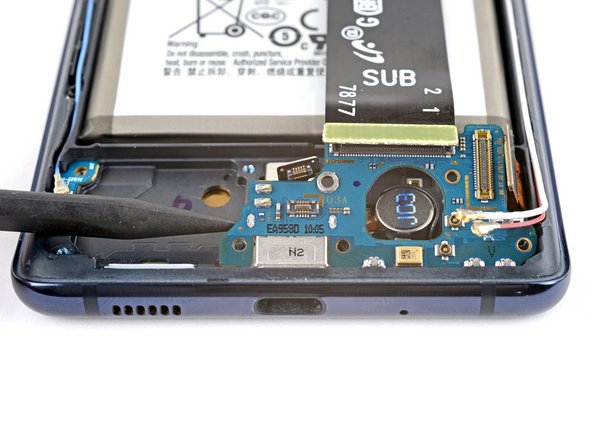
Step 23

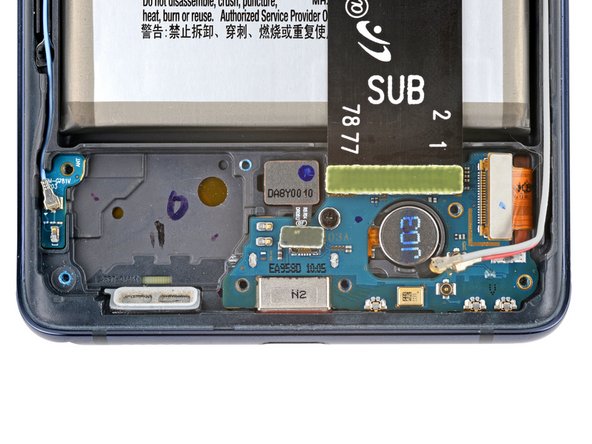
- Grab your Phillips screwdriver and unscrew that 3.5 mm screw holding the charging board in place. Easy does it—you're just freeing up one tiny piece to move forward.
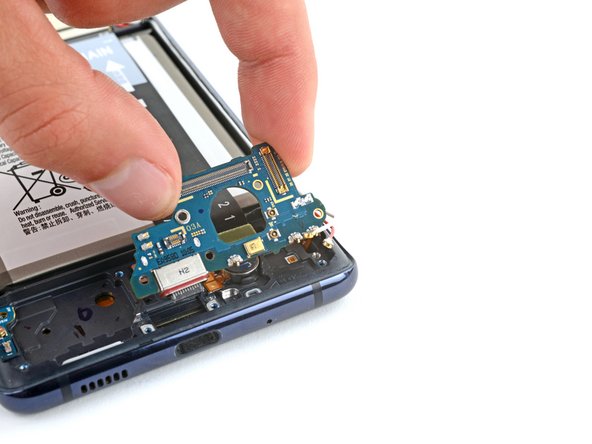
Step 24

- Grab a spudger and gently pry up the left side of the charging board until you can grab it with your fingers. Keep it light and steady—you're just loosening it up for the next step. If you need a hand, you can always schedule a repair.
Tools Used
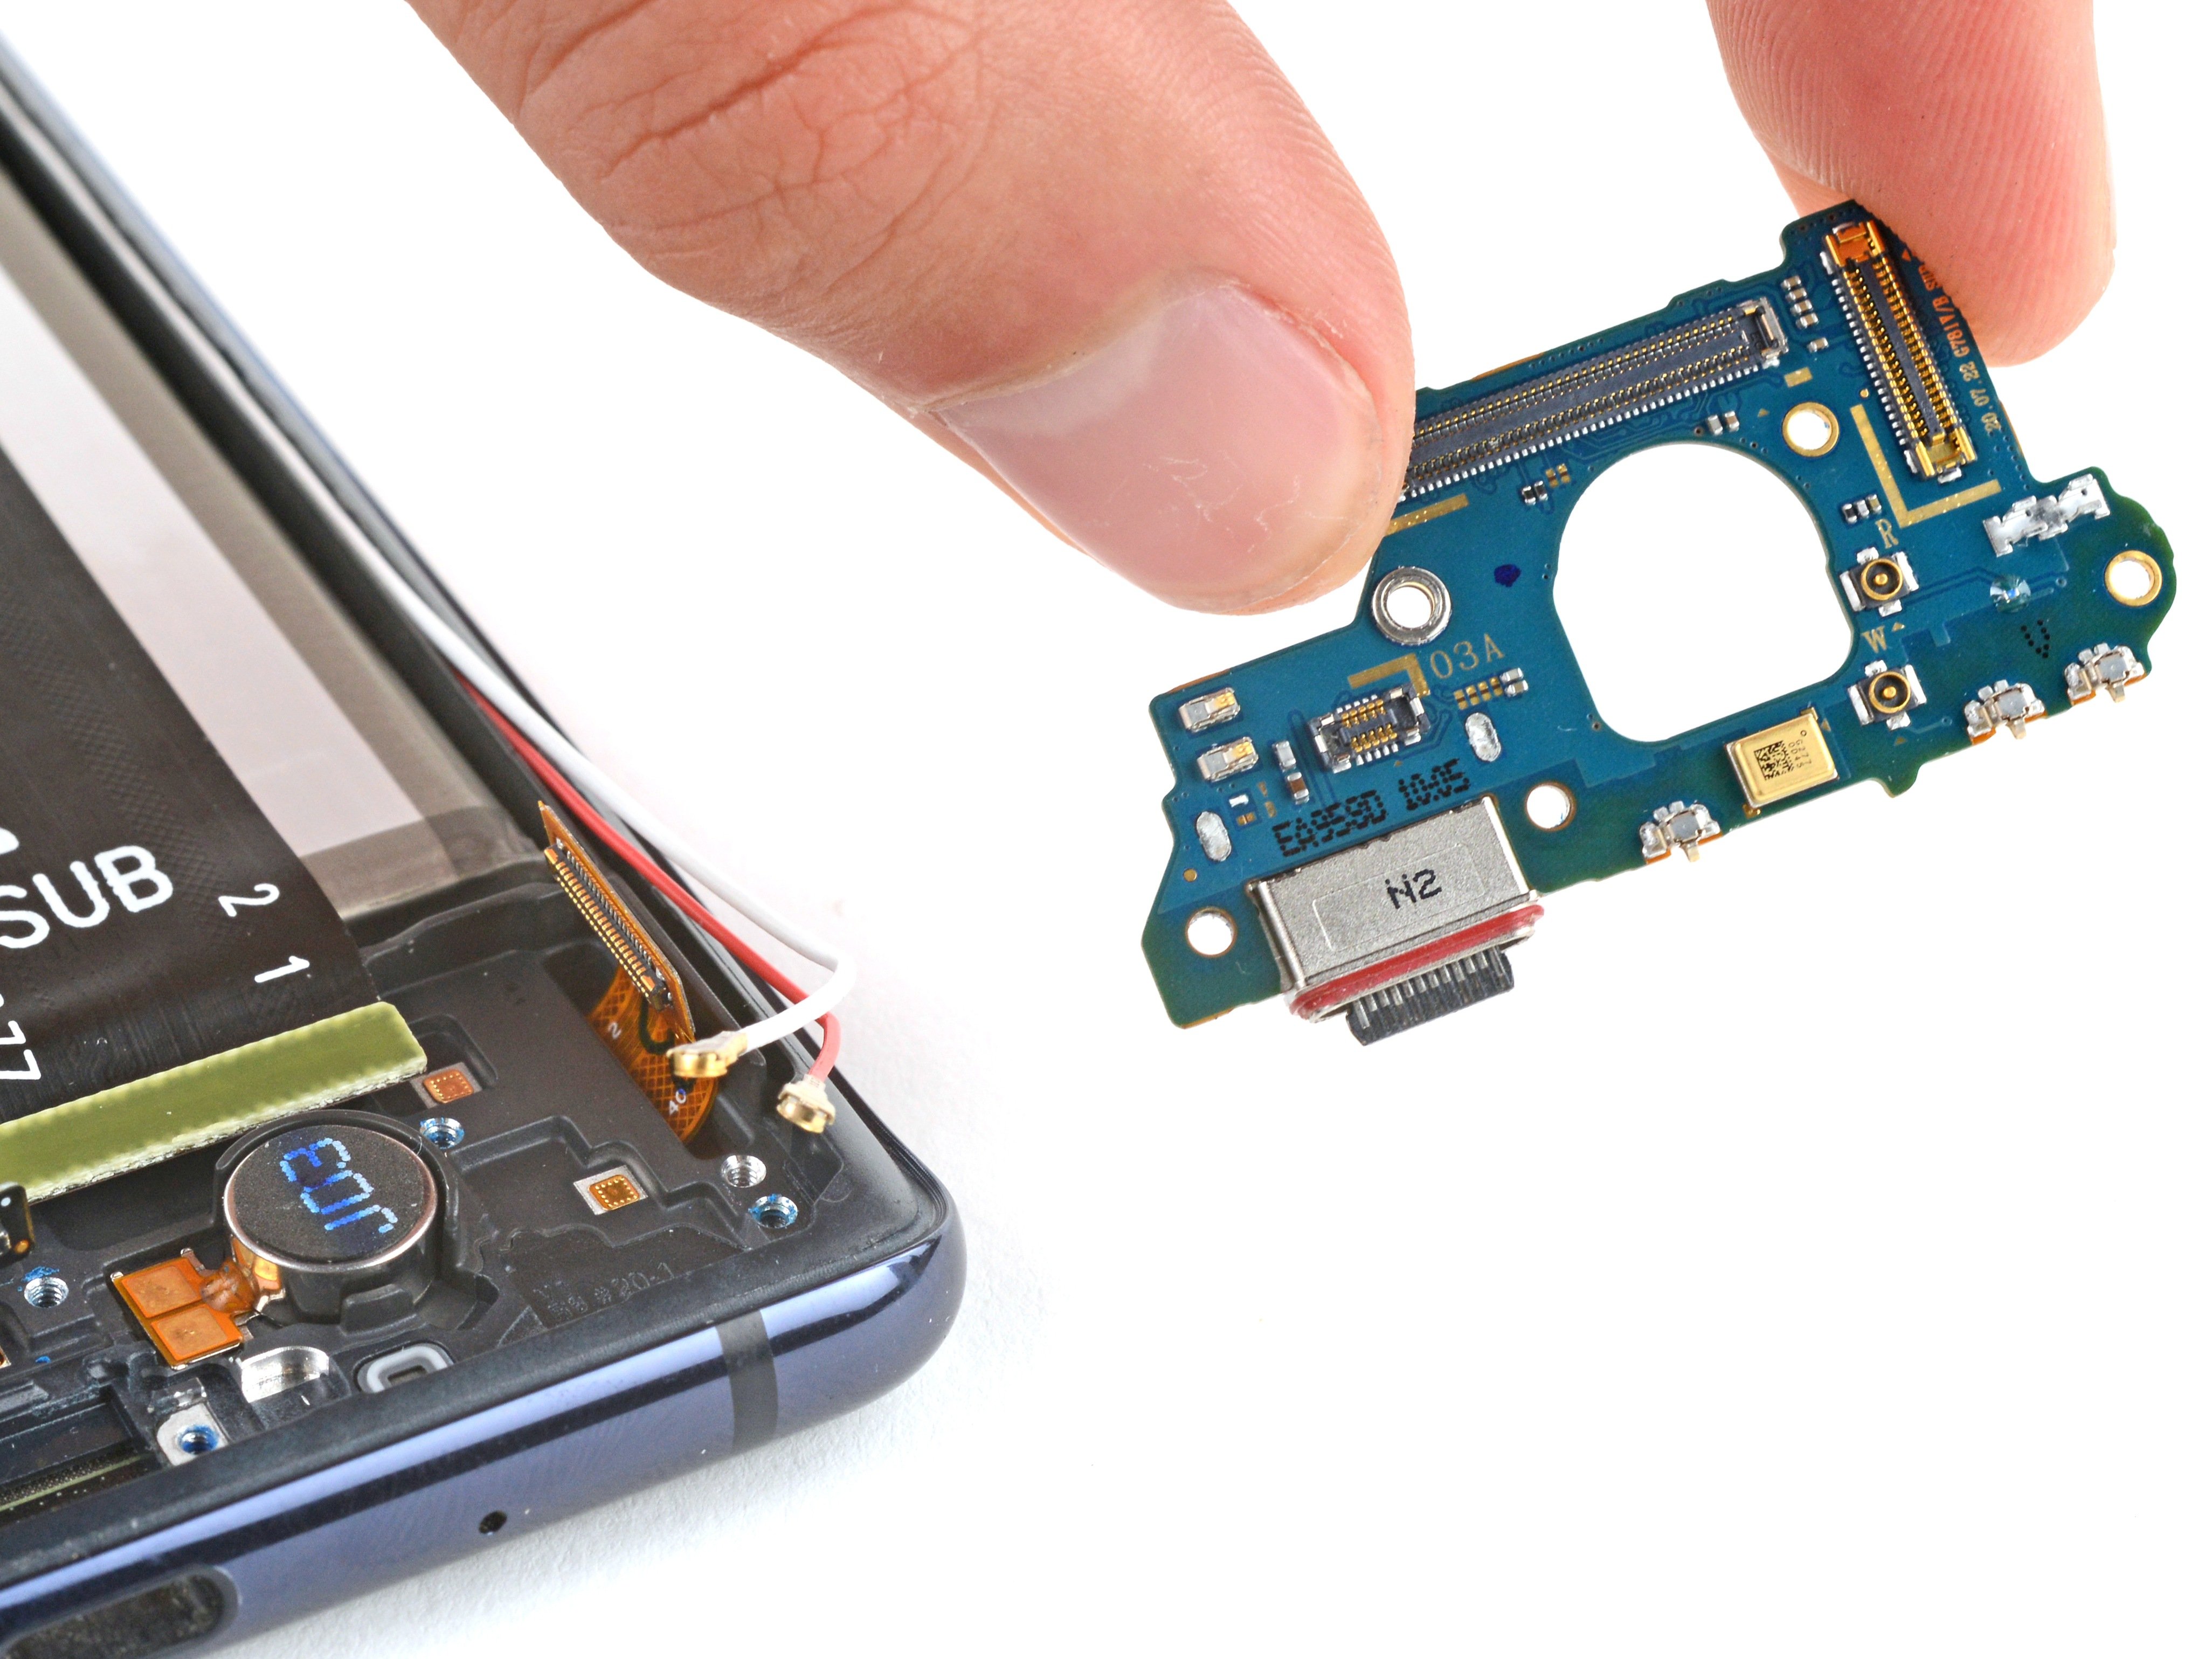
Step 25

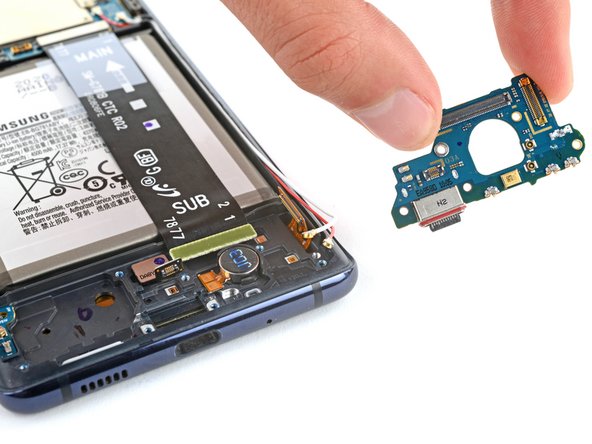
- Before you install your new part, give it a quick side-by-side comparison with the original one. If there’s anything left to transfer, now’s the time.
- To wrap things up, just reverse the steps you followed to take it apart—easy, right?
- Got e-waste? Make sure to drop it off at an R2 or e-Stewards certified recycler to keep things green.
- Something went wrong? No worries, take a breath! Try some basic troubleshooting or reach out to our community for some extra guidance. And if it’s still not working, you can always schedule a repair.