Samsung Galaxy S20+ Front Facing Camera Module Replacement Guide
Duration: 45 minutes
Steps: 25 Steps
Whoa there! Before you dive into this repair adventure, make sure to power off your device. Trust us, it’s the best way to avoid any surprises. Safety first, right? If you need help, you can always schedule a repair.
Ready to take your Samsung Galaxy S20 Plus selfie game to the next level? Let’s dive in and swap out that front-facing camera module! Removing it might be a bit tricky, but fear not – we’ve got your back. Just remember to handle it with care to avoid any module mayhem. And hey, if you plan on giving that old camera module a second life, pay close attention to the warnings. To seal the deal, make sure you have some replacement adhesive on hand to wrap up this repair party with a bow.
Step 1

Make sure to unplug and power down your phone before diving in! You’ve got this!
– Get your iOpener ready and gently warm up the back cover’s bottom edge for a couple of minutes.
Tools Used

Step 2


– Get that suction cup ready and stick it on the back of the device, right in the middle at the bottom.
– Give that suction cup a good, firm tug to make some space between the back cover and the frame.
– Take that trusty opening pick and slide it into the gap. Let’s do this!
Step 3


– Gently glide the pick along the bottom edge, back and forth, to cut through that sticky adhesive.
– Keep your opening pick nestled in the seam to stop the adhesive from sticking back together.
Step 4

– Heat up an iOpener and give the left edge of your back cover a cozy two-minute warm-up. It’s like a spa day for your device!
Tools Used
Step 5


This might take a few tries, so hang in there!
– Grab a suction cup and stick it on the back of your phone, aiming for a spot near the center of the left edge.
– With a good grip, pull steadily on the suction cup to start creating a little space between the back cover and the frame.
– Now, take the pointed end of an opening pick and carefully slide it into that gap you created.
Step 6


– Gently slide the pick under the edge of the glass, give it a little tilt downwards, and then confidently push it in to fully remove the back cover’s adhesive.
Step 7


– Gently glide your pick along the left edge of the phone to break free the back cover’s adhesive.
– Keep that pick nestled under the left edge of the glass to stop the adhesive from making new friends!
Step 8

– Don’t be shy! Warm up a friendly iOpener and give the right edge of the back cover a nice cozy hug for two minutes.
Tools Used
Step 9


– Stay groovy as you start by placing a fun little suction cup on your phone’s back, near the top right edge. With your inner Luke Skywalker force, gently pry open a path using the power of an opening pick. Channel your best Han Solo coolness to accomplish this daring repair mission.
Step 10


– Gently slide the pick along the right edge of your phone to break the adhesive holding the back cover in place. You’ve got this!
– Once you’re in, tuck that pick under the right edge of the glass near the top of your device to keep the adhesive from sticking back together. Nice job!
Step 11

– Warm up the top edge of the back cover with a heated iOpener for a cozy two minutes.
Tools Used
Step 12


Hey there! Just a heads-up, the glass near the corners of the back cover is a bit delicate, so handle with care to keep it crack-free. You got this!
– Gently glide the pick from the right edge of the device around the top right corner with a touch of finesse.
– Keep cutting along the top edge all the way around to the left edge to completely separate the back cover adhesive.
Step 13


– Gently lift off the back cover with a smile on your face! Use those cool opening picks to cut through any leftover adhesive with style.
– Bid farewell to the back cover as you remove it like a pro.
– Hey, just a friendly reminder for the reassembly phase:
Step 14

– Alrighty, let’s get this motherboard bracket loosened! Gather your Phillips #00 screwdriver and prepare for some satisfying smallscrew extraction. Remember those six 4 mm-long screws? This is one 👀 you for! Have fun and if you need help, you can always schedule a repair.
Tools Used

Step 15


– Grab your trusty tweezers and give that motherboard bracket a gentle lift to unclip it from the plastic midframe. You’ve got this!
Tools Used


Step 18


– Get in there and pry up that wireless charging coil connector with a trusty spudger. You’ve got this!
Tools Used
Step 19


– Grab your trusty tweezers and gently coax the wireless charging coil away from the device, just like peeling a sticker off a fresh laptop.
– Carefully remove the wireless charging coil and set it aside.
– When putting everything back together, start by reconnecting the charging coil and battery connectors. Tighten those motherboard bracket screws to keep everything in line, and then give the coil pad a firm press to make sure it sticks like a good friend.
Tools Used
Step 20

– Grab your trusty Phillips #00 screwdriver and let’s tackle those three 4 mm-long screws giving the upper midframe a tight hug.
Tools Used


Step 22


– Grab your trusty spudger and gently pry up to disconnect the front-facing camera flex cable from the motherboard. Easy peasy!
– When it’s time to reattach, align those connectors just right. Press down on one side until you hear that satisfying click, then do the same on the other side. Avoid pressing down in the middle, though! Misalignment can bend the pins and that’s a no-go. If you need help, you can always schedule a repair.
Tools Used
Step 23


– Splash on some high-octane isopropyl alcohol (over 90% if you can find it) around the edges of the front-facing camera module. This will work its magic to loosen up that pesky adhesive holding it in place.
– Give the alcohol a moment—about 1-2 minutes—to work its way into the adhesive. Patience is key!
Tools Used

Step 24


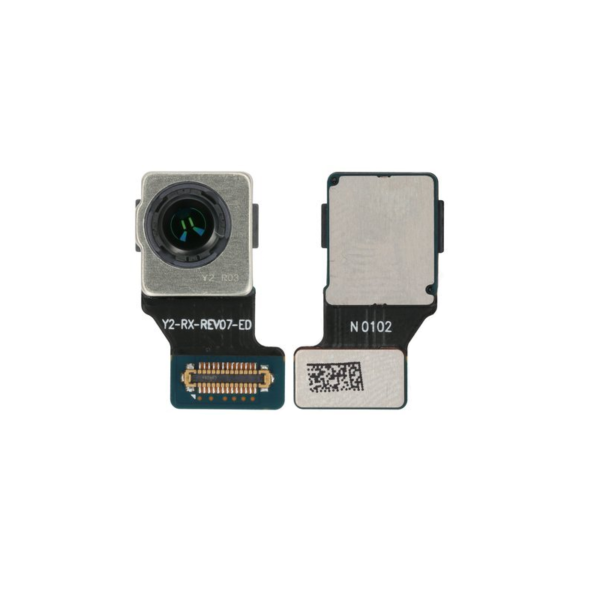
– Hey there, rockstar! Let’s take a little peek at the front-facing camera module. Give that spudger a little squeeze to lift the bottom edge of the camera, no need to break a sweat. Bye-bye, camera module! If you want to keep it in the fam, no worries, just stick it back on with some adhesive. If you’re feeling fresh, slap on a new pre-cut sheet to keep things tight and secure. You got this! If you need help, you can always schedule a repair.
Tools Used
Step 25


– If you’ve taken out the camera module’s inner parts without the plastic casing, don’t fret! Just dab a few drops of high-concentration isopropyl alcohol (over 90% is your friend here) around the edges of that casing to loosen up the adhesive holding it snugly in place.
– Grab your trusty tweezers and gently pull out that plastic camera casing. You’ve got this!
Tools Used


