Samsung Galaxy S20 Screen Replacement Guide: DIY Tutorial
Duration: 45 minutes
Steps: 34 Steps
Heads up:
The display panel can be pretty fragile, so be careful not to break it during this step. If you’re not feeling confident, don’t worry – you can always schedule a repair and let the pros handle it.
Ready to give your Samsung Galaxy S20 a brand new look? Let’s swap out that screen assembly! This guide will walk you through replacing the whole shebang – the display glass, OLED panel, and digitizer. Heads up, some replacement screens come with a new frame, so you’ll need to move all your phone’s guts and pop in a fresh battery. Double-check you’ve got the right part before you dive in. This is a delicate procedure – the display is pretty fragile, so take your time and don’t be afraid to apply some heat to loosen things up. You’ll need some fresh adhesive to finish things off. If you’re feeling a little unsure, you can always schedule a repair with the pros at Salvation Repair. We’ve got your back!
Step 1

Make sure to unplug and power down your phone before diving in. Let’s keep things safe and sound!
If you’re feeling adventurous, you can try using a hairdryer, heat gun, or hot plate. Just be sure not to get too close to the phone, or you might give it a little too much love—the display and battery are a bit delicate. If you need help, you can always schedule a repair.
– Let’s warm things up! Grab your trusty iOpener and give the back cover’s bottom edge a nice two-minute hug. Heat it up good!
Tools Used

Step 2


Hey, be gentle with that pick! Don’t go Hulk-smashing on the back cover. We want to keep things smooth, not cracked, you know?
If your display is cracked, don’t fret! Cover it with some clear packing tape so the suction cup can stick. If that’s not working, try some strong tape instead. Or, if you’re really in a bind, you can superglue the suction cup to the screen. It’s your call!
Just like trying on a new pair of jeans, this might take a few tries. Reheat the area with your iOpener and carefully separate the screen using the suction cup. Keep at it, you got this!
If you’re having trouble getting a gap, don’t worry! Just apply more heat to the edge and try again. You’ll be a pro in no time! If you need help, you can always schedule a repair
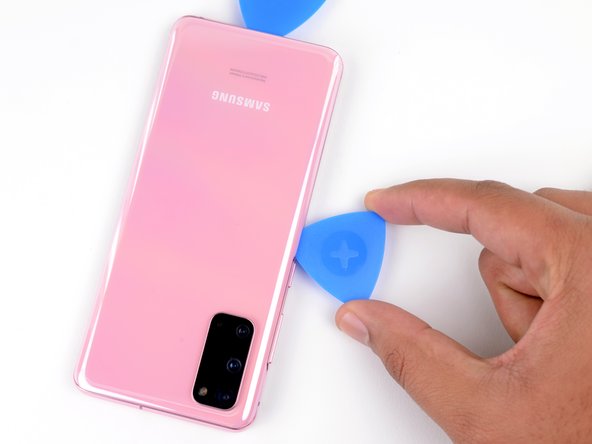
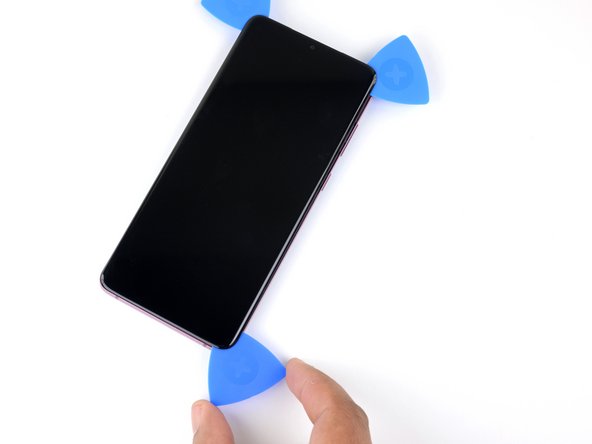
– Start by placing a suction cup on the back of your phone, aiming for the center of the bottom edge like a pro.
– Give that suction cup a good pull with steady strength to create a nice little gap between the back cover and the frame. You’ve got this!
– Now, take an opening pick and gently slide it into that gap you’ve created. Easy peasy!
Tools Used
Step 3


– Gently glide the pick back and forth along the bottom edge to break through that sticky adhesive like a pro.
– Keep your opening pick nestled in the seam to stop that adhesive from getting all clingy again.
Step 4

– Time to get this repair started. Apply a heated iOpener to the left edge of the back cover for about two minutes. If you need help, you can always schedule a repair
Tools Used
Step 5


Be careful, amigo! Don’t go all Hulk on that pick. Too much force can crack the back cover glass. If you need help, you can always schedule a repair.
Don’t worry if it takes a few tries to get it just right – these tight tolerances can be a bit tricky.
Since the glass on this edge is curved, you won’t be able to insert the pick too far in. Just make sure the tip is under the edge and you’re good to go.
Having trouble getting a gap started? Try applying a bit more heat to the edge and giving it another shot. If you’re still having trouble, don’t hesitate to schedule a repair with our experts at Salvation Repair.
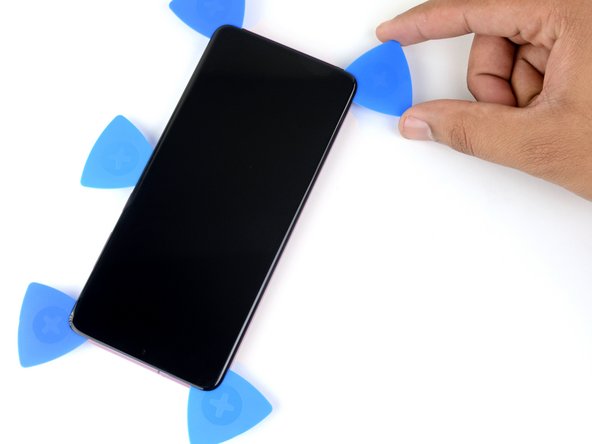
– First things first, grab a suction cup and stick it onto the back of your phone, aiming for the center of the left edge – it’s like giving your phone a little love tap!
– Now, give that suction cup a good, strong pull! This will help create a nice little gap between the back cover and the frame. You’re doing great!
– Once that gap is there, take an opening pick and slide it in gently. It’s like slipping a bookmark into your favorite book.
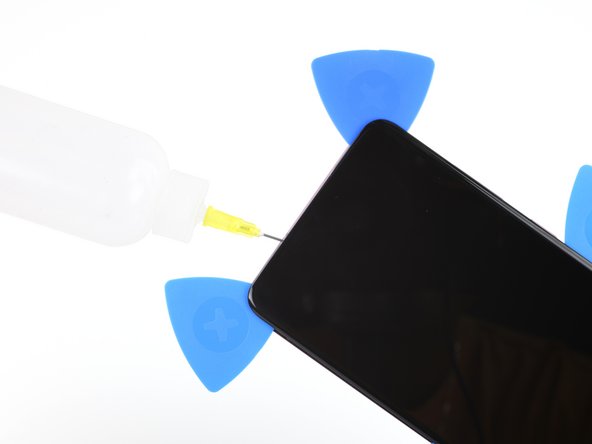
– And hey, if you’re feeling adventurous, you can sprinkle a few drops of high concentration (over 90%) isopropyl alcohol into the seam to help loosen that sticky adhesive. Just a little magic potion to make things easier!
Tools Used

Step 6


– Once your trusty pick is snugly nestled under the glass edge, give it a little tilt downward and slide it in a bit further to make sure the back cover’s adhesive is fully set free.
Step 7


Be cautious when gliding across the edge around the volume and power buttons—the notch in the glass might make it a bit more vulnerable to cracking.
– Gently glide your pick along the left edge of the phone to break free the back cover’s sticky grip.
– Keep your pick tucked under the left edge of the glass near the top left corner to stop that adhesive from making a comeback.
Step 8

You can use a hair dryer, heat gun, or hot plate to help out, but remember to keep it cool! Overheating your phone can lead to some serious heat damage for the display and internal battery. So, let’s keep things chill! If you need help, you can always schedule a repair.
– Heat things up by applying a heated iOpener to the right edge of the back cover for about two minutes. If you need help, you can always schedule a repair
Tools Used
Step 9


Now it’s time to get that opening pick fully underneath the back cover. Just tilt it downward and you’ll be all set.
– Grab a suction cup and stick it on the back of your phone, aiming for the center of that right edge like a pro.
– Give that suction cup a good, steady tug to make a little space between the back cover and the frame—time to make some room!
– Slide the tip of an opening pick into that newly created gap and let’s keep this repair party going!
Step 10


As you give that back cover a little nudge, don’t be surprised if one of those trusty picks decides to bail out! If they do, just place them to the side because at this stage, that bottom edge is not going back on. You’ve got this!
– Let’s loosen up that back cover! Slide the pick all along the right edge to separate the adhesive.
– Now, don’t let the adhesive get sneaky and reseal itself! Leave your pick under the right edge of the glass near the top of the device.
Step 11

– Warm up that iOpener and give it a cozy two-minute hug on the top edge of the back cover. You’ll be on your way to a smooth repair in no time!
Tools Used
Step 12


The glass around the corners of the back cover is a bit wavy and can crack easily. Take your time and be gentle here to keep your back cover safe and sound.
Hey, if you start to feel like you’re wrestling with that slicing, don’t force it! Take a break, reheat your tool and jump back in. You got this!
– Gently ease that pick from the right side of your device, wrapping it around the top right corner like a pro.
– Keep on slicing along the top edge all the way to the top left corner to completely release the back cover adhesive. You’re doing great!
Step 13


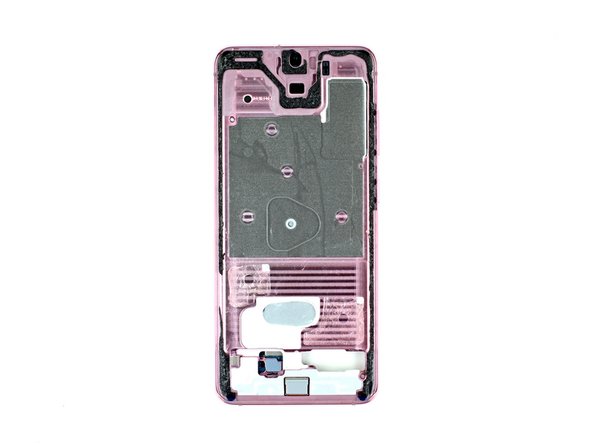
– Alright, let’s gently lift that back cover. Use those opening picks to carefully slice through any stubborn adhesive.
– Time to remove the back cover – you’re doing great!
– During reassembly:
– This is a good time to power on your phone and check everything’s working as it should before you seal it up. Don’t forget to power it back down completely before moving on.
– Remove any sticky bits with tweezers or your fingers. If you’re struggling to separate the adhesive, try applying some heat.
– If you’re using custom-cut adhesive, check out this guide .
– If you’re using double-sided tape, check out this guide .
Tools Used

Step 14

As you tackle this repair, keep an eye on each screw and make sure it finds its way back to its original home.
– Alright, let’s loosen things up! Grab your trusty Phillips #00 screwdriver and give those five 4 mm-long screws holding the motherboard bracket a little spin. You’ll be feeling pretty good about yourself in no time. If you need help, you can always schedule a repair
Tools Used

Step 15


Be careful not to completely remove the bracket just yet – it’s still connected to the wireless charging coil, so let’s take it one step at a time.
– Grab a trusty pair of tweezers and carefully lift up to unclip that motherboard bracket from the cozy plastic midframe. You’ve got this!
Tools Used
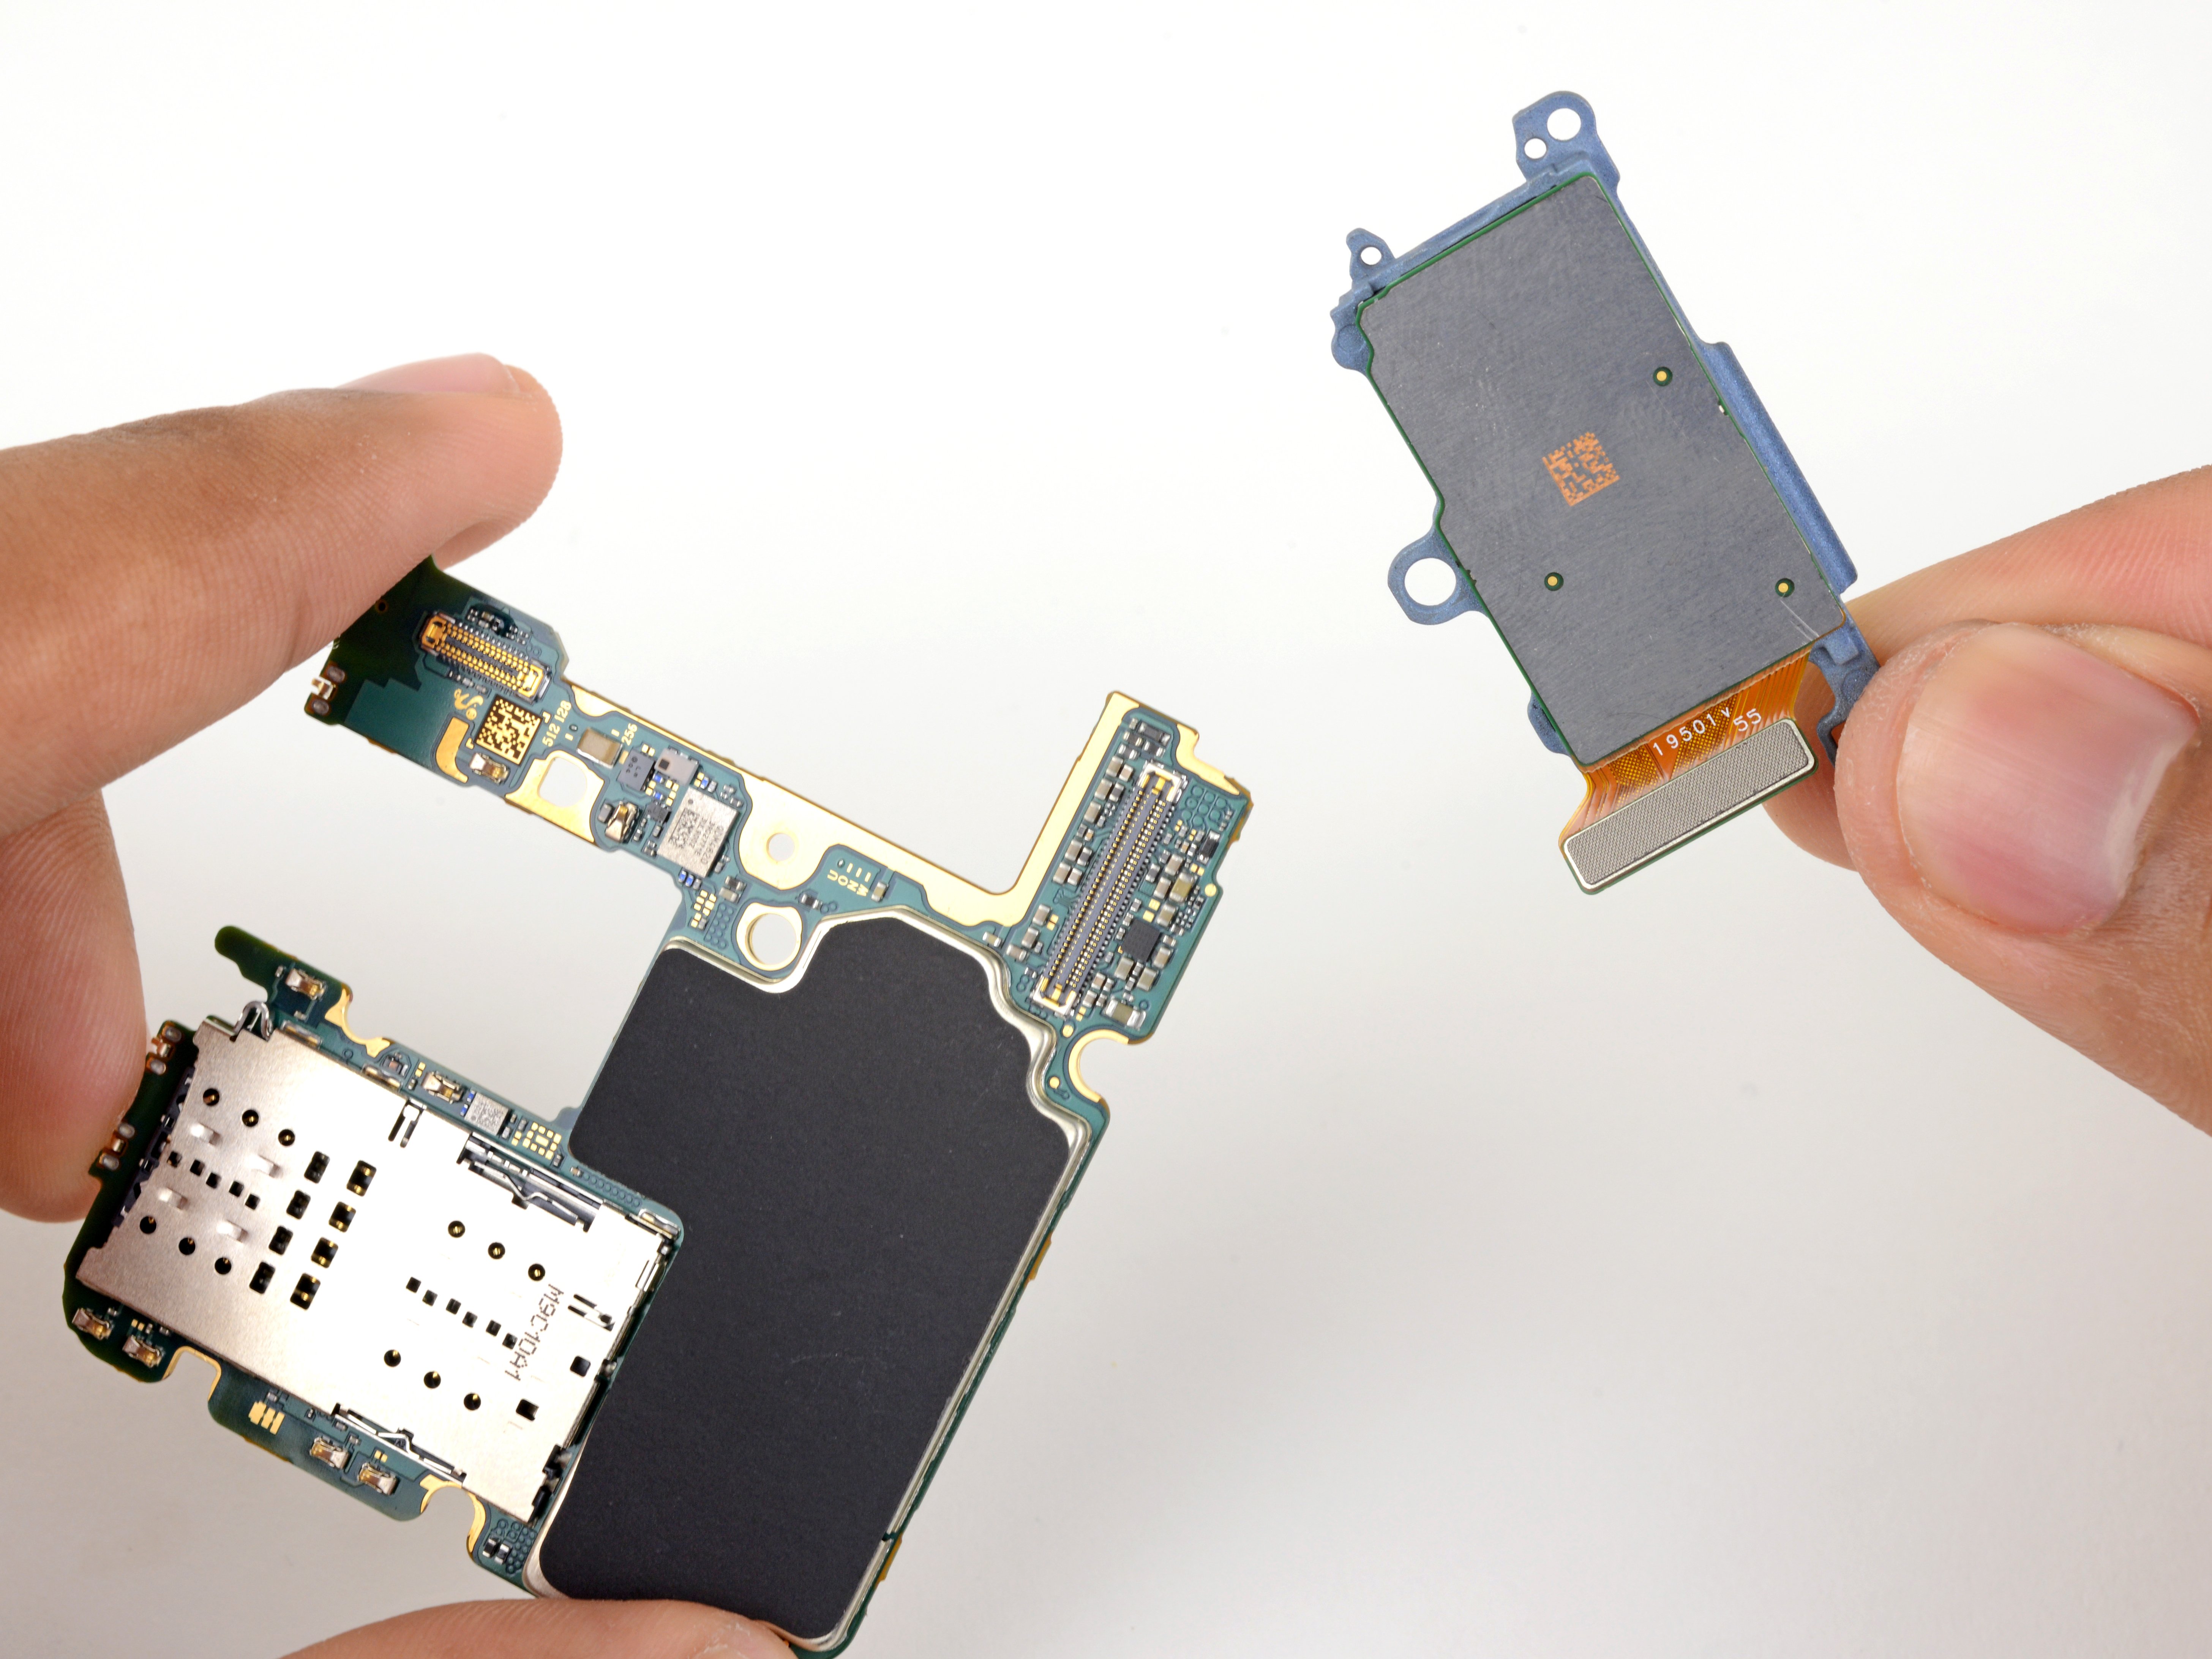
Step 16


The coil is linked to the rest of the device through spring contacts, so there’s no need to unplug any connectors. You’re all set to keep going!
– Carefully peel the wireless charging coil off the device. It’s like peeling a sticker, but more high-tech.
– Take off the wireless charging coil. Easy peasy, right?
– When putting it back together, start by securing the motherboard bracket screws. This will help line up the charging coil perfectly. Then, press the rest of the coil down firmly to stick it in place. If you need help, you can always schedule a repair.
Step 17


Those little connectors can be tricky! Just be careful not to accidentally knock loose any of the tiny parts around them when you unplug. No worries though, you’ve got this! If you need help, you can always schedule a repair.
Tools Used

Step 18

– Alright, let’s get those speakers out! Use a Phillips #00 screwdriver to take out the five 4 mm-long screws that hold the loudspeaker and lower midframe in place. You’ve got this!
Tools Used
Step 19


– Time to get started. Use a spudger or a pair of tweezers to carefully pry open the midframe by inserting the point into the notch at the top left corner and gently releasing the clips that hold it in place.
– Next, remove the loudspeaker and lower midframe – you’re making great progress. If you need help, you can always schedule a repair
Step 20


– Time to get this display cable out of there! Use your spudger to gently pry it up and disconnect it. If you need help, you can always schedule a repair.
Tools Used
Step 21


Alright, let’s get this party started! Next up, we’re gonna heat things up and loosen that black glue around the edges. It’s like a little warm-up for our device.
– The adhesive along the long edges of your device is pretty thin, so just slide that pick in about 5 mm to get things moving. Easy peasy!
– Keep in mind that the adhesive at the top edge of your phone is a bit more clingy and runs further from the edge. You’ll need to give your pick a little extra love here and go deeper to fully break free the adhesive.
Step 22

You can also use a hair dryer, heat gun, or hot plate, but watch out—overheating the phone can harm the display and internal battery. If you need help, you can always schedule a repair.
– Let’s get started by heating up an iOpener and applying it to the top edge of the display for about two minutes. This will help loosen things up and make the repair process smoother. If you need help, you can always schedule a repair
Tools Used
Step 23


Make sure the pick glides smoothly over the front-facing camera – we don’t want it getting too cozy with that lens!
Hey, if your screen is looking like a shattered mosaic, no worries! Cover it with some clear tape, like a superhero shield. Or, you can try some super strong tape instead of the suction cup. If you’re still struggling, you can always give that suction cup a little extra stick with some superglue. It’s a sticky situation, but we got this!
Ok, so this gooey stuff holding everything together can be a little stubborn. Just keep heating it up with that iOpener and gently pulling with the suction cup, and you’ll eventually pry things apart. It’s like a delicate dance, but don’t worry, you’ve got this.
If things aren’t budging, add a little more heat to the edge and try again. You’ll have those parts separated in no time! And remember, if you need a helping hand, you can always schedule a repair with us. We’re always here to lend a hand!
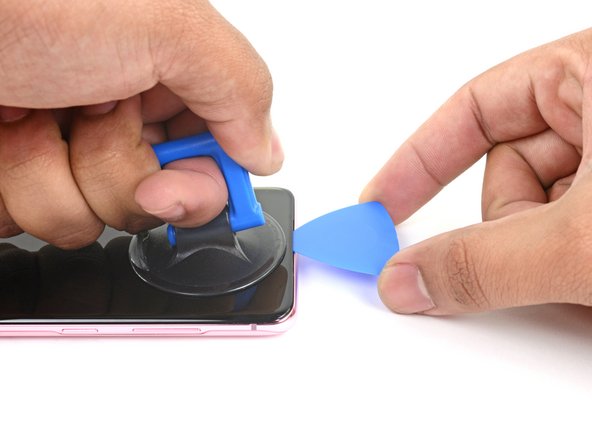
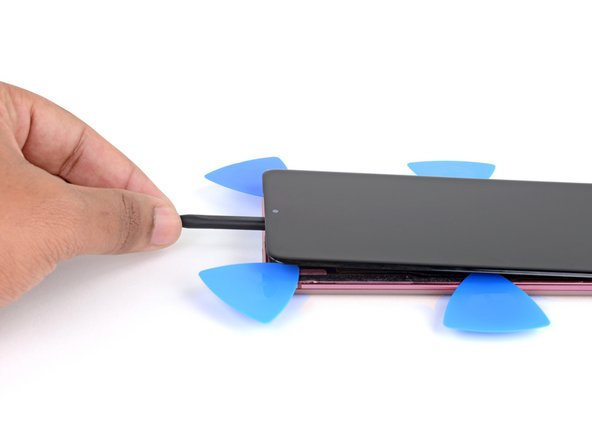
– Let’s get started by applying a suction cup to the display glass, right at the center of the top edge – it’s the perfect spot to begin.
– Now, pull on that suction cup with some strong, steady force to create a gap between the display glass and the frame. You got this!
– Next, take the point of an opening pick and carefully insert it into the gap in the center of the earpiece speaker notch. Gently work it downwards underneath the display – you’re making great progress!
– Leave your pick in the seam to prevent the adhesive from resealing. If you need help or feel unsure, you can always schedule a repair with Salvation Repair.
Tools Used
Step 24

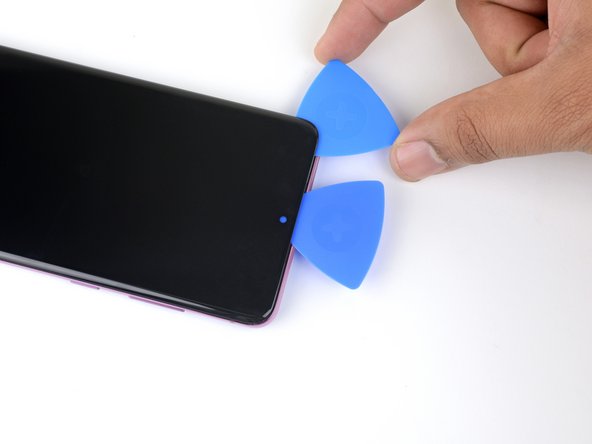
– Now, let’s get that display loose. Slide a second pick into the same gap and use it to slice the adhesive along the top left corner of the display.
– Don’t let the adhesive seal back up! Keep your opening pick in the seam to keep it open.
Step 25

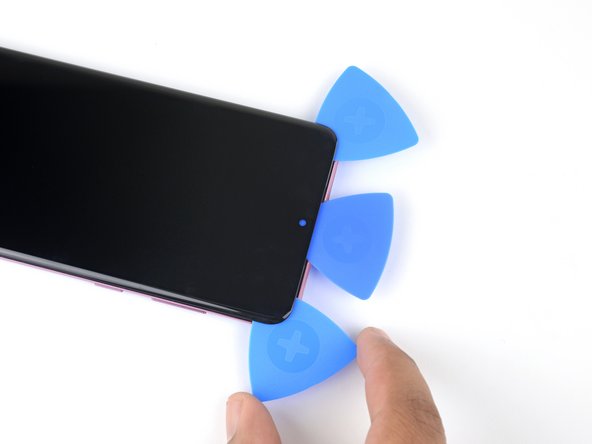
– Now it’s time to bring in the third pick – insert it into the center gap and gently slide it up to the top right corner of the display. This will help you slice through the adhesive and make the repair process smoother.
– Don’t remove your pick just yet! Leave it in the seam to keep the adhesive from resealing, making it easier to continue with the repair. If you need help, you can always schedule a repair
Step 26


If the adhesive is being a bit stubborn, just sprinkle on some extra heat and give it another go!
Be careful not to push the pick in too deep, or it might just decide to play hide and seek under the screen assembly.
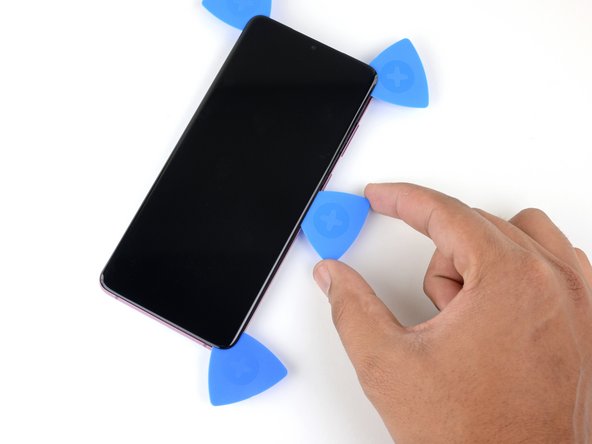
– Let’s slide that center pick deeper into the top edge of your device, like you’re giving it a little hug and cutting through the adhesive around the earpiece and front-facing camera. It’s like a tiny dance!
– Time to remove the center pick. You’re doing great!
Step 27

– Time to get this repair started. Apply a heated iOpener to the right edge of the display for about two minutes. If you need help, you can always schedule a repair
Tools Used
Step 28

– Slide in another pick at the top right corner of your display. It’s like giving your device a little poke!
– Gently glide that pick down to the bottom right corner to cut through the adhesive. Think of it as slicing through butter!
– Pop a pick beneath the center of the right edge of the screen to keep that pesky adhesive from sealing up again. We want to keep things open and accessible!
Step 29

– Let’s get this display loosened up! Apply a heated iOpener to the left edge of the display for two minutes. If you need help, you can always schedule a repair.
Tools Used
Step 30


– Start off by gently sliding a pick into the little gap at the top left corner of the display. You’ve got this!
– Now, glide that pick all the way down to the bottom left corner to expertly slice through the adhesive – it’s like cutting butter!
– To keep that adhesive from playing tricks on you, pop a pick under the center of the screen’s left edge. Stay strong!
Step 31

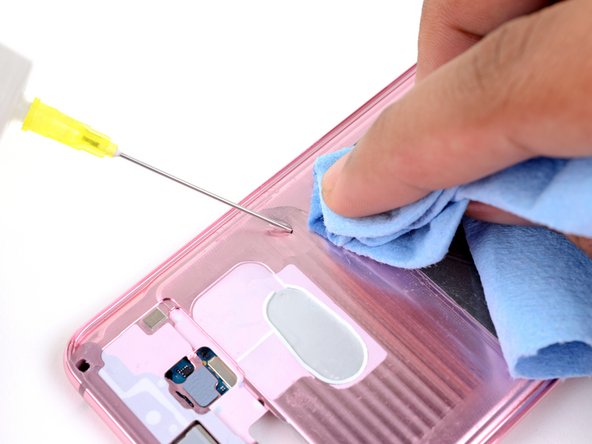
Now it’s time to get the clear adhesive to release – apply some isopropyl alcohol behind the screen, focusing on the bottom center of your device. If you need help, you can always schedule a repair
– Grab some high concentration isopropyl alcohol (over 90% is the magic number) and carefully apply it behind the display, getting as close to that clear adhesive (you’ll find it marked in red) as you can.
– Give your device a little tilt as you pour on the alcohol—this will help it work its way through the adhesive lurking underneath the lower part of the display.
– Once you’ve applied the alcohol, keep that bottom of the phone tilted down for about two to three minutes. This will give the alcohol a chance to really do its thing and seep in nicely.
Tools Used


Step 33


You might still find a tiny bit of adhesive stuck to the bottom edge of your phone, but don’t worry, it should come off easily.
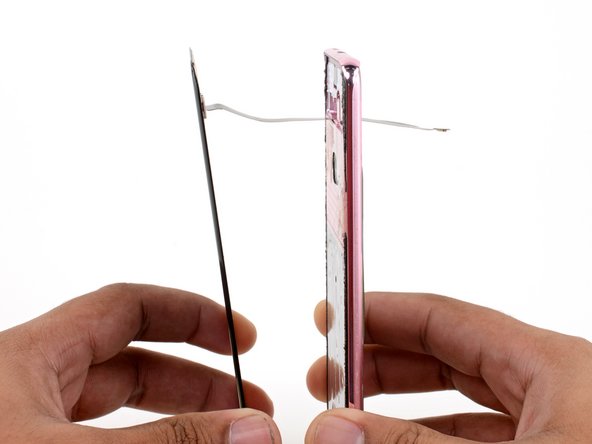
When reassembling, be sure to carefully thread the display cable through the frame – it’s a breeze with a little patience. If you need help, you can always schedule a repair
– Gently detach the display from the frame. Remember, it’s all about that smooth separation!
– When you’re putting everything back together, make sure to thread the display cable through the frame’s hole before snugly pressing the display into position. Just a heads up: hold off on inserting the display cable until after you’ve applied the new screen adhesive. You’ve got this!
Step 34
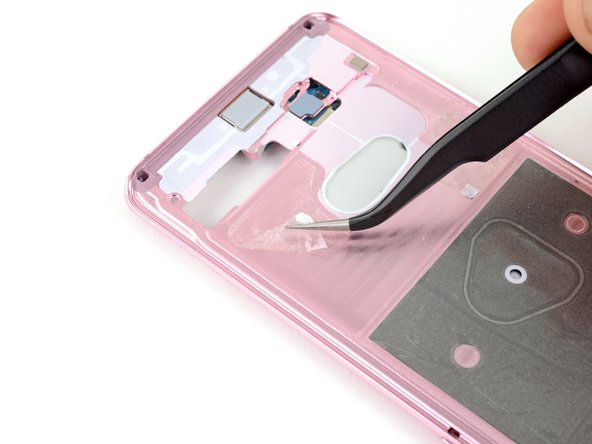

– Let’s get rid of that leftover adhesive, grab those tweezers and gently remove any lingering bits.
– Time for a little clean-up! Use some isopropyl alcohol and a lint-free cloth to give the frame a sparkling clean surface. Remember to wipe in one direction to avoid any smudges.
– Alright, ready to put things back together? Follow this guide to install those custom-cut adhesives for your device. If you need help, you can always schedule a repair
Tools Used