
Samsung Galaxy S20 Ultra Earpiece Speaker Replacement
Duration: 45 minutes
Steps: 40 Steps
Ready to swap out the earpiece speaker in your Galaxy S20 Ultra? While you can technically leave the motherboard in place, removing it makes the whole process a lot smoother. Grab some fresh adhesive before diving in, and follow these steps to get that earpiece back in action. Need a hand? You can always schedule a repair with us for extra help.
Step 1


If your tool found its way into the other hole, no worries—the microphone and its trusty gasket are hanging out safely away from the action.
- Grab your SIM card eject tool, a small bit, or just straighten out a paperclip—whatever works! Find the little hole on the SIM tray up at the top edge of your phone, right next to the plastic antenna band.
- Give it a confident push to pop that tray out.
Tools Used

Step 2


The SIM card is likely to pop right out of the tray without any hassle.
- Pop out the SIM card tray and get ready for some reorganization. When slipping the SIM back in, double-check that it’s facing the right way—no one likes a sideways card! A slim rubber gasket around the tray keeps water and dust out, so if it’s torn or missing, swap it out or replace the whole tray to keep your device happy and healthy.
Step 3

Power down and unplug your phone before you get started—let’s not give the battery any surprises.
You can use a hair dryer, heat gun, or hot plate for a little heat magic, but go easy—no one likes roasted screens or crispy batteries.
- Warm up an iOpener and press it against the bottom edge of the back cover for a solid two minutes.
Tools Used

Step 4


Handle the pick with care—too much pressure and you might just shatter that back cover glass!
Got a super cracked back cover? Slap on some clear packing tape to help that suction cup stick. If you’re feeling adventurous, strong tape can take the suction cup’s place. Worst case scenario, a dab of superglue will hold the suction cup on—just don’t glue your fingers.
These tight-fitting parts sometimes play hard to get. You might need a few rounds of reheating with the iOpener and giving it another go with the suction cup before things finally budge.
If the gap refuses to show up, hit the edge with more heat and give it another try. Patience (and a little warmth) wins!
- Stick a suction cup onto the back of your device, aiming for as close to the middle of the bottom edge as you can get.
- Give the suction cup a firm, steady tug to loosen the back cover from the frame and create a small gap.
- Gently slide the tip of an opening pick into that gap to start prying it open.
Tools Used
Step 5


When working near the edges of the phone, especially where the glass curves, avoid slicing the adhesive — you might end up with a cracked glass panel. Take your time, stay gentle, and if you need a hand, you can always schedule a repair.
- Gently glide the pick back and forth along the bottom edge to cut through that sticky adhesive like a pro.
- Keep your opening pick snugly in the seam to stop the adhesive from sealing back up. You're doing great!
Step 6

- Warm up the left edge of the back cover with a heated iOpener for about two minutes. Keep it cozy to help loosen things up.
Tools Used
Step 7


- Place the suction cup on the back of the phone, close to the center of the left edge. Get it in a nice, snug spot.
- Now, pull gently but firmly on the suction cup. You’ll create a small gap between the back cover and the frame—just enough to work with.
- Take your opening pick and slide it into the gap you just created. Keep it steady.
- If you're feeling adventurous, try a couple of drops of high-concentration (over 90%) isopropyl alcohol into the seam. It’ll help loosen up that adhesive a little more.
Handle that pick with care! Too much pressure and you might just crack that beautiful back cover glass. Let's keep it intact!
Because of tight fits, you might need to try a few times to get it right. Since the glass edge curves, don’t push the pick in too far—just get the tip underneath the edge, and you’ll be able to move forward. If creating a gap is giving you trouble, try applying a little more heat and give it another shot. If you need a hand at any point, you can always schedule a repair.
Step 8


- Once your pick is cozy under the edge of the glass, angle it down and slide it deeper to break up all that stubborn adhesive holding the back cover. You got this—peel away like a pro!
Step 9


- Glide your pick along the bottom edge to loosen up that stubborn back cover adhesive.
- Let your pick chill under the left edge of the glass near the bottom—this keeps the glue from sticking things back together when you’re not looking.
Step 10


Be gentle when sliding around the ridge near the volume and power buttons—since the glass cutout can be a bit more fragile, a light touch helps prevent cracks. If you need help, you can always schedule a repair.
- Slide another pick right under the center of the left edge of the back cover.
- Gently glide that pick toward the top of the device to break free the back cover's sticky grip.
- Keep your pick tucked under the left edge of the glass near the top of the device to stop the adhesive from making a comeback.
Step 11

You can use a hair dryer, heat gun, or hot plate for this step—just keep things cool, because too much heat can mess with your display or battery.
- Place a heated iOpener on the right edge of the back cover and hold it there for about two minutes. This will help loosen things up so you can get inside more easily.
Tools Used
Step 12


Just like with the previous edge, gently tilt the opening pick downward and slide it fully underneath the back cover. It'll fit right in!
- Stick a suction cup on the back of your phone, aiming for the center of the right edge—bullseye!
- Give that suction cup a solid, steady pull to pop open a gap between the back cover and the frame.
- Slip the tip of an opening pick into the gap you just made.
Step 13


- Gently slide your pick towards the bottom edge of the phone to break free the sticky adhesive holding the back cover.
- Leave your pick resting under the right edge of the glass, near the bottom, to keep that adhesive from sealing back up. It's like holding the door open for a smooth repair!
Step 14


While you're at it, the bottom edge of the back cover might just let go of those three picks hanging out there. If that happens, no worries—just set them aside, as the bottom edge won't be sealing back up from here on out.
- Slide another pick under the middle of the right edge of the back cover—like you're sneaking it into a secret club.
- Glide the pick up toward the top of the device, gently breaking up that sticky adhesive as you go.
Step 15

- Heat up the top edge of the back cover with a warmed iOpener for about two minutes—let it work its magic!
Tools Used
Step 16


The glass around the corners of the back cover has a bit of a curve and is quite prone to cracking. So, take it easy during this step to keep your back cover safe and sound!
If you find the slicing gets stubborn or starts to resist, just hit pause and reapply some heat before moving on. It keeps things smooth and helps you get the job done without any fuss.
- Gently slide the pick along the right edge, then curve it around the top right corner. Keep it smooth and steady.
- Keep slicing along the top edge to finish separating the back cover adhesive. Almost there!
Step 17


- Gently lift the back cover, working slowly to avoid cracks. Use opening picks to carefully slice through any stubborn adhesive. Once loose, remove the back cover. During reassembly, it's a good idea to power on your device and check that all functions are working before sealing it back up—no point in putting it all together only to find something's off. If you encounter any leftover adhesive chunks, grab some tweezers or your fingers to pluck them out. Having trouble separating adhesive? Applying a bit of heat can help loosen things up. For Samsung custom-cut adhesives, follow this guide. If you're working with double-sided tape, this guide has you covered.
Tools Used

Step 18


When you’re unplugging those connectors, remember to tread carefully around those tiny surface-mounted components that like to play hide and seek near the socket!
- Grab your spudger and gently pop up the wireless charging coil connector—just like opening a stubborn pickle jar, but with way less mess.
Tools Used

Step 19


- Grab your trusty tweezers and gently lift the wireless charging coil—slow and steady wins this race.
- Take out the wireless charging coil. Give it a little wiggle if it’s stuck, but don’t force it.
- When putting things back together, connect the wireless charging coil’s connector first to line it up nicely, then press down to secure the rest of the coil. Nice work!
Tools Used
Step 20

As you tackle this repair, be sure to keep an eye on each screw and return it to its original home when you're done. It's like a little screw reunion!
- Grab your trusty Phillips #00 and twist out the five 3.9 mm screws holding the motherboard bracket—easy does it!
Tools Used

Step 21

- Grab a trusty pair of tweezers and gently pop out the motherboard bracket. Easy does it—just unclip and lift it away to keep things moving smoothly.
Tools Used
Step 22


- Grab a spudger and gently pry up the battery connector to disconnect it. Easy does it—no force needed to keep things safe. If you run into any trouble, you can always schedule a repair for extra help.
Tools Used
Step 23

- Grab your Phillips #00 screwdriver and remove the five screws (they're all 3.9 mm long) that are holding the loudspeaker and lower midframe in place.
Tools Used
Step 24


- Grab the pointy end of a spudger or a trusty pair of tweezers and gently slide it into the little notch at the top left corner of the midframe. Give it a careful pry to pop those clips loose and set it free!
- Now, go ahead and take out the loudspeaker along with the lower midframe.
Step 25
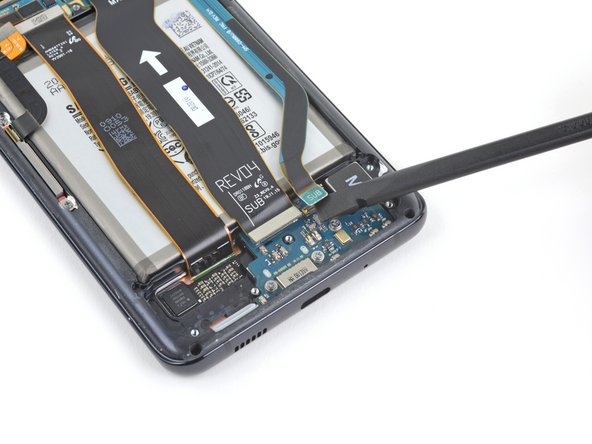
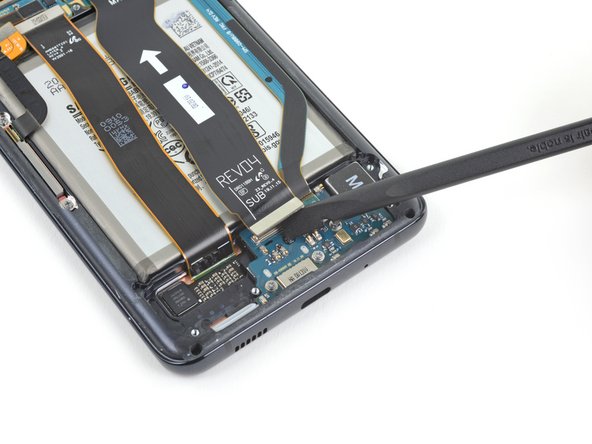

- Grab your trusty spudger and gently lift up the main and auxiliary flex cables from the daughterboard at the bottom of your device. Take it slow—these cables like a gentle touch.
- When reconnecting press connectors, line them up carefully and press down on one side until you hear that satisfying click, then do the same for the other side. Skip pressing the middle—misaligned pins can spell trouble. If things aren't lining up, double-check to avoid any bent pins or permanent damage.
Tools Used
Step 26


- Grab a spudger and gently pry up those main and auxiliary flex cables to disconnect them from the motherboard. You've got this!
Tools Used
Step 27
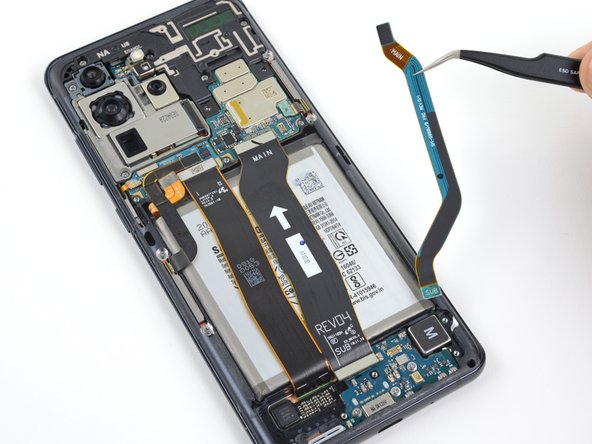

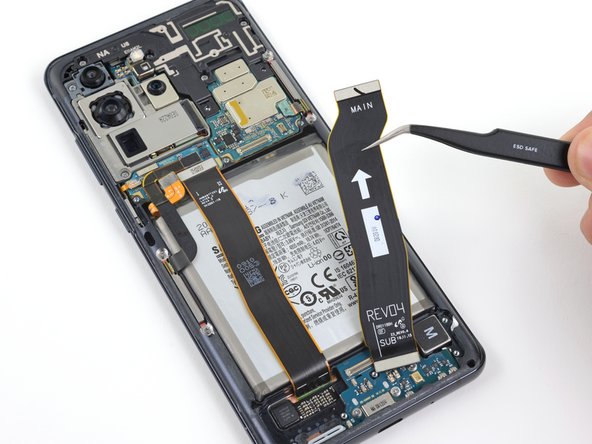
- Give those cables a gentle lift-off—main and aux flex are officially out of the game.
Step 28

- Gently lift up and disconnect the left 5G antenna cable from the motherboard.
Step 29


- Gently lift up the main display flex cable and disconnect it from the motherboard.
Step 30


- Carefully lift and nudge the display and left 5G antenna flex cables aside, making sure they’re clear of the motherboard and battery.
Step 31

- Grab your Phillips #00 screwdriver and take out the four screws (they're 3.9 mm long) holding down the upper midframe. Easy does it!
Tools Used
Step 32

- Gently slide the spudger into the notch on the right side of the upper midframe. Give it a little pry to release those clips holding everything in place.
- Now, lift off the upper midframe with ease.
Tools Used
Step 33
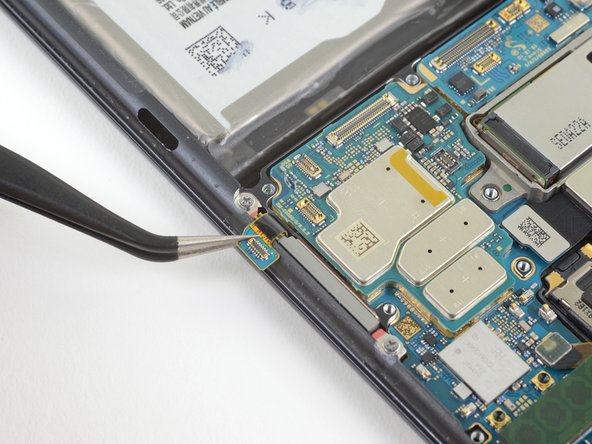

- Gently pry up and detach the right 5G antenna flex cable from the motherboard—no need to rush, we're in this together!
- Grab a pair of tweezers and carefully bend the cable to the side, giving the motherboard some space to breathe.
Tools Used
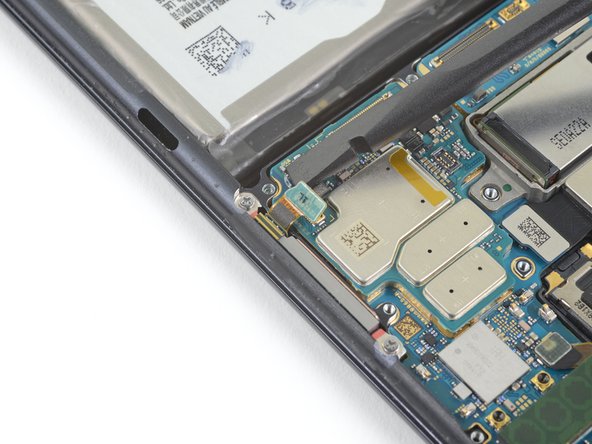
Step 34

- Gently lift and disconnect the side button flex cable from the motherboard—easy peasy!
- Now, bend that cable out of the way so it doesn't interfere with the motherboard magic.
Step 35

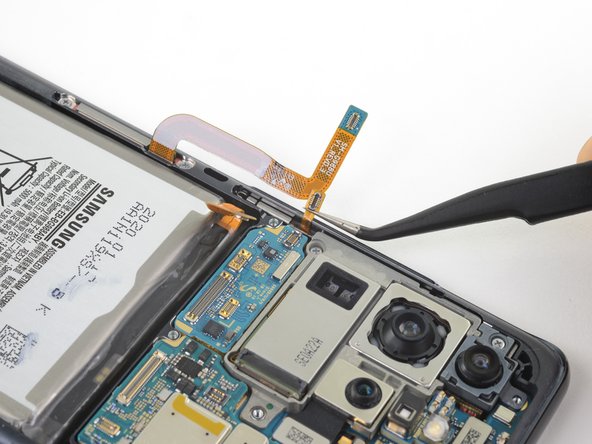
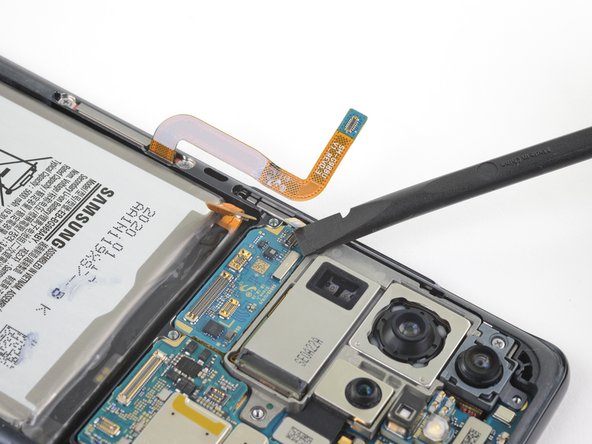
- Gently lift the front-facing camera flex cable from its spot on the motherboard and give it a gentle disconnect. Then, carefully bend the cable out of the way so it doesn't get in the way of the work ahead. If you need a hand, you can always schedule a repair.
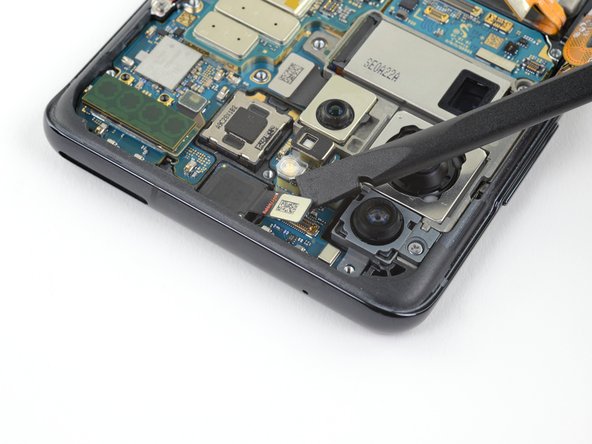
Step 36

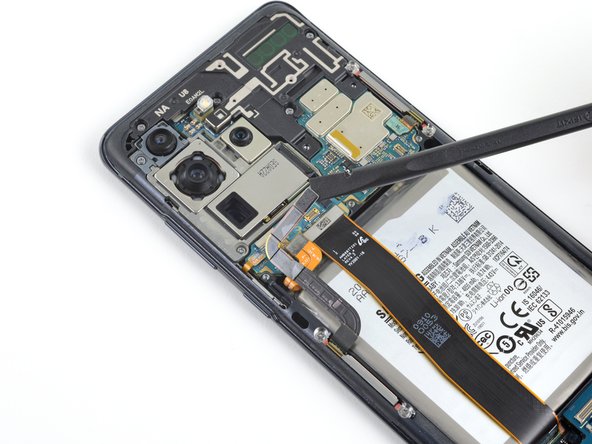
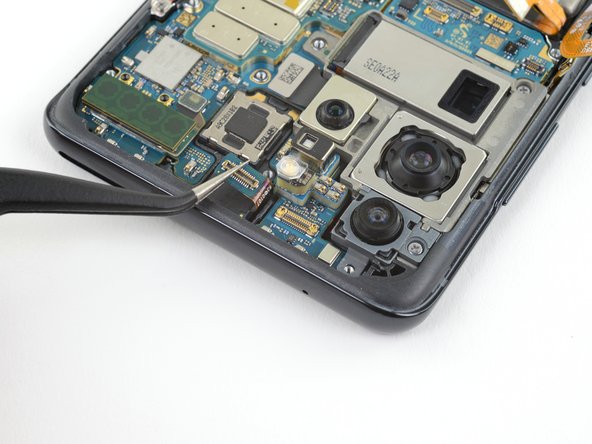
- Gently pop up the upper 5G antenna cable and unplug it from the motherboard—easy does it!
Step 37

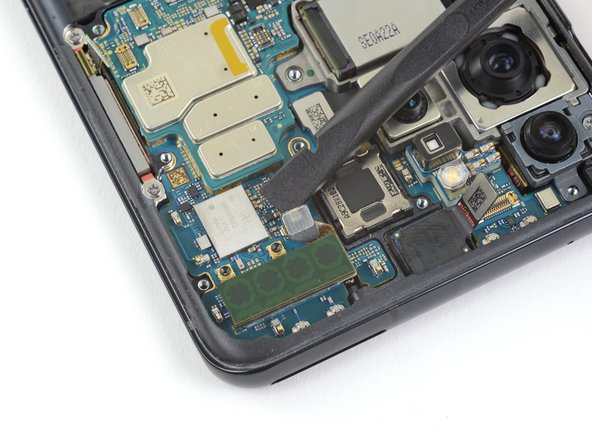
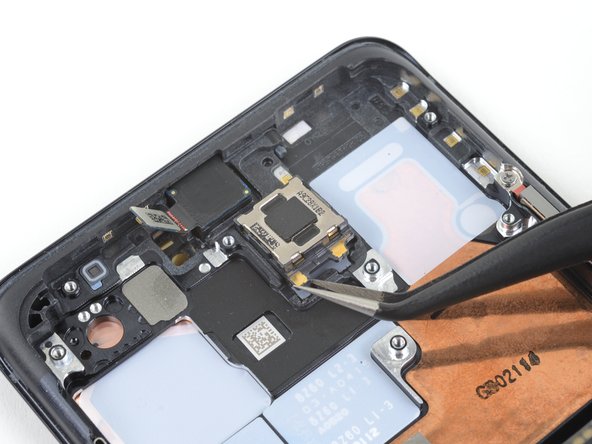
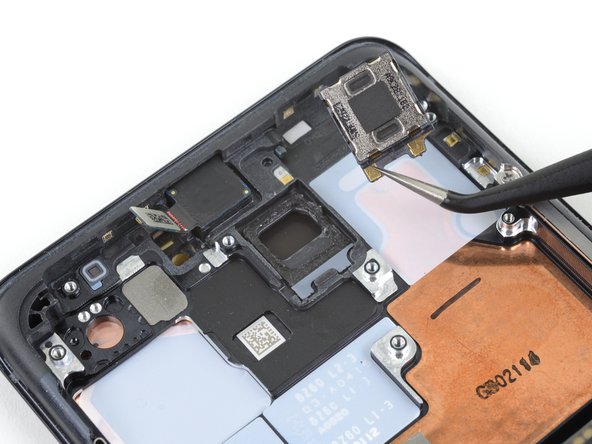
A little adhesive is holding the module in place, but it should pop out without putting up much of a fight.
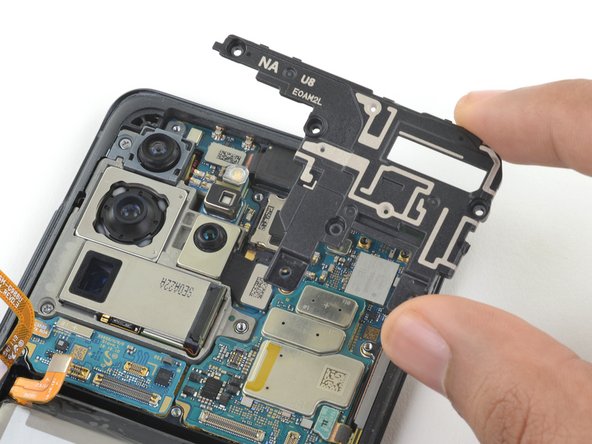
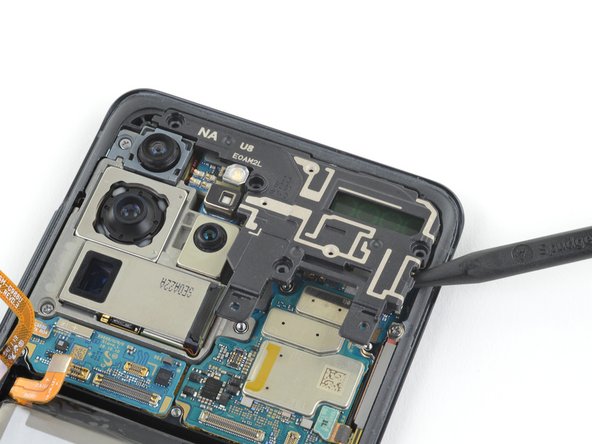
- Grab your trusty spudger and gently lift the corner of the 5G millimeter wave antenna module. You're doing great!
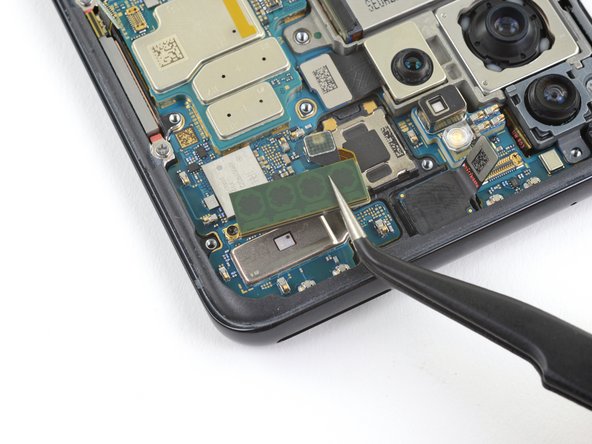
- Carefully take out the 5G antenna module like a pro.
- When it's time to put it all back together, make sure to reconnect that 5G antenna connector first so everything lines up just right. Then, give the rest of the antenna module a solid press down to secure it in place. Nice work!
Tools Used
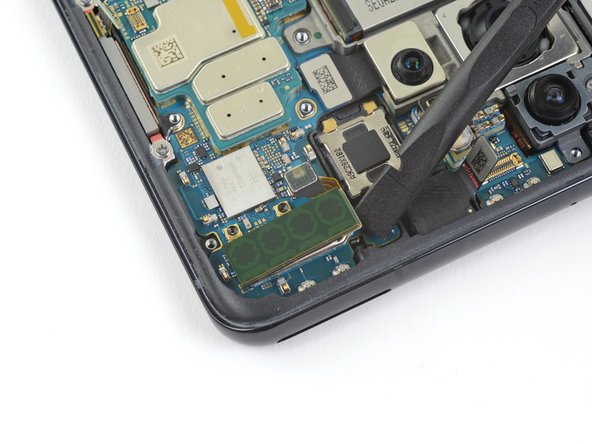
Step 38

- Grab your Phillips #00 screwdriver and get ready to remove the two screws—each about 3.9 mm long—that hold the motherboard and camera assembly in place. Easy peasy! If you need a hand along the way, remember you can always schedule a repair.
Tools Used
Step 39


- Gently insert the pointed end of a spudger into the bottom-left corner of the motherboard assembly and carefully pry upward to loosen it from the phone body. Once it's free, lift out the motherboard assembly. If you need help along the way, you can always schedule a repair.
Tools Used
Step 40

The earpiece speaker likes to hang out in a deep spot and is held down with sticky adhesive. If it’s being stubborn, a few drops of high-strength (over 90%) isopropyl alcohol will help loosen things up and make removal a breeze.
- Take a look at your shiny new part versus the old one—make sure nothing’s left behind, and peel off any sticker or adhesive that’s tagging along for the ride.
- Put everything back together by reversing the steps above. Your device will appreciate the reunion.
- Ready for the moment of truth? Use our guide to put your fix to the test and celebrate your handiwork.
- Got leftover bits or busted parts? Drop them off at an R2 or e-Stewards certified recycler—Mother Earth says thanks.
- If things got a little wild and your device isn’t cooperating, swing by our Answers community for some friendly troubleshooting, or you can always schedule a repair if you need backup.


