
Samsung Galaxy S20 Ultra Screen and Battery Assembly Replacement
Duration: 45 minutes
Steps: 50 Steps
This guide is all about tackling the screen and battery assembly. Let's dive in and get your device back in action!
Ready to upgrade your Samsung Galaxy S20 Ultra? This guide is your go-to for swapping out the screen and battery assembly. We’re talking full assembly action here, including the screen, battery, and frame all in one neat package. Before diving in, make sure you've got the right part to avoid any hiccups. If you spot a swollen battery, remember to take extra care—safety first! Oh, and don’t forget to fully discharge your device’s battery before starting. This helps keep things safe and sound during the repair process. Just a heads-up: keeping that water resistance intact post-repair relies on how well you reapply the adhesive, but your device might lose its official IP rating. Lastly, a few images in this guide may show slight variations, but don’t let that trip you up; they won’t affect the overall repair steps!
Step 1


If you happen to insert the tool into the other hole, no worries—the microphone and ingress gasket are tucked away out of harm’s way. Easy does it, and you're all set to move forward.
- Grab your SIM eject tool, the tiniest screwdriver bit you have, or a trusty straightened paperclip and poke it into the little hole on the SIM tray up top by the antenna band.
- Give it a good push! The tray will pop out and you’re on your way.
Tools Used

Step 2


The SIM card likes to slide right out of the tray, so keep an eye on it!
- Let's kick things off by taking out that SIM card tray. You've got this!
- When you're popping that SIM card back in, make sure it's facing the right way in relation to the tray. It's like a puzzle piece that needs to fit just right.
- Don't forget about the thin rubber gasket that hugs the SIM tray. It's there to keep out the pesky water and dust. If it's looking a bit worn out or has gone AWOL, time to replace that gasket or grab a new SIM tray to keep your phone's insides safe and sound.
Step 3

Make sure your phone is powered down and unplugged before you dive in.
You can use a hair dryer, heat gun, or hot plate to loosen things up—just keep it cool (literally), since too much heat can mess with your screen or battery.


Step 4


Take it easy with the pick—going Hulk-mode could leave you with cracked glass on the back cover.
If the back cover is really cracked up, slapping on a layer of clear packing tape might just do the trick to help the suction cup stick. If you're feeling adventurous, you can also try using some super strong tape instead of the suction cup. And if you're really in a bind, a little superglue on the suction cup can help it cling to that broken cover.
Getting that cover off might take a few tries, so don’t sweat it! Just keep reheating with the iOpener and giving it another go with the suction cup until you nail it.
If you're struggling to create a gap, just heat up the edge a bit more and give it another shot. You've got this!
- Stick a suction cup on the back of the phone, aiming for the center of the bottom edge.
- Give the suction cup a good, steady pull to crack open a gap between the back cover and the frame.
- Slide the tip of your opening pick into that gap—like a pro sneaking into a secret club.
Tools Used
Step 5


Steer clear of the corners when slicing through the adhesive—the glass curves there, and it's way too easy to end up with a crack.
- Gently slide your pick along the bottom edge, working back and forth to cut through the adhesive like a pro. Keep it steady and confident! Leave your opening pick tucked in the seam to keep the adhesive from sealing back up—nobody wants that to happen. If you need a hand, you can always schedule a repair.
Step 6

- Warm up the left edge of the back cover with a heated iOpener for about two minutes. Keep the heat steady to help loosen the adhesive and make the cover easier to lift. If you need a hand, you can always schedule a repair.
Tools Used
Step 7


- Grab a suction cup and stick it to the back of your phone, aiming for the center of the left edge. You're doing great!
- Give that suction cup a good, steady pull to create a little gap between the back cover and the frame. Keep it strong and steady!
- Slide the tip of an opening pick into that gap you just made. You're almost there!
- For an extra boost, consider adding a few drops of high concentration (over 90%) isopropyl alcohol into the seam to help loosen up that stubborn adhesive. Just a little will do the trick!
Easy does it—don't go Hulk mode with the pick, or you might end up with a cracked back cover glass.
Because of tight fits, you might need a couple of tries to get it right. Since the glass edge is curved, don’t worry if your pick doesn’t go in far—just make sure the tip is tucked under the glass edge, and you’re good to go. If you’re struggling to create a gap, try applying a bit more heat to soften things up and then give it another shot. Need a hand? You can always schedule a repair with Salvation Repair.
Step 8


- Once the pick is tucked under the edge of the glass, tilt it gently downward and slide it in further to break through the back cover's adhesive. Keep at it steadily to free the panel smoothly.
Step 9


- Gently slide the pick towards the bottom of your device to break the seal of the back cover's adhesive.
- Leave your pick tucked under the left edge of the glass near the bottom to stop the adhesive from sticking back together.
Step 10


Watch out as you slide over the ridge around the volume and power buttons. The glass cutout there is a bit of a weak spot, so take it easy to avoid cracking.
- Slip another pick under the middle of the left side of the back cover—smooth moves only.
- Gently glide the pick up toward the top edge to loosen that sticky adhesive. Take it slow; no rush.
- Keep your pick parked under the left edge near the top, so the sticky stuff doesn't try to reunite. You're in control here.
Step 11

Now it's time to bring in the heat - carefully, of course. A hair dryerledger, heat guntorch, or hot bara plate can help, just be sure not to wateringcan the phonelor with too much heat, as the AMOLED display and battery are sensitive to high temperatures.
Step 12


Just like before, tilt that opening pick downward a bit more so it slides easily underneath the back cover. Steady and confident motions will get it done—think of it as a gentle dance move for your device. If you hit any snags, remember you can always schedule a repair for extra help.
- Stick a suction cup onto the back of your phone, aiming for the center of the right edge—precision is cool, but eyeballing it works too.
- Give that suction cup a firm, confident pull to open up a gap between the back cover and the frame—no need to wrestle, just steady hands.
- Slide the tip of an opening pick into the gap you just made, kind of like you're sneaking a pick into a guitar solo.
Step 13


- Glide your pick down towards the bottom edge of the phone to loosen that stubborn back cover adhesive.
- Keep your pick chilling under the right edge of the glass near the bottom—this stops the adhesive from trying to reunite with its long-lost love, the cover.
Step 14


As you lift, the bottom edge of the back cover might pop free from the three clips nestled there. If that happens, just set those clips aside — the bottom edge isn’t going back together from this point, so no need to worry about resealing it. Keep going, you're making good progress!
- Slide a plastic pick beneath the center of the right edge of the back cover. Then, gently work the pick upward, guiding it towards the top of the device to loosen the adhesive. Take your time to avoid damaging the cover. If you need help, you can always schedule a repair.
Step 15

- Warm up the top edge of the back cover with a heated iOpener for about two minutes. This helps loosen the adhesive and makes the cover easier to lift off. If you need help, you can always schedule a repair.
Tools Used
Step 16


- Gently slide the pick from the right edge of your device, making your way around the top right corner like a pro.
- Keep slicing along the top edge until the back cover adhesive is fully separated. You've got this!
The glass near the corners of the back cover is curved and pretty prone to cracking. Handle this step with care to avoid any unwanted breakage—gentle moves go a long way. If you need help, you can always schedule a repair.
If you hit a snag and the slicing gets stubborn, just take a breather, reheat a bit, and then get back to it. Sometimes a little warm-up is all you need to keep things sliding smoothly. If you need help along the way, you can always schedule a repair.
Step 17


- Gently lift the back cover—no Hulk moves needed. Slide an opening pick along the edge to slice through any stubborn adhesive.
- Once free, remove the back cover. Victory dance optional.
- Reassembly time:
- This is your moment to power on your phone and make sure everything’s working before you seal it up. Better safe than sorry!
- Clear out any leftover adhesive chunks with tweezers or your fingers. A little heat can help loosen things up if the adhesive is playing hard to get.
- Using Samsung custom-cut adhesives? Check out Salvation Repair’s guide for details.
- Rolling with double-sided tape? Salvation Repair’s guide has you covered.
Step 18


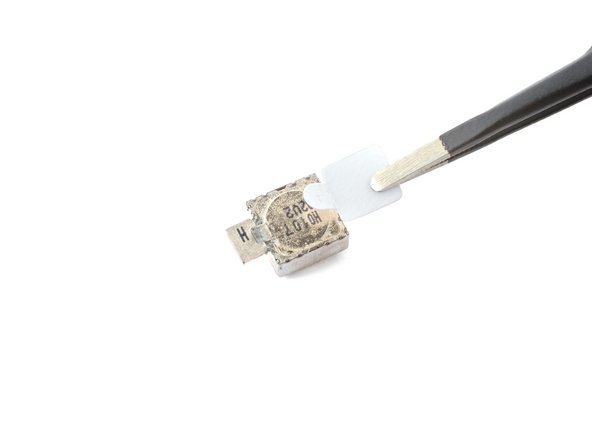
When disconnecting connectors like these, keep an eye out for those tiny surface-mounted components around the socket—they're easy to knock loose if you're not careful. Proceed gently, and if you need a hand, you can always schedule a repair.
- Grab a spudger and gently pry up to disconnect the wireless charging coil connector. Keep it friendly, keep it simple, and if you hit a snag, remember you can always schedule a repair to get professional help.
Tools Used

Step 19

As you tackle this repair, keep an eye on those screws! Make sure each one finds its way back to its original home. You've got this!
- Grab a Phillips #00 screwdriver and unscrew the five 3.9 mm-long screws holding in the loudspeaker and lower midframe. Keep those screws safe—you'll need them later! If you need a hand, you can always schedule a repair.
Tools Used

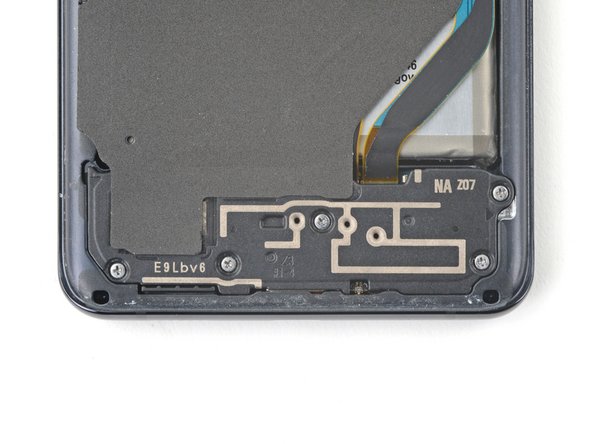
Step 20

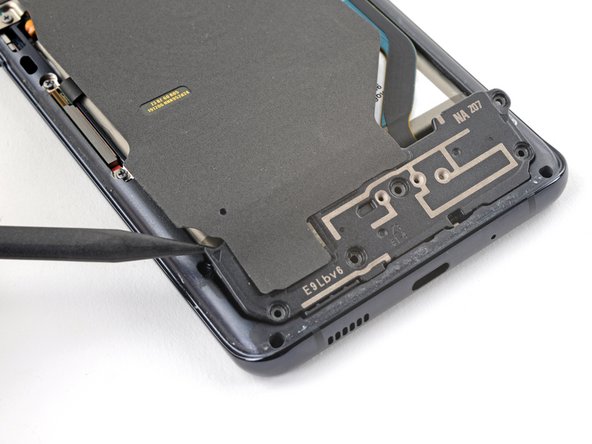
- Gently slide the tip of your spudger into the little notch at the top left corner of the loudspeaker. You're doing great!
- Now, give it a little pry to pop those clips loose. You've got this!
Tools Used
Step 21


- Grab your tweezers (or your fingers, if you're feeling confident) and carefully peel the wireless charging coil away from the device. Take it slow, no need to rush!
- Now, gently lift the wireless charging coil out. Easy does it!
- Place the charging coil aside for now—don't worry, you'll be putting it back together later when it's time to reassemble.
Step 22


- Grab your Phillips #00 screwdriver and whisk away those five 3.9 mm screws holding down the motherboard bracket. Precision counts, but don’t sweat it—just keep track of those tiny screws!
Tools Used
Step 23


- Grab a pair of blunt-nose tweezers and gently unclip the motherboard bracket. Once it's free, set it aside—you’ll be reusing it when you put everything back together.
Step 24


- Grab your trusty spudger and gently lift the battery connector out of its spot. Disconnect like a pro!
Tools Used
Step 25


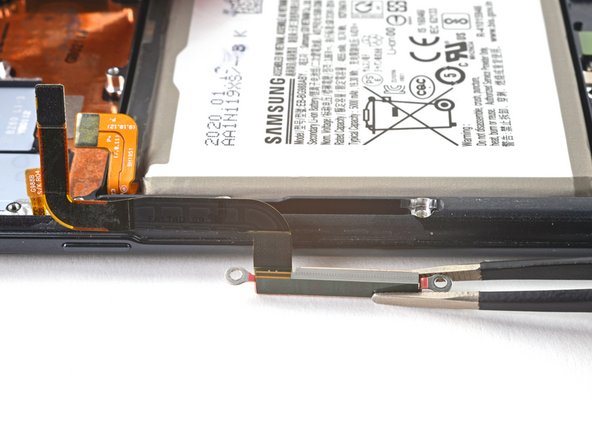
- Grab a spudger and gently pry up the primary and secondary interconnect cables from the daughterboard near the bottom of the device. To reconnect press connectors like these, carefully align them and press down on one side until it clicks, then do the same on the other side. Avoid pressing in the middle to prevent bending the pins—misalignment can lead to permanent damage. If you need a hand with tricky steps, you can always schedule a repair.
Tools Used
Step 26


- Grab your trusty spudger and gently pry up those interconnect cables from the motherboard—both the primary and secondary ones. You've got this!
Tools Used
Step 27


- Carefully lift up and take off the primary and secondary interconnect cables—no need to wrestle them.
- Put both cables somewhere safe. You’ll need them when it’s time to put everything back together.
Step 28


- Grab a Phillips #00 screwdriver and remove the three 3.7 mm screws holding in the USB-C port and daughterboard. Easy peasy—just a few turns and you're on your way. If you hit any snags, remember you can always schedule a repair with the pros.
Tools Used
Step 29


- Slip the pointy end of your spudger under the left side of the daughterboard and gently pop it loose from its spot.
- Grab the daughterboard with tweezers or your fingers, lift it up from the bottom, and set it aside. Nice work!
Tools Used
Step 30

- Warm up your trusty iOpener and give it a cozy spot on the bottom-right corner of your device for a delightful 90 seconds.
Tools Used
Step 31
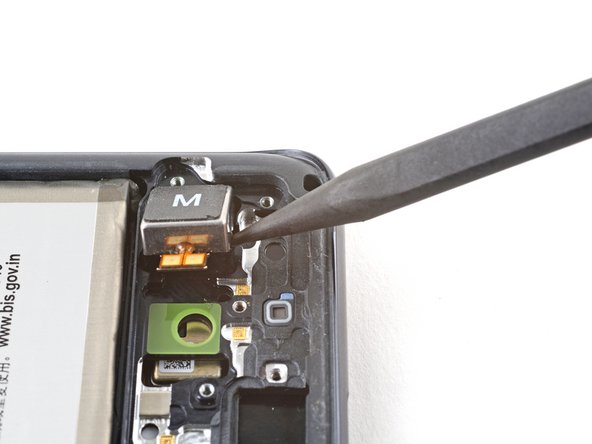
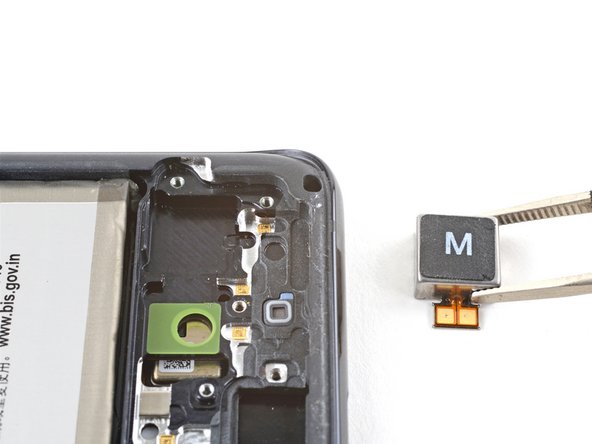

- Slide the spudger's tip into the gap between the frame and the notch on the vibrator's edge, right near the bottom of your device.
- Gently pry upwards with the spudger to detach the vibrator from the frame.
- Carefully take out the vibrator.
Tools Used
Step 32


- Alright, let's get that vibrator back in action! Start by peeling off the adhesive from its liner and stick the gooey side to the bottom of the vibrator.
- Now, grab some tweezers or your fingers and gently pull up on the white liner to reveal the top layer of adhesive. It's like a surprise party for your gadget!
- Time to insert the vibrator! Give it a little push and apply some pressure to make sure it sticks to the frame. You're doing great!
Since the adhesive is super thin and kinda blends in with the liner, it might be tricky to spot. Just use your fingers to feel if the adhesive made it over properly—no need for fancy tools. If you're unsure, a gentle press and feel can do the trick. And hey, if things get a little tangled, remember, help is just a schedule a repair away.
Step 33


- Gently lift and unplug the left 5G mmWave antenna connector from the motherboard. If you need help, you can always schedule a repair.
Step 34
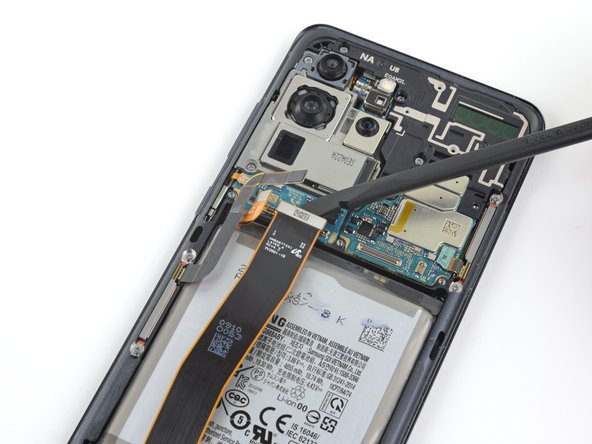

- Gently lift and unplug the display flex cable from the motherboard. You're almost there!
Step 35
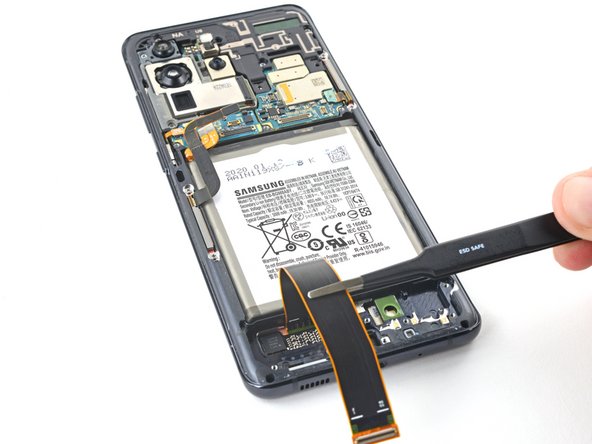

- Carefully lift up and tuck the display and left 5G mmWave antenna flex cables aside, keeping them out of the way of the motherboard and battery. No stress—just a little cable yoga!
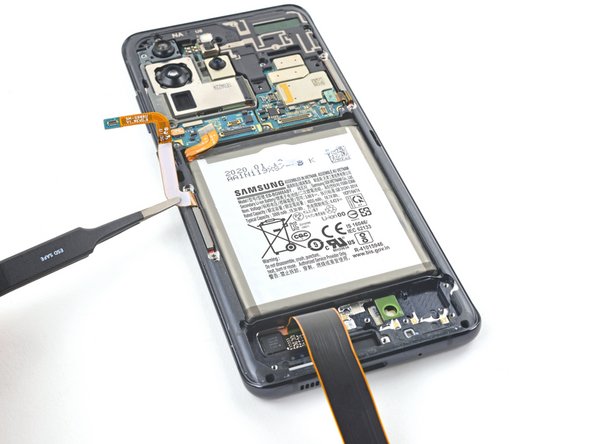
Step 36


- Grab your Phillips #00 screwdriver and take out the four screws (they’re 3.9 mm long) holding the upper midframe in place. Easy does it!
Tools Used
Step 37


- Take your trusty spudger and slide it into the notch on the right side of the upper midframe. Give it a gentle twist to pop those clips loose.
- Lift off the upper midframe like a pro.
- Set the upper midframe aside for now—you’ll need it again when putting everything back together.
Tools Used
Step 38


- Gently lift and unplug the right 5G mmWave antenna flex cable from the motherboard. You've got this!
- Carefully bend the cable to keep it out of the motherboard's way. Easy peasy!
Step 39


- Gently lift up the side button flex cable and unplug it from the motherboard—think of it as giving your phone a little stretch.
- Move the cable aside so it’s not blocking the motherboard. Easy does it!
Step 40


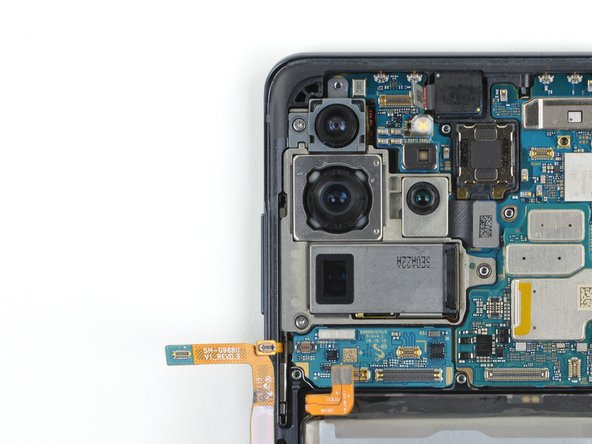
- Gently pop up the front camera flex cable from the motherboard. Treat it like a delicate little lever.
- Swing that cable away from the motherboard—kind of like moving a curtain aside to let the sunshine in.
Step 41


The upper 5G mmWave antenna is gently stuck to the motherboard—it's not going anywhere without a little nudge.
- Gently lift and unplug the upper 5G mmWave antenna cable from the motherboard. Then, use tweezers or your fingers to peel away the upper 5G antenna. Keep the antenna safe—you'll want it again when putting everything back together. When reassembling, connect the antenna connector first to ensure it lines up perfectly, then press down on the rest of the antenna module to secure it in place. If you need a hand, you can always schedule a repair.
Step 42

- Grab your Phillips #00 screwdriver and unscrew those two 3.9 mm screws holding down the motherboard and camera assembly. Precision work, but you’ve got this!
Tools Used
Step 43


- Gently slide the tip of your spudger into the bottom left corner of the motherboard assembly and give it a little nudge to pop it free from the phone's body.
- Carefully lift out the motherboard assembly.
Tools Used
Step 44

- Warm up the iOpener and place it over the front camera for about 90 seconds to loosen things up.
Tools Used
Step 45

If that front camera is clinging on for dear life, hit it with some extra heat—sometimes the adhesive just needs a little more encouragement to let go.
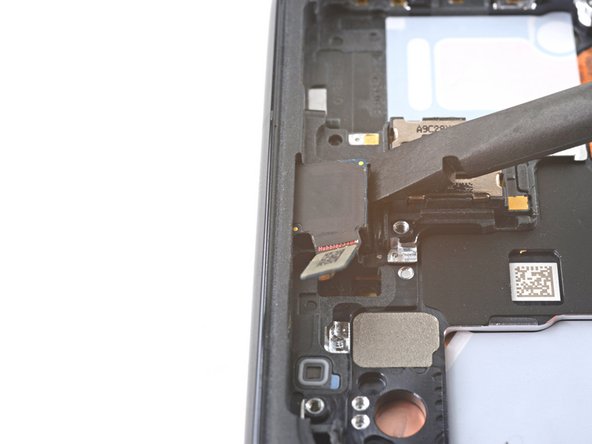
- Slide a spudger into the little gap between the frame and the front camera. It's like giving your device a gentle nudge!
- Gently pry up with the spudger to help the front camera break free from the frame. You're doing great!
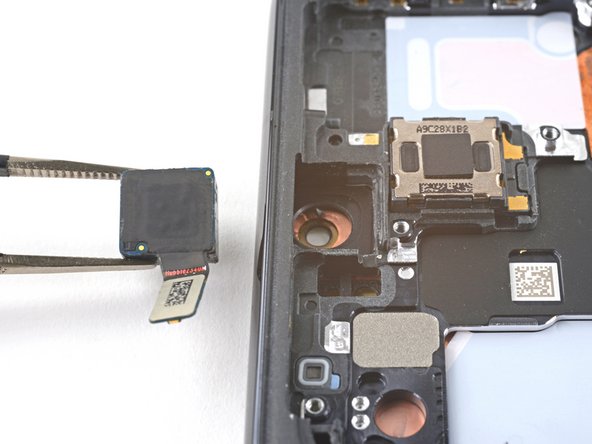
- Carefully use tweezers or your fingers to lift out the front camera. You've got this!
- Set the front camera aside for now; it will be back in action during reassembly. Keep it safe!
Tools Used
Step 46


- Time to get that front camera back in action! Here’s how to do it:
- Peel the adhesive off its liner and stick it onto the frame—make sure it’s lined up nicely.
- Grab the tab with tweezers or your fingers and pull to reveal the sticky top layer.
- Pop the front camera into place and press it down so it sticks snugly to the frame.
Step 47


- Grab a Phillips screwdriver and unscrew those four 3.4 mm-long screws holding down the 5G mmWave antennas. Easy as that—just a bit of twist to free them up. If you need help along the way, you can always schedule a repair.
Step 48


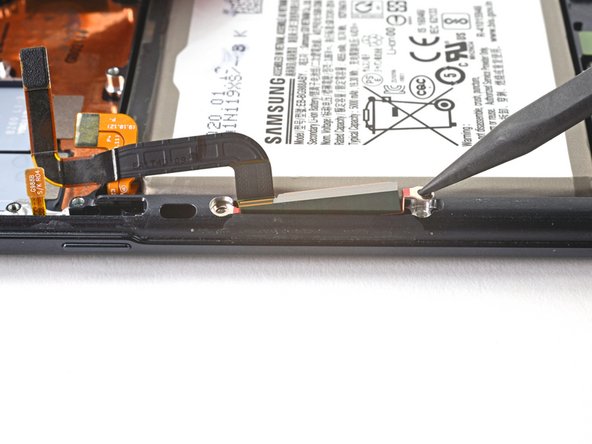
- Grab a spudger and gently lift the bottom screw tab of the 5G mmWave antenna bracket—think of it as giving it a little nudge to get things started.
- Use tweezers or your fingertips to carefully lift and remove the 5G mmWave antenna—treat it like a delicate treasure.
- Set the antenna aside in a safe spot—you'll be bringing it back during reassembly, so keep it handy.
Tools Used
Step 49

- Grab your trusty spudger and give the top edge of that 5G mmWave antenna bracket a gentle pry. It’ll pop up just like magic!
- Now, with your fingers or some tweezers, delicately lift out the 5G mmWave antenna. Nice and easy!
- Once it's out, place the antenna to the side—don't lose it, as it will be making a comeback after we finish up!
Tools Used
Step 50

- Time to put everything back together! Just follow these steps in reverse, and you'll be good as new.
- Now that you're done, don't forget to responsibly recycle any leftover e-waste with an R2 or e-Stewards certified recycler.
- If things didn't quite go as planned, try some basic troubleshooting or reach out to our community at Salvation Repair for some expert help. And if you're really stuck, you can always schedule a repair with us.


