Samsung Galaxy S21 Daughterboard Replacement
Duration: 45 minutes
Steps: 34 Steps
Play it safe—drop your battery below 25% charge before cracking open your phone.
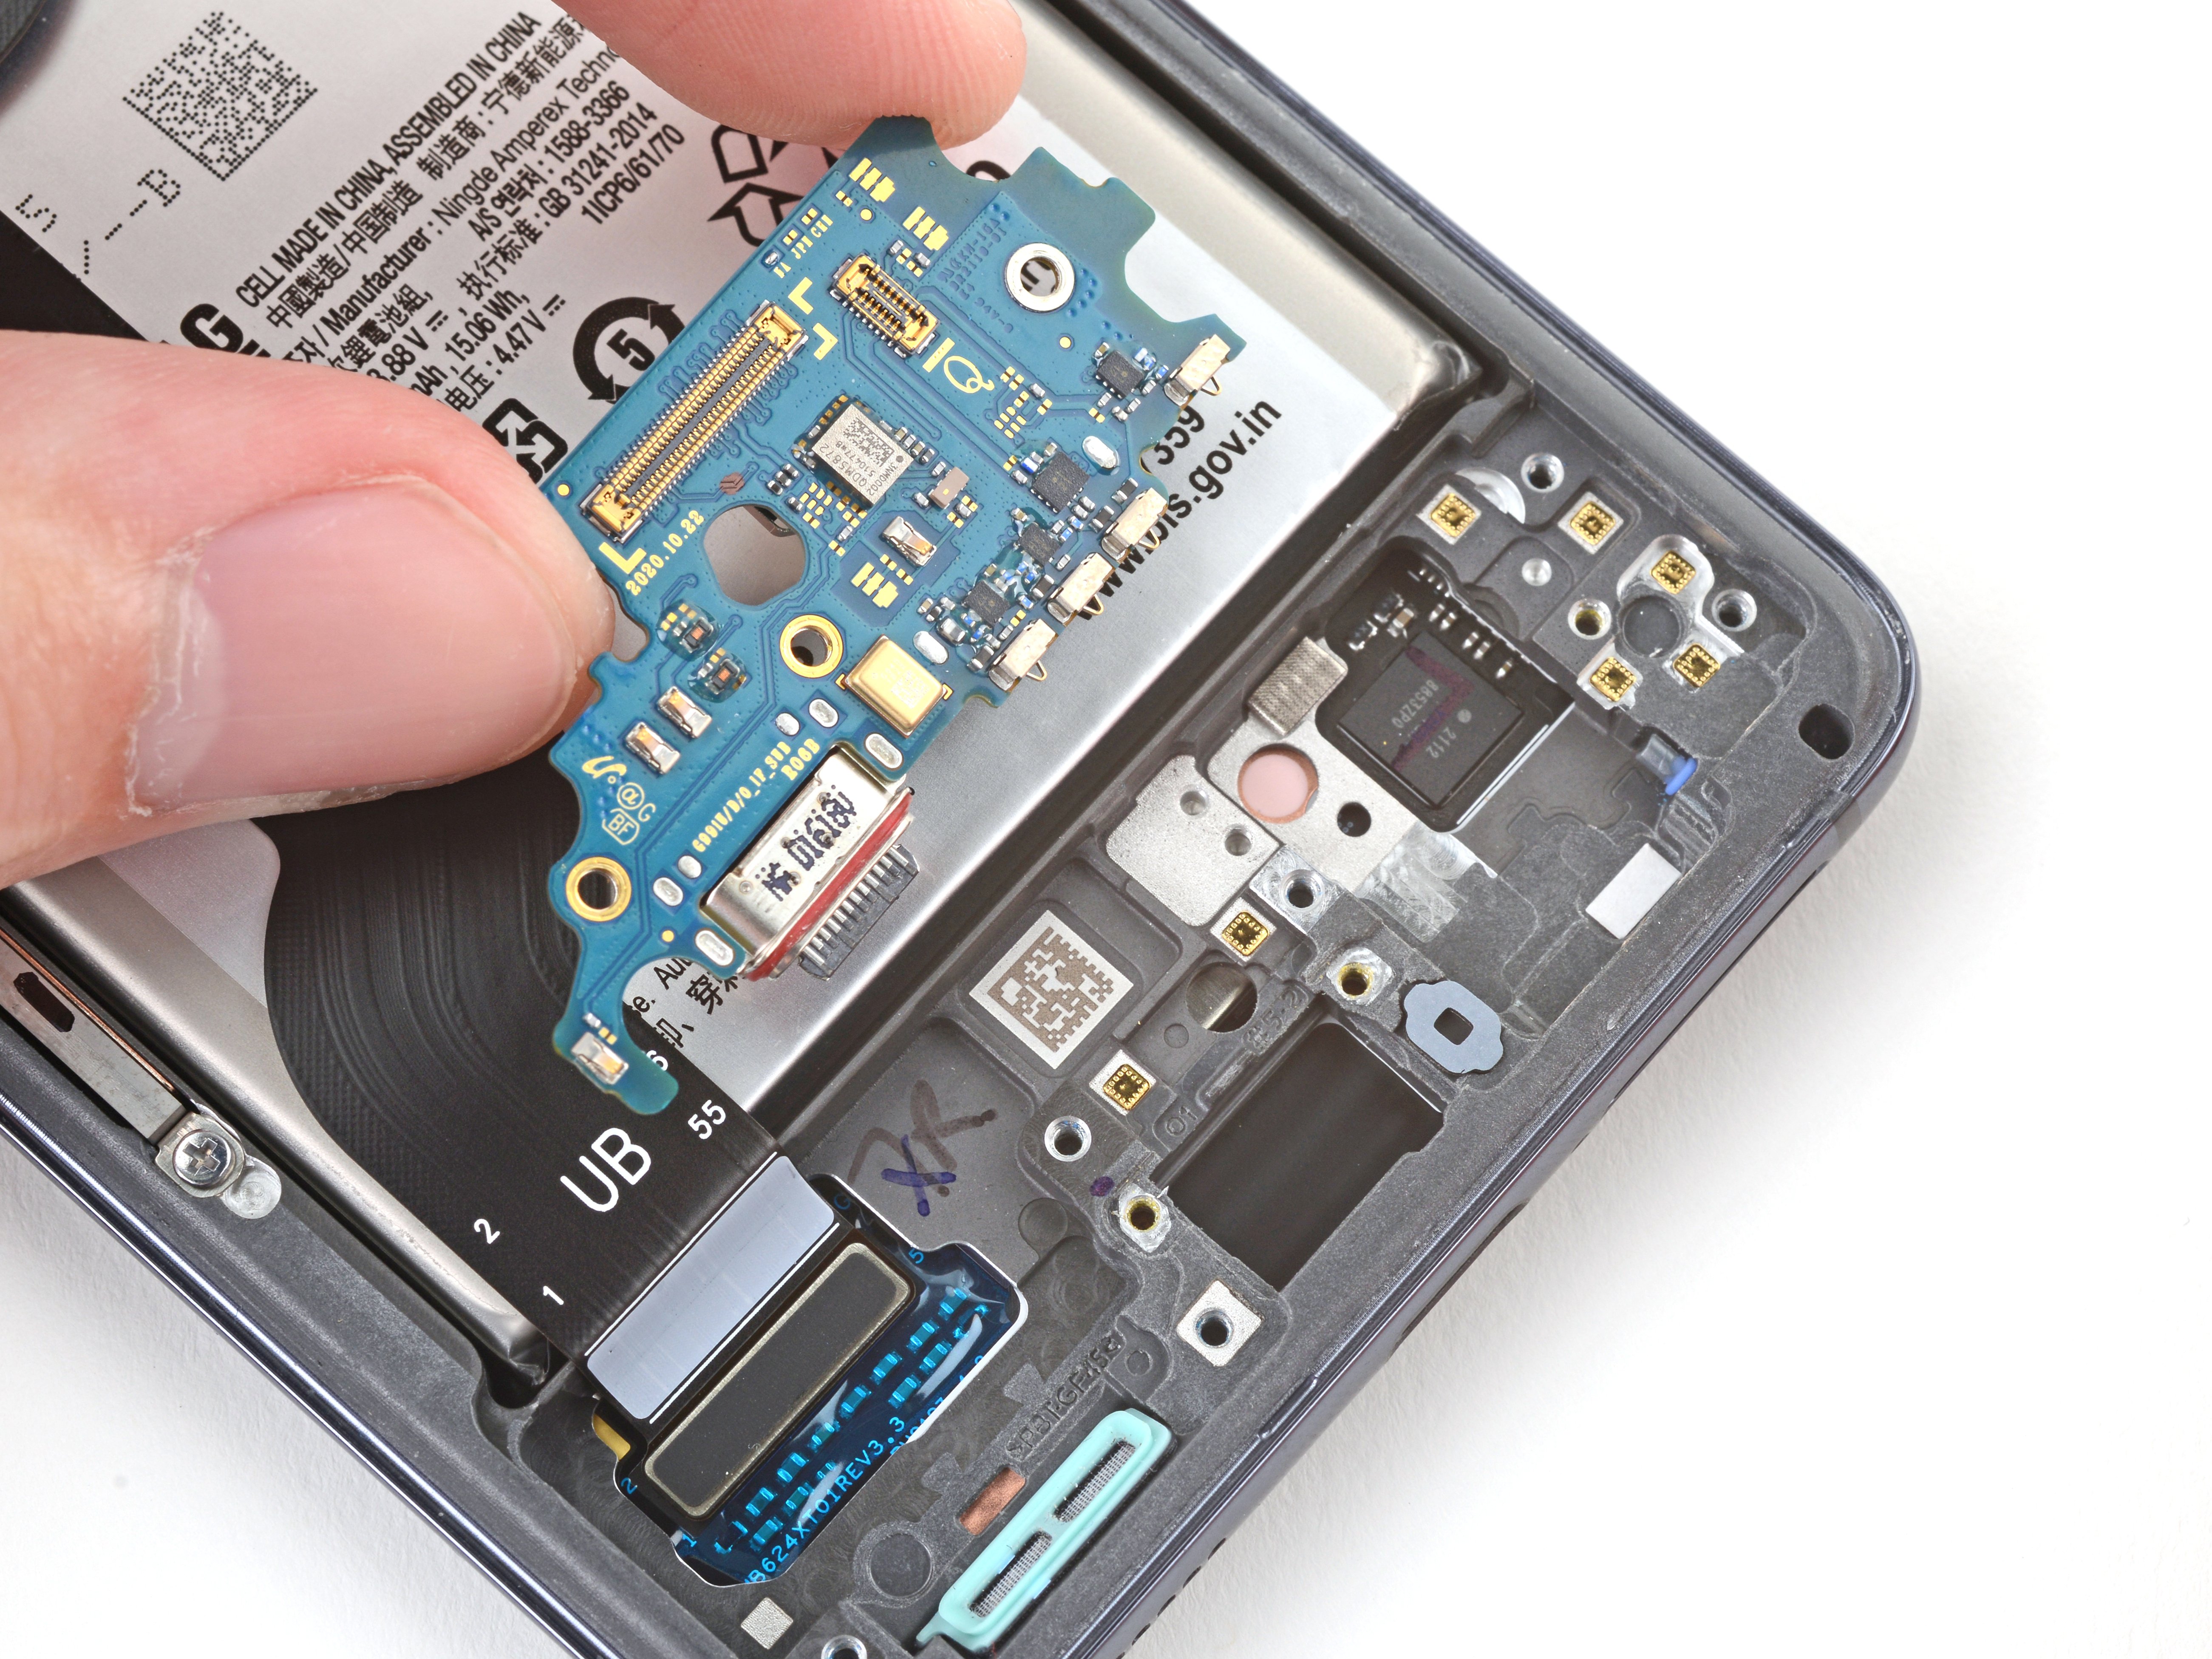
Welcome to your adventure in replacing the daughterboard of your Samsung Galaxy S21! Before you dive in, make sure to charge your battery below 25%—this helps keep the danger gremlins at bay during your disassembly quest. If your battery seems a bit puffy, take extra care. Remember, the daughterboard and USB-C charging port are best friends (soldered together, actually), so when it's time for one to go, you’ve got to say goodbye to both. You don't have to remove those interconnect cables first, but doing so can smooth out your journey a bit. Some images might show those cables being tackled one at a time, but just follow the steps and they'll be out in no time!
Step 1
Oops! If you accidentally poked the SIM eject tool into the microphone hole, no need to stress! It’s likely that you didn’t cause any harm to the microphone.
- Grab a SIM eject tool, a small flat tool, or even a paperclip that you’ve straightened out, and gently pop it into the SIM card tray hole on the bottom of your phone.
- Give it a little push to eject the SIM tray. Don’t be shy, but don’t go too hard either.
- Once the tray is out, carefully remove it. Easy peasy!
Step 2
Make sure your phone is completely turned off before you dive in. Don’t be that person who tries to repair a device while it's still powered on!
You can use a hair dryer, heat gun, or hot plate to apply some gentle warmth, just be cautious not to crank up the heat too high! Your phone's display, internal battery, and plastic back cover are all a bit sensitive to overheating, so let’s keep things cool and safe while we work our magic.
- Warm up your iOpener and gently place it against the bottom edge of the back cover for a cozy two minutes.
Tools Used
Step 3
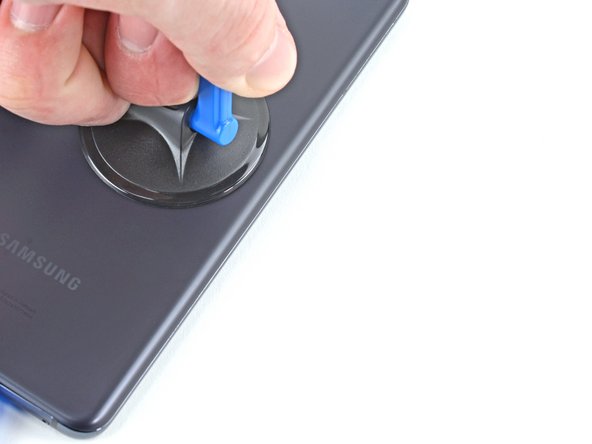
- Stick a suction cup smack dab near the bottom edge of your phone’s back side.
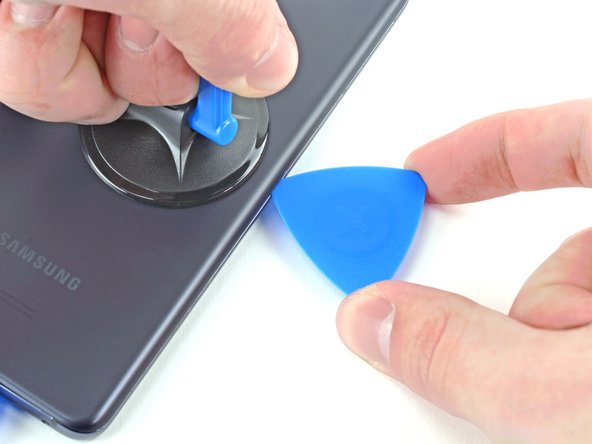
- Give the suction cup a confident, steady tug upwards—you're aiming for a small gap between the back cover and the frame.
- Slide an opening pick right into that gap like you mean it.
Be careful to only insert the pick up to 5 mm, as going deeper might lead to some unintentional damage to the internal components. Keep it light and safe!
Depending on how old your device is, this step might be a bit tricky. If you're hitting a wall, try applying a little more heat around the edge and give it another go. Sometimes, a gentle touch of warmth can make all the difference. If you need a hand along the way, just schedule a repair and we’ll help you out.
Step 4
- Wiggle that pick along the bottom edge to slice through the sticky stuff holding things together.
- Let the pick chill there—this keeps the adhesive from sneakily sticking itself back.
Step 5
- Place a heated iOpener along the left edge of the back cover and let it work its magic for about two minutes.
Tools Used
Step 6
Slide the pick in gently—don't go past 5 mm, or you'll be poking at parts you don't want to meet!
- Grab a suction cup and stick it on the back of your phone, aiming for the center of the left edge.
- Pull up with a nice, steady force on that suction cup; we want to create a little space between the back cover and the frame.
- Now, slide an opening pick into the newfound gap!
Step 7
Be careful not to slice beyond where the camera shell meets the back cover; otherwise, you might end up with a cracked plastic surprise.
- Gently glide an opening pick along the left edge down to the bottom left corner to slice through that pesky adhesive.
- Keep that pick in place so the adhesive doesn’t seal itself back up.
Step 8
- Heat up your iOpener and give that right edge of the back cover a cozy two-minute spa session. It's all about warming things up for a smooth repair!
Tools Used
Step 9
Be careful not to insert the pick more than 3mm—going any deeper could damage the secondary interconnect cable that runs along the right edge. Keep it gentle and steady!
- Stick your suction cup smack dab near the middle of the right edge of the phone’s back.
- Give the suction cup a confident pull—steady and strong—to wiggle open a gap between the back cover and the frame.
- Slide an opening pick into that gap like you’re sneaking into a secret club.
Step 10
- Gently slide an opening pick along the back cover's right edge to slice through the adhesive. Keep the pick in place afterward to stop the adhesive from sealing back up. If you need extra help, you can always schedule a repair.
Step 11
Just slide the pick in no more than 5 mm—going further could risk damaging the internal parts. Take it slow and steady, and if you need a hand, you can always schedule a repair.
You can repeat this step for each corner—just skip the top-left, since that's where the rear-facing camera hangs out.
- Gently glide the right-edge opening pick around the top-right corner of your phone, like you're giving it a little hug!
Step 12
- Gently slide the top-most opening pick as close to the camera shell as you can get. You've got this!
- Now, let's do the same thing with the left-edge pick. Keep it steady!
Step 13
- Warm up an iOpener and gently press it onto the camera shell, holding it there for about two minutes to loosen things up.
Tools Used
Step 14
Be careful to only insert the pick up to 5 mm to keep that camera scratch-free and happy!
If this step doesn’t do the trick, just move on to the next one for a different approach—no stress. Keep it moving, and if you need a hand, you can always schedule a repair.
- Twist the back cover to the left and watch as a gap appears between the camera shell and the frame—like magic, but with less glitter.
- Slide an opening pick into that new gap like you're sneaking into a secret club.
Step 15
Proceed with caution! There's a chance you might crack the plastic back cover if you're not careful.
- Slide those two picks over to hang out near the camera shell, slipping them under the back cover corners right next to it.
- Wiggle the picks gently along the edge between the back cover and the camera shell until you see a gap forming between the camera shell and the frame. Keep it smooth—no rush!
Step 16
Getting the frame off the camera shell is like peeling a super stubborn sticker—there’s plenty of adhesive holding it down, so you might need to heat it up a few times to loosen things up.
- Slide a thin pick between the camera shell and the frame like you’re sneaking a note into class—just a gentle shimmy to slice that adhesive loose.
Step 17
Watch out for that sneaky plate on the back cover around the phone's flash! It's known to play hide and seek with your pick:
- There's some extra adhesive to the right of the camera that you'll want to cut through carefully.
- Tilt your pick downward to steer clear of any damage and get the job done smoothly.
Step 18
The plate's resistance might feel a bit like sticky tape. Tilt the pick downwards to stop it from slipping into the plate. Take your time, no rush!
- Line up the tip of the opening pick with your phone's flash to get it started.
- Gently slide the pick in, being careful to avoid the flash's plate — no need to force it.
- Carefully slice through the adhesive on the right side of the camera to free it up.
Step 19
If the back cover is still clinging to the frame, just gently slide your pick around the edges of the phone until the back pops free. Keep at it, and you'll have that cover off in no time.
- First things first, let's pop off that back cover and get to work!
- Now, as we move on to putting everything back together:
- Here's a pro tip: take a moment to power on your phone and make sure everything's functioning like a champ before you seal it up tight. Just remember to power it down completely before diving back in!
- If you've got any sticky adhesive bits hanging around, grab some tweezers or just your fingers to pull them away. A little high concentration (over 90%) isopropyl alcohol will help you wipe away any pesky adhesive residue.
- Using those fancy Samsung custom-cut adhesives? Just follow this guide.
- And if double-sided tape is your go-to? This guide has got you covered!
Tools Used
Step 20
As you tackle this repair, be sure to keep an eye on each screw and remember to return it to its original home. You've got this!
- Time to grab your Phillips screwdriver and take out the five 4 mm screws holding the motherboard bracket in place. Easy does it—just keep track of those tiny screws!
Step 21
Hold up—don't yank that bracket off just yet, it's still connected to the wireless charging coil.
- Grab your tweezers and give that motherboard bracket a gentle lift—unclip it from the frame like you’re popping the top off a soda. Easy does it!
Tools Used
Step 22
Be gentle when prying near the connector edge—think of it like a friendly tap, not a big shove—so you don't bend or break the socket or nearby parts. If you're feeling unsure, you can always schedule a repair for some extra peace of mind.
- Hold the motherboard bracket out of the way with tweezers or your fingers while you grab a spudger to gently lift the battery press connector up. You've got this!
- When it’s time to re-attach those press connectors, just align one side perfectly and give it a gentle press until you hear that satisfying click, then repeat for the other side. Remember, no need to press in the middle! If things get a bit misaligned, those little pins can bend, and that's a bit of a bummer. Take your time and do it right!
Step 23
- While keeping the motherboard bracket out of the way, gently pry up and disconnect the wireless charging coil's press connector using a spudger. Take your time—patience makes perfect. If you need a hand, you can always schedule a repair.
Tools Used
Step 24
The wireless charging coil is gently held in place with just a bit of adhesive, making it easy to work with when you're taking things apart.
- Using your fingers, carefully lift the wireless charging coil away from the phone. Be gentle – we don’t want any drama here!
- When you're putting things back together, start by securing the motherboard bracket screws first. This will help the charging coil sit perfectly in its spot. After that, give the rest of the coil a good press to make sure it sticks nicely.
Step 25
- Grab a Phillips screwdriver and unscrew those six 4 mm screws holding the loudspeaker in place. Keep them safe—you'll need them to reassemble later. If you hit a snag or need a hand, you can always schedule a repair with Salvation Repair.
Step 26
- Slide a spudger into the notch at the top-left corner of the loudspeaker and gently pry upward to free the clips holding it in place. Once loose, lift out the loudspeaker. If you need a hand, you can always schedule a repair.
Tools Used
Step 27
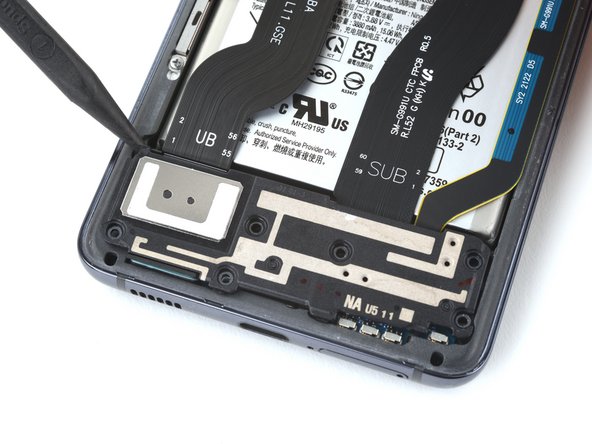
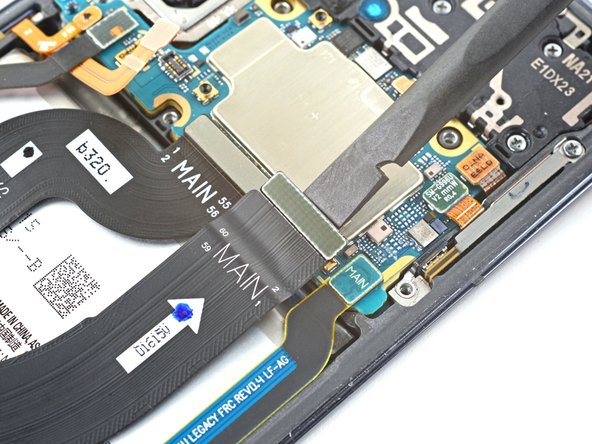
- Grab the flat end of your spudger and gently pop up the bottom press connector on the primary interconnect cable—like you're opening a secret door to the next step.
Tools Used
Step 28
- Grab the flat end of a spudger and gently pry up the top press connector of the primary interconnect cable. Keep it steady and work carefully—patience is key! If you need a hand, you can always schedule a repair.
Tools Used
Step 29
- Grab your trusty tweezers or just your fingers, and gently lift out the primary interconnect cable. You've got this!
Tools Used
Step 30
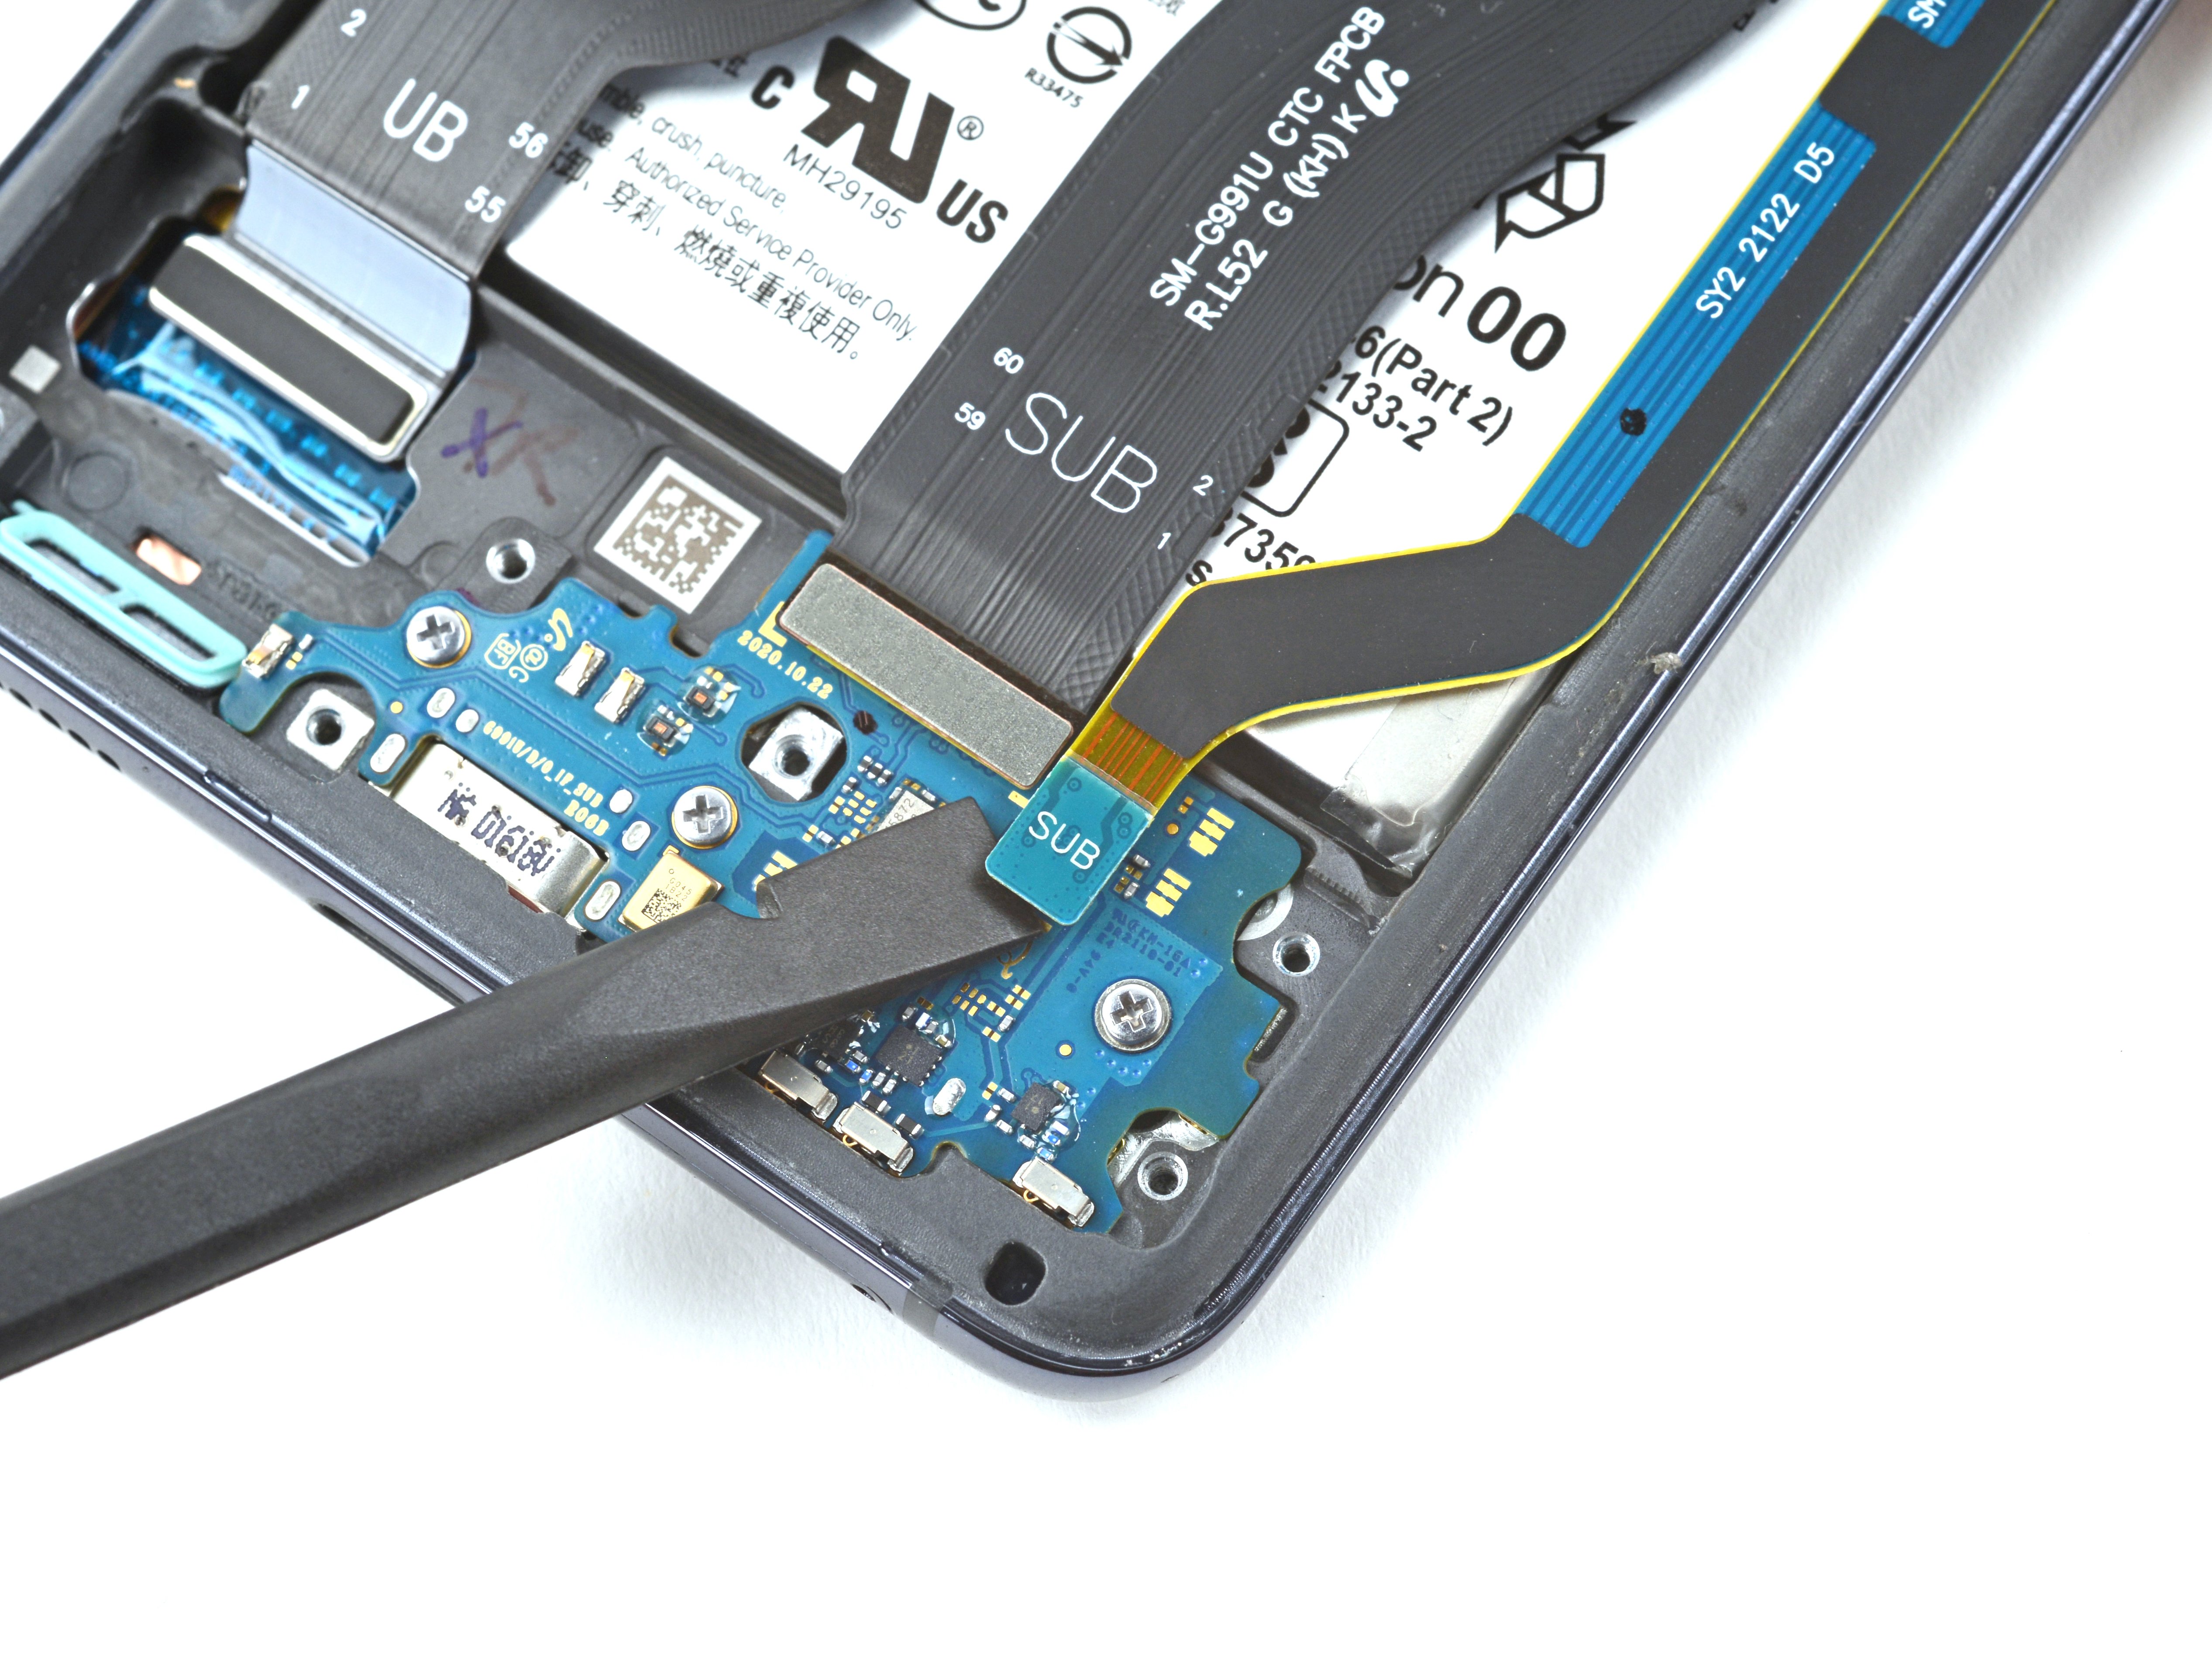
- Gently slide the flat end of a spudger under the secondary interconnect cable's bottom press connector and give it a little nudge to disconnect it. You've got this!
Tools Used
Step 31
- Grab your trusty spudger and gently pop up the top press connector for the secondary interconnect cable. Easy does it!
Tools Used
Step 32
- Grab tweezers—or your nimble fingers—and lift that secondary interconnect cable like you're picking the last slice of pizza.
Tools Used
Step 33
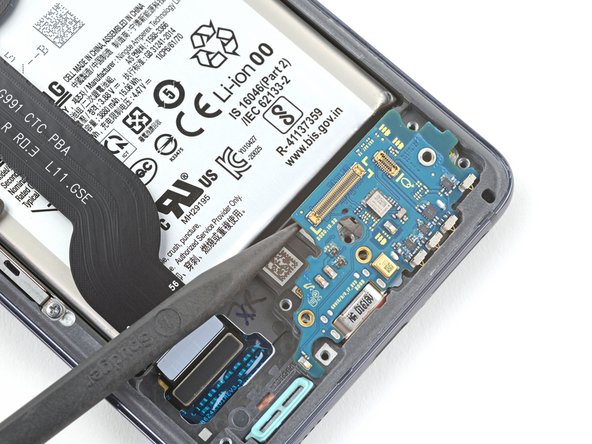
- Grab a Phillips screwdriver and gently unscrew those three 3.5 mm screws holding the daughterboard in place. Once they’re out, you’re all set to move forward. If you need help along the way, remember you can always schedule a repair.
Step 34
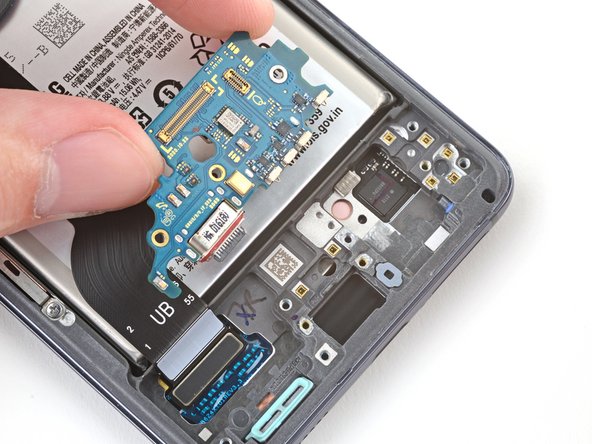
If you meet a stubborn spot, the USB-C port might still be hanging on in its groove. Give the daughterboard a gentle wiggle while you pull—don’t rush it—and it’ll come free like a champ.
- Give your new part a quick side-by-side with the old one—sometimes you’ve got bits to swap or sticky stuff to peel before it fits right.
- Ready to put it all back together? Just reverse the steps above and you’re golden.
- Curious if everything’s working? Check out our guide to test your fix.
- Got leftover parts you don’t need? Drop your e-waste at an R2 or e-Stewards certified recycler and feel good about it.
- If your repair journey hit a bump, swing by our Answers community for troubleshooting tips. And if you’d rather let the pros handle it, you can always schedule a repair.
