Samsung Galaxy S21 Front Camera Replacement
Duration: 45 minutes
Steps: 29 Steps
Before you get started, make sure your battery's under 25%—we don’t want any surprises when you crack open that phone! Safety first, always.
Ready to give your Samsung Galaxy S21 a fresh perspective? Use this step-by-step guide to swap out the front camera. Before you dive in, make sure your battery is below 25%—less juice means less risk if you accidentally poke the battery. If your battery looks like it’s trying to break free (swollen), handle with extra care. Let’s get started and keep it cool!
Step 1
Before you jump in, make sure your phone is fully powered down—give those circuits a nap!
You can use a hair dryer, heat gun, or hot plate for this step—just keep it cool, literally. Too much heat can mess with your display, the battery, or the plastic back cover, so don’t let things get toasty!
- Warm up your iOpener and let it hang out on the bottom edge of the back cover for a couple of minutes.
Tools Used
Step 2
Just insert the pick-up to 5 mm—going further might risk damaging those internal parts. Keep it gentle and within range to stay safe.
Older phones can be a bit stubborn with this step. If the edge isn’t budging, give it some more heat and show it who’s boss.
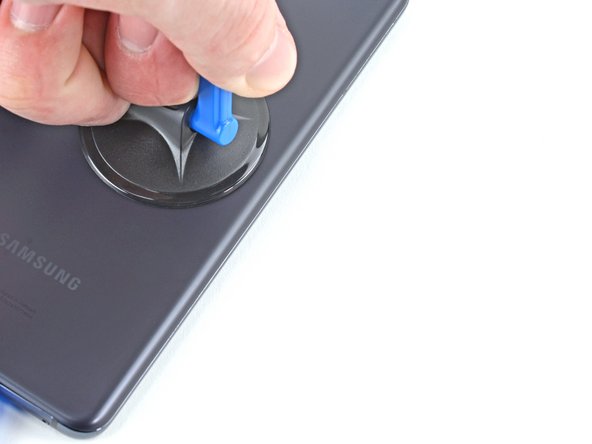
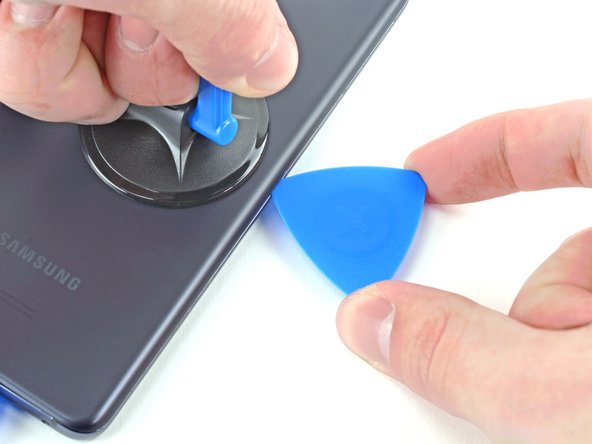
- Stick a suction cup on the back of your phone, aiming for the center near the bottom edge—precision counts, but no stress.
- Lift the suction cup with a steady, confident pull until you see a tiny gap forming between the back cover and the frame. You're making progress!
- Slide an opening pick into that gap—go slow, and let the tool do the work.
Step 3
- Gently glide the pick back and forth along the bottom edge to cut through that sticky adhesive like a pro.
- Keep the pick in place to stop the adhesive from sealing up again. You're doing great!
Step 4
- Warm up the left edge of the back cover with a heated iOpener for about two minutes. Get ready for some gentle prying action!
Tools Used
Step 5
Be careful to only insert the pick up to 5 mm—going deeper could lead to some unintentional damage to those delicate internal components. You've got this!
- Slap that suction cup on the back of your phone, aiming for the center of the left edge. It’s like giving your device a little hug.
- Give the suction cup a steady, confident pull—think strong but chill. You’re going for a gap between the back cover and the frame, not a wrestling match.
- Slide an opening pick into the gap you just made. Congrats, you’re officially prying things apart like a pro.
Step 6
Be careful not to slice past where the camera shell meets the back cover—unless you want to add ‘cracked plastic’ to your to-do list!
- Glide an opening pick along the left edge and down to the bottom corner to slice through that stubborn adhesive.
- Keep the pick parked there to stop the glue from making a comeback.
Step 7
- Warm up the back cover's right edge with a heated iOpener for about two minutes. This helps loosen the adhesive so you can get inside more easily.
Tools Used
Step 8
Be careful and only insert the pick up to 3 mm, or you might accidentally tangle with the secondary interconnect cable that hangs out near the right edge. Let's keep everything safe and sound!
- Stick a suction cup onto the back of your phone—aim for the center along the right edge for best grip.
- Give the suction cup a steady, strong pull to crack open a little gap between the back cover and the phone’s frame. (Think of it like opening a stubborn pickle jar, just much cooler.)
- Slide an opening pick into the gap you created. You’re in!
Step 9
- Work an opening pick along the right edge of the back cover, slicing through that stubborn adhesive.
- Keep the pick in place to stop the sticky stuff from sealing itself back up.
Step 10
Be careful not to insert the pick more than 5 mm. Pushing further might damage internal components. Keep it gentle!
You can tackle this process at each corner, just steer clear of the top-left where the rear-facing camera hangs out.
- Swing that opening pick around the top-right corner to keep things moving smoothly!
Step 11
- Slide that top opening pick right up next to the camera shell—it’s like they were meant to be neighbors.
- Do the same with the pick on the left edge. Let those picks mingle!
Step 12
- Warm up an iOpener and gently press it onto the camera shell for about two minutes. This helps loosen things up for the next step.
Tools Used
Step 13
Be careful to only insert the pick up to 5 mm to keep that camera scratch-free and happy!
If this method doesn’t do the trick, just hop to the next step for another shot—no stress. Keep it moving until your device is back in action.
- Turn the back cover counterclockwise to loosen it up and create a small gap between the camera shell and the frame.
- Slide an opening pick into that gap to start prying it open.
Step 14
Take it easy with this step—plastic back covers can be as fragile as your favorite sunglasses on a sunny day.
- Slide those picks gently toward the camera shell, sneaking them right under the back cover's corners next to the camera shell.
- Wiggle the picks back and forth along the spot where the back cover and camera shell meet, working your magic until you see a gap between the camera shell and the frame.
Step 15
The frame is pretty much glued to the camera shell like it's holding on for dear life, so you might need to warm things up a few times before it lets go.
- Gently slide a pry tool or opening pick between the camera shell and the frame to loosen the adhesive holding it in place. Keep it steady and work your way around to avoid any cracks or damage. If you need help, you can always schedule a repair.
Step 16
There's a little plate on the back cover near the flash that the pick can catch on—no worries, just a quick nudge and it's free to go.
- Don't forget to slice through the extra adhesive hanging out to the right of the camera. It's just waiting for you to give it a little snip!
- When you're using the pick, tilt it downwards to keep everything safe and sound. We want to avoid any mishaps!
Step 17
The plate's resistance might feel a bit like sticky glue. Tilt the pick downwards to prevent it from slipping into the plate. You've got this!
- Aim the tip of your opening pick right at your phone’s flash—it’s not a game of darts, but close!
- Slide the pick in gently, dodging the flash plate like a pro.
- Cut through that sticky adhesive just to the right of the camera. You’re almost there!
Step 18
If your back cover is still clinging to the frame, gently glide the pick around the edges of your device until it fully releases. You've got this!
- Pop off the back cover.
- When you're putting everything back together:
- Now’s the perfect moment to power up your phone and make sure everything’s working right—test it out before you button it up. Just don’t forget to turn it off again before diving back in.
- Clear away any leftover adhesive chunks using tweezers or your fingers. A little isopropyl alcohol (90% or higher) works wonders for getting rid of sticky residue.
- Rolling with Samsung custom-cut adhesives? Check out Salvation Repair’s guide.
- Using double-sided tape? Salvation Repair’s guide has you covered.
Tools Used
Step 19
Keep an eye on those screws—each one has its own special spot, so make sure they get home safe and sound.
- Grab your trusty Phillips screwdriver and get ready to tackle those five 4 mm-long screws holding the motherboard bracket snugly to the frame. Let's get this party started!
Step 20
Hold off on pulling the bracket all the way out just yet—it's still hanging on to the wireless charging coil. Keep it in place for now and continue with the next steps.
- Grab your tweezers and carefully lift up the motherboard bracket, unclipping it from the frame. Easy does it—no need to muscle through this part!
Tools Used
Step 21
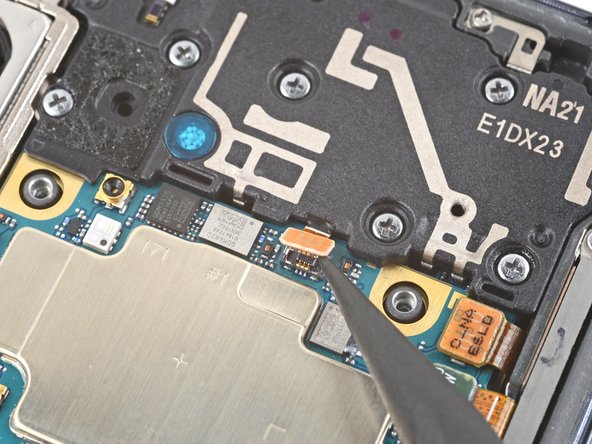
Be sure to gently lift only at the edge of the connector to keep the socket and nearby components safe and sound!
- Use tweezers or your fingers to carefully hold the motherboard bracket out of the way, then gently pry up the battery press connector with a spudger. When it's time to reconnect, align the press connector carefully—press down on one side until it clicks, then do the same on the other side. Avoid pressing in the middle to prevent bending the pins and causing permanent damage. Need some help? You can always schedule a repair.
Step 22
- Keep the motherboard bracket out of the way with one hand, and with the other, grab your trusty spudger to gently pop up and disconnect the wireless charging coil's press connector.
Tools Used
Step 23
The wireless charging coil is gently held in place with a light adhesive. Just a little stick to keep it where it needs to be, no big deal!
- Gently peel the wireless charging coil away from the phone using your fingers. No rush, take your time!
- When putting everything back together, start by securing the motherboard bracket screws. This will help line up the charging coil just right. Then, press down firmly on the rest of the coil to make sure it sticks properly.
Step 24
- Grab your trusty spudger and gently pop up the earpiece speaker cable connector. Easy does it—no need to flex your muscles!
Tools Used
Step 25
- Grab a Phillips screwdriver and unscrew those seven 4mm screws holding the earpiece speaker to the motherboard. Once they're out, you're one step closer to swapping or repairing that part. If you need help, you can always schedule a repair.
Step 26
- Slide your spudger into the gap right next to the earpiece speaker on the far right side of your phone.
- Pop those speaker clips out by gently prying with your spudger—like opening a stubborn bag of chips.
- Grab the speaker with tweezers or your fingers and lift it out. Nice work!
Step 27
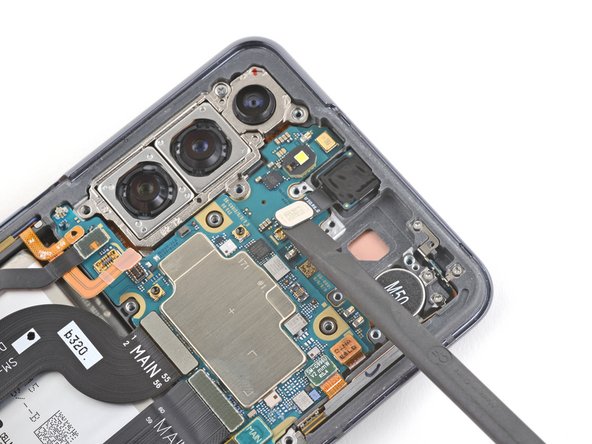
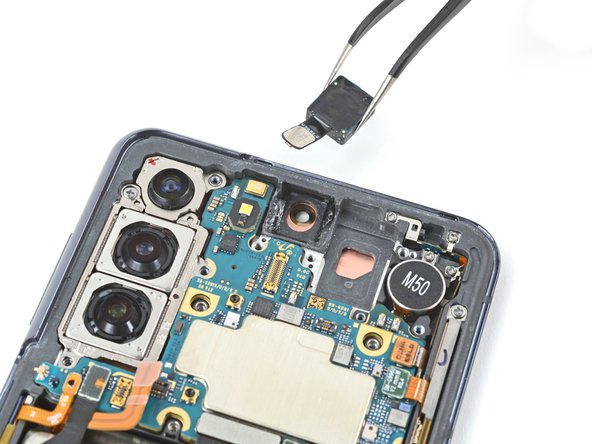
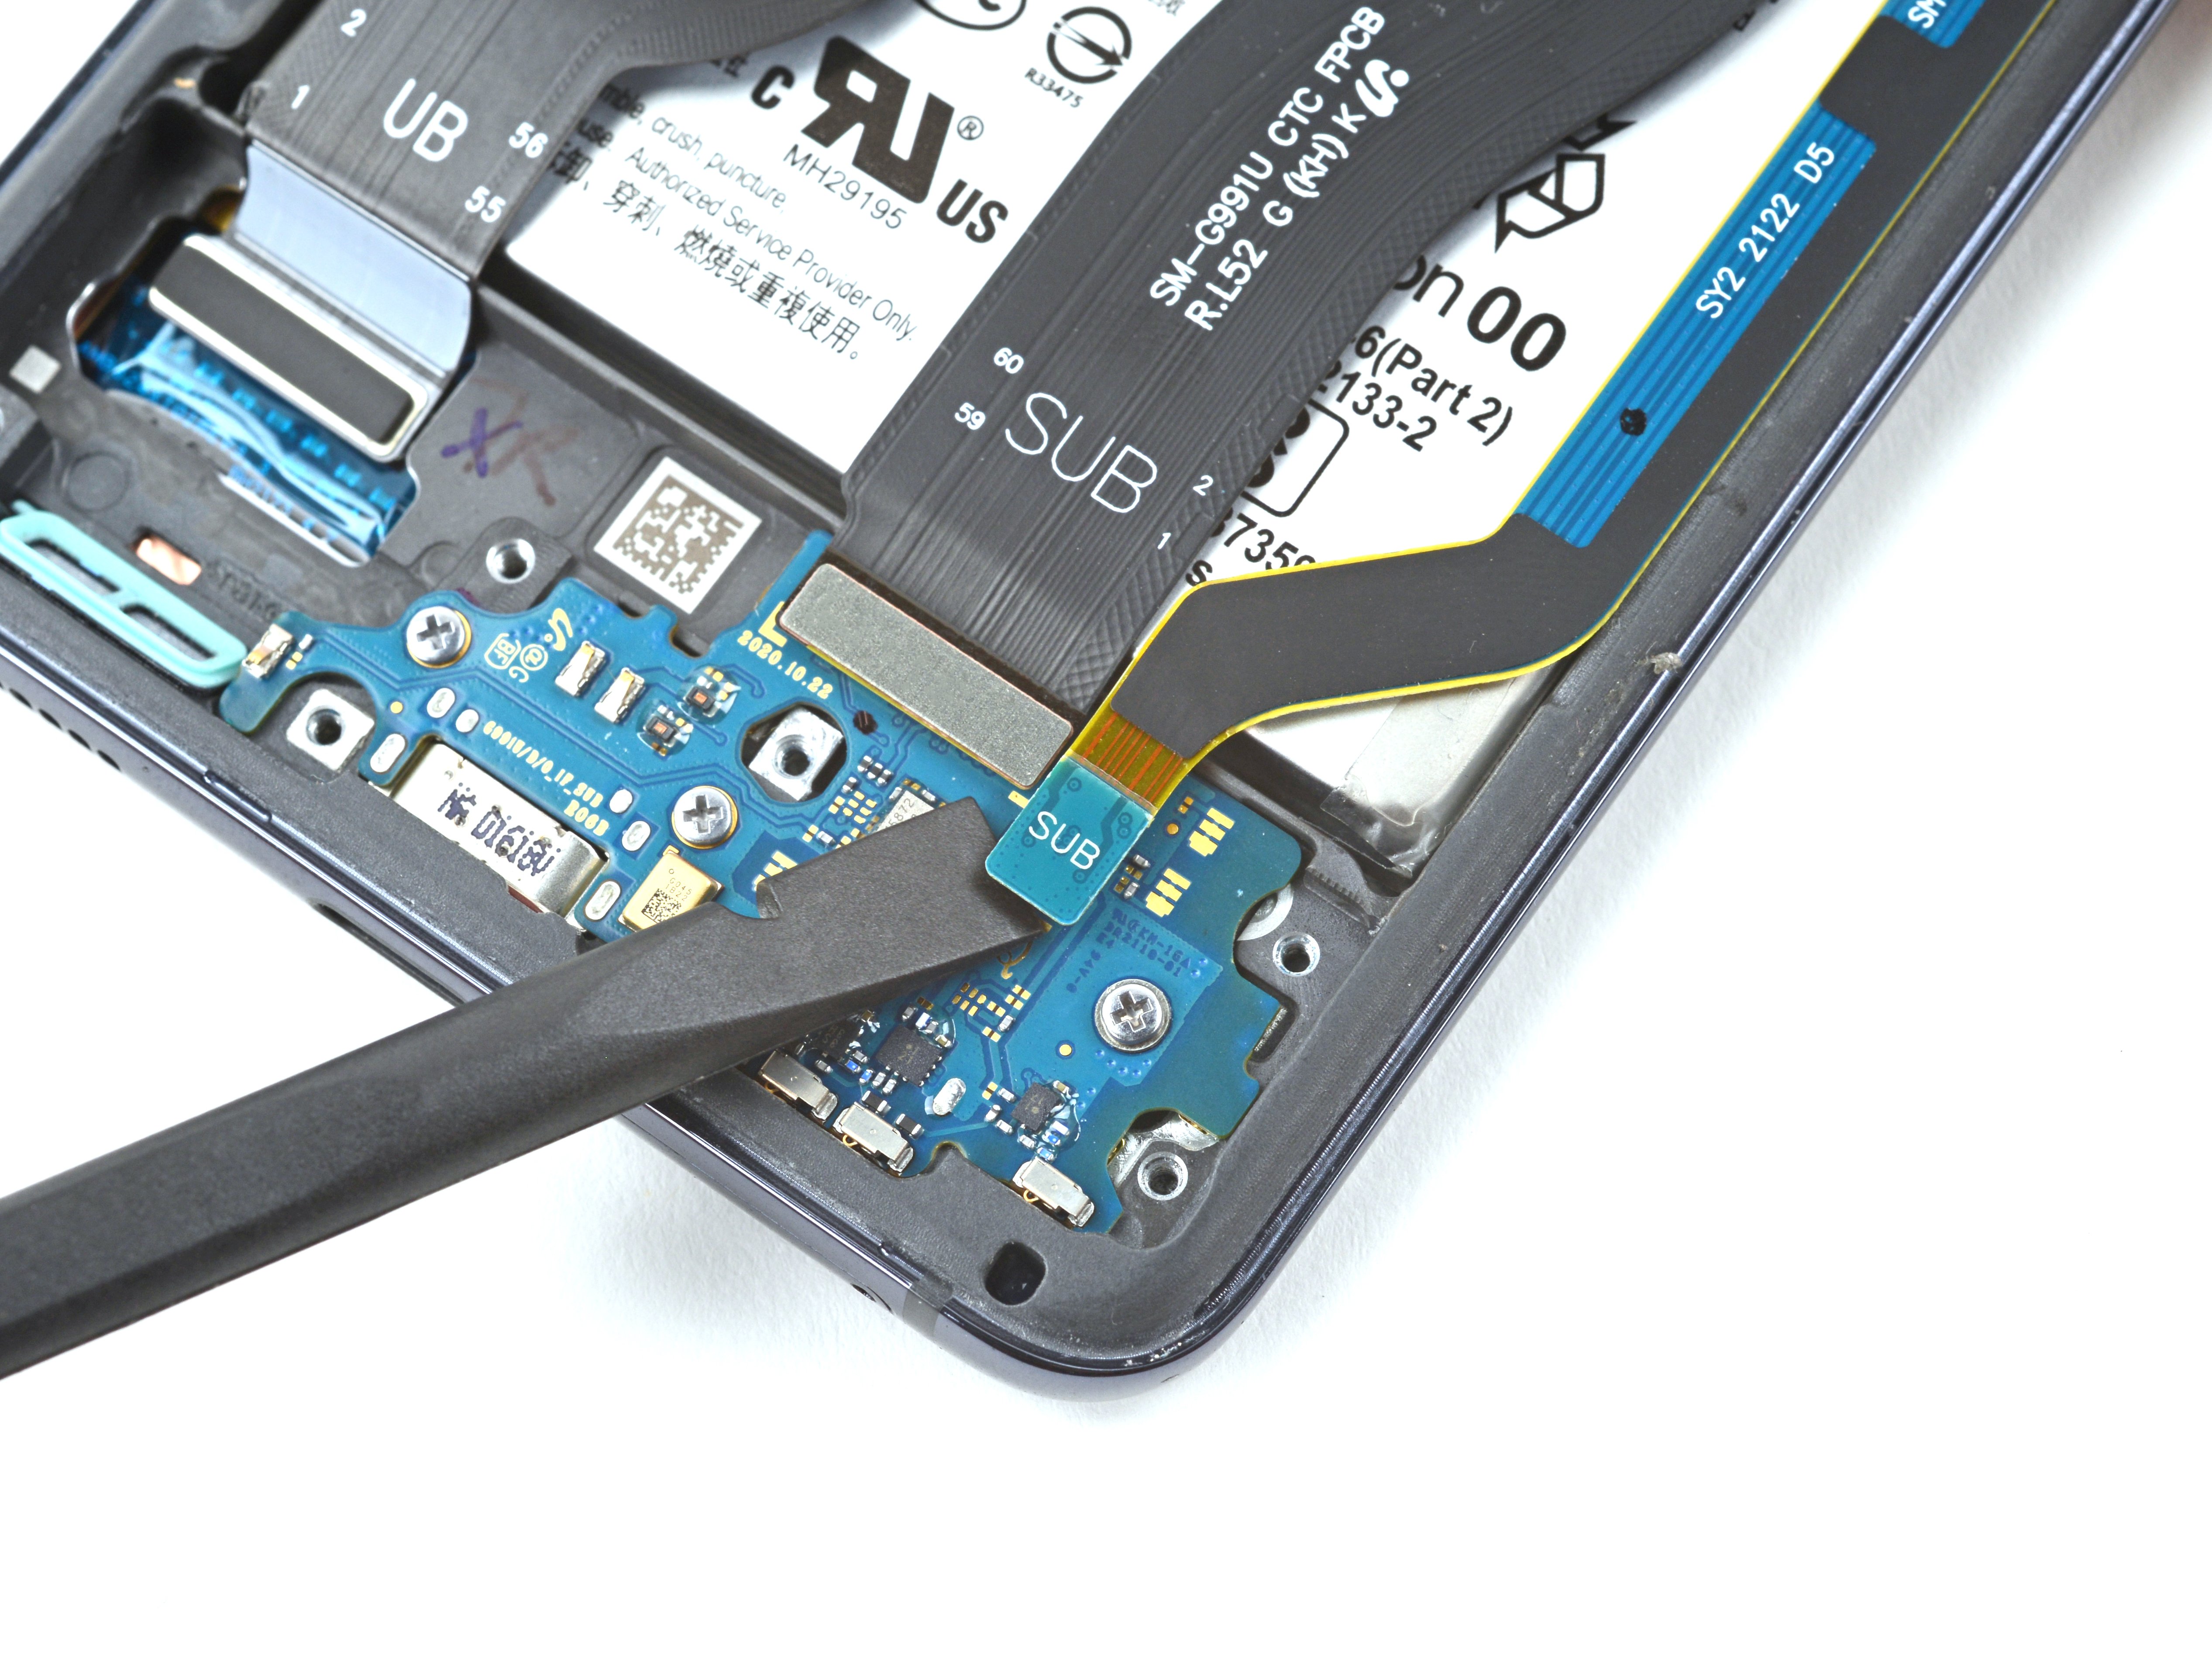
- Grab the flat end of a spudger and gently pry up to disconnect the front camera's press connector. Take your time—patience is key to keeping everything in one piece. If you need a hand, you can always schedule a repair.
Tools Used
Step 28
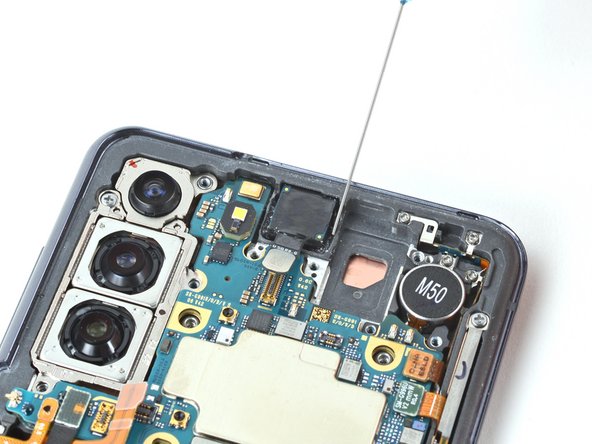
Start with just a few drops, and if it seems like more is needed, go ahead and add a little extra; using too much isopropyl alcohol might lead to a messy situation with the motherboard.
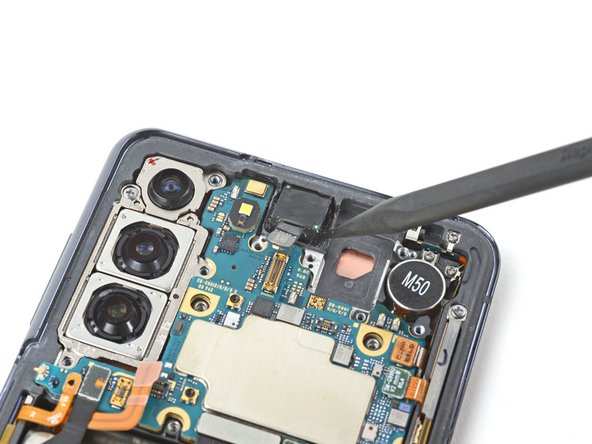
- Grab some high-octane isopropyl alcohol (90% or higher) and drop a few magic drops around the edges of the front camera. Let it work its cleaning charm in those tiny gaps.
Step 29
If you're finding it tricky to detach the front camera from the frame, just dab on a bit more isopropyl alcohol; it might take a moment for that adhesive to give up the fight.


