Samsung Galaxy S21 Plus Charging Board Replacement
Duration: 45 minutes
Steps: 25 Steps
Ready to swap out the charging board on your Samsung Galaxy S21 Plus? You've come to the right place! This guide is tailored for the SM-G996B/DS (international) model. Just a heads up, if you're working with other models, they may have an extra antenna cable tucked away in the edge of the midframe. When you're putting everything back together, remember that skipping the adhesive seals might leave your device functioning but could dampen its water protection. So, make sure to grab some replacement adhesive to keep everything snug and secure. Let’s dive in!
Step 1

You can use a hair dryer, heat gun, or hot plate to help with the process, but remember to keep it cool! Overheating your phone can lead to some serious heat damage to the display and internal battery. So, let's keep it chill while we work our magic!


Step 2


If the back cover is cracked, the suction handle might not adhere as well as you'd like. No worries! You can try using some strong tape to give it a lift, or get creative and superglue the suction handle in place. Just let it cure for a bit, and then you're good to go!
If you're having a tough time creating a gap, crank up the heat a little more to help soften that adhesive. Just remember to follow the iOpener instructions to avoid any overheating mishaps!
- Get a grip on that back cover by attaching a suction handle to the bottom edge - the closer to the edge, the better!
- Use the suction handle to carefully lift the back cover and create a small gap between it and the frame. You're making progress!
- Now it's time to bring in the opening pick. Insert it into the gap you just created and get ready to loosen things up.
- Slide the opening pick all the way to the bottom left corner. This is where the magic happens, and you'll start to slice through the adhesive.
- Leave the opening pick in place for now. This will prevent the adhesive from sneaking back in and resealing itself. You're doing great!
Tools Used

Step 3


- Time to get this repair started! Insert a second opening pick at the bottom edge of your phone to help loosen things up.
- Now, carefully slide the opening pick to the bottom right corner to slice through the adhesive - you're making great progress!
- Leave the opening picks in place for now, so the adhesive doesn't reseal and you can keep moving forward with your repair.
Step 4


If the adhesive gets too tough to cut through, chances are it's cooled off. Just pop your iOpener back on for a couple of minutes to heat it up again and keep things moving smoothly.
- Pop in a third opening pick at the bottom right corner of your phone.
- Gently slide that opening pick along the right edge to cut through the adhesive like a pro.
- Keep the opening pick parked in the top right corner to stop the adhesive from sealing up again.
Tools Used
Step 5


When you’re slicing near the camera assembly, just slide in the tip of the opening pick (about 4-5 mm) to keep your camera safe and sound—let's avoid any smudges or damage, shall we?
- Pop a fourth opening pick under the top right corner of your phone—like you’re sneaking in an extra slice of pizza.
- Glide that pick along the top edge to slice through the sticky stuff holding it together.
- Leave the pick chilling in the top left corner so the adhesive doesn’t get any ideas about sealing back up.
Step 6


As you glide your opening pick near the power button, just slide in the tip—around 3-4 mm is perfect! This little maneuver will keep the power and volume flex cable safe and sound, so you can keep your groove going!
- Slip in a fifth opening pick right under the bottom left corner to get things started.
- Then, glide your opening tool along the left side of the back cover to carefully cut through the remaining adhesive.
Step 7


- Pop off the back cover.
- When you're putting things back together:
- Now's a great time to fire up your phone and make sure everything works before you seal it up. Don't forget to power it down again before you get back to business.
- Clear away any leftover adhesive bits with tweezers or your fingers. For those stubborn sticky spots, grab some isopropyl alcohol (90% or higher) and wipe them clean.
- Rocking Samsung custom-cut adhesives? Check out this guide.
- Rolling with double-sided tape? This guide’s got your back.
Step 8


Handle that battery with love—no poking or bending! A battery with a little too much excitement might just leak some not-so-fun chemicals or even start a thermal party.
Watch out for the sneaky cable hiding beneath the charging coil! Take it slow and steady, and if your pick gets snagged, pause and give it a gentle nudge.
- Sneak an opening pick under the bottom left corner of the NFC antenna and charging coil assembly—like a secret agent on a mission.
- Glide the pick along that bottom left edge, gently separating the assembly from the battery. No need to rush, smooth moves only.
Step 9


- Slip an opening pick under the bottom edge of the NFC antenna and charging coil assembly—like you’re slicing into a tech sandwich.
- Gently glide the pick along the bottom to separate the assembly from the loudspeaker. Take it slow and steady, you got this!
Step 10


- Grab your trusty spudger and gently pry the connector for the charging coil straight up from its socket. It's like a little dance move—just keep it smooth and steady!
Tools Used

Step 11


- Grab a spudger and gently pry the connector of the NFC antenna straight up from its socket. You've got this!
Tools Used
Step 12

- Grab a Phillips screwdriver and loosen those five 3.9 mm screws holding down the NFC antenna and charging coil assembly. Easy peasy—just keep track of those screws so nothing goes missing. If you run into trouble or need a hand, you can always schedule a repair.
Step 13


- Next, use a pair of tweezers or your fingers to gently pull out the NFC antenna and charging coil assembly. Take your time and be careful not to damage any of the surrounding components.
Step 14

- Grab your trusty spudger and gently lift the battery connector straight up out of its socket. Easy does it—no need to fight with it!
Tools Used
Step 15

- Grab your Phillips screwdriver and unscrew the six 3.9 mm screws holding down the loudspeaker assembly. Don’t worry, they’re all the same size—no screw mix-ups here!
Step 16


- Slip an opening pick into the space between the top edge of the loudspeaker assembly and the midframe—like sliding a note to your secret crush.
- Gently pry up the loudspeaker assembly by tipping it downward. Think of it as giving the assembly a little nudge to get it moving.
Step 17


- Let's kick things off by gently removing the loudspeaker assembly. No need to rush, take your time!
- When you're putting things back together, don't forget to apply fresh adhesive where needed after giving those areas a good clean with isopropyl alcohol (>90%). It's all about keeping things nice and tidy!
Step 18

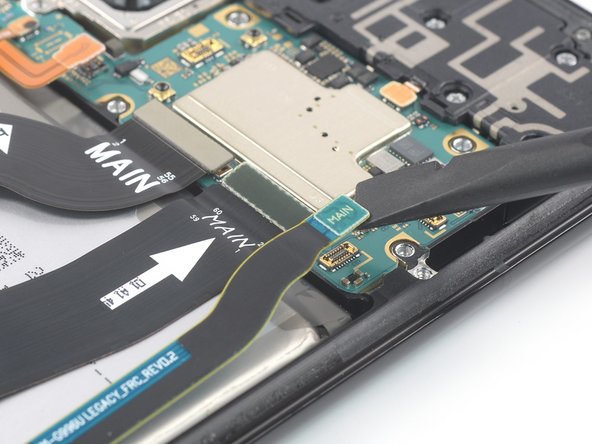
- Grab a spudger and gently pry the main and interconnect flex cables away from the motherboard, lifting their top connectors straight up from their sockets. Easy does it—patience is key! If you need help, you can always schedule a repair.
Tools Used
Step 19
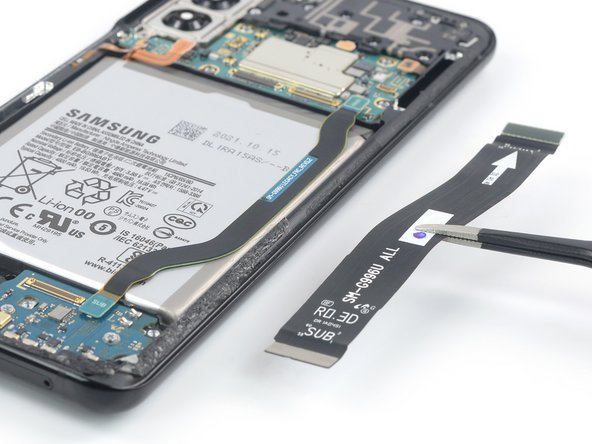

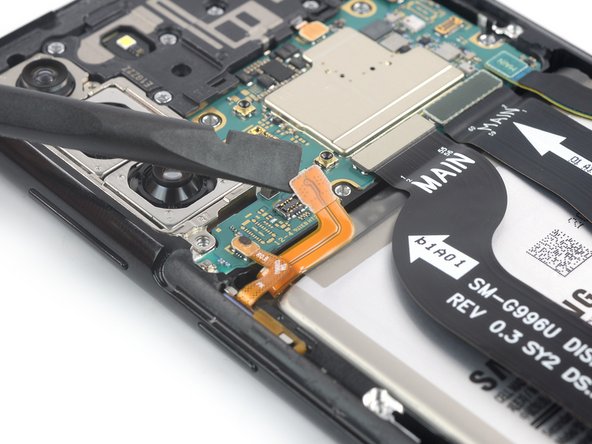
- Grab a spudger and gently pry the bottom connector of the main flex cable straight up from its socket to disconnect it from the daughterboard.
- Next, use your fingers or a pair of tweezers to carefully lift the main flex cable out of the way. Easy peasy!
Tools Used
Step 20


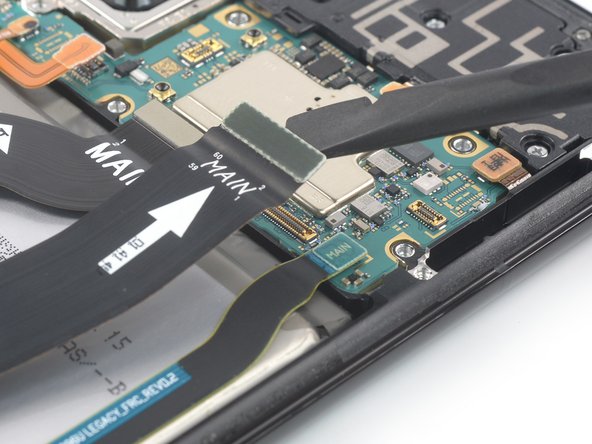
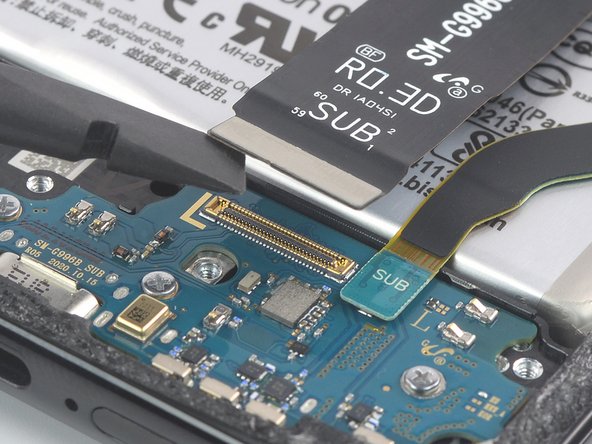
- Grab your trusty spudger and gently pop up the bottom connector of the interconnect flex cable from its socket on the daughterboard. Treat it like opening a stubborn snack bag—firm but careful!
- Now, use your fingers or tweezers to lift out the interconnect flex cable. Take it slow; this cable isn't going to win any tug-of-war contests.
Tools Used
Step 21

- Grab your trusty SIM card eject tool, a SIM eject bit, or even a straightened paper clip. Find the tiny hole on the SIM tray at the bottom edge of your phone.
- Give that hole a gentle poke to pop the SIM card tray out like a pro!
Tools Used

Step 22


- Pop out the SIM card tray with a gentle push or pry. Keep it smooth, and if you need a hand, you can always schedule a repair.
Step 23

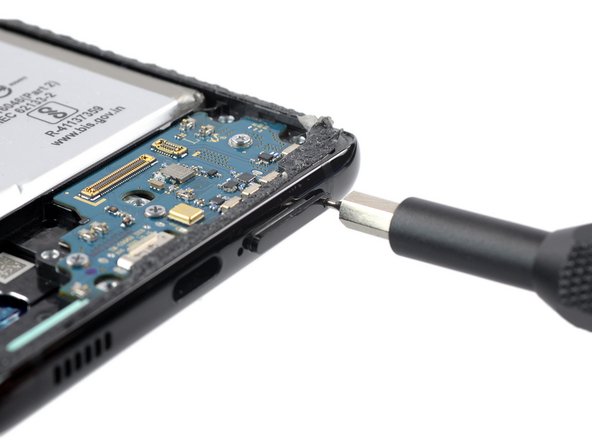
- Grab your Phillips screwdriver and loosen those three 3.4 mm screws holding the charging board in place. Easy does it—you're almost there! If you need help, you can always schedule a repair.
Step 24

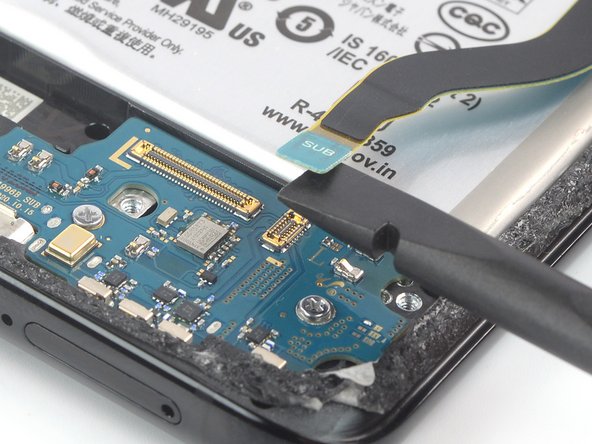
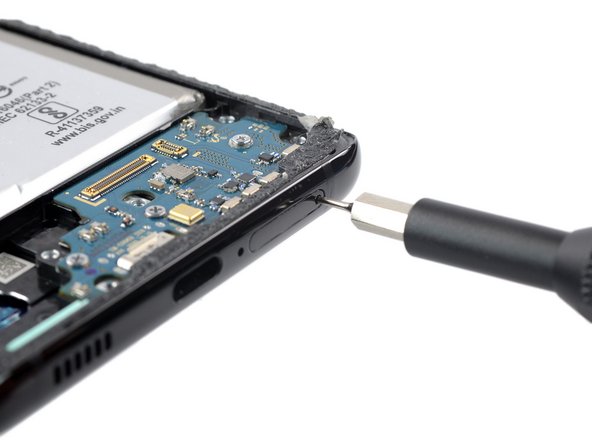
- Gently slide the pointed end of your trusty spudger under the left edge of the charging board, right next to where the main flex cable connects.
- Now, give that charging board a little nudge upwards with your spudger to free it from its snug spot.
Tools Used
Step 25


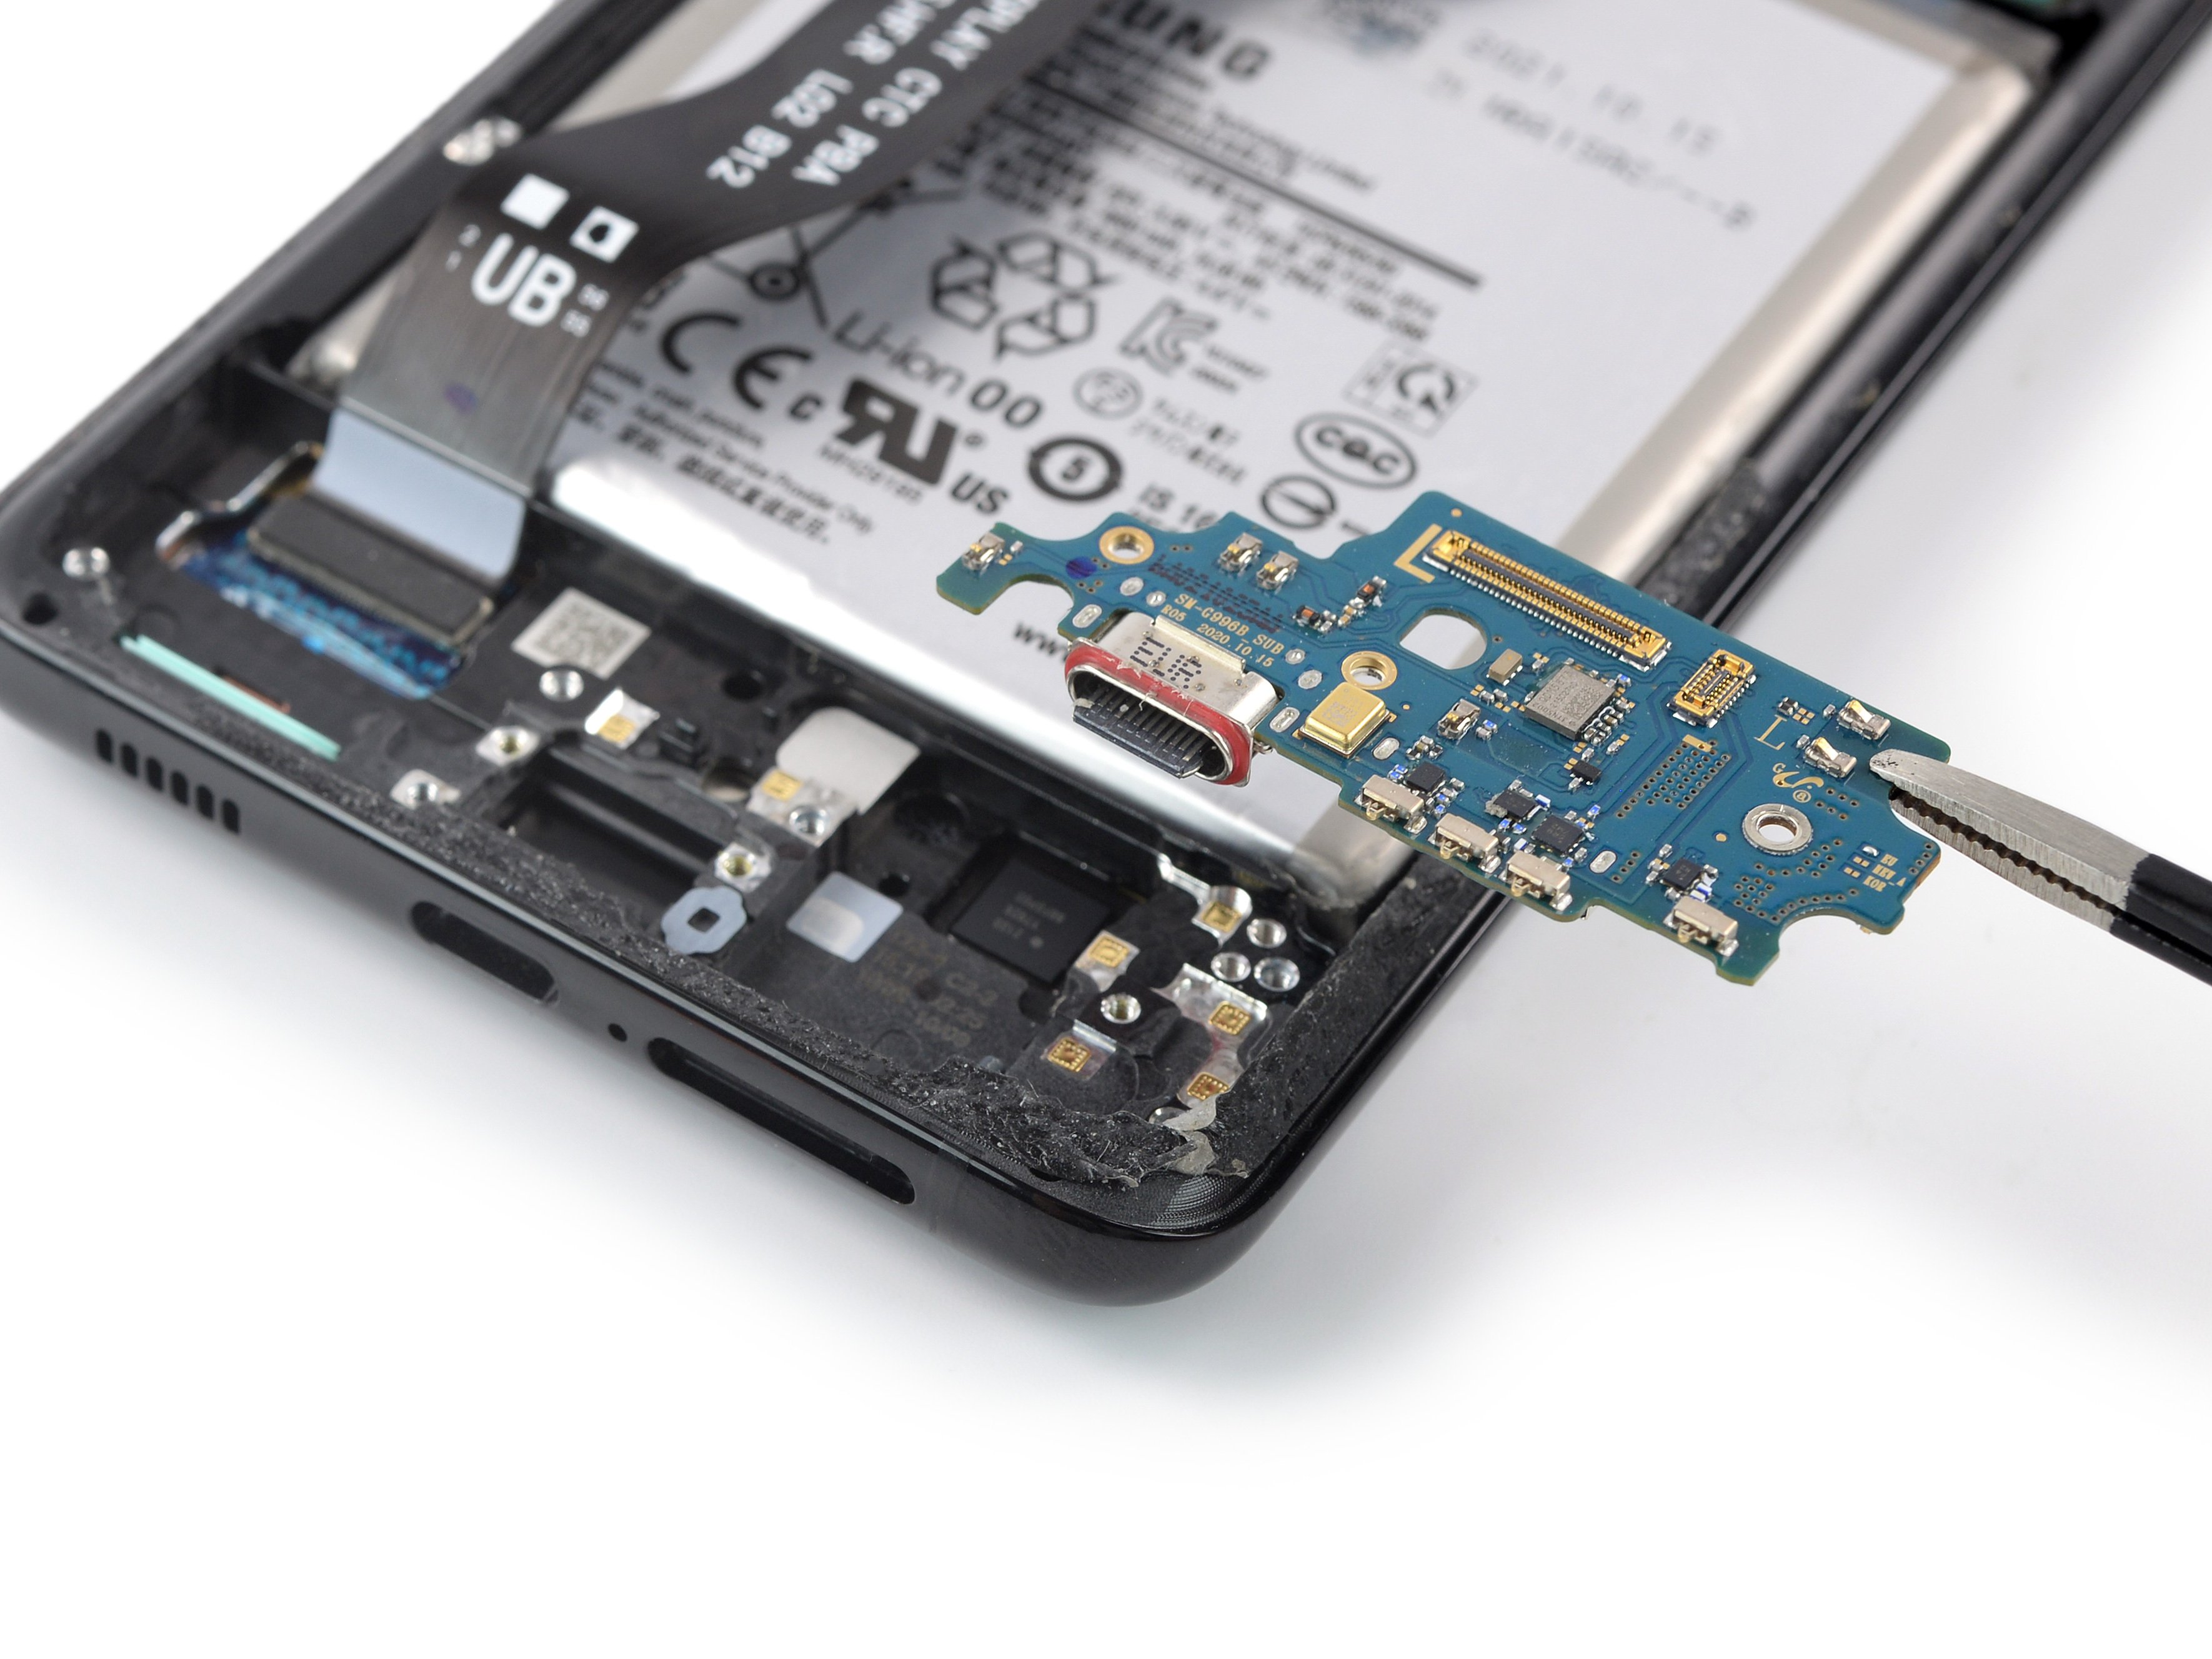
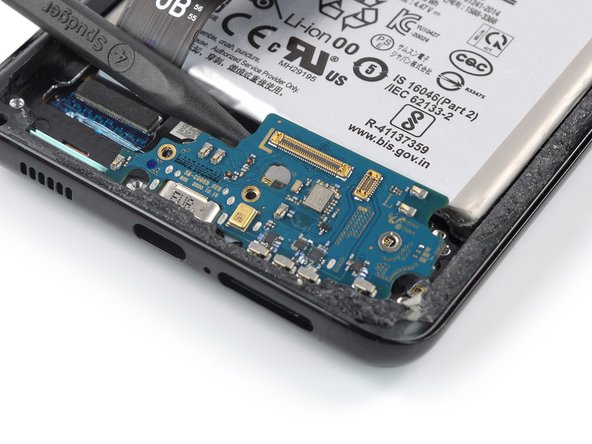
- Grab some blunt tweezers or just use your fingers—no need to get fancy. Gently lift the top edge of the charging board and then slide that USB-C connector out like you’re unplugging from a wild Friday night.
- When you’re putting things back together, fresh adhesive is your friend. Clean up those spots with isopropyl alcohol (90% or higher) before you lay it down. Smooth, clean, and ready to stick!


