Samsung Galaxy S21 Plus Loudspeaker Replacement
Duration: 45 minutes
Steps: 17 Steps
Ready to breathe new life into your Samsung Galaxy S21 Plus? This step-by-step guide will walk you through replacing the loudspeaker on your device, specifically the SM-G996B/DS (international) model. Keep in mind that other models may have an extra antenna cable nestled in the midframe. To keep your device water-resistant, don't forget to swap out the adhesive seals when reassembling. You'll need some fresh adhesive to reattach components, so be sure to have that on hand. Let's get started!
Step 1

A hair dryer, heat gun, or hot plate can be handy tools, but keep an eye on the heat—excessive warmth can damage the display or internal battery. Use these carefully to avoid overheating, and if you need a hand, you can always schedule a repair.


Step 2


If your back cover is sporting a crack, the suction handle might be feeling a bit shy. Give it a try with some sturdy tape, or you could play the hero by supergluing the suction handle in place and letting it set so you can move on to the next step.
Struggling to create that perfect gap? No worries! Just add a bit more heat to help soften the adhesive. Remember to follow the iOpener instructions to keep things from getting too hot to handle.
- Grab a suction handle and attach it to the bottom edge of the back cover, getting as close to the edge as you can.
- Give the back cover a gentle lift using the suction handle to create a little gap between it and the frame.
- Slide an opening pick into that gap you just made.
- Carefully slide the opening pick down to the bottom left corner to cut through the adhesive like a pro.
- Keep that opening pick in place to make sure the adhesive doesn’t seal back up.
Tools Used

Step 3


- Pop in a second opening pick along the bottom edge of your phone—think of it as giving your phone a gentle nudge.
- Glide that pick over to the bottom right corner to cut through the sticky adhesive—like slicing through digital peanut butter.
- Keep those opening picks chilling in place so the adhesive doesn’t sneak back together.
Step 4


If the adhesive is being stubborn and hard to cut, don't worry! It's probably just cooled down a bit. Grab your trusty iOpener and give it a few minutes to heat things up again - about two to three minutes should do the trick.
- Pop a third pick into the bottom right corner of your phone—like you're dealing cards at a high-stakes poker game.
- Glide that pick up the right edge to break through the sticky stuff holding your phone together.
- Let the pick hang out in the top right corner to keep the glue from sneaking back together.
Tools Used
Step 5


When you're getting close to the camera assembly, just slide in the tip of that opening pick (about 4-5 mm) to keep your camera safe and sound—no smudges allowed!
- Pop in a fourth opening pick just beneath the top right corner of your phone to get things started.
- Slide that pick along the top edge to cut through the adhesive like a hot knife through butter.
- Keep the opening pick in the top left corner to stop the adhesive from sealing back up—no surprises here.
Step 6


When working near the power button, just dip the tip of your opening pick in—about 3-4 mm. This keeps the power and volume button flex cable safe and happy!
- Gently slide a fifth opening pick into the bottom left corner, like you're tucking it in for a cozy nap.
- Now, glide that opening pick along the left edge of the back cover to slice through the rest of that sticky adhesive. You're doing great!
Step 7


- First up, let's get that back cover off! You're on your way to a successful repair.
- Now, as you put everything back together:
- This is a perfect moment to power up your phone and give everything a good test before sealing it up tight. Just remember to power it down completely again before diving back into the assembly.
- Got any pesky adhesive chunks? Use tweezers or your fingers to remove them. A little high-concentration isopropyl alcohol (over 90%) can help you wipe away any leftover sticky residue.
- If you're using Samsung's custom-cut adhesives, check out this guide.
- For those using double-sided tape, make sure to follow this guide.
Step 8


Hey there! Just a friendly reminder to handle that battery with care—no poking or bending, please! A battery that's been punctured or bent might leak some not-so-fun chemicals or even cause a thermal mishap.
Watch out for the sneaky cable hiding beneath the charging coil! Take it slow and steady, and if your pick gets snagged, pause and reassess before you keep going.
- Slip an opening pick under the bottom left corner of the NFC antenna and charging coil assembly—think of it like giving your phone a gentle nudge.
- Glide the pick along the bottom left edge to loosen the assembly from the battery. No need to rush, just a smooth move does the trick!
Step 9


- Slide an opening pick under the lower edge of the NFC antenna and charging coil—think of it as giving the pick a backstage pass.
- Gently glide the pick along the bottom to loosen the assembly from the loudspeaker. Take it slow and steady—no need to rush the magic.
Step 10


- Grab your trusty spudger and gently pop the charging coil connector straight up from its socket—like opening a secret treasure chest for your device.
Tools Used

Step 11


- Grab a spudger and gently pry the NFC antenna connector straight up from its socket. Easy does it—just a little lift to disconnect.
Tools Used
Step 12

- Grab your trusty Phillips driver and twist out the five 3.9 mm screws holding the NFC antenna and charging coil—think of it as popping the top off a soda, except way quieter.
Step 13


- Gently lift out the NFC antenna and charging coil using tweezers or your fingers—no need to wrestle with it!
Step 14

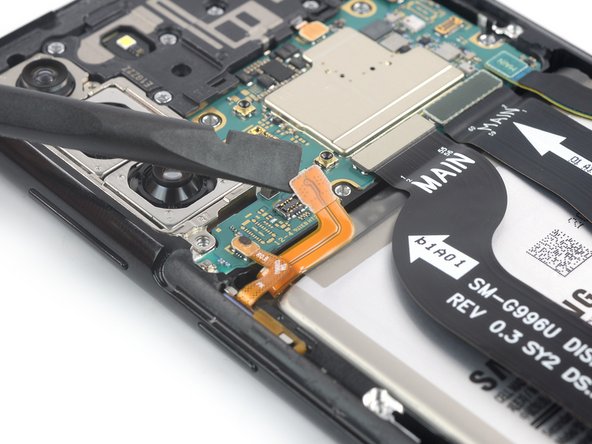
- Grab a spudger and gently pry up the battery connector straight out of its socket. Keep it steady and avoid any wiggle-wiggle. If you need a hand with tools or the process, you can always schedule a repair.
Tools Used
Step 15

- Grab your trusty Phillips screwdriver and start unscrewing the six screws that are holding the loudspeaker assembly in place. Each screw is about 3.9 mm long, so make sure to keep them safe while you work your magic!
Step 16


- Time to get this repair started! Insert an opening pick into the gap between the top edge of the loudspeaker assembly and the midframe. This is where the magic begins.
- Now, use that trusty opening pick to pry up the loudspeaker assembly by gently tilting it downwards. You're making great progress!
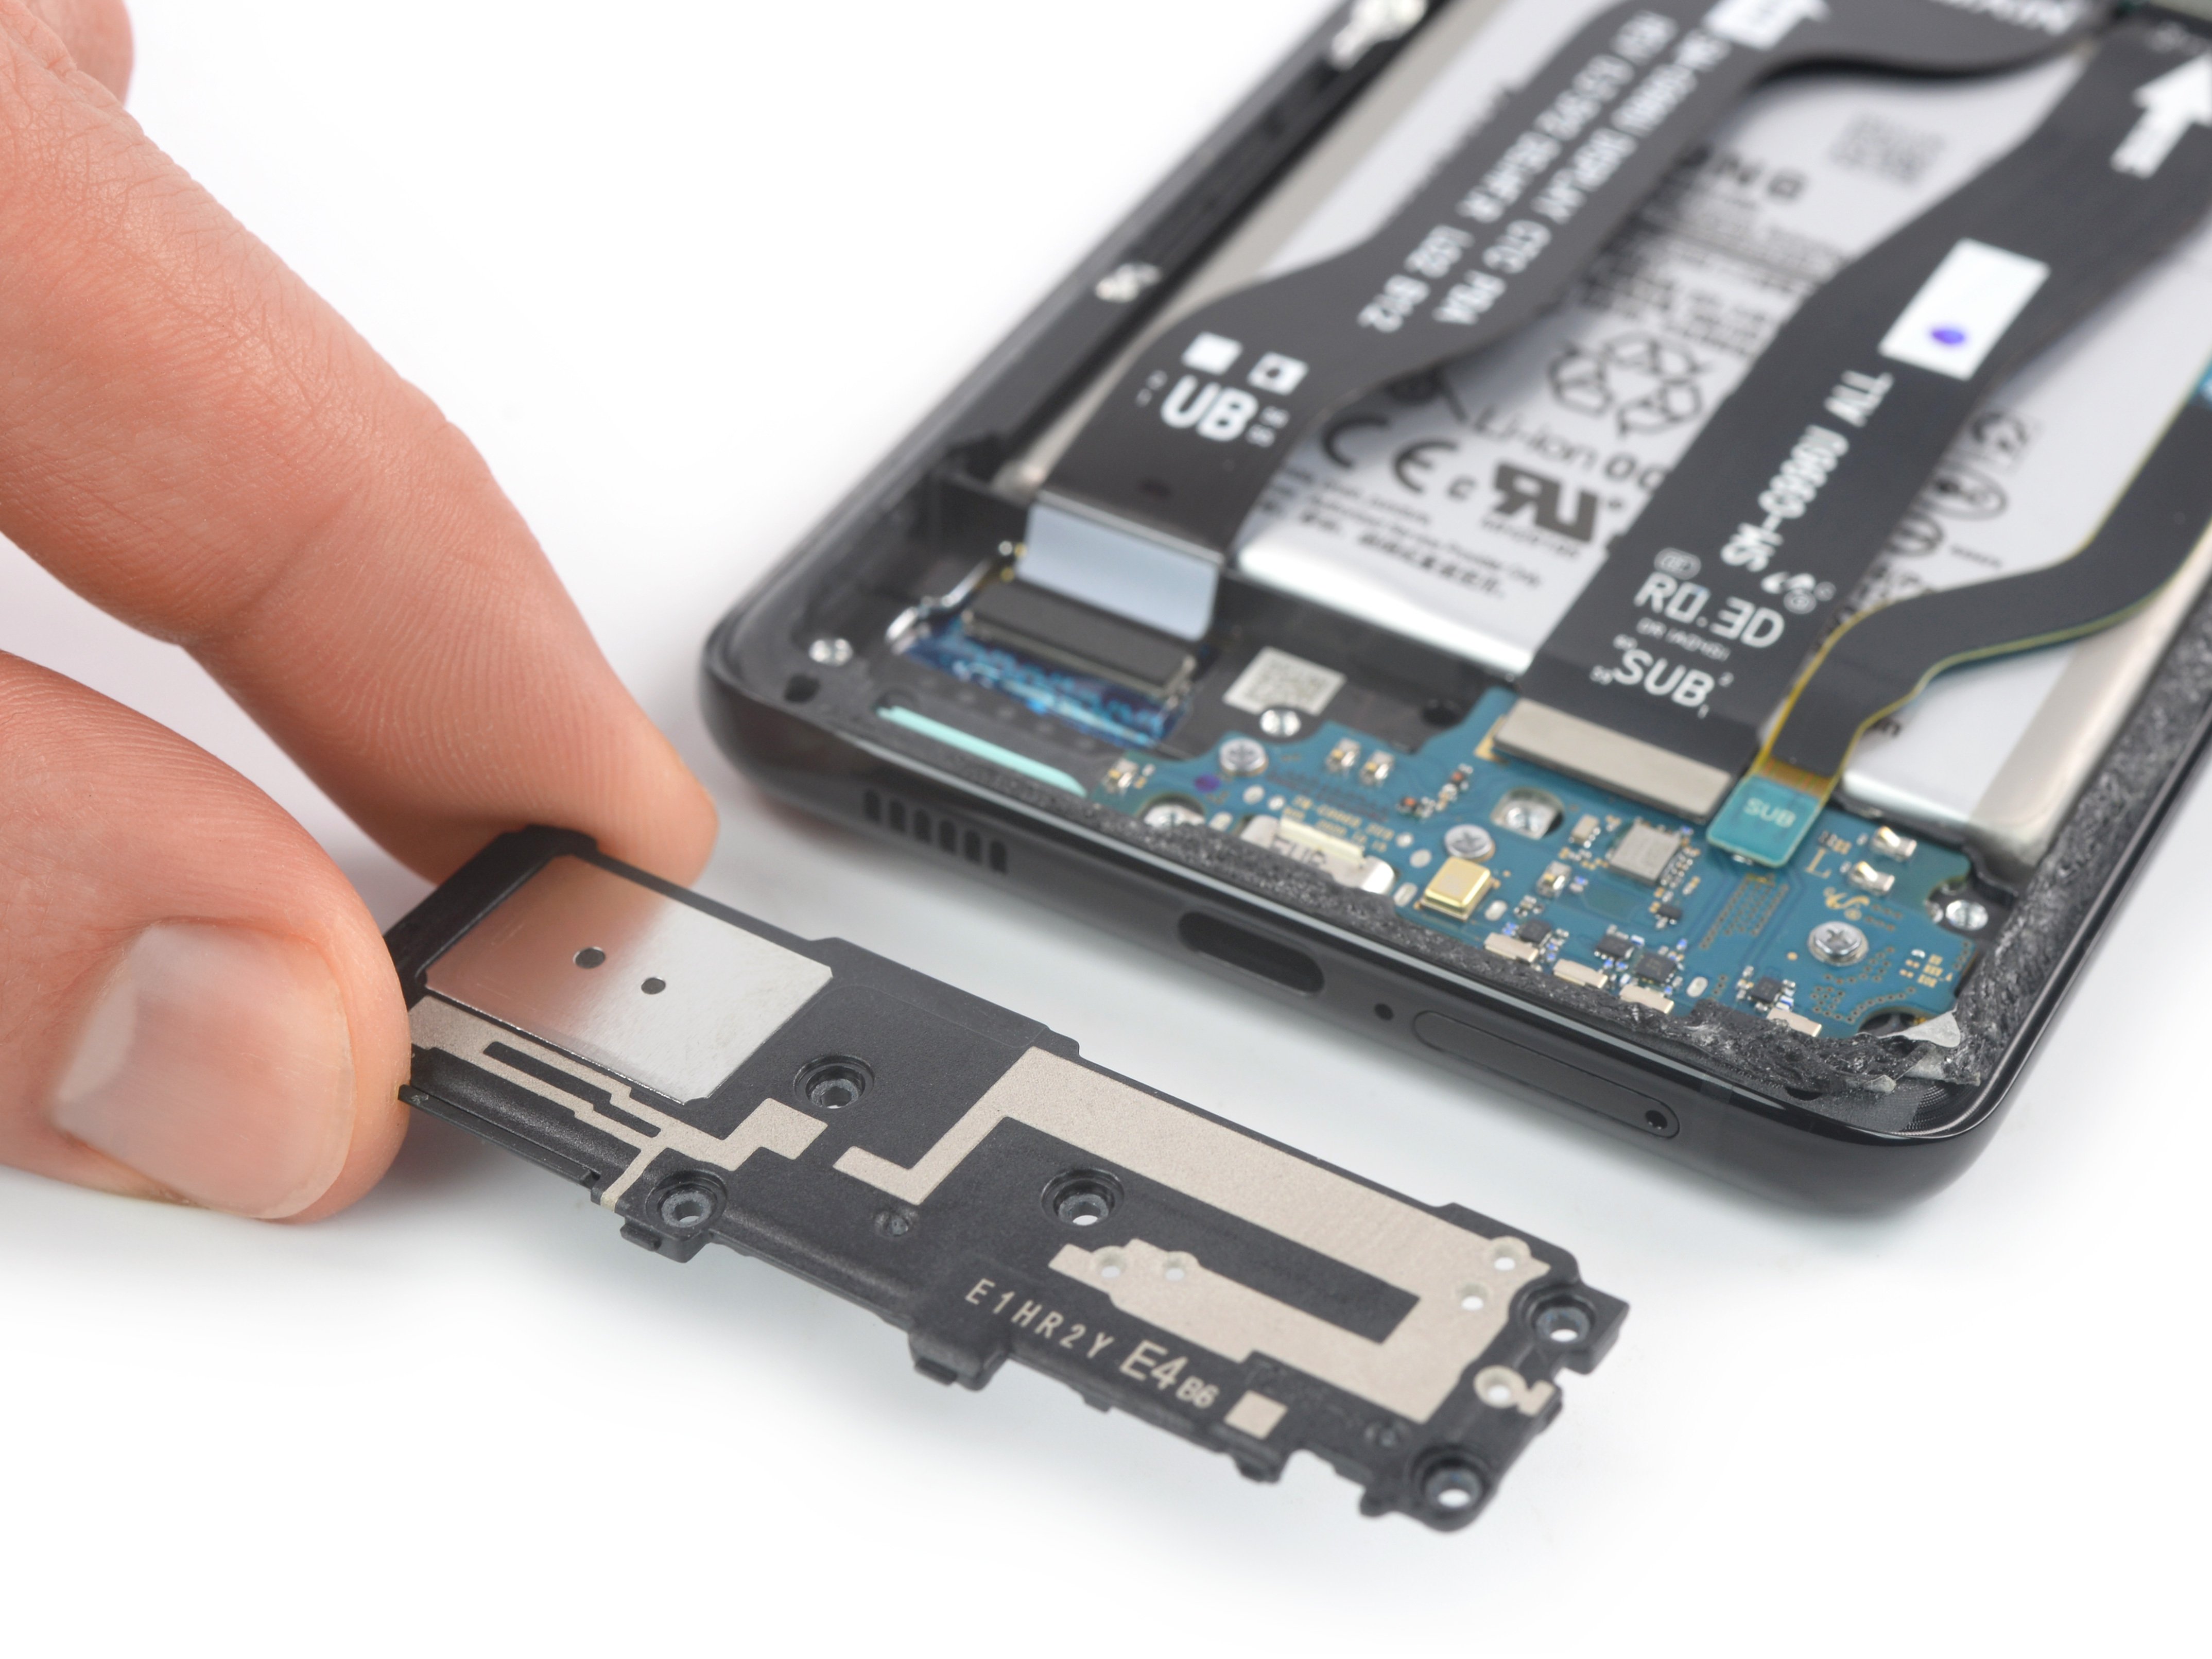
Step 17


- Take out the loudspeaker assembly with care.
- When putting things back together, fresh adhesive is your friend—just make sure to clean the area first with isopropyl alcohol (over 90%).


