
Samsung Galaxy S21 Plus Rear Camera Replacement
Duration: 45 minutes
Steps: 28 Steps
Ready to swap out the rear camera on your Samsung Galaxy S21 Plus? This guide walks you through it on the SM-G996B/DS (international) model. If you're working on a different version, you might spot an extra antenna cable near the midframe edge—watch for that surprise guest. Skipping new adhesive seals during reassembly means your phone will still work just fine, but it could lose its water resistance superpowers. Grab some fresh adhesive to stick everything back together when you're done.
Step 1

Feel free to use a hair dryer, heat gun, or hot plate to loosen things up, but don’t get carried away—too much heat can upset your phone’s display or battery.


Step 2


Cracked back cover giving you trouble? If your suction handle just won't stick, grab some strong tape and try lifting the cover that way. Or, if you're feeling crafty, glue the suction handle in place with superglue, let it set, and you're good to go.
Having a hard time making a gap? Hit it with a bit more heat—this will loosen up that stubborn adhesive. Just follow the iOpener instructions so things don’t get too hot to handle.
- Grab a suction handle and stick it to the bottom edge of the back cover, right up against the edge for the best grip.
- Gently pull on the suction handle to lift the back cover just enough to create a tiny gap between it and the frame.
- Slide an opening pick into that little gap you just made.
- Carefully glide the opening pick down to the bottom left corner to cut through the adhesive.
- Keep that opening pick in place to stop the adhesive from sealing back up.
Tools Used

Step 3


- Slip in a second opening pick at the bottom edge of your phone.
- Gently slide the pick towards the bottom-right corner to break through the adhesive.
- Keep the picks in place to stop the adhesive from sealing up again.
Step 4


If the adhesive starts acting stubborn and tough to slice through, it probably cooled off. Just throw your iOpener on it for a couple minutes to warm things up again.
- Pop a third opening pick into the bottom right corner of your phone.
- Gently slide the pick along the right edge, cutting through that sticky adhesive like a pro.
- Leave the pick in the top right corner so the adhesive doesn't decide to reseal itself. You've got this!
Tools Used
Step 5


Keep it chill near the camera area—just slide in the tip of your opening pick (about 4-5 mm) to steer clear of any camera mishaps or smudges.
- Pop a fourth opening pick under the top right corner—think of it as giving your phone a little lift.
- Glide that pick along the top edge to gently slice through the sticky adhesive. Smooth moves only.
- Let the pick chill in the top left corner to keep the adhesive from trying any sneaky resealing tricks.
Step 6


When you're sliding near the power button, just dip in the very tip of your opening pick (think 3-4 mm). That keeps the power and volume button flex cable out of harm’s way!
- Time to get this repair started! Insert a fifth opening pick underneath the bottom left corner, and gently pry it open.
- Now, slide the opening pick along the left edge of the back cover to slice through the remaining adhesive. Take your time and work carefully to avoid any damage.
Step 7


- Time to pop off the back cover! Carefully lift it off, and you're in business.
- Now, as you're putting everything back together:
- Here’s a great opportunity to power on your phone and make sure all the functions are working smoothly before you seal everything up. Just remember to power it down again before continuing, we don’t want any surprises later!
- Use tweezers or your fingers to gently remove any leftover adhesive chunks. Got some sticky residue? No problem—grab some high-concentration (over 90%) isopropyl alcohol and wipe it clean.
- If you're using Samsung's custom-cut adhesives, we've got a handy guide for that.
- Working with double-sided tape? Follow this guide for a smooth setup.
Step 8


Handle with care—don't poke holes or bend the battery, or it might leak nasty chemicals or even catch fire. Also, watch out for that cable running under the charging coil—work slowly and stop if your tool catches on it. If you need a hand, you can always schedule a repair.
- Let's get this repair started! Begin by carefully inserting an opening pick under the left bottom end of the NFC antenna and charging coil assembly.
- Now, gently slide the opening pick along the bottom left edge of the assembly to loosen it from the battery. Take your time and be patient – we've got this!
Step 9


- Hook a plastic opening tool or pick beneath the bottom edge of the NFC antenna and charging coil assembly. Gently work it along the bottom to separate it from the loudspeaker. Take your time—patience makes perfect! If you need a hand, you can always schedule a repair.
Step 10


- Grab your trusty spudger and gently lift the charging coil connector straight up from its socket—it pops out with a little nudge!
Tools Used

Step 11


- Grab your spudger and gently pop the NFC antenna connector straight up from its socket—like opening a stubborn soda can!
Tools Used
Step 12

- Grab your Phillips screwdriver and zip out those five 3.9 mm screws holding down the NFC antenna and charging coil. Let's get this assembly loose!
Step 13


- Grab some tweezers or use your fingers to gently lift out the NFC antenna and charging coil assembly. Take your time—careful hands make for a smooth removal. If you need help, you can always schedule a repair.
Step 14

- Let's get started! Use a spudger to carefully disconnect the battery cable by gently prying the connector straight up from its socket. Remember to take your time and be patient, we've got this!
Tools Used
Step 15


- Grab your trusty spudger and gently pry the display flex cable's upper connector straight up from its socket. You've got this!
Tools Used
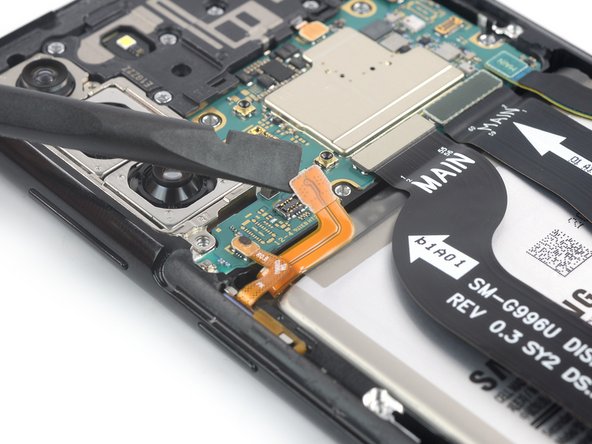
Step 16

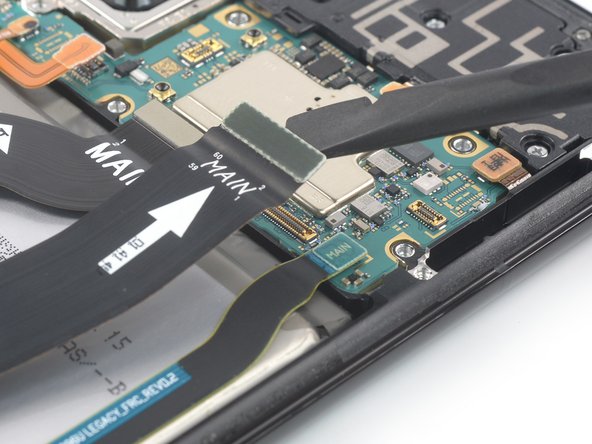
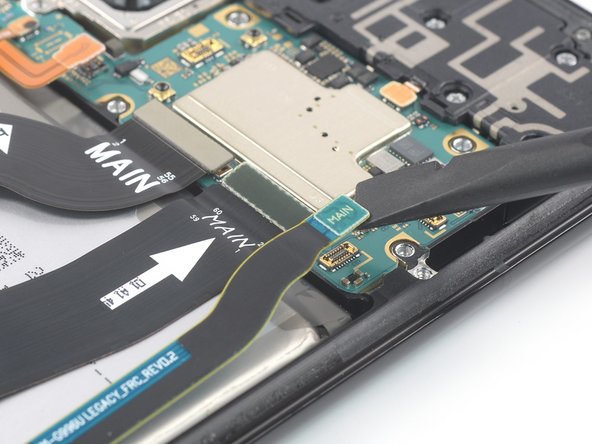
- Grab a spudger and gently pry up the main and interconnect flex cables from the motherboard. Just lift their top connectors straight up from their sockets—easy does it.
Tools Used
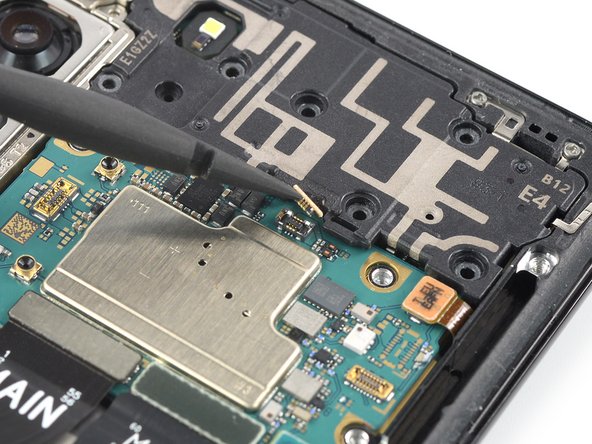
Step 17

- Grab your trusty Phillips screwdriver and get ready to tackle those seven 3.9 mm-long screws holding the earpiece speaker assembly in place. You've got this!
Step 18

- Grab your trusty spudger and give that earpiece speaker cable connector a gentle pop straight up out of its socket—like you’re lifting a tiny lid on a treasure chest.
Tools Used
Step 19


- Slip your spudger under the bottom left corner of the earpiece speaker assembly—like you’re sneaking a fry from the bottom of the bag.
- Gently lift the earpiece speaker assembly with your spudger. Give it a little nudge, no need to wrestle.
Tools Used
Step 20


- Time to get up close and personal with those tiny components! Use a pair of tweezers or your fingers to carefully remove the earpiece speaker assembly - it's like a little puzzle piece waiting to be freed.
- Reassembly time! Apply new adhesive where it's necessary, and don't forget to clean the relevant areas with isopropyl alcohol (>90%) - a clean slate is a happy slate. If you're feeling stuck, remember that a little patience and practice go a long way.
Step 21
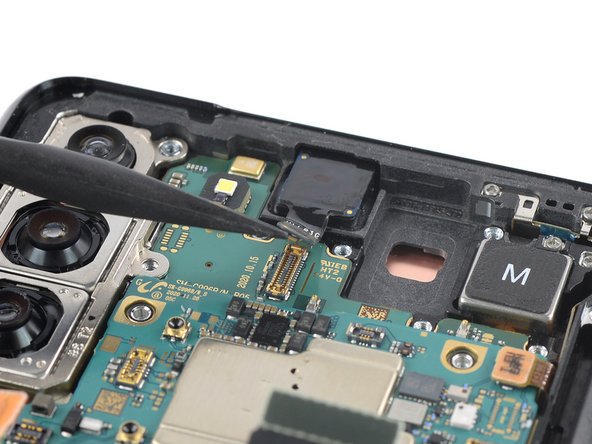

- Grab your spudger and gently lift the front-facing camera cable connector straight up from its socket. No need to rush – just ease it off carefully.
Tools Used
Step 22


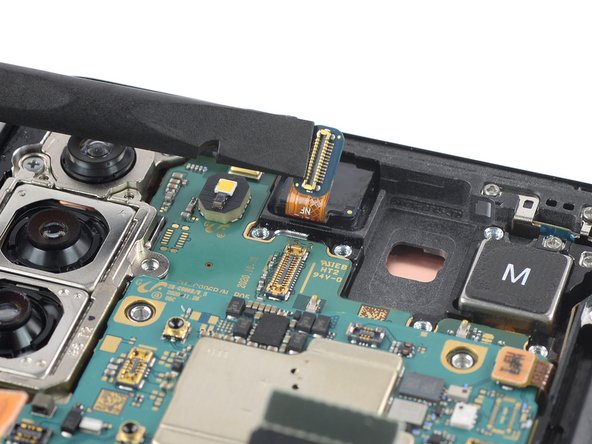
Take it easy when bending the cable—avoid sharp folds and just give it a gentle curve to keep it in top shape!
- Grab your trusty spudger and gently pop the power button flex cable straight up out of its socket. No need to rush – give it a little wiggle if it’s feeling stubborn.
- Swing that flex cable aside with a smooth bend, keeping it safely out of harm’s way while you work on getting the motherboard out.
Tools Used
Step 23

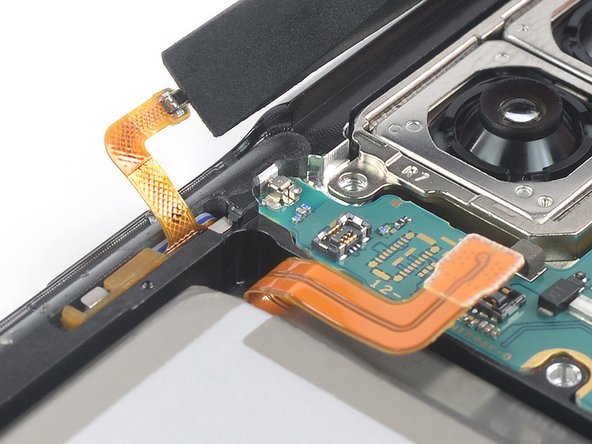
Handle that cable gently—no sharp bends! Just give it a friendly curve to keep it happy and damage-free.
- Grab your spudger and gently pry the power antenna flex cable connector straight up out of its socket—think of it as lifting a tiny lid without forcing it.
- Carefully bend the flex cable to one side with your spudger, making sure not to put any unnecessary stress on it when you're removing the motherboard. Stay gentle, stay confident!
Tools Used
Step 24

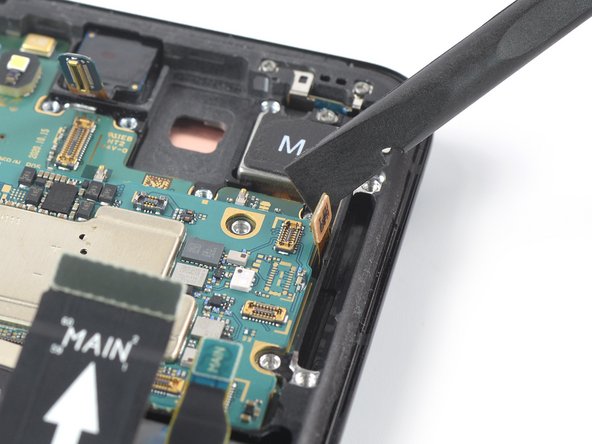
Be mindful not to let any cables get tangled up with the motherboard during removal. Keeping things untangled will help prevent any damage to those delicate wires.
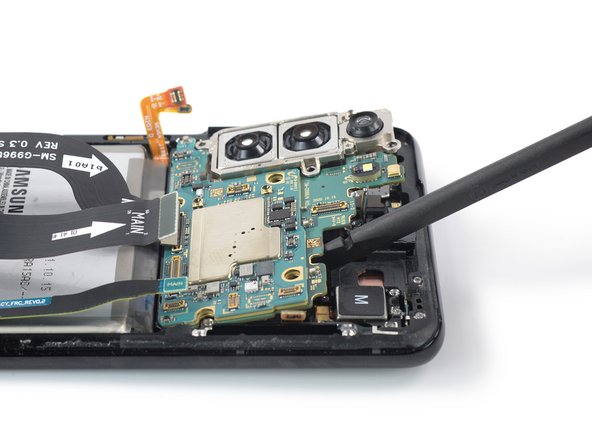
- Slide a spudger gently under the top edge of the motherboard assembly, right next to the vibration motor.
- Use your spudger to carefully lift and pry up the motherboard assembly—think of it as giving it a friendly nudge to loosen things up.
Tools Used
Step 25
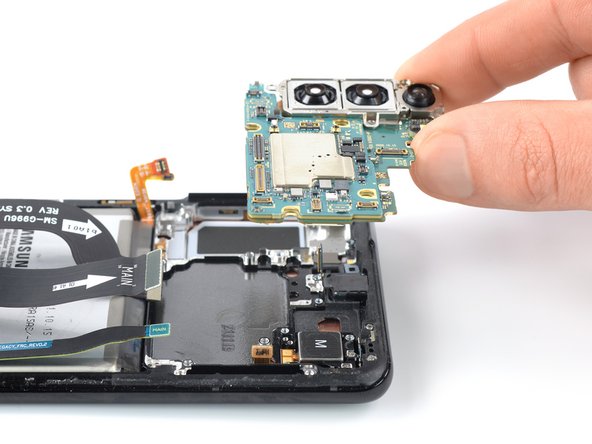

- Gently lift out the motherboard assembly along with the rear cameras. Keep it steady and avoid forcing anything—if it feels stuck, take a moment to double-check for hidden screws or clips. Need a hand? You can always schedule a repair with Salvation Repair.
Step 26
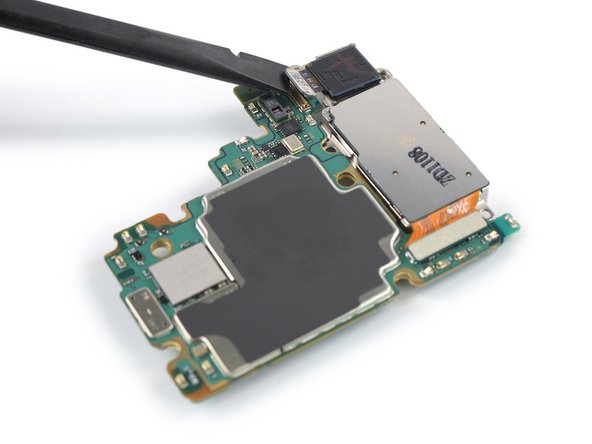
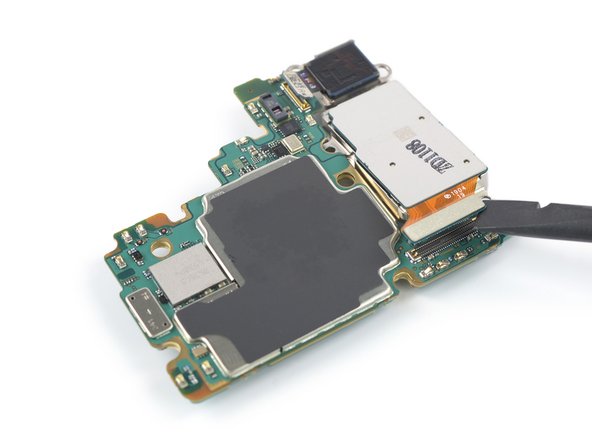

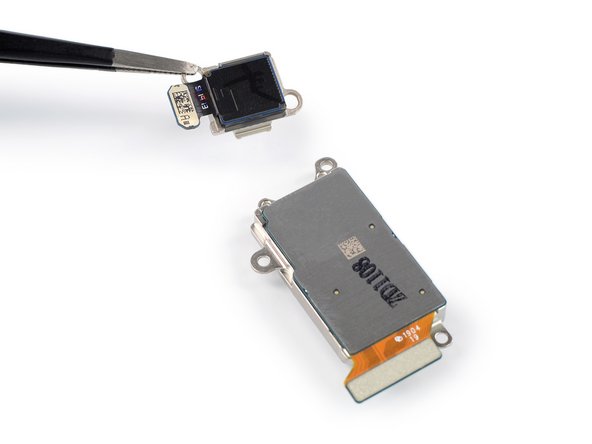
- Grab your trusty spudger and gently pop the ultra wide camera flex cable connector straight up—like you're unplugging a tiny dance partner.
- Next, use the spudger to lift the wide and tele camera assembly connector right out of its socket. Keep it smooth and steady—no wrestling required!
Tools Used
Step 27


- Gently wiggle the camera assembly loose from the motherboard using tweezers or your fingers—slow and steady wins the race here.
Step 28


- Almost done! If possible, power on your device to make sure everything is working smoothly before sealing it up.
- Take a quick glance at your new replacement part and the original one – you might need to swap some components or remove adhesive backing before installing the new part.
- To put everything back together, just follow these steps in reverse. Easy peasy!
- Once you've finished the repair, test it out to make sure all is well. If you need help, check out our troubleshooting tips or schedule a repair with Salvation Repair.
- Don't forget to responsibly recycle your e-waste with an R2 or e-Stewards certified recycler.
- If things didn't quite go as planned, don't worry! Try some basic troubleshooting or ask our community for help. You got this!


