Samsung Galaxy S21+ Screen Replacement Guide: DIY Tutorial
Duration: 45 minutes
Steps: 27 Steps
SM-G996B/DS
let’s get that battery down to below 25% before we dive in!
Just a friendly reminder:
Hey there! Ready to tackle replacing the cracked screen on your Samsung Galaxy S21 Plus? We performed this repair on the SM-G996B/DS (international) model, but keep in mind that other models may have an extra antenna cable to watch out for. If the frame looks off, it’s crucial to swap it out to ensure your new screen fits snugly and doesn’t get damaged from wonky pressure. And if your battery is giving you trouble, take some precautions. Before you dive into the repair, make sure your battery level is below 25% to lower the chances of any unexpected accidents. Just a heads up: This guide is all about swapping the screen, leaving the original frame and motherboard untouched. But hold up! Some replacement screens for this phone come with a new frame included, which means a whole different ball game. Double-check your parts before you jump in. And remember, if you skip replacing the adhesive seals later on, your device may work fine but kiss that water protection goodbye. Before you start, make sure you’ve got replacement adhesives for both the rear glass and the screen. And if you hit a snag, don’t forget you can always schedule a repair for a helping hand. Happy repairing!
Step 1

– Grab your trusty iOpener and give that back cover a warm hug for at least three minutes! This will help loosen up the adhesive underneath, making it easier to get in there and do your thing.
Tools Used

Step 2


– Grab a suction handle and stick it right on the bottom edge of the back cover, keeping it nice and close to the edge.
– Give that back cover a gentle lift with the suction handle to make a tiny gap between it and the frame.
– Slide an opening pick into the gap you’ve just created.
– Now, slide that opening pick over to the bottom left corner to slice through the adhesive.
– Keep the opening pick in place to stop that pesky adhesive from resealing.
Tools Used

Step 3


– Grab a second opening pick and gently slide it in at the bottom edge of your phone.
– Now, glide that pick over to the bottom right corner to cut through the adhesive like a pro.
– Keep those opening picks in place to stop the adhesive from getting all clingy again.
Step 4


If the adhesive is giving you a hard time to cut, it’s probably feeling a bit chilly. Just give it a quick warm-up with your trusty iOpener for a couple of minutes to get it back in action.
– Pop in a third opening pick at the bottom right corner of your phone, just like you’re tucking in a cozy blanket.
– Gently slide that opening pick along the right edge of your phone to neatly slice through the adhesive—like spreading butter on warm toast.
– Keep that opening pick snug in the top right corner to stop the adhesive from getting all clingy again.
Tools Used
Step 5


Hey there, tech enthusiast! To prevent camera damage when slicing near the camera assembly, try using only a wee tiny piece of your opening pick, about 4-5 mm, so you can still capture life’s precious moments!
– Grab a fourth opening pick and slide it under the top right corner of your phone.
– Gently glide that pick along the top edge to cut through the adhesive with ease.
– Keep the opening pick in the top left corner to stop the adhesive from sealing back up on you.
Step 6


– Slide a fifth opening pick right under the bottom left corner, like you’re sneaking a surprise!
– Now, glide that opening pick along the left edge of the back cover to cut through the last bits of adhesive—smooth sailing ahead!
Step 7


– Pop off the back cover with care and finesse!
– When it’s time to put everything back together:
Step 8


Remember, gently does it! Avoid poking or folding the battery with your tool – a twisted or poked battery might spill some not-so-fun chemicals or decide to throw a little heat party.
Keep an eye out for the sneaky cable snaking beneath the charging coil. Take it slow and pause if your pick gets cozy with the cable. No tug-of-war here!
– Slide an opening pick under the left bottom corner of the NFC antenna and charging coil assembly. It’s like giving it a little nudge!
– Gently glide the pick along the bottom left edge of the assembly to help it break free from the battery. You’ve got this!
Step 9


– Slide an opening pick underneath the lower end of the NFC antenna and charging coil assembly with a gentle touch.
– Carefully glide the opening pick along the base of the assembly to detach it from the loudspeaker.
Step 10


– Grab a spudger and gently pry the charging coil connector straight up from its socket. You’ve got this!
Tools Used


Step 12

– Grab your trusty Phillips screwdriver and tackle those five 3.9 mm screws holding the NFC antenna and charging coil assembly in place. You’ve got this!
Step 13


– Whoa there, partner! It’s time to get your hands on some serious tech adventure. Grab your trusty tweezers or fingers and carefully untangle that NFC antenna and charging coil assembly. Not quite sure how? No worries, you can always schedule a repair!

Step 15

– Time for some screwtacular action! Loosen up those six 3.9 mm-long screws, holding the loudspeaker assembly down, using a Phillips screwdriver. Once you’re done, you’ll be ready to rock ‘n’ roll! If you need help, you can always schedule a repair.
Step 16


– Slide that trusty opening pick into the little gap at the top edge of the loudspeaker assembly, right next to the midframe. You’ve got this!
– Now, give your opening pick a gentle nudge to lift the loudspeaker assembly up by angling it downwards. Easy peasy!
Step 17


– First up, let’s get that loudspeaker assembly out of there. It’s time for it to take a little break!
– When you’re putting everything back together, don’t forget to add some fresh adhesive where needed. Just remember to clean those areas first with some isopropyl alcohol (>90%) for a good bond!
Step 18


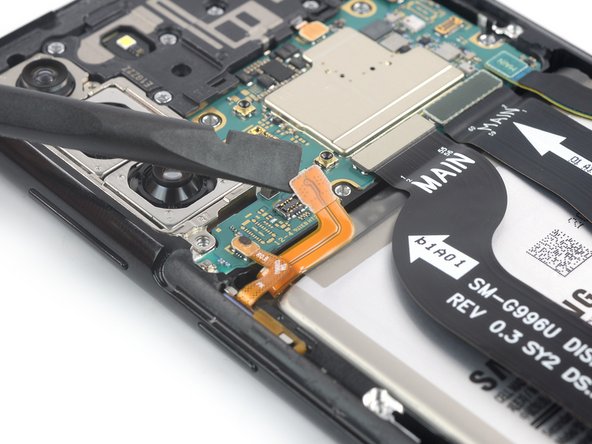
– Grab your trusty spudger and gently pry the display flex cable’s upper connector straight up from its socket. It’s like giving it a little lift!
Tools Used
Step 19


– Grab your trusty spudger and gently pry the display flex cable’s bottom connector straight up from its cozy socket. It’s like giving it a little nudge to say, ‘Time to go!’
– Now, with a bit of finesse, use your fingers or a pair of tweezers to carefully lift out the display flex cable. Treat it like a delicate flower!
Tools Used
Step 20

– Get cozy with your device and introduce it to a toasty iOpener to gently release the adhesive. Let the iOpener work its magic for a solid 5 minutes.
– If you need help, you can always schedule a repair
Tools Used
Step 21
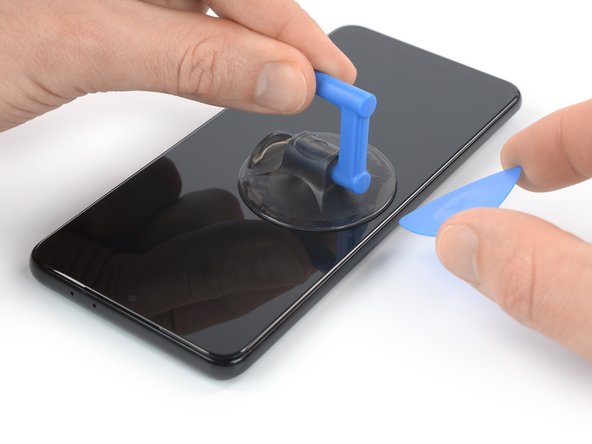
– Alrighty, once the screen is nice and toasty, grab a suction handle and stick it on the left edge of the screen as close as you can.
– Gently lift the screen using the suction handle to create a tiny gap between the screen and the frame.
– Take an opening pick and carefully wiggle it into the gap between the midframe and the screen.
– Slide that opening pick up to the top left corner of the screen to cut through the sticky stuff holding it down.
– Don’t forget to leave the opening pick there to keep the sticky stuff from sticking again.
Tools Used
Step 22


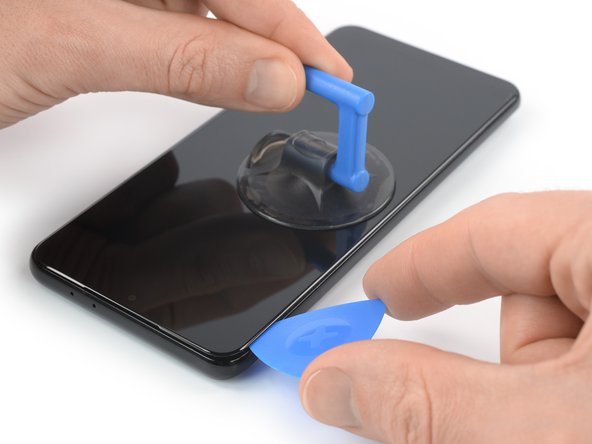
– Gently place a second opening pick at the top left corner and smoothly glide it down to the lower left corner of the screen to gracefully cut through the adhesive.
– Keep the opening pick in position to prevent the adhesive from sealing back up.
Step 23
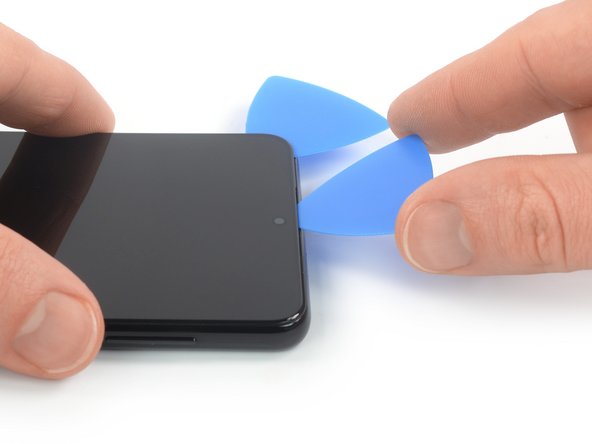

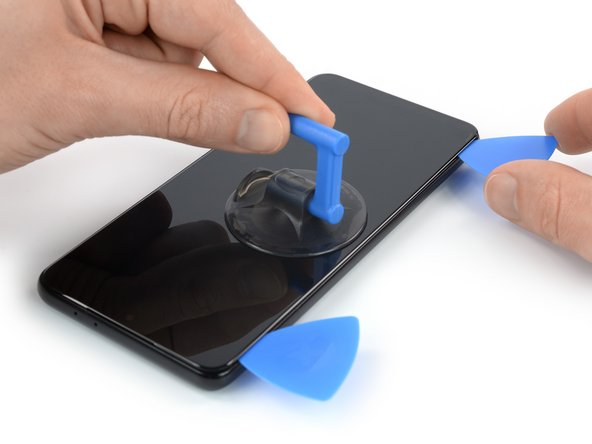
When you’re slicing near the front-facing camera, just slide in the tip of that opening pick (about 2-3 mm) to keep the camera safe and sound. No smudges or damage here, just a smooth repair process!
– Get groovy and slide a third opening pick at the top left corner of the screen.
– Now, boogie on down and slide the opening pick along the cool top edge of the phone to slice through the adhesive.
– Hang loose and keep the opening pick in place to prevent that adhesive from resealing. Stay chill!
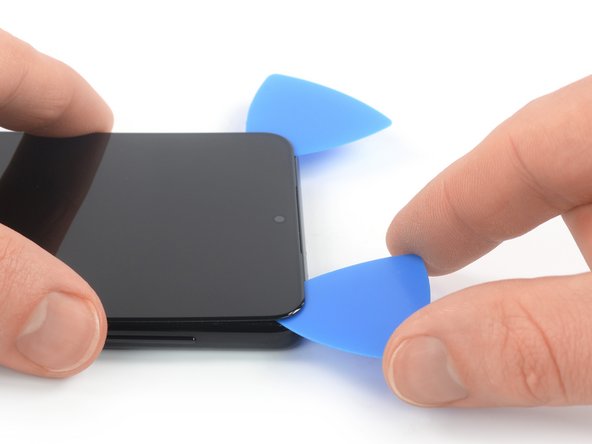
Step 24


– Slide a fourth opening pick right under that top right corner of the screen—it’s like a little dance move for your tools!
– Gently glide the pick down the right edge of the screen, cutting through that sticky adhesive like butter.
– Keep that pick in place to make sure the adhesive doesn’t play tricks on you and reseal.

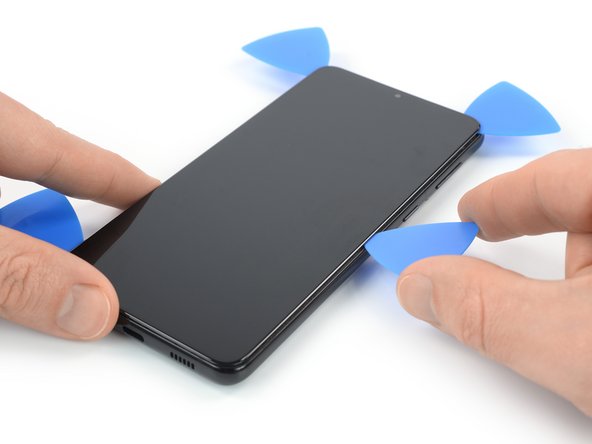
Step 25

– Pop in a fifth opening pick at the bottom right corner of the screen, just like tucking in a cozy blanket.
– Gently glide that opening pick along the bottom edge to cut through the last bit of adhesive – it’s like spreading butter on toast!
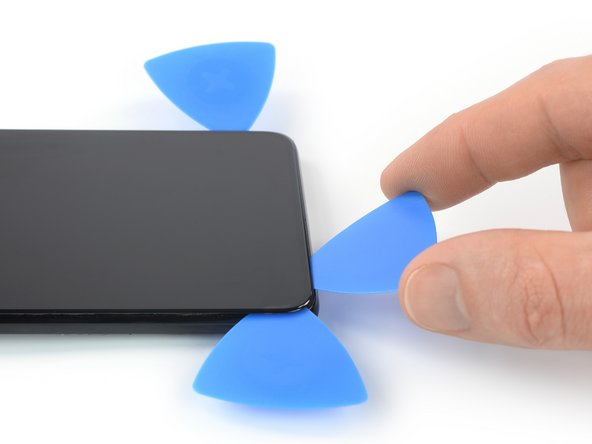
Step 26
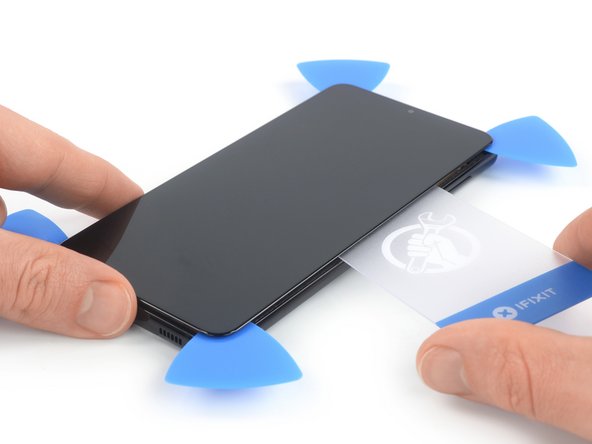

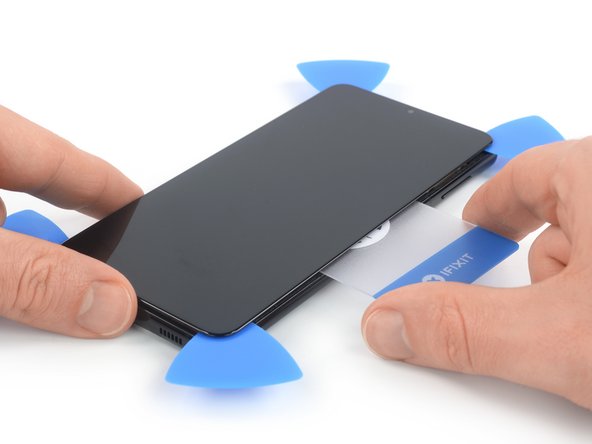
Step 27
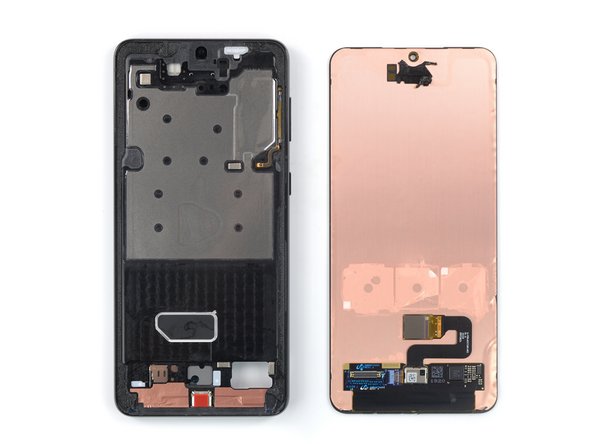

– First things first, gently take off the screen—it’s time for a little makeover!
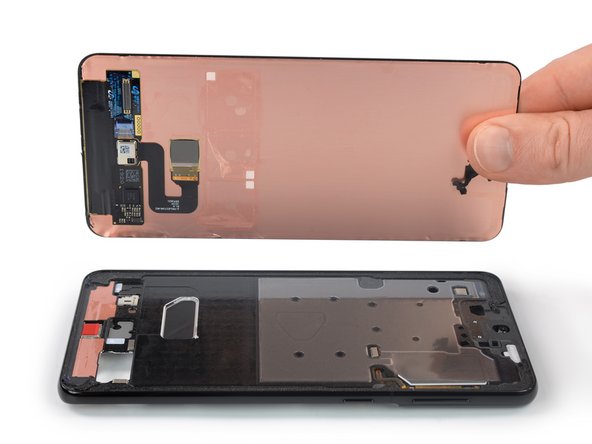
– Next up, let’s play matchmaker! Take a good look at your shiny new replacement part and compare it with the original. You might need to swap some bits and bobs from your old screen to make everything fit just right.
– Before you stick anything down, grab some isopropyl alcohol (90% or more) and clean the areas that need new adhesive. Once that’s all spick and span, apply the fresh adhesive where it’s needed. You’re almost there!


