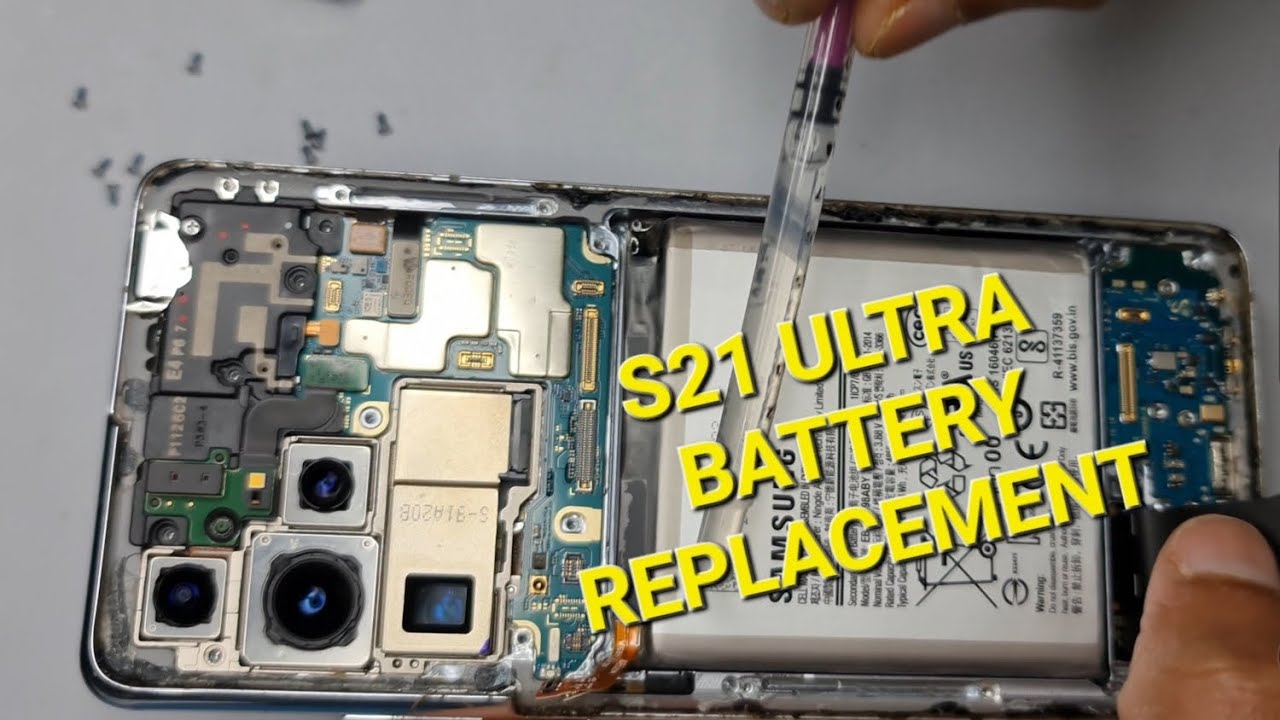
Samsung Galaxy S21 Ultra Battery Replacement Guide: Step-by-Step DIY
Duration: 45 minutes
Steps: 27 Steps
SM-G998B/DS
Hey there! Just a quick heads up: make sure to drain that battery below 25% before diving into your phone disassembly. Safety first, right?
Ready to give your Samsung Galaxy S21 Ultra a new lease on life? Let’s swap out that tired or lifeless battery! This guide is based on the international SM-G998B/DS model, but keep in mind that other models might have an extra antenna cable lurking in the midframe edge. If your battery is looking a bit puffy, be sure to take the necessary precautions. For your safety, make sure to drain your battery below 25% before diving into the disassembly. This helps minimize the risk of any unexpected thermal surprises if the battery gets a little too adventurous during the repair. And just a heads up: if you skip replacing the adhesive seals when putting everything back together, your device will still work like a champ, but might just lose some of its water resistance. So, grab some replacement adhesive to securely reattach everything when you’re done. If you need help, you can always schedule a repair.
Step 1
Make sure to unplug and power down your phone before diving into the repair adventure!
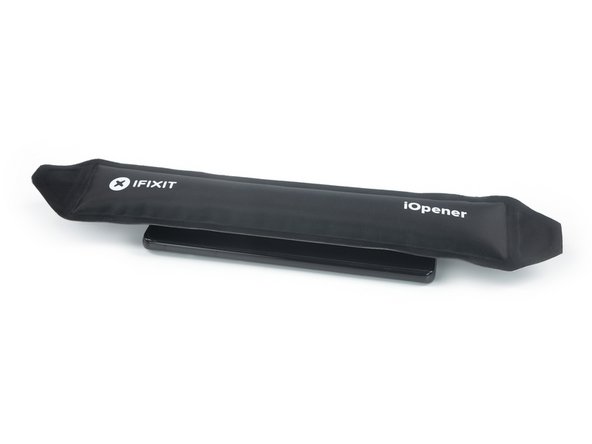
– Grab your trusty iOpener and give it a warm hug on the back cover for at least three minutes. This will help loosen up that sticky adhesive hiding underneath, making your repair journey a breeze!
Tools Used
Step 2
– Grab a suction handle and stick it right on the bottom edge of the back cover—let’s keep it as close to the edge as possible.
– Give that back cover a gentle lift using the suction handle to create a tiny gap between it and the frame.
– Now, it’s time to slide an opening pick into that gap you’ve just made.
– Carefully glide the opening pick down to the bottom left corner to slice through the adhesive like a pro.
– Keep that opening pick in place to stop the adhesive from sealing back up. You’ve got this!
Tools Used
Step 3
– Grab another opening pick and bring it down to the lower part of your device.
– Gently slide it towards the bottom right corner to cut through the sticky stuff.
– Keep those opening picks in place to make sure the stickiness doesn’t try to glue back together.
Step 4
If the adhesive has gotten a bit stubborn and tough to slice through, it’s probably feeling a little chilly. Give it a quick warm-up session with your trusty iOpener for a couple of minutes to loosen it up.
– Pop in a third opening pick at the bottom right corner of your phone.
– Gently slide that opening pick along the right edge to cut through the adhesive like a pro.
– Keep that opening pick in the top right corner to stop the adhesive from sticking back down.
Tools Used
Step 5
Hey there! When you’re delicately working near the camera assembly, just remember to gently slide in the tip of the opening pick (~4-5 mm). This way, you’ll steer clear of any mishaps with the camera. Stay cool and carry on!
– Get ready to rock and roll – slide a cool fourth opening pick under the top right corner of your phone.
– Glide that opening pick along the top edge to cut through the adhesive like a breeze.
– Chill out with the opening pick in the top left corner to make sure the adhesive doesn’t try to stick it to you again.
Step 6
– Get ready to have some fun and insert a cool fifth opening pick right under that top left corner.
– Now, smoothly slide that opening pick along the left edge of the back cover to cut through the remaining adhesive.
Step 8
– Slide an opening pick right underneath the bottom left corner of the NFC antenna and charging coil assembly.
– Gently glide the opening pick along the bottom left edge of the assembly to separate it from the battery with ease.
Step 9
– Slide an opening pick underneath the bottom edge of the NFC antenna and charging coil assembly like you’re slipping a secret note to a friend.
– Gently glide that pick along the bottom of the assembly to gracefully detach it from the loudspeaker, like a smooth dance move.
Step 10
– Grab your trusty spudger and gently nudge the charging coil connector upwards, freeing it from its snug little home. You’ve got this!
Tools Used
Step 12
– Lay’er on that Phillips screw’d-er skillz, and let’s get tf outta here! Remove them five lil’ 3.9mm screws hol’ing down the NFC jinty and the charging hoo-haw assembly.
Step 13
– Get ready to rock and roll! Time to delicately remove the NFC antenna and charging coil assembly using a pair of tweezers or your trusty fingers.
Step 15
– Grab your trusty Phillips screwdriver and carefully unscrew the four 3.9 mm-long screws that are keeping the loudspeaker assembly in place. You’ve got this!
Step 17
– Get ready to rock and roll by removing the loudspeaker assembly. When it’s time to put things back together, spread some love with new adhesive in all the right places. Don’t forget to clean those areas with isopropyl alcohol (>90%) for that extra sparkle.
Step 18
If you’re not looking to pop off the motherboard or switch out the battery, feel free to breeze on past this step and dive into the next one!
– Grab your trusty spudger and gently lift the display flex cable by prying the connector straight up from its socket. You’ve got this!
Tools Used
Step 19
– To disconnect the main and interconnect flex cables from the motherboard, let’s get friendly with a spudger! Gently pry their upper connectors straight up from their sockets like you’re doing a little wiggle dance.
Tools Used
Step 20
– Grab your trusty spudger and gently lift that interconnect flex cable off the daughterboard by prying its bottom connector straight up from its cozy socket. You’ve got this!
– Now, with a little finesse, use your fingers or tweezers to delicately coax the interconnect flex cable out. Easy peasy!
Tools Used
Step 21
– Get ready to work some magic! Use a spudger to disconnect the main flex cable from the daughterboard by prying its bottom connector straight up from its socket.
– Time to show off your skills! Use your fingers or a pair of tweezers to carefully remove the main flex cable.
Tools Used
Step 22
– Grab your trusty spudger and gently lift the power button flex cable right out of its socket—think of it as giving it a little hug goodbye!
– Now, with that same spudger, give the flex cable a gentle nudge to the side. This keeps it safe and sound while we tackle the battery removal. You’re doing great!
Tools Used
Step 23
As you tackle this step, remember to keep that cable in one piece! Bend it gently, like you would a noodle, but steer clear of any sharp folds to keep it happy and damage-free.
– Gently fold the display flex cable towards the charging port to clear the way for the battery. You’ve got this!
Step 24
Removing the battery adhesive from the Samsung Galaxy S21 Ultra is no small feat! If the high isopropyl alcohol isn’t doing the trick, it’s time to heat things up a bit. Grab an iOpener, lay it on the screen for a cool two minutes, and watch that stubborn adhesive start to loosen its grip underneath the battery.
– Drop 1-2 splashes of high-octane (over 90%) isopropyl alcohol into the little nooks between the frame and the left and right edges of the battery.
– Give the isopropyl alcohol a couple of minutes to work its magic and seep into the battery adhesive—around two to three minutes should do the trick!
Tools Used
Step 25
For this step, pop that opening pick into the gap that’s playing hard to get between the midframe and the battery. This way, you’ll have a little extra wiggle room and some solid leverage to work with.
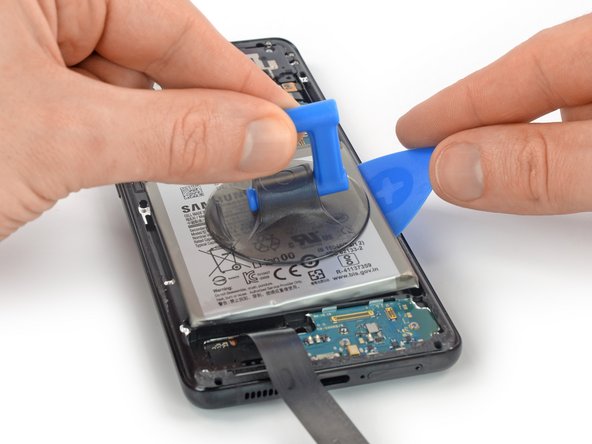
– Grab a suction handle and stick it to the battery, aiming for the edge like a pro.
– Slide an opening pick into the tiny gap between the battery and the frame.
– Twist that opening pick to wedge its long edge into the gap and get things moving.
Tools Used
Step 26
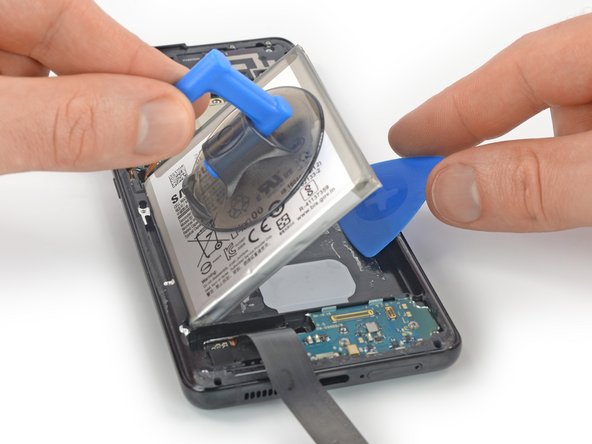
Whoa there, careful with that battery! Puncturing or bending it’s not cool, as it can lead to some seriously scary situations like chemical leaks or.. alarm bells ringing! thermal events. If you’re having trouble pulling it up, no worries, just douse it a bit more with some isopropyl alcohol and try again. Keep rocking!
– Lift the suction handle with a steady grip while angling the opening pick downward to gently nudge the battery free. Keep it cool and collected—you’re doing great!
Tools Used
Step 27
Hey there! Just a friendly reminder: it’s best to steer clear of reinstalling a battery that looks a bit worse for wear. Safety first, folks!
– First things first, let’s take out that battery! Don’t forget to gently peel away any leftover sticky stuff while you’re at it.
– If you’ve used isopropyl alcohol, hang tight for about ten minutes before popping in the new battery. We want to give that alcohol a chance to evaporate completely!
– Now, as you’re putting everything back together:


