
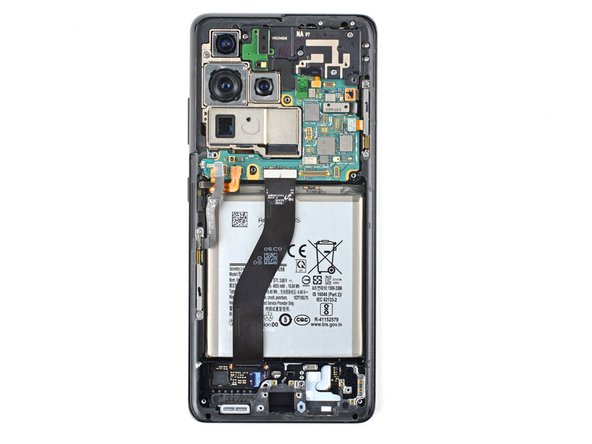
Samsung Galaxy S21 Ultra Screen and Battery Assembly Replacement
Duration: 45 minutes
Steps: 42 Steps
Heads up: This guide covers the screen and battery assembly. Get ready to give your device some TLC!
Ready to swap out the screen and battery assembly on your Samsung Galaxy S21 Ultra? This guide walks you through replacing the entire assembly — that’s the screen, battery, and frame all bundled together. Double-check you’ve got the right part before diving in. If your battery’s puffed up, take extra care—safety first. Before you start pulling things apart, fully discharge the battery to lower the risk of any thermal surprises if it gets nicked. Keep in mind, how well you reseal everything impacts water resistance, but your device will lose its IP rating after the repair.
Step 1


Oops! If your SIM eject tool ended up in a microphone hole, no stress—chances are the microphone is still perfectly fine.
- Pop the SIM-eject tool (or a carefully unfolded paperclip with street cred) into the tiny hole on the phone’s top edge.
- Give it a gentle push—like ringing a doorbell—until the tray slides out to say hello.
- Lift the tray out and set it aside; you’re one step closer to gadget glory.
Step 2

Turn off your phone and unplug it—no one wants a surprise buzz in the middle of a fix.
A hair dryer, heat gun, or hot plate can do the trick for loosening things up, but go easy on the heat. Too much and your screen or battery might throw a fit.
- Grab an iOpener and gently place it on the back cover. Hold it there for at least three minutes to help loosen up that stubborn adhesive underneath. When in doubt, take a breather and try again — patience is part of the process. If you need a hand, you can always schedule a repair.


Step 3


If your back cover looks like it’s auditioning for a glass-shattering contest, slap on some clear packing tape to give your suction cup a fighting chance. No suction cup? Super-strong tape works too. If all else fails, you can go rogue and superglue the suction cup right onto the cover.
Having trouble getting that first gap? Hit it with a bit more heat to loosen up the adhesive. Just follow the iOpener instructions and don’t go overboard with the heat—your device isn’t trying to become a grilled cheese.
- Stick a suction handle near the bottom edge of the back cover—get it as close to the edge as possible for maximum grip.
- Give the suction handle a gentle pull to open up a tiny gap between the back cover and the frame. You’re looking for just enough space to sneak in your next tool.
- Slide an opening pick into the gap you created. Don’t be shy—just ease it in.
- Glide the pick over to the bottom left corner and slice through that sticky adhesive holding things together.
- Leave the pick hanging out in the gap to keep the adhesive from getting any ideas about sticking itself back together.
Tools Used

Step 4


- Pop in a second opening pick along the bottom edge of your phone.
- Slide it over to the bottom right corner to slice through the sticky stuff.
- Let those picks chill in place so the adhesive doesn't sneak back together.
Step 5


If the adhesive feels too tough to cut through, chances are it's cooled off too much. Just warm it up again by applying your iOpener for a couple of minutes—think of it as giving the glue a little spa treatment to loosen up.
- Pop in a third opening pick at the bottom right corner of your phone.
- Gently glide that pick along the right edge to break the adhesive's grip.
- Keep the opening pick in the top right corner to stop the adhesive from sealing back up.
Tools Used
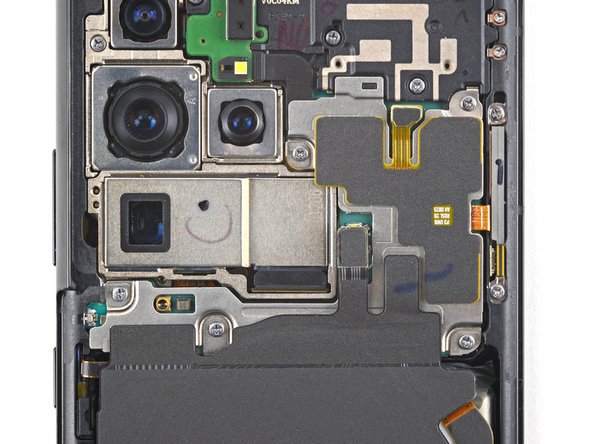
Step 6


When working near the camera assembly, keep your opening pick just at the tip—about 4-5 mm—so the camera stays clean and damage-free.
- Pop in a fourth opening pick right beneath the top right corner of your phone.
- Gently glide that opening pick along the top edge to slice through the adhesive like a pro.
- Keep that opening pick snug in the top left corner to stop the adhesive from sealing up again.
Step 7


As you work around the power button, just dip the tip of your opening pick in—think 3-4 mm max! That way, you'll keep the power and volume button flex cable safe and sound.
- Slip in a fifth opening pick just beneath the top left corner to get things started.
- Glide your opening pick along the left edge of the back cover, gently slicing through the remaining adhesive as you go.
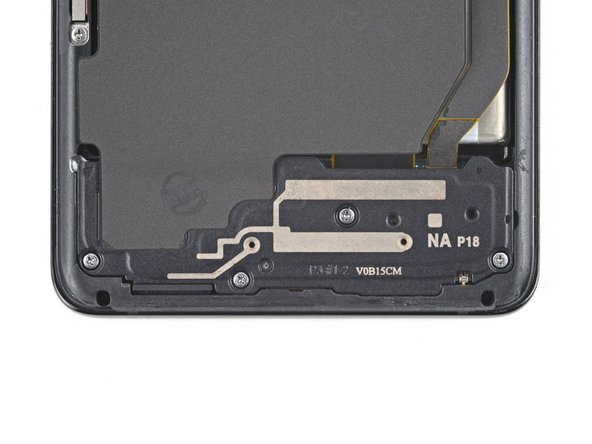
Step 8


- Pop off that back cover like you mean it.
- When you're putting things back together:
- This is the perfect moment to fire up your phone and check that everything's working before you seal it shut again. Just make sure to fully power it down before moving forward.
- Grab your tweezers (or fingers) and pick away any leftover adhesive bits. If the sticky stuff is holding out, a little heat can help loosen things up.
- Got custom-cut adhesive? Head over to our guide for the details.
- Rolling with double-sided tape? We've got a guide for that, too.
Step 9


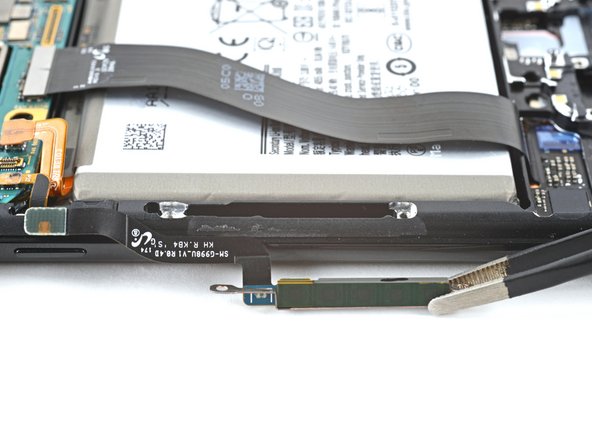
- Gently slide an opening pick under the left bottom edge of the NFC antenna and charging coil assembly. Carefully work the pick along the bottom left side to separate the assembly from the battery, keeping things smooth and steady. If you need a hand, you can always schedule a repair.
Step 10


- Grab your trusty spudger and gently pry the charging coil connector straight up from its socket. You've got this!
Tools Used

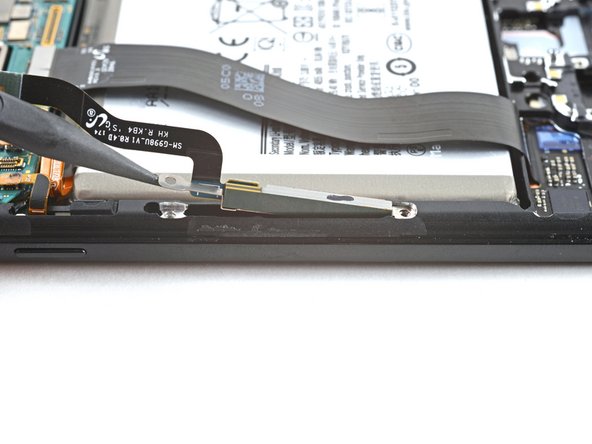
Step 11


- Grab a spudger and gently pry the NFC antenna connector straight up from its socket. Easy does it—just a little lift, and you're good to go. If you need a hand, you can always schedule a repair.
Tools Used
Step 12

- Grab your Phillips screwdriver and take out the five screws (they’re 3.9 mm long) holding the NFC antenna and charging coil assembly in place. Let’s get that hardware moving!
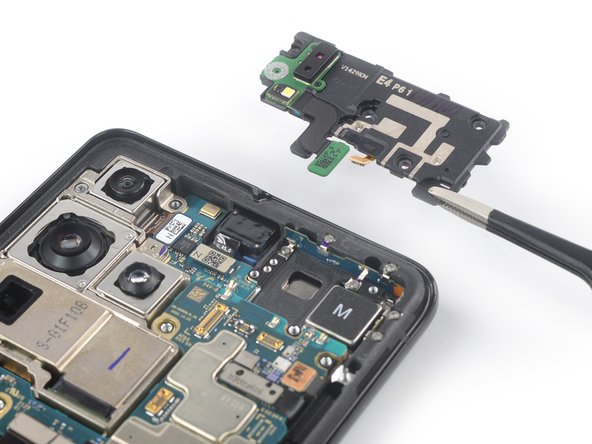
Step 13

- Grab your Phillips screwdriver and unscrew the four 3.9 mm-long screws holding the loudspeaker assembly in place.
Step 14

- Slide the tip of a spudger into the gap between the frame and the upper-left notch of the loudspeaker. Gently pry upward with the spudger to pop the loudspeaker free from its plastic clips. If you need a hand, you can always schedule a repair.
Tools Used
Step 15


- Grab some tweezers or your trusty fingers and gently lift out the NFC antenna, charging coil, and loudspeaker assembly. You've got this!
- Once you've done that, set the assembly aside. It'll be back in action during reassembly, so keep it safe!
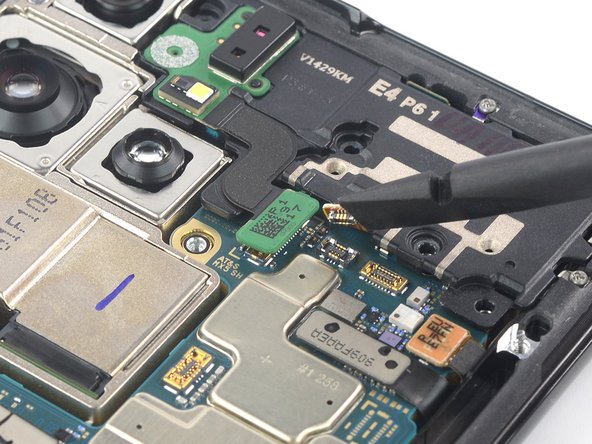
Step 16

- Grab your spudger like it owes you rent and gently pop the battery’s press connector loose. Easy does it—no drama, just a clean disconnect.
Tools Used
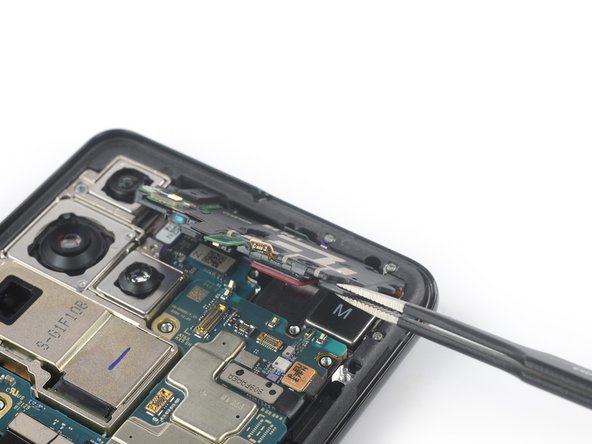
Step 17

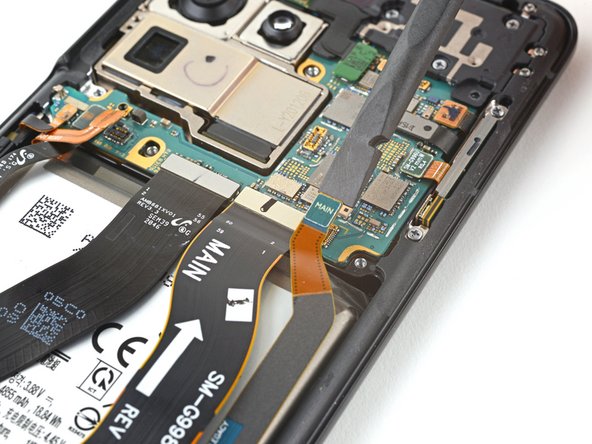

- Grab a spudger and gently pry up the connectors that link the main and secondary interconnect cables on the motherboard. Carefully disconnect them to keep everything in good shape. If you need a hand with this, you can always schedule a repair.
Tools Used
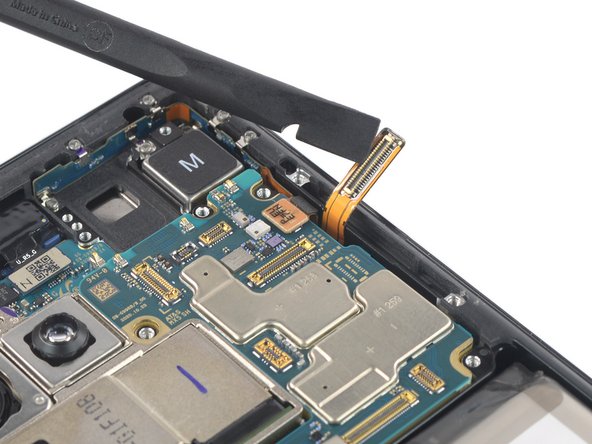
Step 18


- Grab your trusty spudger and gently pop the bottom connector of the secondary interconnect cable straight up from the daughterboard socket.
- Use your fingers or tweezers to carefully lift the secondary interconnect cable out.
- Set that cable aside—you’ll be putting it back in when you reassemble.
Tools Used
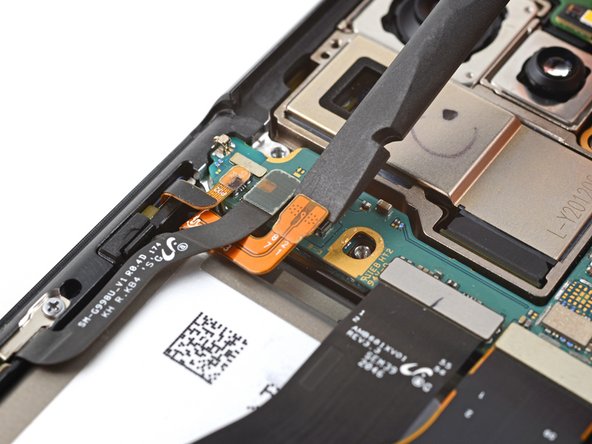
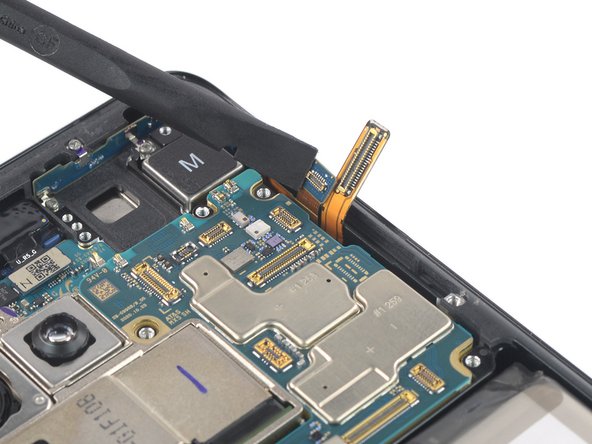
Step 19


- Grab your trusty spudger and pop the primary interconnect cable off the daughterboard—just lift that bottom connector straight up.
- With fingers or tweezers, gently pull out the primary interconnect cable. No need for a Hulk grip here.
- Keep the cable somewhere safe, because you'll need it when it's time to put everything back together.
Tools Used
Step 20


- Grab a Phillips screwdriver and loosen the three 3.4 mm screws holding down the charging board. Easy as that—just a few turns and you’re on your way. If you need help, you can always schedule a repair.
Step 21

- Slide the pointed end of your spudger carefully under the left edge of the charging board, right next to the main flex cable connector. Then, gently pry up the charging board with your spudger, giving it a little lift to loosen it from its place.
Tools Used
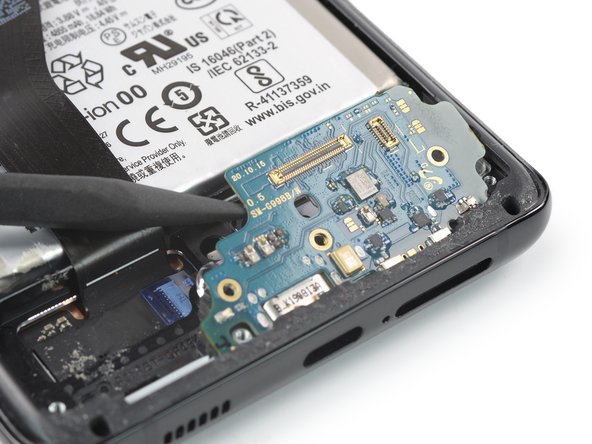
Step 22


- Grab some blunt tweezers or use your fingers to gently lift out the charging board. Start by lifting the top edge, then carefully slide the USB-C connector out of its slot. Take your time—patience is key! If you need a hand, you can always schedule a repair.
Step 23

- Grab your trusty spudger and gently work it under the left 5G mmWave antenna's press connector to pop it loose. You're doing great!
Tools Used
Step 24

- Grab a spudger and gently pry up the right 5G mmWave antenna's press connector to disconnect it. Keep it careful and steady—no rush needed. If you need a hand, you can always schedule a repair.
Tools Used
Step 25

- Grab a Phillips screwdriver and gently unscrew the four 3.4 mm-long screws holding the 5G mmWave antennas in place. Keep track of those screws—they're tiny but important! If you need a hand, you can always schedule a repair.
Step 26


- Grab a spudger and gently pry up the bottom screw tab of the right 5G mmWave antenna bracket—think of it as giving it a little lift to get started.
- Using tweezers or your fingers, carefully lift out the right 5G mmWave antenna—no rush, it’s all about a gentle touch.
- Set the antenna aside for now—you’ll be reusing it when it’s time to put everything back together.
Tools Used
Step 27

- Grab your trusty spudger and gently pop up the bottom screw tab of the left 5G mmWave antenna bracket.
- Use tweezers—or just your fingers—to pluck out the left 5G mmWave antenna.
- Put that antenna somewhere safe! You’ll need it again when you put everything back together.
Tools Used
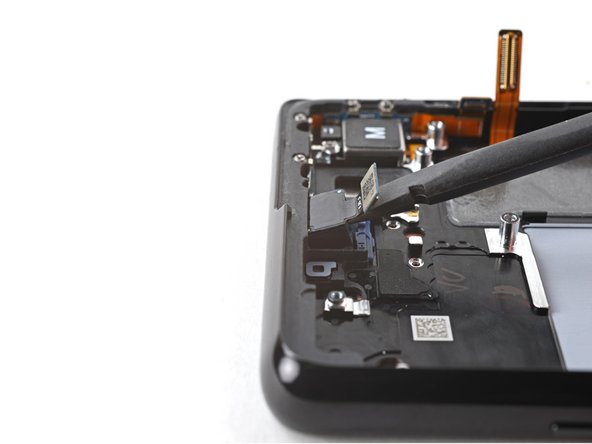
Step 28


- Grab your Phillips screwdriver and unscrew the four 3.9 mm-long screws that are holding the earpiece speaker and laser AF module assembly in place.
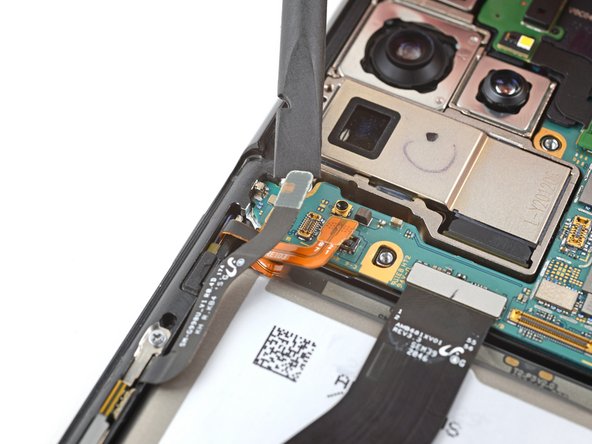
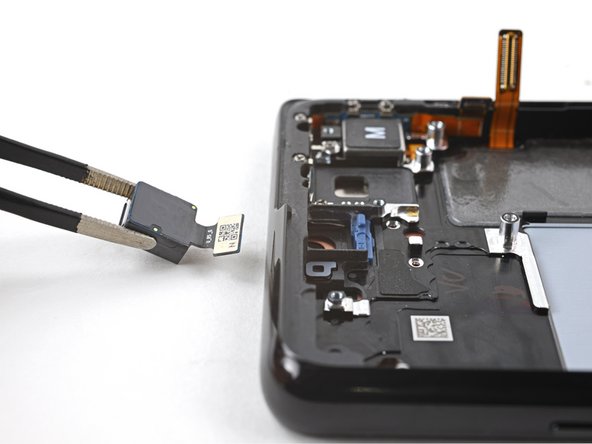
Step 29


- Grab your trusty spudger and gently pop up the connectors for the laser AF module and the earpiece speaker flex cables—just pry them straight up and out, easy does it!
Tools Used
Step 30

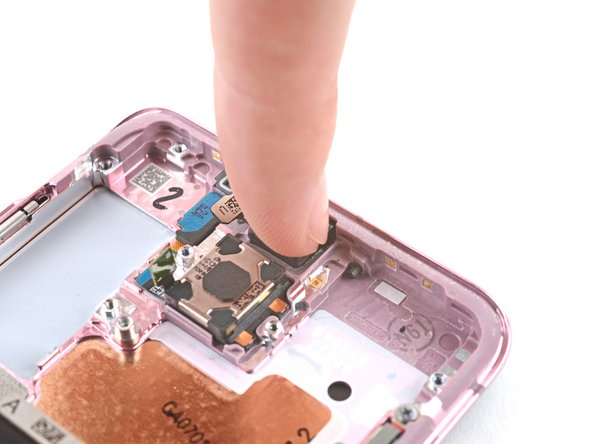
- Use a pair of blunt nose tweezers to gently grab the bottom right corner of the earpiece speaker and laser AF module assembly, then carefully lift it straight up. Once free, remove the assembly from the device. Keep it handy—you'll be reusing it during reassembly. If you need help, you can always schedule a repair.
Step 31

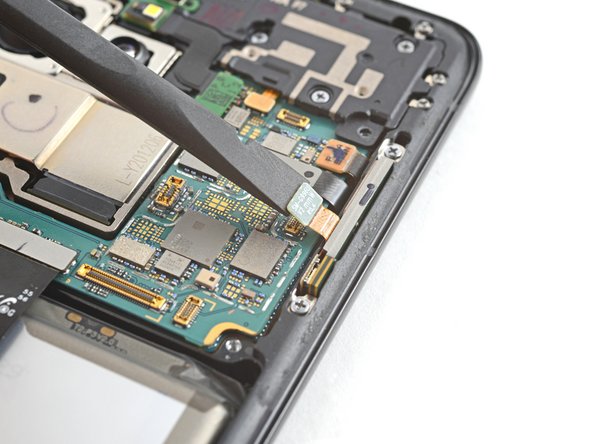
Treat those cables like royalty—no sharp folds, just gentle bends to keep them happy and healthy.
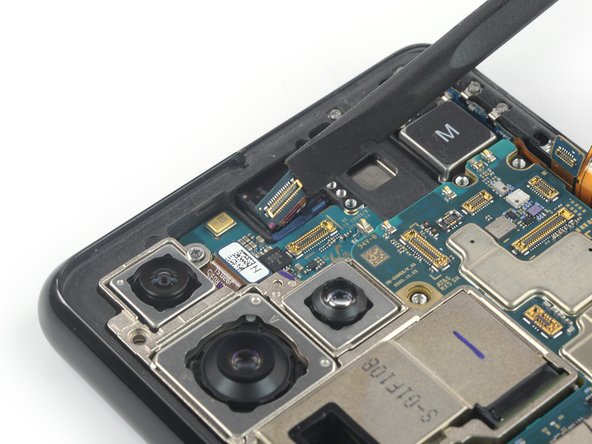
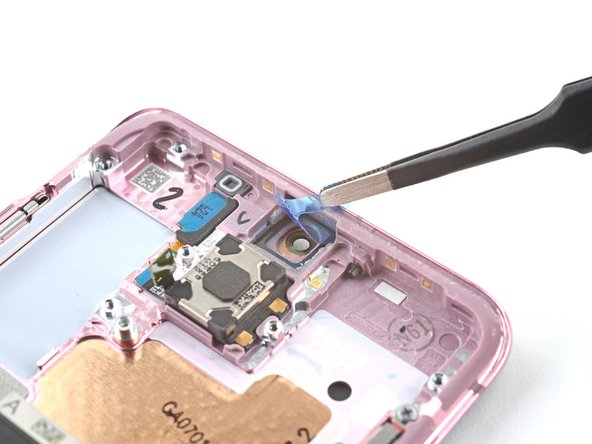
- Grab your trusty spudger and gently pop the connectors for the in-display fingerprint and antenna flex cables straight up from their sockets—think of it as giving them a little encouragement to head out.
- Once they're loose, nudge both connectors to the side to clear the way for the motherboard. Smooth moves!
Tools Used
Step 32

- Gently pop the front-facing camera cable connector straight up with your spudger—like opening a stubborn jar, but way less messy.
Tools Used
Step 33
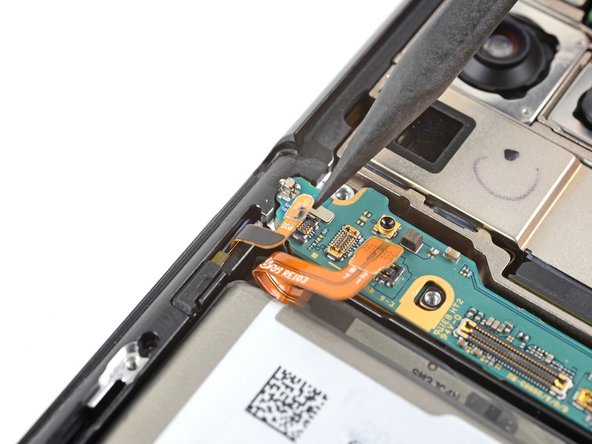

- Grab your trusty spudger and lift the power button flex cable connector straight up—think of it as giving the motherboard a little breathing room.
- Gently nudge the connector to the side so your motherboard can break free and do its thing.
Tools Used
Step 34

- Grab your trusty spudger and gently pop up the display cable's press connector. Easy does it—no need to rush!
Tools Used
Step 35


- Grab some tweezers or just use your fingers to gently bend the display cable away from the device. Easy does it—you're making room for the next step.
Step 36

- Grab your trusty Phillips screwdriver and twist out that tiny 3.9 mm screw holding the camera module—easy does it!
Step 37
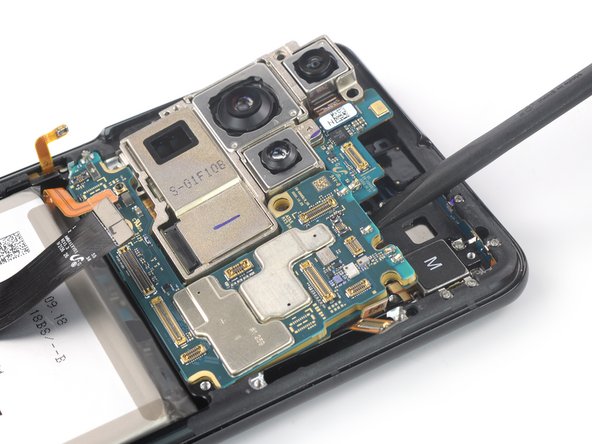

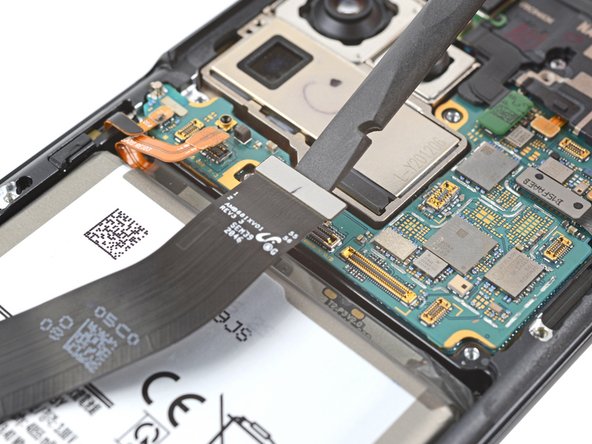
- Grab your trusty spudger and slide it under the top edge of the motherboard right next to the vibration motor. We're getting into the nitty-gritty!
- Give that spudger a little twist to gently lift and loosen the motherboard. You've got this!
Tools Used
Step 38

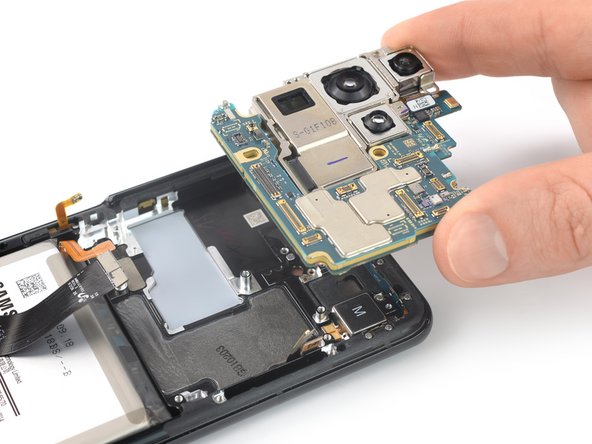
Take it slow and steady when removing parts—no sudden moves! Double-check that all flex cables are free and clear from the motherboard, so you don’t accidentally give them a surprise haircut.
- Gently lift out the motherboard like you're handling a delicate slice of cake—no sudden moves!
Step 39

- Place a heated iOpener on the front camera for about 90 seconds to get things nice and toasty.
Tools Used
Step 40

Struggling to peel the front camera off the frame? Give it a gentle blast of heat to loosen things up.
- Slip a spudger into the little gap next to the front camera—like you're picking the lock on a treasure chest.
- Gently pop the front camera up with the spudger. It should come loose from the frame, no sweat.
- Grab the camera with tweezers or your fingers and lift it out. Easy does it!
- Put the camera somewhere safe—you'll want to use it again when you put things back together.
Tools Used
Step 41

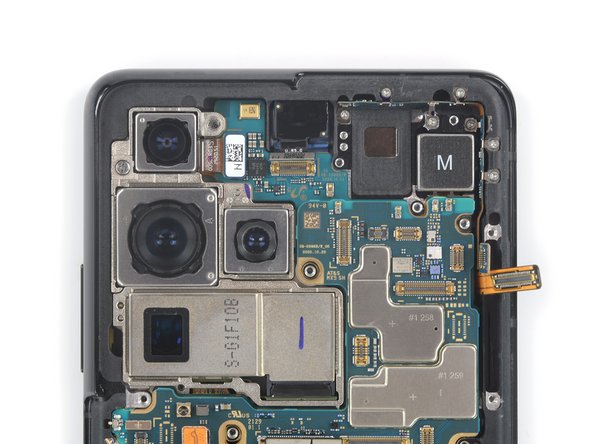
- Now you’ve got just the screen and battery assembly hanging out together.
- Grab your new replacement part and size it up against the original—sometimes you’ll need to move a few leftover bits over or peel off sticky protectors before popping it in.
Step 42

- To put your device back together, just work through the steps in reverse.
- When it’s time to say goodbye to your old parts, drop them off at an R2 or e-Stewards certified recycler.
- If things didn’t go quite as planned, try a little troubleshooting or connect with our Answers community for some extra tips. And if you’d rather leave it to the pros, you can always schedule a repair.


