
Samsung Galaxy S21 Wireless Charging Coil Replacement
Duration: 45 minutes
Steps: 23 Steps
For your safety, make sure to drain the battery down to under 25% before you get started on disassembling your device. It’s a good habit to keep things safe and sound.
Ready to tackle the task of removing or replacing your Samsung Galaxy S21's wireless charging coil? Before you dive in, make sure to juice your battery down to below 25%. It's a smart move to keep things safe and avoid any thermal mishaps if the battery takes a hit during disassembly. If you're dealing with a swollen battery, be sure to take all the necessary precautions. And just a heads-up: you’ll want some replacement adhesive on hand to wrap up this repair like a pro!
Step 1

Before you dive in, make sure your phone is completely powered off. No one likes surprise vibrations while fixing things!
You can use a hair dryer, heat gun, or hot plate to loosen things up—but keep it cool! Too much heat can mess with your screen, battery, or plastic cover. Go easy and take your time.
- Warm up your iOpener and let it chill on the bottom edge of the back cover for a couple of minutes.
Tools Used

Step 2


- Stick a suction cup on the back of the phone, aiming for the sweet spot near the center of the bottom edge.
- Give the suction cup a firm, steady pull—this should create just enough of a gap between the back cover and the frame.
- Slide an opening pick into that gap and get ready to keep going!
Slip the pick in just 5 mm—any deeper and your phone might start sending you SOS signals from inside.
Depending on how old your phone is, this part might be a bit stubborn. If you're hitting a wall, try applying a little more heat to the edge and give it another shot. Sometimes patience and a gentle touch are all you need. If you run into any trouble, remember you can always schedule a repair with Salvation Repair for extra help.
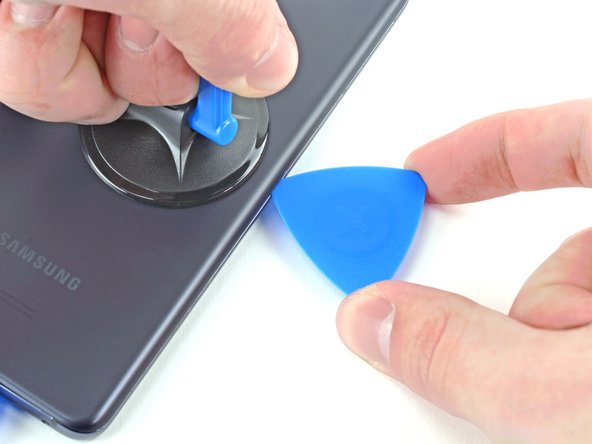
Step 3


- Gently slide your pick back and forth along the bottom edge to cut through the adhesive. Keep the pick in place afterward to stop the adhesive from sealing back up. If you need assistance, you can always schedule a repair.
Step 4

- Warm up the left edge of the back cover with a toasty iOpener for a couple of minutes—just enough to make the adhesive loosen up and say ‘uncle’.
Tools Used
Step 5


Keep it cool—slide the pick in just 5 mm, or you might give the hidden parts an accidental poke they won’t appreciate.
- Stick a suction cup onto the back of your phone, aiming for the center along the left edge—precision is cool, but there’s wiggle room.
- Give the suction cup a firm, steady tug upward to start cracking open a gap between the back cover and the frame (think of it as opening a stubborn jar, but gentler).
- Slide an opening pick into that gap like a pro. You’re on your way!
Step 6


When you're slicing around the camera shell, stop before the back cover—going too far here can snap the plastic, and nobody wants that drama.
- Gently slide an opening pick down the left edge and towards the bottom left corner, slicing through that stubborn adhesive like a pro.
- Leave that pick in place to keep the adhesive from playing tricks on you and sealing back up!
Step 7

- Warm up that iOpener and give the right edge of the back cover a cozy two-minute hug!
Tools Used
Step 8


Only insert the pick-up up to 3 mm, to avoid risking damage to the secondary interconnect cable that runs alongside the right edge.
- Grab a suction cup and stick it onto the back of your phone, as close to the center of the right edge as you can. Get that cup firmly in place.
- Now, pull up with a steady but strong hand to gently open a gap between the back cover and the frame. You got this!
- Slide an opening pick into that new gap you just created, and you're on your way to unlocking this repair.
Step 9


- Gently slide an opening pick back and forth along the right edge of the back cover to loosen the adhesive. Keep the pick in place afterward to prevent the adhesive from sealing back up.
Step 10


Keep your pick shallow—just up to 5 mm—so you don't poke any sensitive parts inside.
You can apply this procedure to each corner, but remember: the top-left corner is off-limits because that's where the rear-facing camera hangs out. Just give it a skip and move on!
- Gently rotate the right edge opening pick around the top-right corner of the phone to get things started. Keep it smooth and steady—you're just loosening things up! If you need a hand, you can always schedule a repair.
Step 11


- Gently slide the opening pick closest to the camera shell to get things started right.
- Now, give the left-edge pick some love by repeating the same smooth move.
Step 12

- Warm up your iOpener and gently press it against the camera shell for about two minutes. Let the heat do its magic, softening everything up so you can get to the next step with ease.
Tools Used
Step 13


Keep your pick shallow—just 5 mm is all you need. Go deeper and your camera might get an unwanted scratch!
If this method doesn’t do the trick, don’t sweat it! Just roll on to the next step for another option. If it works, you can totally skip ahead!
- Turn the back cover counterclockwise until it starts to loosen, creating a small gap between the camera shell and the frame.
- Slide an opening pick into that gap to get things moving.
Step 14


Handle with care on this step—you're walking a fine line and might crack that plastic back cover if you're not gentle. Take your time and go slow to avoid any mishaps.
- Carefully slide the two picks toward the camera shell, slipping them underneath the corners of the back cover near the camera. Then, gently work the picks back and forth along the bridge connecting the back cover and the camera shell until you've created a small gap between the camera shell and the frame. If you need a hand along the way, you can always schedule a repair.
Step 15


The frame is glued in there pretty securely, so you might need to warm it up a few times to loosen things up.
- Gently slide an opening pick between the camera shell and the frame to carefully cut through the adhesive holding them together.
Step 16


Heads up: There’s a plate around the flash on the back cover that loves catching your pick. Go slow and keep an eye out for any sneaky snags!
- Don't forget to slice through the extra adhesive hanging out to the right of the camera. It's just waiting for you to give it a little snip!
- When you're using the pick, tilt it downwards to keep everything safe and sound. We want to avoid any mishaps!
Step 17


The plate might put up some resistance—kind of like sticky tape. Tilt your pick downward so it doesn’t wander off into the plate.
- Aim the tip of your opening pick right at your phone’s flash, like a pro.
- Gently slide the pick in—easy does it! Steer clear of the flash plate.
- Carefully slice through the sticky stuff just to the right of the camera.
Step 18


If the back cover is still hanging on, gently slide your pick around the edges of the phone until the cover pops free. Keep at it, and you'll have that back off in no time. If you need a hand, you can always schedule a repair.
- Let's kick things off by popping off the back cover.
- When you're putting everything back together:
- Now's a perfect time to power up your phone and check out all its features before you close it up. Just make sure to shut it down completely before diving back in!
- If you’ve got any sticky adhesive bits hanging around, grab some tweezers or just use your fingers to pick them out. A dash of high-concentration (over 90%) isopropyl alcohol will help you wipe away any leftover adhesive residue like a pro.
- Got Samsung custom-cut adhesives? Be sure to check out this nifty guide.
- Using double-sided tape? Don’t forget to follow this guide.
Tools Used

Step 19

As you work through this repair, keep tabs on each screw — treat them like little treasures. Make sure each one finds its way back to exactly where it belongs. Staying organized will save you headaches later on and keep things running smoothly.
- Grab your Phillips screwdriver and go ahead and unscrew the five 4mm screws holding that motherboard bracket in place. Easy, right? Just a few twists, and you're one step closer!
Step 20


Hold on just a sec—don't yank that bracket all the way out yet, since it's still hanging around the wireless charging coil. Keep it in place for now, and we'll move on to the next step.
- Grab your tweezers and gently lift the motherboard bracket up and away from the frame—just unclip it like you're popping open a bag of chips.
Tools Used
Step 21


Be gentle when prying—stick to the edge of the connector so you don't accidentally mess up the socket or any nearby parts.
- Use tweezers or your fingers to gently hold the motherboard bracket aside. Then grab your trusty spudger and pop up the battery press connector. Easy does it!
- When reconnecting press connectors like this, line it up, then press down on one side until you hear that satisfying click, and do the same on the other. Skip pressing the middle—misaligned connectors can end up with bent pins, and nobody wants that kind of drama.

Step 22


- While keeping the motherboard bracket out of the way, gently pry up the wireless charging coil's press connector with a spudger. Take your time—careful prying keeps everything happy. If you need a hand, you can always schedule a repair.
Tools Used
Step 23


The wireless charging coil is held in place with a bit of light adhesive, like a gentle sticker. Just peel it off carefully, and you're good to go. If you need help, you can always schedule a repair.
- Take a moment to compare your shiny new replacement part to the original—make sure to move any leftover pieces or peel off those adhesive backings before diving into installation.
- Time to put your device back together! Just retrace your steps from the earlier tasks—it's easier than you think!
- Once you're all done, give your repair a quick test run using this guide to ensure everything's working smoothly.
- Don't let that old e-waste pile up! Be a hero and take it to an R2 or e-Stewards certified recycler.
- If things didn’t exactly go according to plan, no worries! Swing by our Answers community for some troubleshooting tips.
-


