Samsung Galaxy S22+ Back Cover Replacement Guide
Duration: 45 minutes
Steps: 11 Steps
Ready to give your Samsung Galaxy S22+ a fresh back cover? Follow this guide to get it done! Just a heads up: keeping your device water-resistant after the swap hinges on how well you reapply that adhesive. So, while your S22+ might lose its IP (Ingress Protection) rating, you’ll still be rocking a snazzy new look! If you need help, you can always schedule a repair.
Step 1

Hey, before we get started, let’s give your phone’s battery a little break and let it power down to below 25%. This is just a safety precaution because a charged lithium-ion battery might get a little too excited if we’re not careful. But don’t worry, it’s all good! We’re here to help you through it. If you need a hand, you can always schedule a repair.
When using heat to loosen things up, remember that a hair dryer, heat gun, or hot plate can be your best friend – just be gentle and don’t overdo it. Your phone’s display and internal battery are sensitive to heat, so keep an eye on the temperature. If you’re not feeling confident, don’t worry – you can always schedule a repair and let the pros handle it.
– Get ready to unlock your device’s full potential. Start by using an iOpener on the bottom edge of the back cover for about three minutes. This will help loosen the adhesive underneath, making the repair process a whole lot smoother. If you need help, you can always schedule a repair


Step 2


If the back cover’s cracked, don’t sweat it! The suction handle might not stick so well, so try lifting it with some strong tape or give that handle a little glue boost and let it dry. You’ll be good to go then!
If you’re having a hard time getting that gap open, just apply a little more heat to soften up the adhesive. Make sure you follow those iOpener instructions so you don’t overheat things. We want everything nice and toasty, not smoking hot!
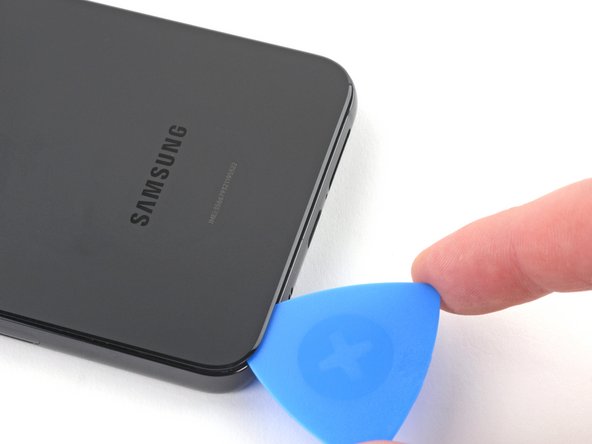
– Attach a suction handle to the bottom edge of the back cover – the closer to the edge, the better. This will give you some extra grip to work with.
– Use the suction handle to carefully lift the back cover and create a small gap between it and the frame. You’re making progress!
– Now, take an opening pick and insert it into the gap you just created. If you need help, you can always schedule a repair
Tools Used

Step 3


If your adhesive gets tough to cut, it’s probably just a little chilly. No worries, just give it a quick warm-up with your trusty iOpener for a couple of minutes. You got this!
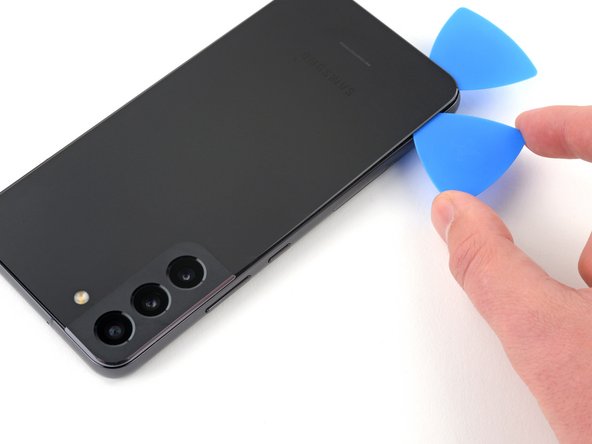
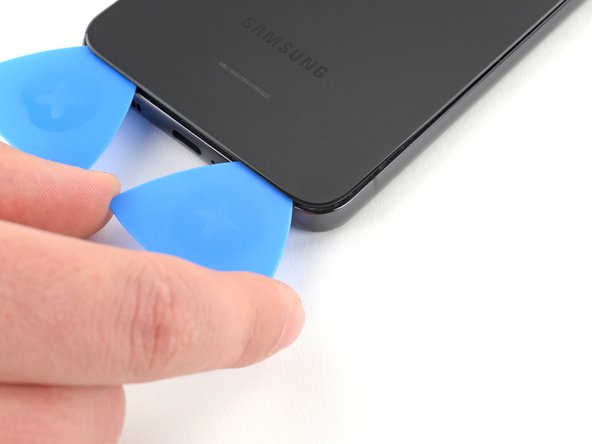
– First, carefully remove the suction handle to get started.
– Next, slide the opening pick along the bottom edge to gently slice through the adhesive – it’s like cutting through butter!
– Leave the opening pick inserted near the bottom left corner to keep the adhesive from resealing, and you’ll be one step closer to fixing your device. If you need help, you can always schedule a repair
Tools Used
Step 4

Keep the iOpener from getting too hot! Overheating can make it explode. It wouldn’t be fun to have an iOpener explode. If you need help, you can always schedule a repair
A properly heated iOpener will keep things toasty for about 10 minutes, so you’ve got plenty of time to get the job done. If you need help, you can always schedule a repair
– Let’s get this party started! Heat up your iOpener and apply it to the left edge of your phone for 3 minutes. We’re gonna loosen that adhesive up!
– If you need to, give your iOpener another 30 seconds in the microwave. We’re almost there!
Tools Used
Step 5


Don’t go too deep! Keep that opening pick at 5 mm or less to avoid any awkward cable encounters near the camera module. If you need help, you can always schedule a repair.
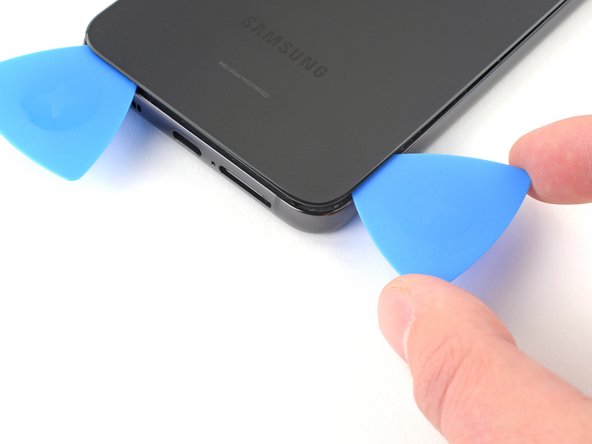
– Pop in a second opening pick right into that little gap you made at the bottom left corner – you’re doing great!
– Now, glide that opening pick along the left edge to cut through the sticky stuff keeping things together.
– Keep that opening pick snugly in place near the top left corner to stop the adhesive from being a party crasher and resealing.
Step 6

Heads up! Be gentle with that iOpener – overheating can cause it to burst, and that’s no fun. If you need help, you can always schedule a repair
Keep that iOpener toasty for up to 10 minutes, it’s gonna be a hot minute!
– Get that iOpener nice and toasty! Heat it up and apply it to the right edge of your phone for about 3 minutes. This will help loosen up that sticky adhesive.
– If things need a little extra love, give your iOpener another 30 seconds of heat. It’s like a little hug for your phone’s screen!
Tools Used
Step 7

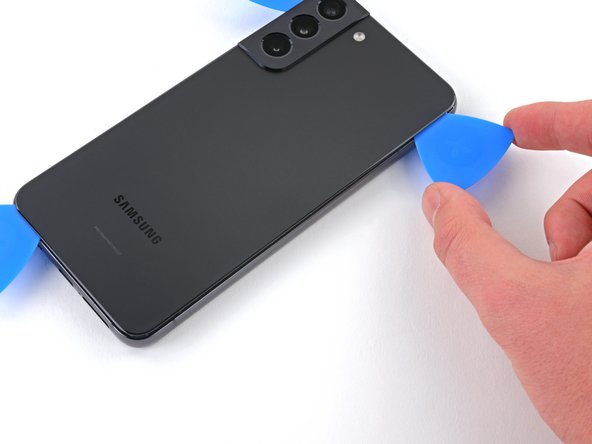
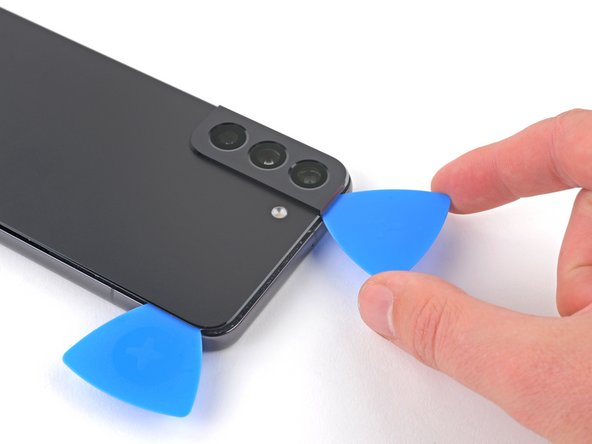
– Let’s get that back cover popping! Slide a third opening pick into the gap you just made along the bottom edge.
– Now, gently slide the opening pick around the bottom right corner to loosen up the adhesive holding the back cover in place. You got this!
Step 8

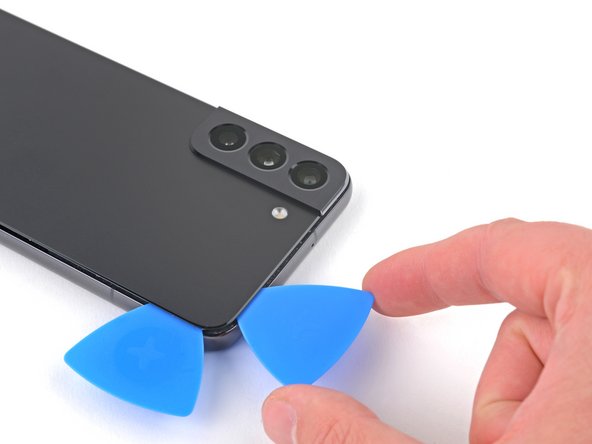
Keep that opening pick under 5 mm deep—your internal components will thank you for it!
– Keep gliding that pick along the right edge to slice through the sticky stuff.
– Leave the pick chilling at the top right corner to stop the adhesive from sticking back together.
Step 9

Don’t burn your iOpener! Keep it cool, so it doesn’t get too hot and cause any trouble. You can always schedule a repair if you need help.
An adequately warmed iOpener can keep its cozy heat for about 10 minutes!
– Let’s get this party started! Heat up your trusty iOpener and give the top edge of your phone a nice 3-minute warm-up. We’re gonna loosen that adhesive up, buddy.
– Need a little more heat? No worries! Just give that iOpener a 30-second boost and we’ll be back in business.
Tools Used
Step 10

Hey, don’t go crazy with that pick! Keep it chill and only slide it in about 5mm. We don’t want to mess with those fancy cameras and flash, right? 😉 If you need help, you can always schedule a repair.
– Now it’s time to get that top edge loose – slide the opening pick from the top left corner across to separate the remaining adhesive. If you need help, you can always schedule a repair
Step 11


– Let’s get started by removing the back cover. Easy does it!
– When you’re putting everything back together, take a quick break to power on your device and make sure all the functions are working smoothly. Just remember to power it back down before you finish up.
– Now it’s time to tackle any leftover adhesive. Use a pair of tweezers or your fingers to gently remove any chunks. If it’s being stubborn, try applying a little heat to help loosen things up.
– If you’re using custom-cut adhesives, be sure to follow our guide for the best results.
– And if you’re working with double-sided tape, we’ve got a guide for that too.
– If you need help along the way, you can always schedule a repair with the experts at Salvation Repair.