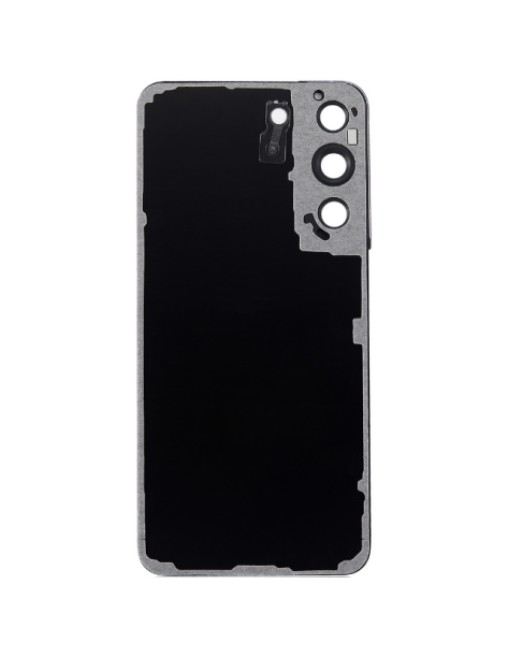
Samsung Galaxy S22 Back Cover Replacement Guide: A Step-by-Step DIY Solution
Duration: 45 minutes
Steps: 11 Steps
Get ready to tackle your Samsung Galaxy S22 like a pro! This guide will walk you through the steps to remove or swap out the back cover. Just a heads up: keeping that water resistance intact after your repair is all about how well you reapply the adhesive. Keep in mind, though, your device’s IP (Ingress Protection) rating might take a little hit.
Step 1

Before you start, make sure your phone’s battery is below 25%. We want to avoid any accidents – a damaged lithium-ion battery can be a fire hazard if it’s fully charged. If you need help, you can always schedule a repair
You can use a hair dryer, heat gun, or hot plate to warm things up, but be cautious! Overheating your phone can harm the display and the internal battery. If you need help, you can always schedule a repair.
– Let’s get started by heating up an iOpener and applying it to the bottom edge of the back cover for about two minutes. This will help loosen things up and make the repair process smoother. If you need help, you can always schedule a repair


Step 2


Alright, listen up, the adhesive is strongest in the bottom right and top left corners. Think of it like the sticky part of a really good note – you’ll need a bit of extra elbow grease there. If you need help, you can always schedule a repair
– While you wait for the adhesive to soften, keep this in mind:
– There’s some sticky stuff holding the back cover onto the frame, all around the edges. It’s just doing its job, keeping things secure!
Step 3


If you’re having a little trouble getting that gap open, don’t sweat it! Just give it a little more heat to soften the adhesive even further. Follow our iOpener instructions to make sure you’re not getting things too toasty. And remember, if you need a helping hand, you can always schedule a repair.
– Alright, let’s get this party started! Grab your suction handle and stick it to the back cover, nice and close to the bottom edge. You got this!
– Now, give that suction handle a good, strong pull. We’re aiming for a little gap between the cover and the frame. Think of it as creating some breathing room.
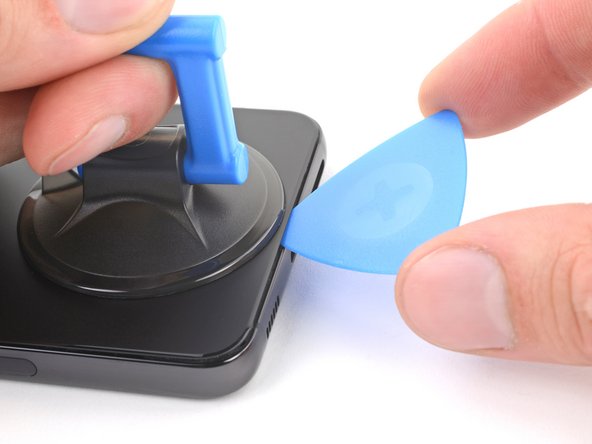
– Time to slide in your opening pick. Gently, gently, now. We don’t want to scratch anything.
Tools Used


Step 5

– Alrighty, tech savvy friend! Warm up a heat gun or hair straightener real quick. Now, place it gently on the left edge of your device’s back cover for approximately 2 minutes. Easy peasy lemon squeezy! Still feeling confident? If not, no worries! You can always schedule a repair and let our experts handle it for you.
Tools Used
Step 6


Just a heads-up, don’t go crazy with that pick! Keep it nice and chill, about 5mm deep max. You don’t want to have a chat with the antenna or power button cables, right? If you need help, you can always schedule a repair
– Now it’s time to add a second opening pick – insert it at the bottom left corner to get started.
– Gently slide the pick down to the bottom of the camera bezel, which will help you slice through the left adhesive.
– Leave that pick right where it is, so the adhesive doesn’t reseal and make your job harder. If you need help, you can always schedule a repair
Step 7

– Grab your trusty iOpener and give the right edge of the back cover a warm hug for two minutes. You got this!
Tools Used
Step 8


If the adhesive has resealed, don’t worry, just slide that pick in a little closer to the bottom edge. You’ve got this!
– Let’s get that adhesive separated! Slide a third opening pick into the bottom right corner.
– Now, slide the pick up towards the top right corner, like you’re slicing through butter. (Just kidding, it’s not butter… but it’s satisfying.)
– Hold that pick in place at the top right corner so the adhesive doesn’t get cozy and stick back together.
Step 9

– Get your trusty iOpener nice and toasty by heating it up for two minutes. Then, give that back cover some love by applying the warm iOpener to the top edge for a couple of minutes.
Tools Used
Step 10


Hey there! Just a heads up, you’ll wanna keep that pick tool nice and chill, only going in about 4mm. Going deeper could cause some trouble with those fancy rear cameras and flash. No worries, though, if you ever get stuck, you can always schedule a repair.
– Let’s get this party started! Grab your opening pick and slide it into that gap at the top right edge.
– Now, just like a pro, slide that pick across the top edge and around the top left corner. You’re slicing through the adhesive like butter!
Step 11


If the cover is still glued to the frame, gently wiggle an opening pick around the edge until it pops right off. It’s like a little dance!
– Let’s get started by removing the back cover. Take a firm grip and gently pull it off.
– When you’re putting everything back together:
– Now’s a great time to turn on your phone and make sure all the functions are working properly. Just remember to power it back down before you continue.
– Use a pair of tweezers or your fingers to carefully remove any leftover adhesive. If it’s being stubborn, try applying a little heat to help loosen it up.
– To apply new adhesive, follow our guide at schedule a repair for more information. If you need help or have any questions, you can always schedule a repair with Salvation Repair.