Samsung Galaxy S22 Plus Screen and Battery Assembly Replacement
Duration: 45 minutes
Steps: 50 Steps
This guide is all about tackling the screen and battery assembly like a pro!
Ready to swap out the screen and battery on your Samsung Galaxy S22+? You’ll be working with the full screen, battery, and frame assembly—all bundled together for a smooth repair. Double-check you’ve got the right part before diving in. Heads up: keeping your phone water-resistant depends on how well you stick everything back together, but the official IP rating won’t stick around after the repair.
Step 1


Oops! If you accidentally poked the microphone hole with the SIM eject tool, no worries—you probably didn't do any damage to the mic. Just take a deep breath and keep going. If you need a hand with anything, you can always schedule a repair.
- Take your SIM eject tool, tiny screwdriver bit, or a trusty paper clip—straighten that bad boy out—and aim for the little hole next to the SIM tray on the bottom edge of your phone.
- Gently press the tool into the hole until the SIM card tray pops out. It’s like a secret handshake for your phone.
- Pull the SIM card tray out and set it aside. Easy does it!
Step 2

Let your phone's battery dip below 25% before you dive in. If a lithium-ion battery gets banged up while it's charged, it might decide to throw a fire party—and nobody wants that.
A hair dryer, heat gun, or hot plate can come in handy, but be cautious not to overdo it—excessive heat can damage both the display and the internal battery. Keep the heat moderate and steady to avoid any mishaps.


Step 3


If the back cover is cracked, the suction handle might not stick. No worries! Just try sticking it down with some strong tape, or if you're feeling fancy, superglue the suction handle in place and let it dry before moving on.
Having trouble creating a gap? No problem! Just apply a bit more heat to soften that adhesive some more. Be sure to follow the iOpener instructions to keep things from getting too toasty.
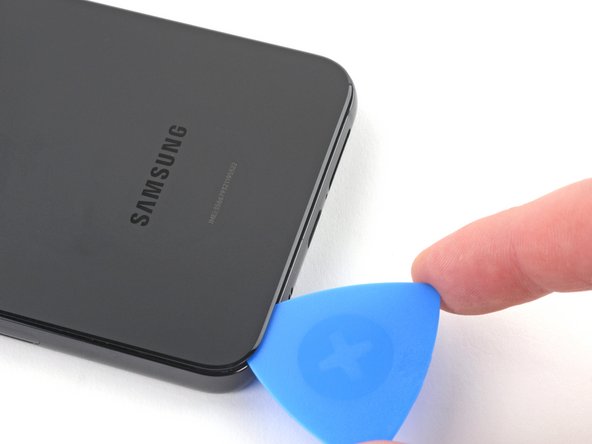
- Stick a suction handle on the bottom edge of the back cover—get it as close to the edge as you can for maximum grip.
- Give that suction handle a gentle lift to open up a tiny gap between the back cover and the frame.
- Slide an opening pick into that gap. Go slow, you got this!
Tools Used

Step 4


If the adhesive gets tough to cut through, it’s probably cooled off. Give your iOpener a couple of minutes on the heat to warm things up again—about two to three minutes should do it.
- Take off the suction handle—like you’re removing a VIP pass.
- Glide the opening pick along the bottom edge to slice through the sticky adhesive. It’s like butter, but for gadgets.
- Park the pick near the bottom left corner to keep the sticky stuff from sneaking back together.
Tools Used
Step 5

Watch out for the heat! Keep the iOpener from getting too toasty, or it might just decide to pop like a party balloon!
A good heated iOpener stays warm and cozy for up to 10 minutes, giving you plenty of time to get your repair done without rushing. Keep an eye on it to make sure it’s still warm enough to do its job—no need for it to be hotter than your morning coffee, just comfortably warm.
- Place your warmed-up iOpener along the left edge of the phone for about 3 minutes to loosen things up.
- If your iOpener starts cooling off, give it a 30-second trip to the microwave to keep the heat going.
Tools Used
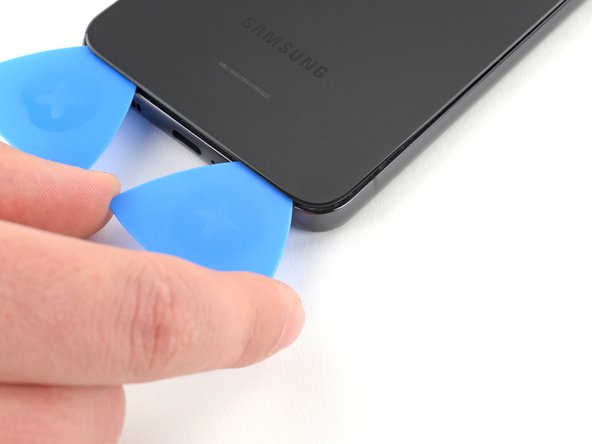
Step 6


Keep that pick shallow—no deeper than 5 mm—or you might bump into some delicate cables hanging out near the camera module.
- Pop in a second opening pick where you've made a little gap at the bottom left corner.
- Gently glide that pick along the left edge to cut through the adhesive like a pro.
- Keep the opening pick snugly in place near the top left corner to stop that pesky adhesive from sealing back up.
Step 7

Go easy on heating the iOpener—cranking the heat up too much could make it pop like a surprise party you didn’t want.
Once your iOpener is good and warm, it'll stay toasty for around 10 minutes—plenty of time to work your magic.
- Warm up your trusty iOpener and give the right edge of your phone a cozy 3-minute hug to loosen that stubborn adhesive.
- If your iOpener starts to cool down, just pop it back in the heat for another 30 seconds to keep the warmth flowing.
Tools Used
Step 8
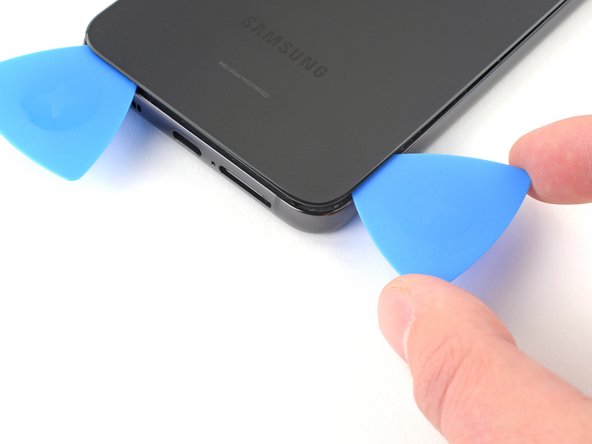

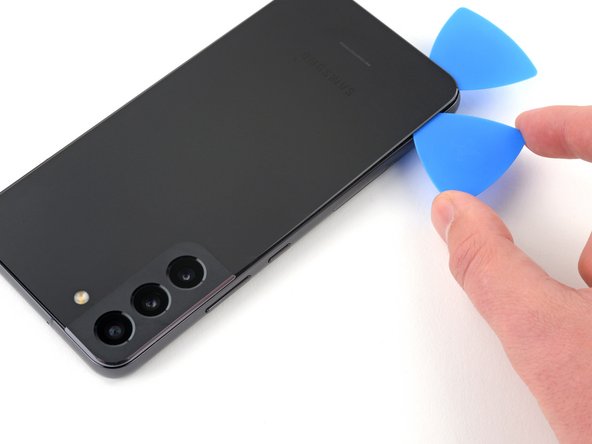
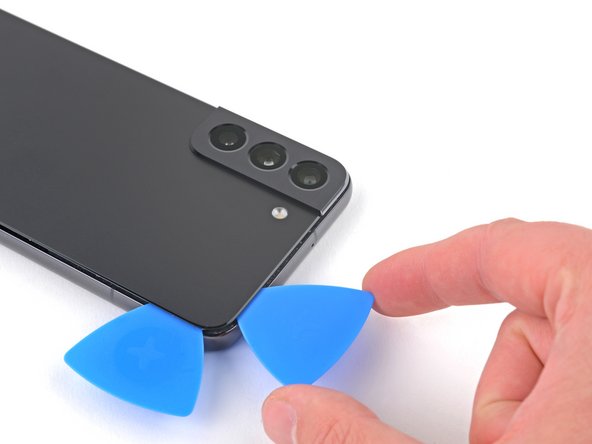
- Now it's time to bring in the reinforcements - insert a third opening pick into the gap you created along the bottom edge to help pry the back cover open.
- Gently slide the opening pick around the bottom right corner of the back cover to cut through the adhesive, being careful not to apply too much pressure.
Step 9

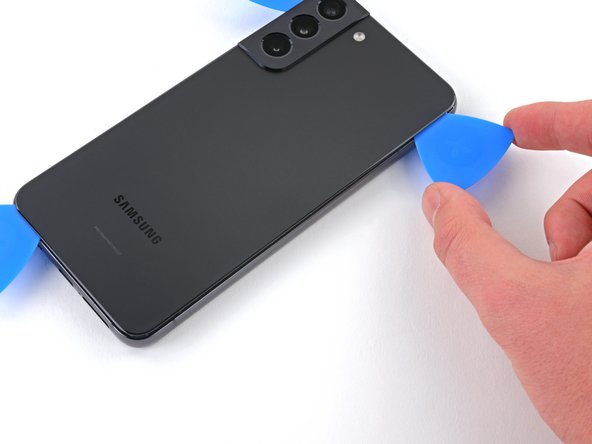
Keep the opening pick shallow—no deeper than 5 mm—or you'll risk poking something you shouldn't!
- Gently slide your opening pick along the right edge of the back cover to cut through the adhesive. Keep the pick inserted near the top right corner to prevent the adhesive from sticking back together. If you need a hand, you can always schedule a repair.
Step 10

Keep an eye on your iOpener—if it gets too hot, it might pop!
Once your iOpener is nice and toasty, it should hold its warmth for around 10 minutes—plenty of time to work your magic.
- Give your iOpener a spa day on the top edge of your phone for about 3 minutes to loosen up that stubborn adhesive.
- If your iOpener cools off, pop it back in for another 30 seconds to keep things nice and toasty.
Tools Used
Step 11
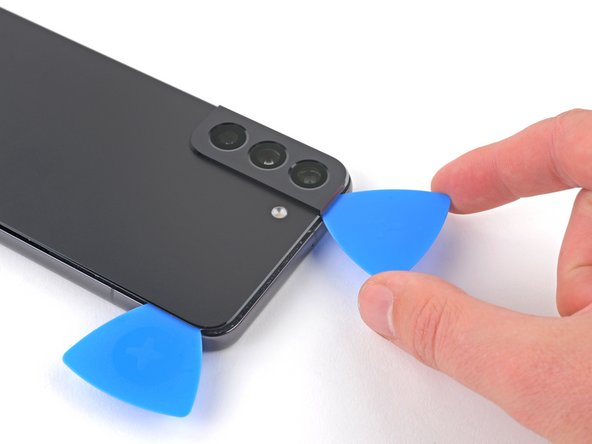

Keep your pick shallow—no deeper than 5 mm—or you might end up giving the rear cameras and flash a bad day.
- Gently glide the opening pick from the top left corner across the top edge to break the last of that pesky adhesive free. Keep it smooth and steady—you've got this!
Step 12


- Pop that back cover off like you're opening a fresh deck of cards.
- When you're piecing everything back together:
- Perfect time to hit the power button and make sure your phone is still singing in tune. When it checks out, shut it down all the way before you keep going.
- Pick off any stubborn glue blobs with tweezers or your fingertips. A little heat from your trusty hair dryer will soften them if they’re feeling clingy.
- If you scored custom-cut adhesives, let this guide show you the way.
- If you’re rolling with double-sided tape, here’s the roadmap for that too.
Step 13

- Grab your spudger's pointed end and gently pry up the charging coil's press connector from the motherboard. Take your time—think of it as giving your device a little friendly nudge. If you need a hand, you can always schedule a repair.
Tools Used

Step 14

- Grab your trusty spudger and gently pop up the NFC antenna cable from the motherboard—just a little lift will do the trick!
Tools Used
Step 15

- Grab your Phillips screwdriver and unscrew those six 3.5 mm screws holding the charging coil in place. Easy peasy!
Step 16

- Grab your Phillips screwdriver and take out the seven 3.5 mm screws holding the loudspeaker in place.
Step 17


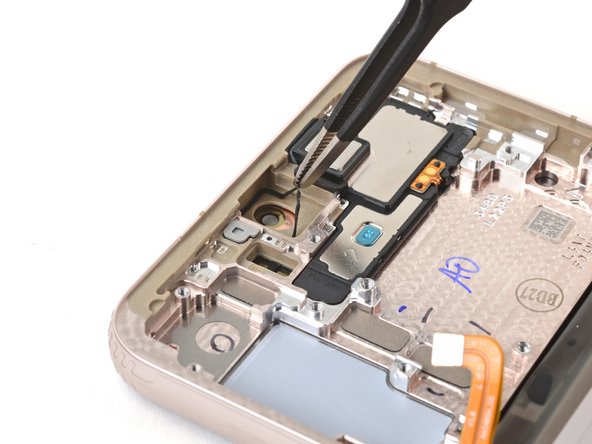
Watch out—don’t let the loudspeaker wander off from the charging coil while you're working on this step!
- Slide your spudger between the left side of the loudspeaker and the frame—think of it as just making a little room.
- Lift gently to pop the clips loose and set the loudspeaker free.
- When putting it back together, press the loudspeaker into place until you hear those clips snap in—music to your ears!
Tools Used
Step 18
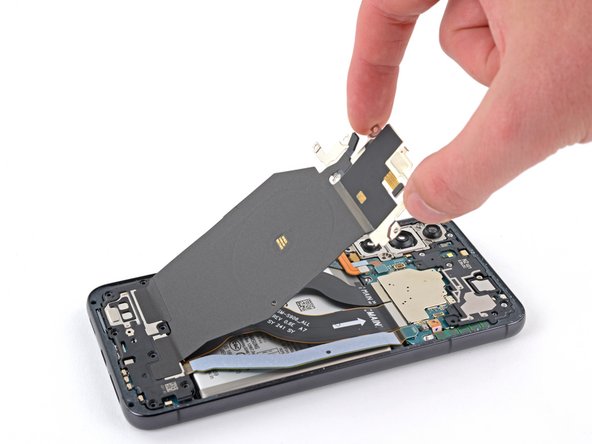


Keep the charging coil and loudspeaker together—these two are a package deal!
- Carefully detach the charging coil and NFC antenna assembly with a gentle touch.
Step 19

- Grab your spudger and gently pry up the battery's press connector to disconnect it. Easy does it—patience is key here. If you need a hand, you can always schedule a repair.
Tools Used
Step 20

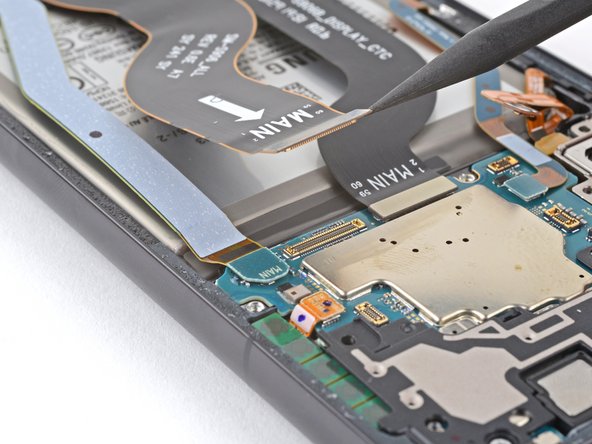
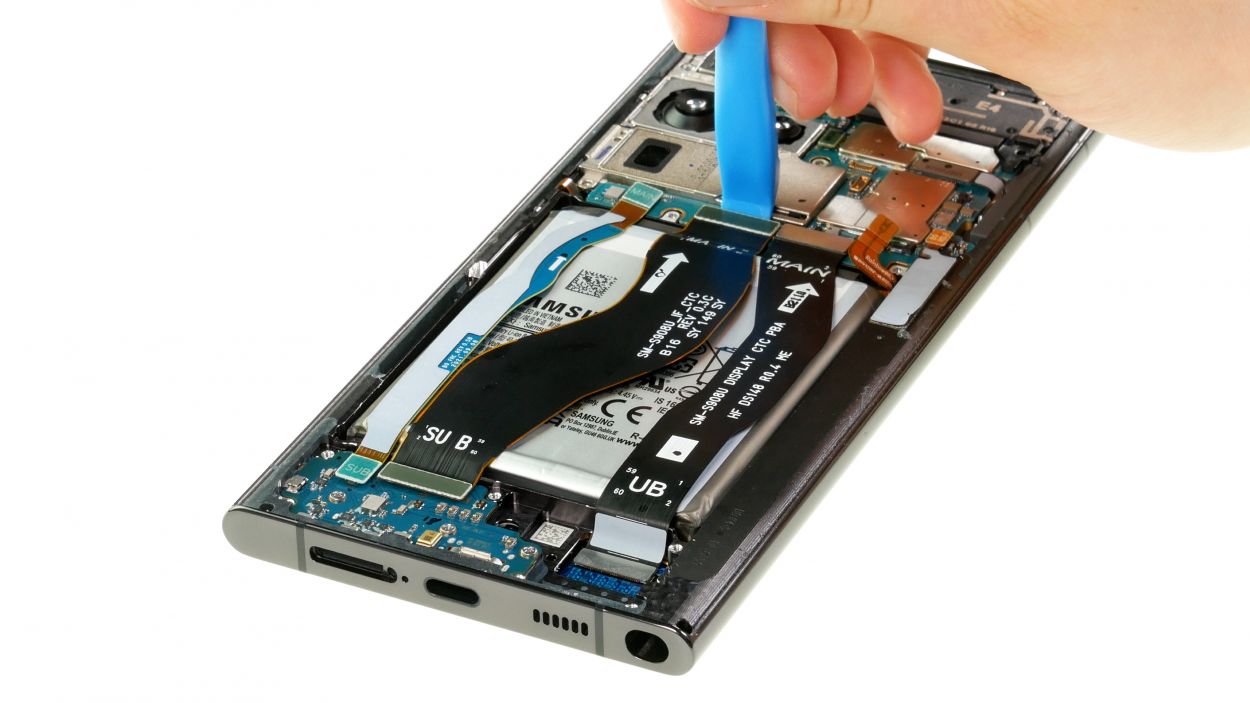
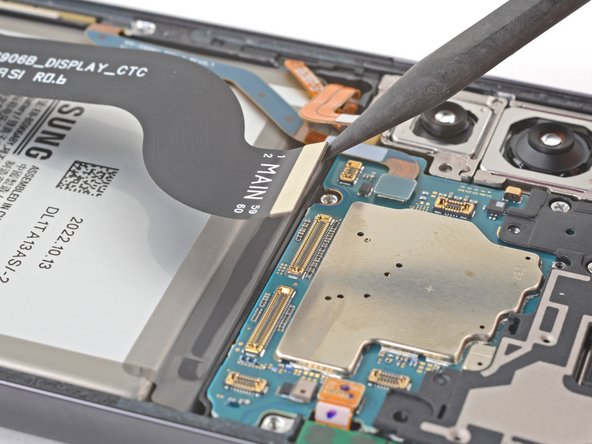
- Grab your spudger and gently pry up the primary interconnect cable from the motherboard, then carefully disconnect it. Next, do the same for the secondary interconnect cable—lift it free with your spudger. If you need help at any point, you can always schedule a repair.
Tools Used
Step 21
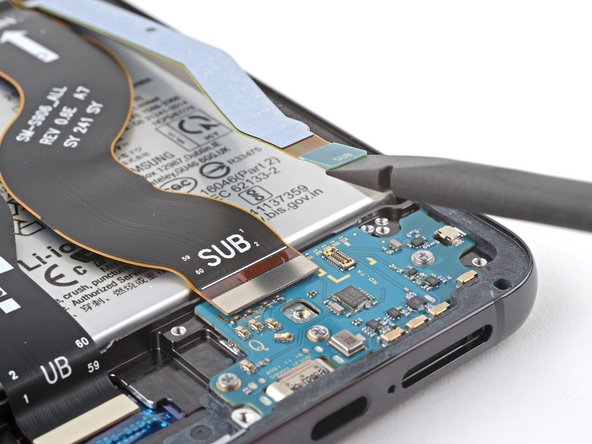

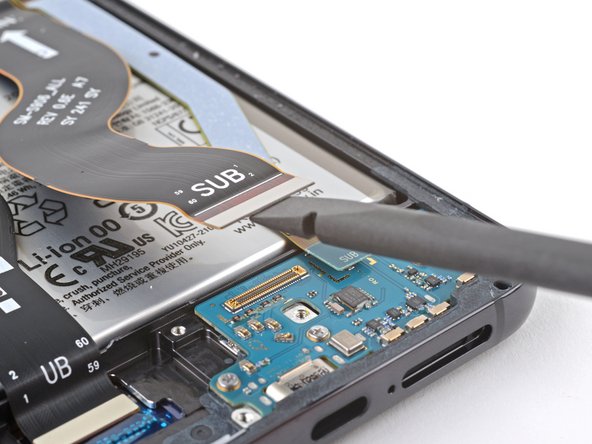
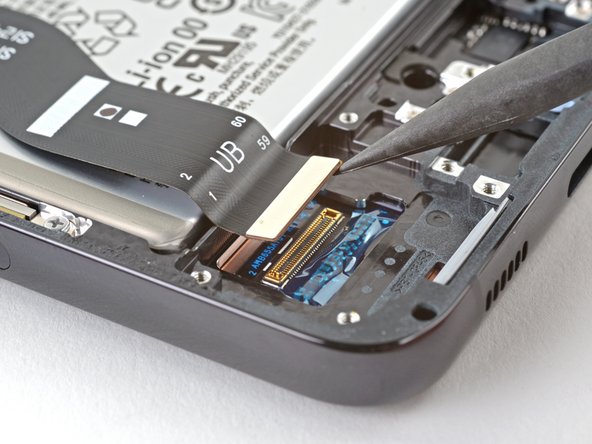
- Slide your spudger under the primary interconnect cable and give it a gentle pop off the charging board—easy does it.
- Now coax the secondary interconnect cable up with the spudger and disconnect it from the charging board—almost done!
Tools Used
Step 22

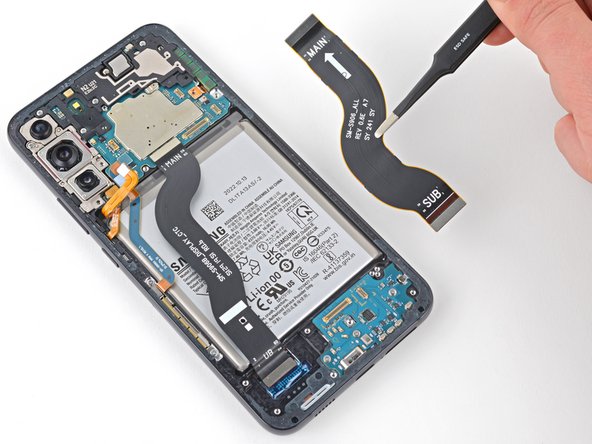
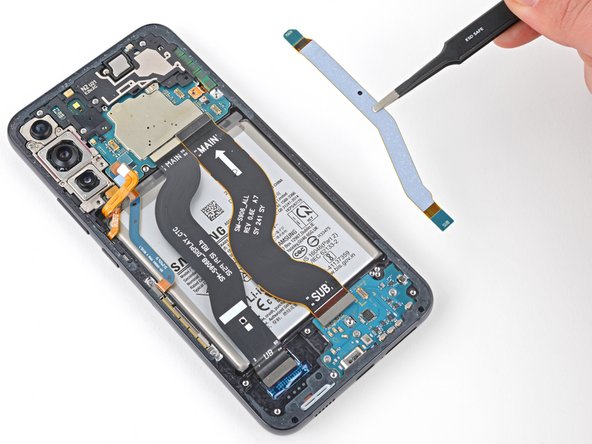
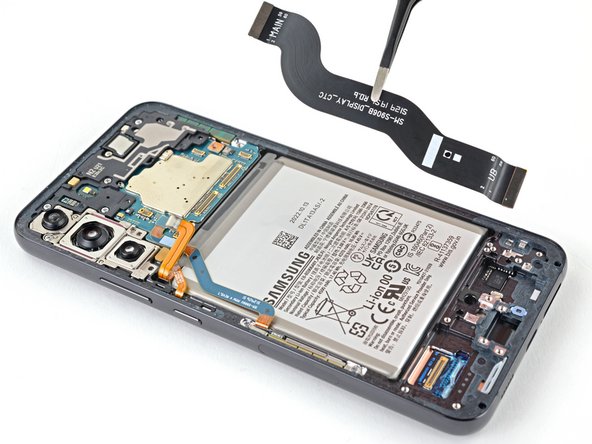
- Get ready to show those interconnect cables who's boss! Gently grab your tweezers or your trusty fingers and pop those cables out with ease.
- As you put everything back together, double-check that each cable marked MAIN is snugly connected to the motherboard, while the ones labeled SUB are happily linked to the charging board. You've got this!
Step 23

- Grab your Phillips screwdriver and loosen those three 3.4 mm screws holding the charging board in place. Keep it steady and don't forget—you can always schedule a repair if you run into trouble.
Step 24
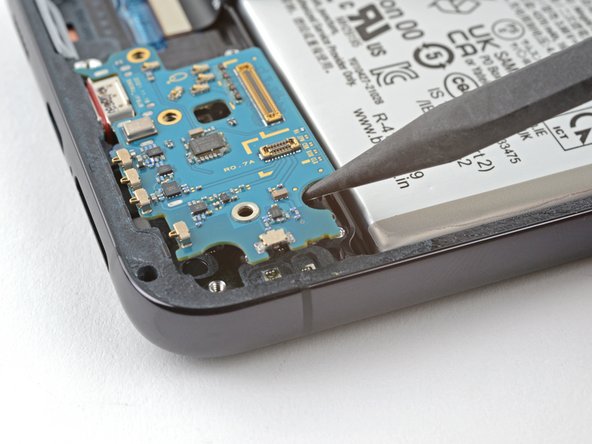

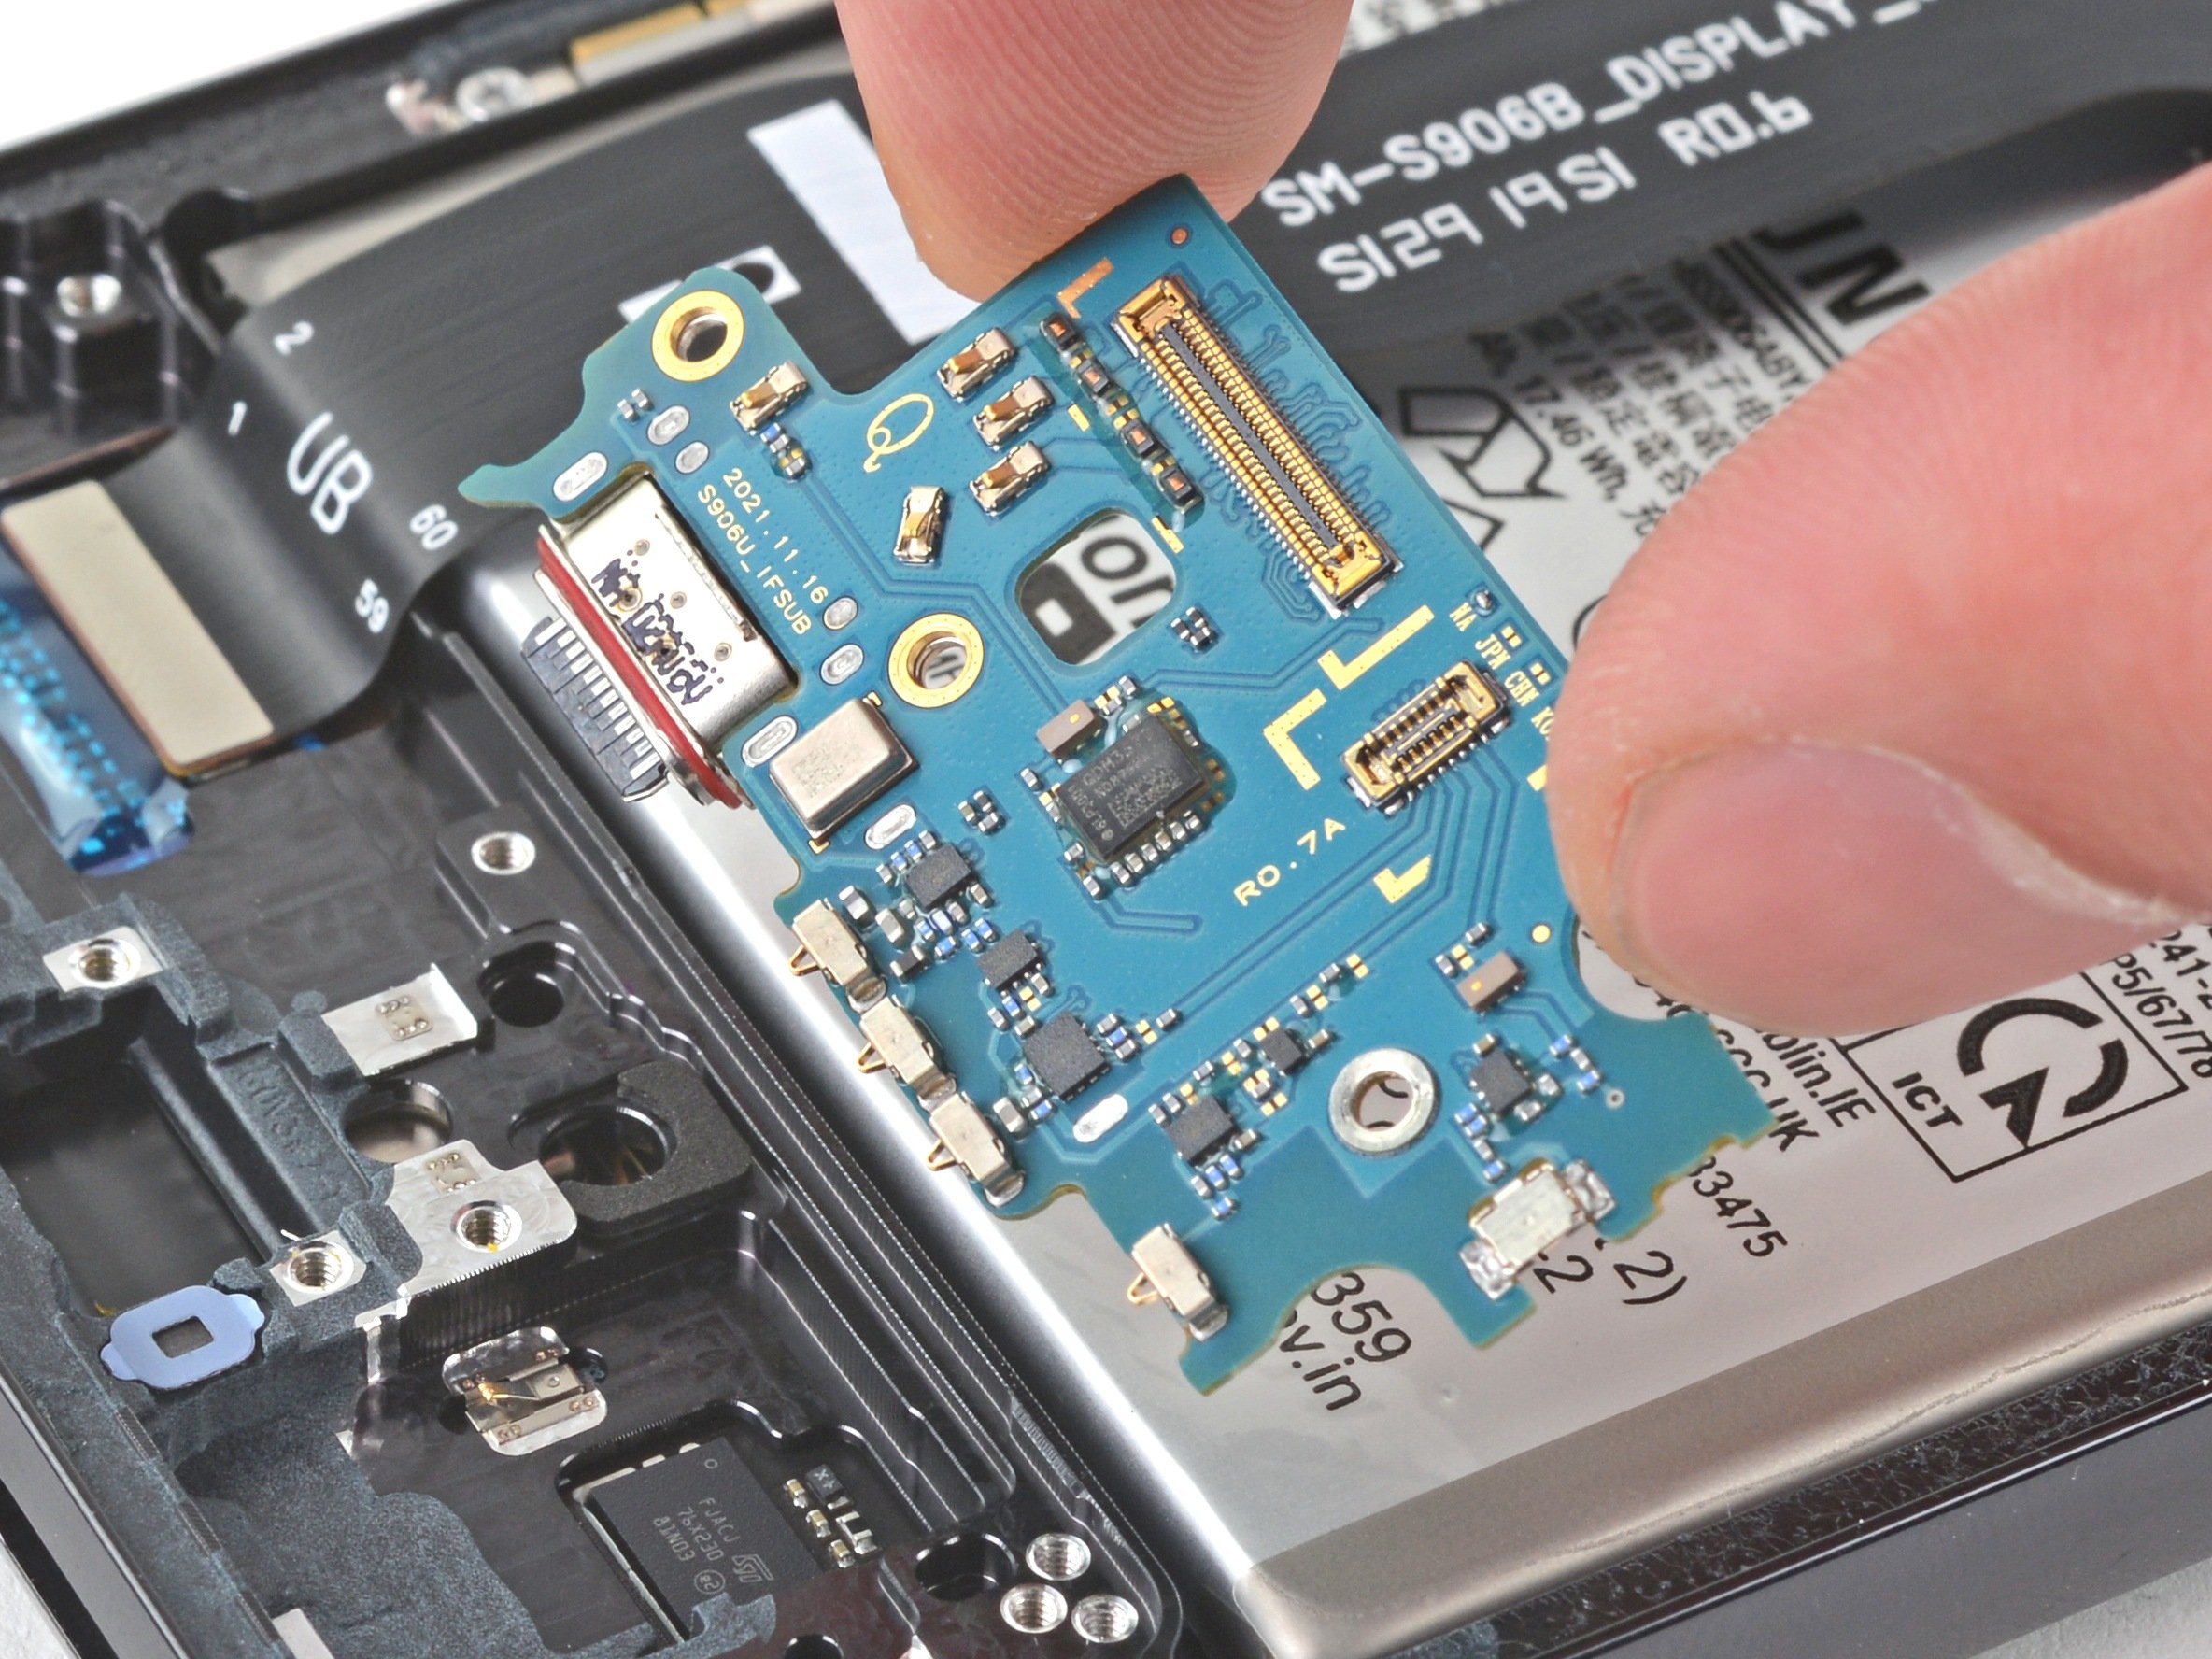
- Slide the pointy end of your spudger between the top right edge of the charging board and the frame—think of it like sneaking into a secret club.
- Gently pry the board upwards just enough so you can grab it with your fingers. No need to wrestle it, just a little lift is all it takes.
Tools Used
Step 25


- Gently pull the charging board toward the top of the phone at about a 30-degree tilt and lift it out. During reinstallation, make sure that the red gasket around the charging port sits snugly against the phone's edge—this helps keep out dust and water. If you need a hand, you can always schedule a repair.
Step 26

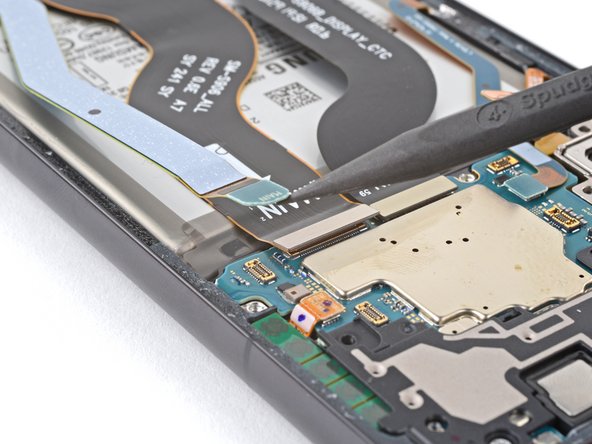
- Grab your trusty spudger and gently pop the display cable off the motherboard—it’s like opening a secret door, but for electronics.
Tools Used
Step 27

- Grab your spudger and gently pry up the display cable from its press connector, which is tucked below the battery. Take your time—patience makes perfect. If you need a hand along the way, you can always schedule a repair.
Tools Used
Step 28

- Carefully disconnect the display cable from its connector.
- Gently set the cable aside—you'll reuse it when putting everything back together.
Step 29

- Grab your Phillips screwdriver and take out the four 3.5 mm screws holding down the motherboard cover. Easy does it!
Step 30


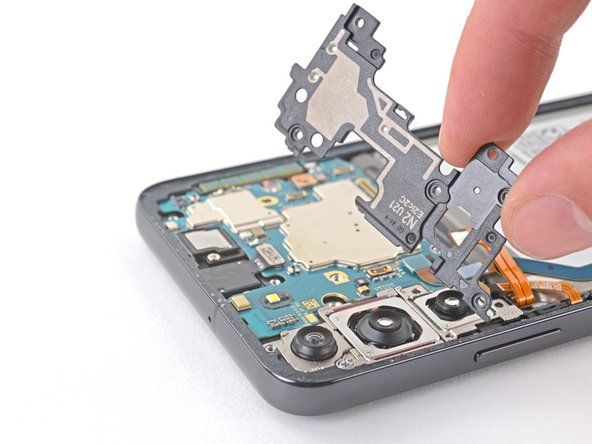
The triangle on the motherboard cover marks the spot – that's where this piece goes!
- Slide the sharp end of your spudger right between the motherboard cover and the motherboard.
- With a little finesse, lift the motherboard cover off the motherboard.
- Voilà! The motherboard cover is now free!
Tools Used
Step 31


- Grab your trusty spudger and gently pop the left mmWave antenna off the motherboard. No ninja moves required.
- When putting things back together, make sure the mmWave antenna cable takes the scenic route underneath the battery cable.
Tools Used
Step 32

- Grab your trusty spudger and gently lift up to disconnect the right mmWave antenna from the motherboard. Take it easy and make sure you're not applying too much pressure. You’ve got this!
Tools Used
Step 33
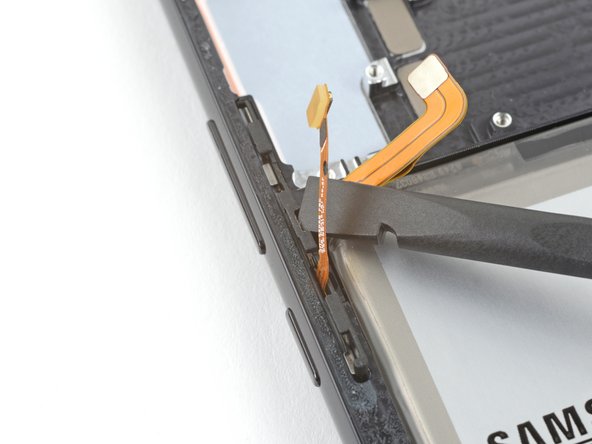
- Scoot the battery and mmWave antenna cables aside to uncover the connector for the volume and power buttons hiding underneath.
- Grab your spudger (pointy end, please) and pop off the volume and power button connectors.
Tools Used
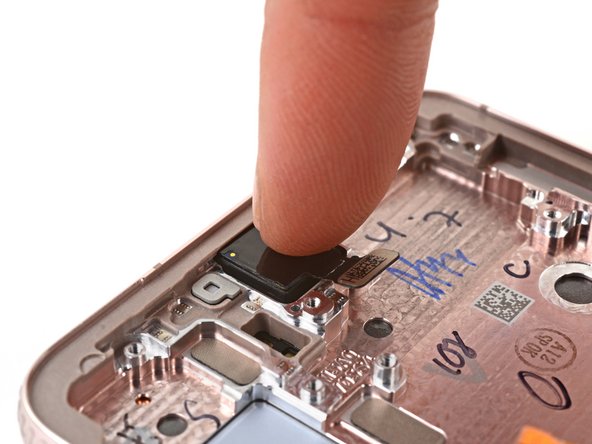
Step 34
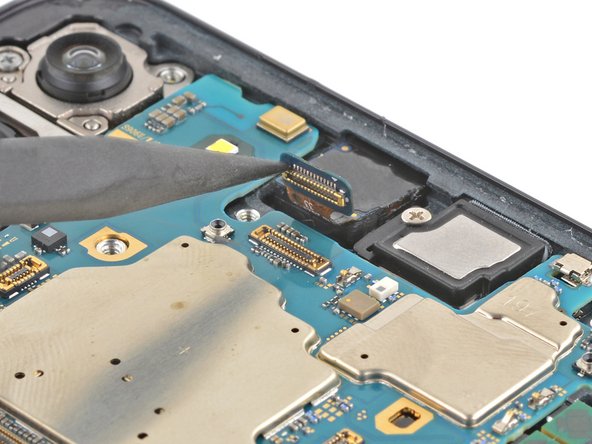

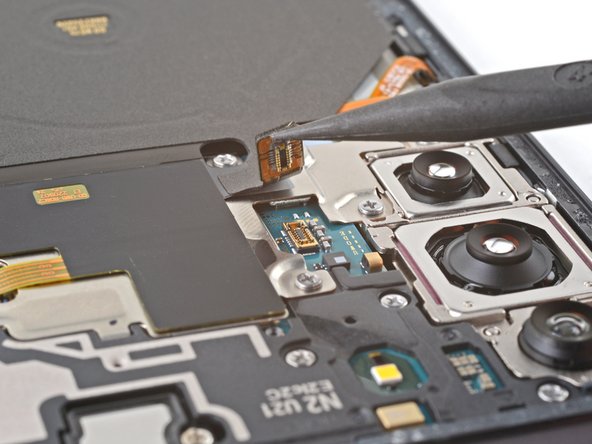
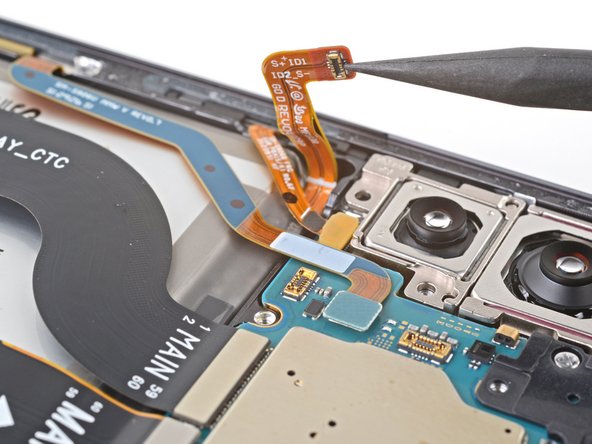
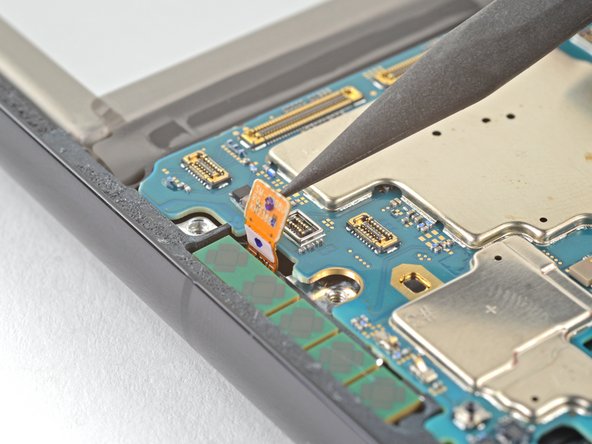
- Grab your spudger and use the pointy side to gently pop the front camera connector off the motherboard. Easy does it!
Tools Used
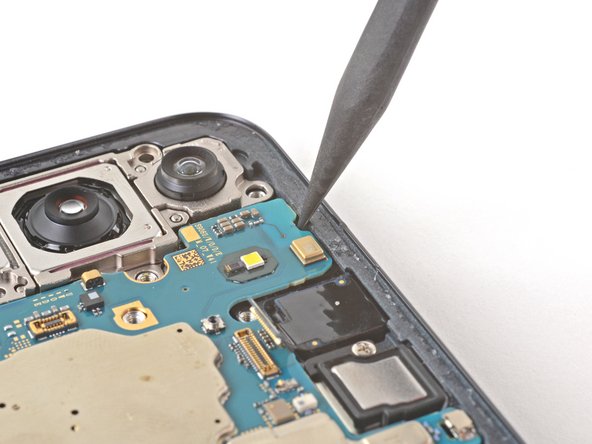
Step 35

- Grab your Phillips screwdriver and unscrew the 3.5 mm screw that's holding the camera module and motherboard to the frame.
Step 36


When lifting out the motherboard, watch out for any sneaky cables trying to hold on. If it feels stuck, double-check for any cables still connected and give them a gentle release.
This spot is the same one that was marked by the little triangle on the top antenna earlier.
- Slide the pointy end of your spudger underneath the top left corner of the motherboard.
- Carefully lift the motherboard out of the phone, then gently grab it with your fingers for control.
Tools Used
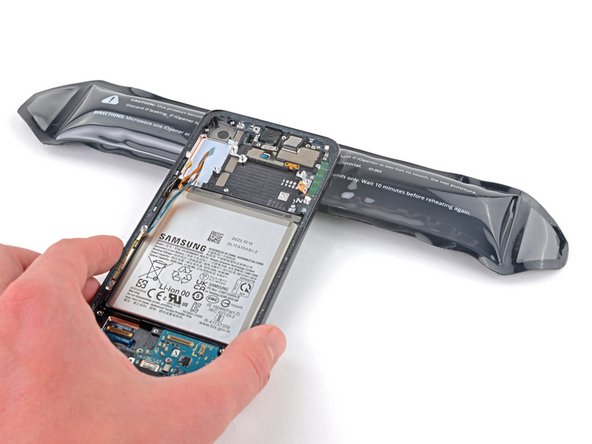
Step 37


- Carefully lift out the motherboard and set it aside like the VIP it is.
- When putting everything back together, double-check that none of those sneaky cables are hiding under the motherboard.
Step 38

You can also use a hair dryer, heat gun, or hot plate to warm things up a bit, but keep an eye on it—nobody wants to turn their phone into a mini sauna!
Step 39


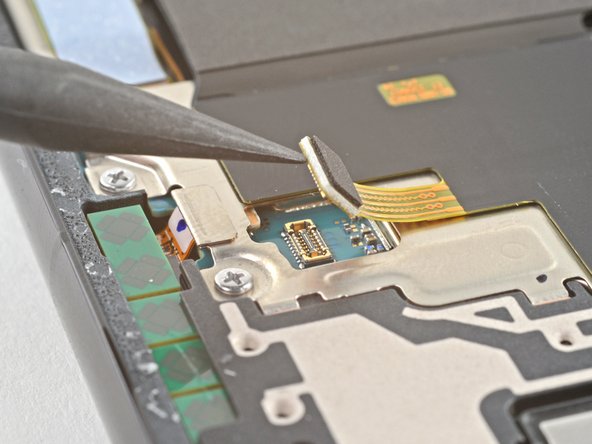
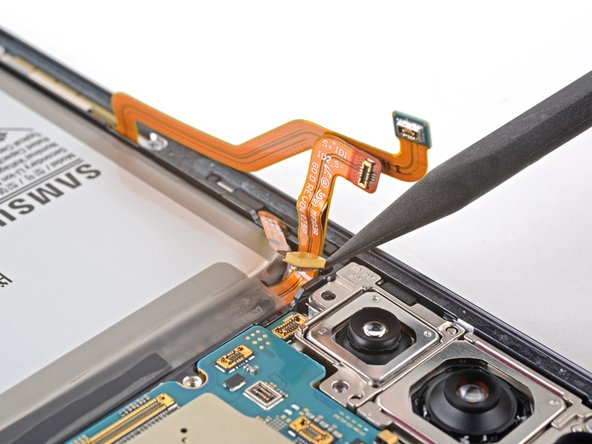
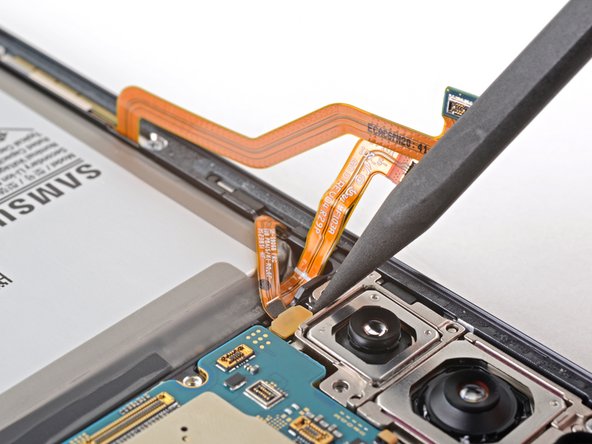
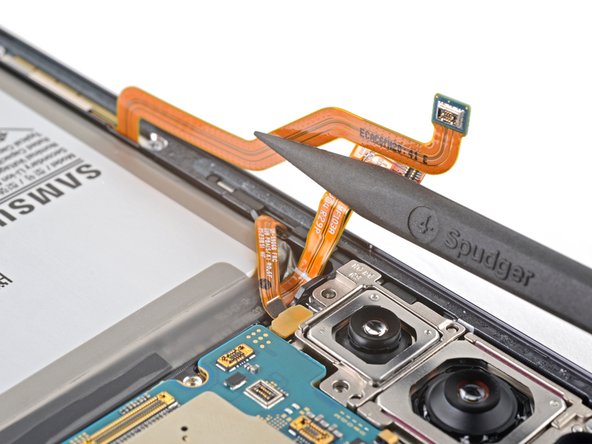
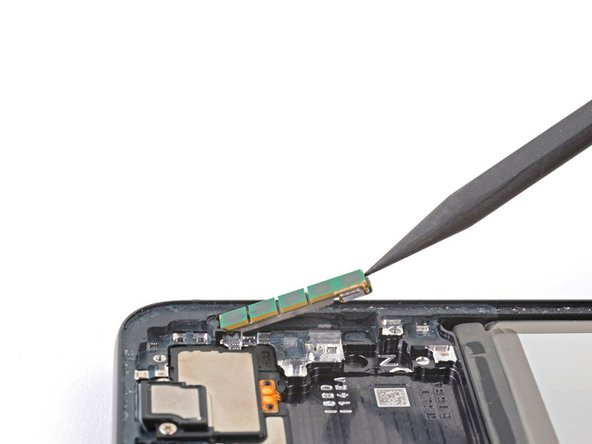
If the front camera’s giving you a hard time, try gently scraping away the resin that bonds it to the frame with your SIM eject tool. A little extra heat can help loosen things up if needed. Just take your time—patience is key!
- Gently lift the front camera from its frame using the pointed end of your spudger—think of it as a tiny pry party. If it's feeling stubborn, a pair of tweezers or your fingertips can help lift it out smoothly. Need a hand? Remember, you can always schedule a repair with Salvation Repair.
Tools Used
Step 40

This step is more of a bonus rather than a must-do for the repair.
- Get your new frame ready for the front-facing camera during reassembly: peel away the black adhesive liner from the camera recess to free it up. Then, peel off the foam liner from the new frame to keep everything tidy and in place. If you need a hand, you can always schedule a repair.
Step 41

- Ready to give your front-facing camera a comfy new home? Start by swapping out the old adhesive in the frame.
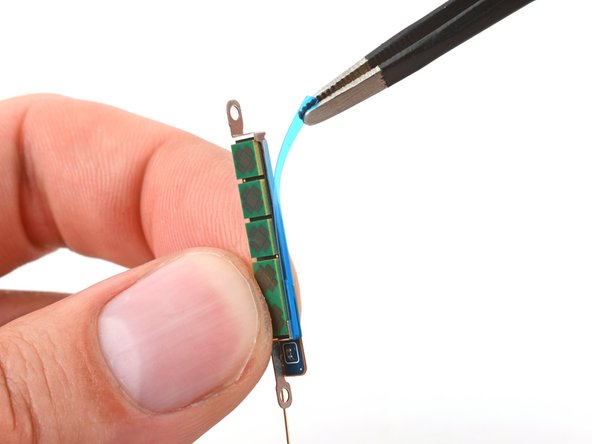
- Peel off the clear liner from your camera adhesive—think of it as revealing a fresh sticker.
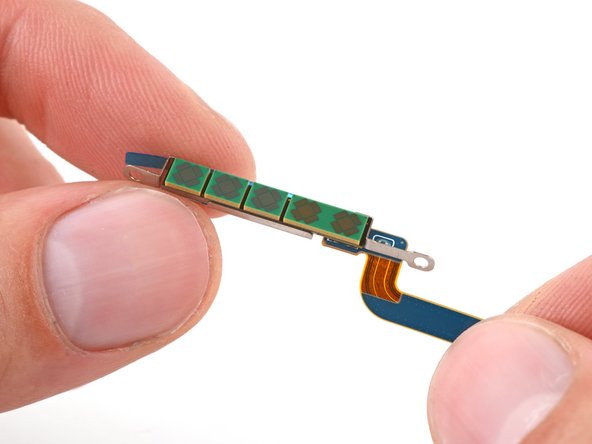
- Stick the adhesive into the camera’s nook, making sure the pull tab is chilling on the right side.
- Grab the pull tab and whisk away the blue adhesive liner like a magician.
- Nestle the front-facing camera into its spot and press down gently to lock it in place. High five, you’re almost done!
Step 42

- Grab your Phillips screwdriver and gently unscrew the pair of 3.5 mm screws holding down the left 5G mmWave antenna. Keep them safe—you'll need them to reassemble later. If you hit any snags, remember you can always schedule a repair with Salvation Repair for a hand.
Step 43


- Grab your trusty spudger and gently nudge up the lower screw tab on the left 5G mmWave antenna bracket until it’s within tweezers range.
- With tweezers at the ready, pluck out the left 5G mmWave antenna.
- Put the antenna somewhere safe—you’ll need it when putting things back together.
Tools Used
Step 44

- Ready to swap out the lower 5G mmWave antenna? Pop in a new bracket if you’ve got one—otherwise, no worries, just keep going.
- Gently separate the antenna and connector from the old bracket. It’s like a mini spa day for your phone parts.
- Peel off the L-shaped adhesive liner from your shiny new bracket. Satisfying, right?
- Nestle the antenna right into the bracket’s recess, making sure the connector sneaks under the longer screw mount.
- Before locking it all down in the frame, peel off the thin adhesive liner hanging out on the bracket’s outside. You’re almost done!
Step 45


If the antenna feels like it's got a grip, give it a gentle warm-up with a Heated iOpener for about two minutes to loosen things up a bit. It’s a handy trick to make that stubborn adhesive more friendly.
Step 46

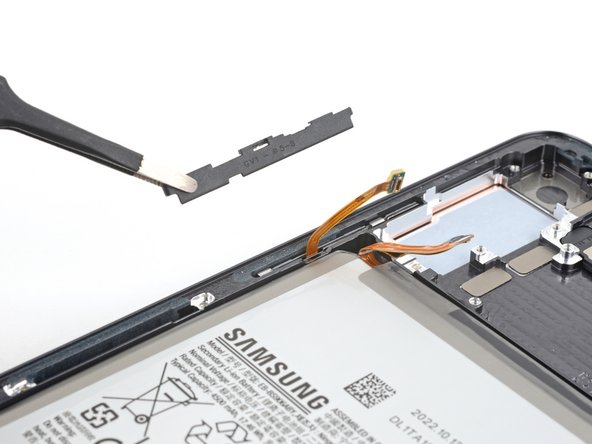
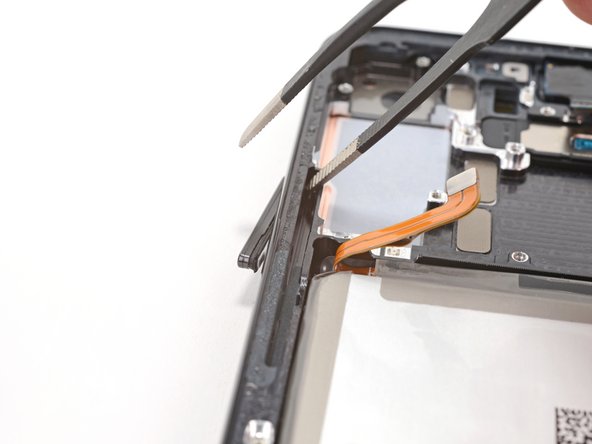
- Slide the corner of your spudger into the tab on the side button bracket—like you're picking the lock to a tiny treasure chest.
- Give the spudger a gentle twist upward to pop and loosen the bracket out of its spot in the frame. It should come free without much fuss.
- When you're putting things back together, be sure to press each button and listen for that classic 'click.' If it sounds and feels just like before, you nailed it.
Tools Used
Step 47
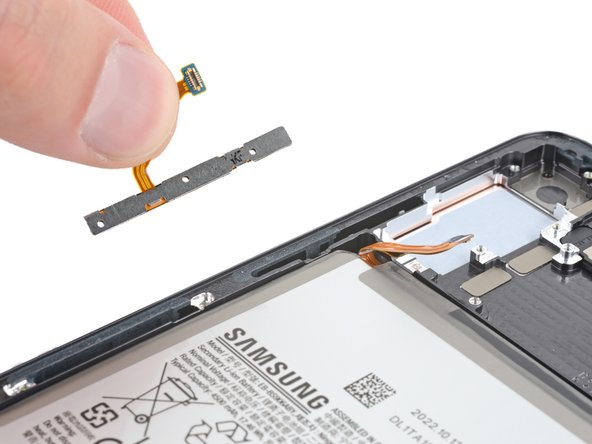

The button pad might come out along with the bracket—no big deal, just a little teamwork to get it all separated.
- Grab that side button bracket with some blunt nose tweezers or your trusty fingers and give it a gentle tug to remove it.
- Next up, use your fingers to snag the button pad and pull it out.
- When it's time to put everything back together, start with the button pad. Once that's in place, slide the bracket snugly against the back of the button pad. Together, they’ll look just right!
Step 48
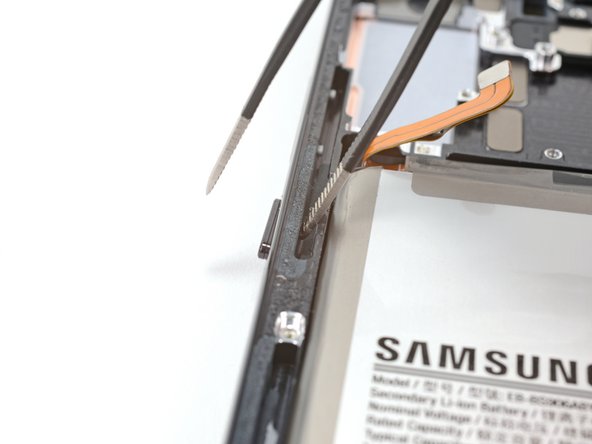

If your blunt nose tweezers can’t quite reach into tight spots, try using the bent tip of a paperclip or a similarly shaped object. It’s a handy trick to get into those tricky recesses without a fuss.
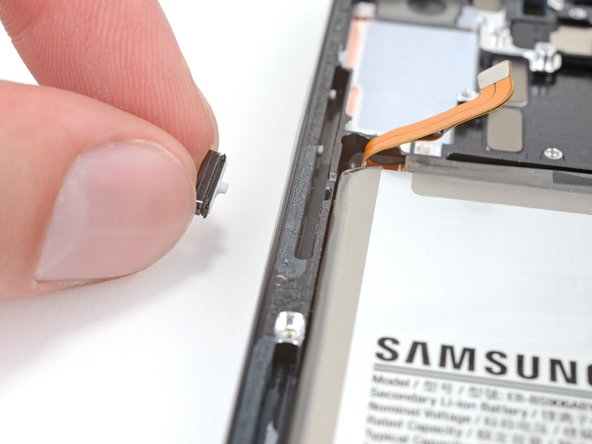
- Slip one arm of your blunt nose tweezers into the little nook where the side button hangs out.
- Give the power button's peg a gentle push through the frame until it's poking out enough for you to grab.
- Snag the button with your fingers and pull it out—nice and easy!
Step 49

If your tweezers are coming up short and can't quite reach, grab a bent paperclip or anything with a similar shape to get into those tricky spots.
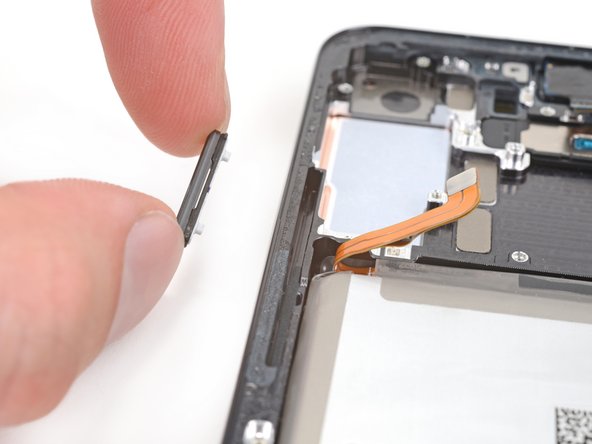
- Gently slide the tip of your blunt nose tweezers into the groove next to the side button.
- Press the two pegs of the volume buttons through the frame until you can get a grip on the buttons with your fingers.
- Grab the volume buttons with your fingers and lift them out.
Step 50

- To wrap things up, just reverse these steps to put everything back together.
- Got some e-waste? Make sure it’s recycled responsibly at an R2 or e-Stewards certified facility.
- If things didn’t go as planned, don't sweat it! A little troubleshooting might do the trick, or feel free to ask for some advice over at our Answers community.