Samsung Galaxy S22 Ultra Battery Replacement Guide: DIY Tutorial
Duration: 45 minutes
Steps: 36 Steps
This guide is all about the battery itself, so keep your eyes peeled for that little powerhouse!
Ready to give your Samsung Galaxy S22 Ultra a fresh power boost? This guide will walk you through replacing the battery itself. If you’re tackling the whole OEM screen and battery assembly as one unit, be sure to check out the other guide. And remember, if you need assistance, you can always schedule a repair!
Step 1

Hey there! To keep things safe and sound, let’s make sure your phone’s battery is below 25% before we start this repair. You know, just in case things get a little toasty. If you need help, you can always schedule a repair.
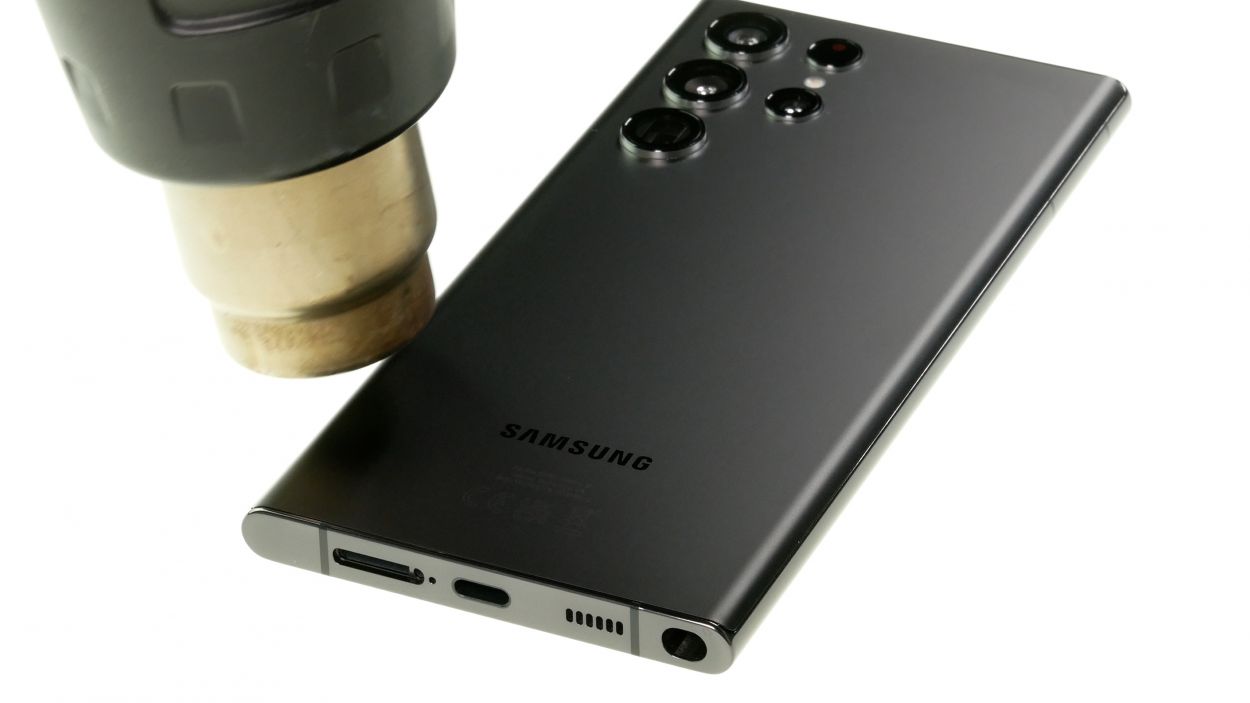
When using heat to loosen things up, remember that a hair dryer, heat gun, or hot plate can be your best friend – just be gentle and avoid overheating, since your phone’s display and internal battery aren’t big fans of extreme temperatures. If you need help, you can always schedule a repair
– Get your trusty iOpener nice and toasty for two minutes. Then, stick it on the right edge of the back cover. Let it hang out for a bit, like it’s enjoying the heat!
Tools Used


Step 2


Hey, the adhesive is strongest in the bottom right and top left corners. Don’t worry, you can do this, buddy! You’ve got this.
– While that sticky stuff chills out, let’s take a peek at something important: There’s a little bit of adhesive holding the back cover to the frame, all around the edges.
Step 3


If you’re having trouble making space, try adding a little more heat to help the adhesive soften up. Just remember to follow the iOpener guidelines so you don’t end up with an overheated situation. And if you need help, you can always schedule a repair!
– Grab your suction handle and stick it to the back cover, aiming for the center of the right edge. Get a good grip on it!
– Now, pull up on that suction handle with a nice steady force. You’re trying to make a little space between the cover and the frame.
– You’ve got that gap? Sweet! Now slide an opening pick into that gap to help you separate things.
Tools Used

Step 4


– Gently wiggle the pick along the right edge to break through the adhesive – you’re making great progress!
– Leave the pick in place near the bottom of the right edge, so the adhesive doesn’t seal back up. You’re doing a great job, and if you need help, you can always schedule a repair
Step 5

– Let’s get this repair started! Apply a heated iOpener to the bottom edge of the back cover for about two minutes. If you need help, you can always schedule a repair
Tools Used
Step 6


Tread carefully near the glassy edges, as this area is super delicate. Take it slow without cracking the scene!
– Slide a second opening pick into the bottom right corner.
– Tilt the pick upwards to follow the curve and gently rotate it around the bottom right edge.
Step 7


– Alright, slide that opening pick down to the bottom left corner like you’re cutting a cake! You want to slice through the adhesive, separating the parts nicely.
– Keep that pick in place down there to make sure the adhesive doesn’t get too cozy and stick back together. We don’t want that, do we?
Step 8

– Warm up that trusty iOpener and place it on the left edge of the back cover for a solid two minutes. You’re almost there!
Tools Used
Step 9


Hey, be super careful around those corners! The glass is kinda delicate there. Take your time, and you’ll be good to go!
– Let’s slide that third opening pick right into the bottom left corner, like you’re fitting a puzzle piece.
– Now, give that pick a little angle to match the curve of the device, and gently rotate it around that bottom left corner. You’re almost there!
Step 10


Hey, just a heads-up! Don’t go overboard with the pick – only go in about 5mm. You don’t want to mess with the antenna flex cable or the power button cable. If you’re not sure about this step, no worries, you can always schedule a repair.
– Now it’s time to get this repair started – slide your opening pick along the left edge to carefully cut through the adhesive, stopping when you reach the power button. Take your time and be gentle.
– Leave the pick in place on the left edge – this will prevent the adhesive from resealing and make the next steps a whole lot easier. If you need help, you can always schedule a repair
Step 11

– Warm up an iOpener and snugly press it onto the top edge of the back cover for a couple of minutes.
Tools Used
Step 12


Hey, take it easy around those corners! The glass is super delicate, so be careful and go slow to keep it from cracking. If you need help, you can always schedule a repair.
– Slide an opening pick into the gap at the top right edge.
– Angle the pick upwards to match the curved edge and then spin it around the top right corner. You got this!
Step 13


Don’t go overboard with the pick! Just a tiny bit, about 4mm, is all you need. We don’t want to hurt any of those delicate cameras or sensors, now do we? If you’re feeling nervous, you can always schedule a repair.
– Gently slide the pick all the way to the top left corner – this will help break the adhesive bond.
– Leave the pick right where it is, so the adhesive doesn’t reseal itself. If you need help, you can always schedule a repair
Step 14


Be cool and just slide that pick in no more than 4mm, or you might mess up the cameras.
– Slide an opening pick into the tiny gap at the top left edge.
– Tilt the pick upwards to follow the curve and gently rotate it around the top left corner.
Step 15


Be careful and only insert the pick up to 4 mm deep, as going further could put your cameras in jeopardy!
– Now, gently slide the pick towards the bottom camera. Keep going until you’ve cut through the remaining adhesive, but be sure to stop before you reach the power button. If you need help, you can always schedule a repair
Step 16


If that cover is still hanging on for dear life, slide that opening pick around the edge until the cover is totally free. You got this!
– Alright, let’s pop that back cover off! No need to be shy, just give it a gentle tug.
– During reassembly – a little tip from your friends at Salvation Repair:
– This is a good time to power up your phone and make sure everything’s working like a charm before you button things up. Then give it a power down before you move on.
– Any stubborn adhesive bits? Use a pair of tweezers or your fingers – no worries, it’s all good. Need a little extra help? A touch of heat might do the trick.
– If you’re using custom-cut adhesives, check out this guide. It’s full of tips and tricks.
– If you’re working with double-sided tape, this guide will help you stick it like a pro!
Step 17


Careful with that right side of the charging coil, folks! Don’t let that display interconnect cable become a victim of your repair frenzy. If you’re feeling extra unsure, you know the deal: schedule a repair and let our experts swoop in!
The wireless charging coil is stuck to the battery with a little bit of adhesive, so be gentle when you’re removing it. If you need help, you can always schedule a repair
– Let’s get this wireless charging coil separated! Slide your trusty opening pick between the right edge of the coil and the battery. You got this!
– Now, gently slide that pick along the right edge to loosen up that adhesive. You’re doing great!
Step 18


To re-attach press connectors, align it carefully, and press down on one side until it clicks. Repeat on the other side. Don’t press on the middle. If it’s misaligned, the pins could bend and cause damage. If you need help, you can always schedule a repair.
– Let’s get those connectors disconnected! Use the pointed end of your spudger tool to gently pry the NFC antenna press connector loose from the motherboard.
– Now, do the same thing with the wireless charging coil press connector. You got this!
Tools Used

Step 19

– Grab your trusty Phillips screwdriver and take out the five 3.5mm screws holding down the NFC antenna and charging coil. If you need help, you can always schedule a repair
Step 20

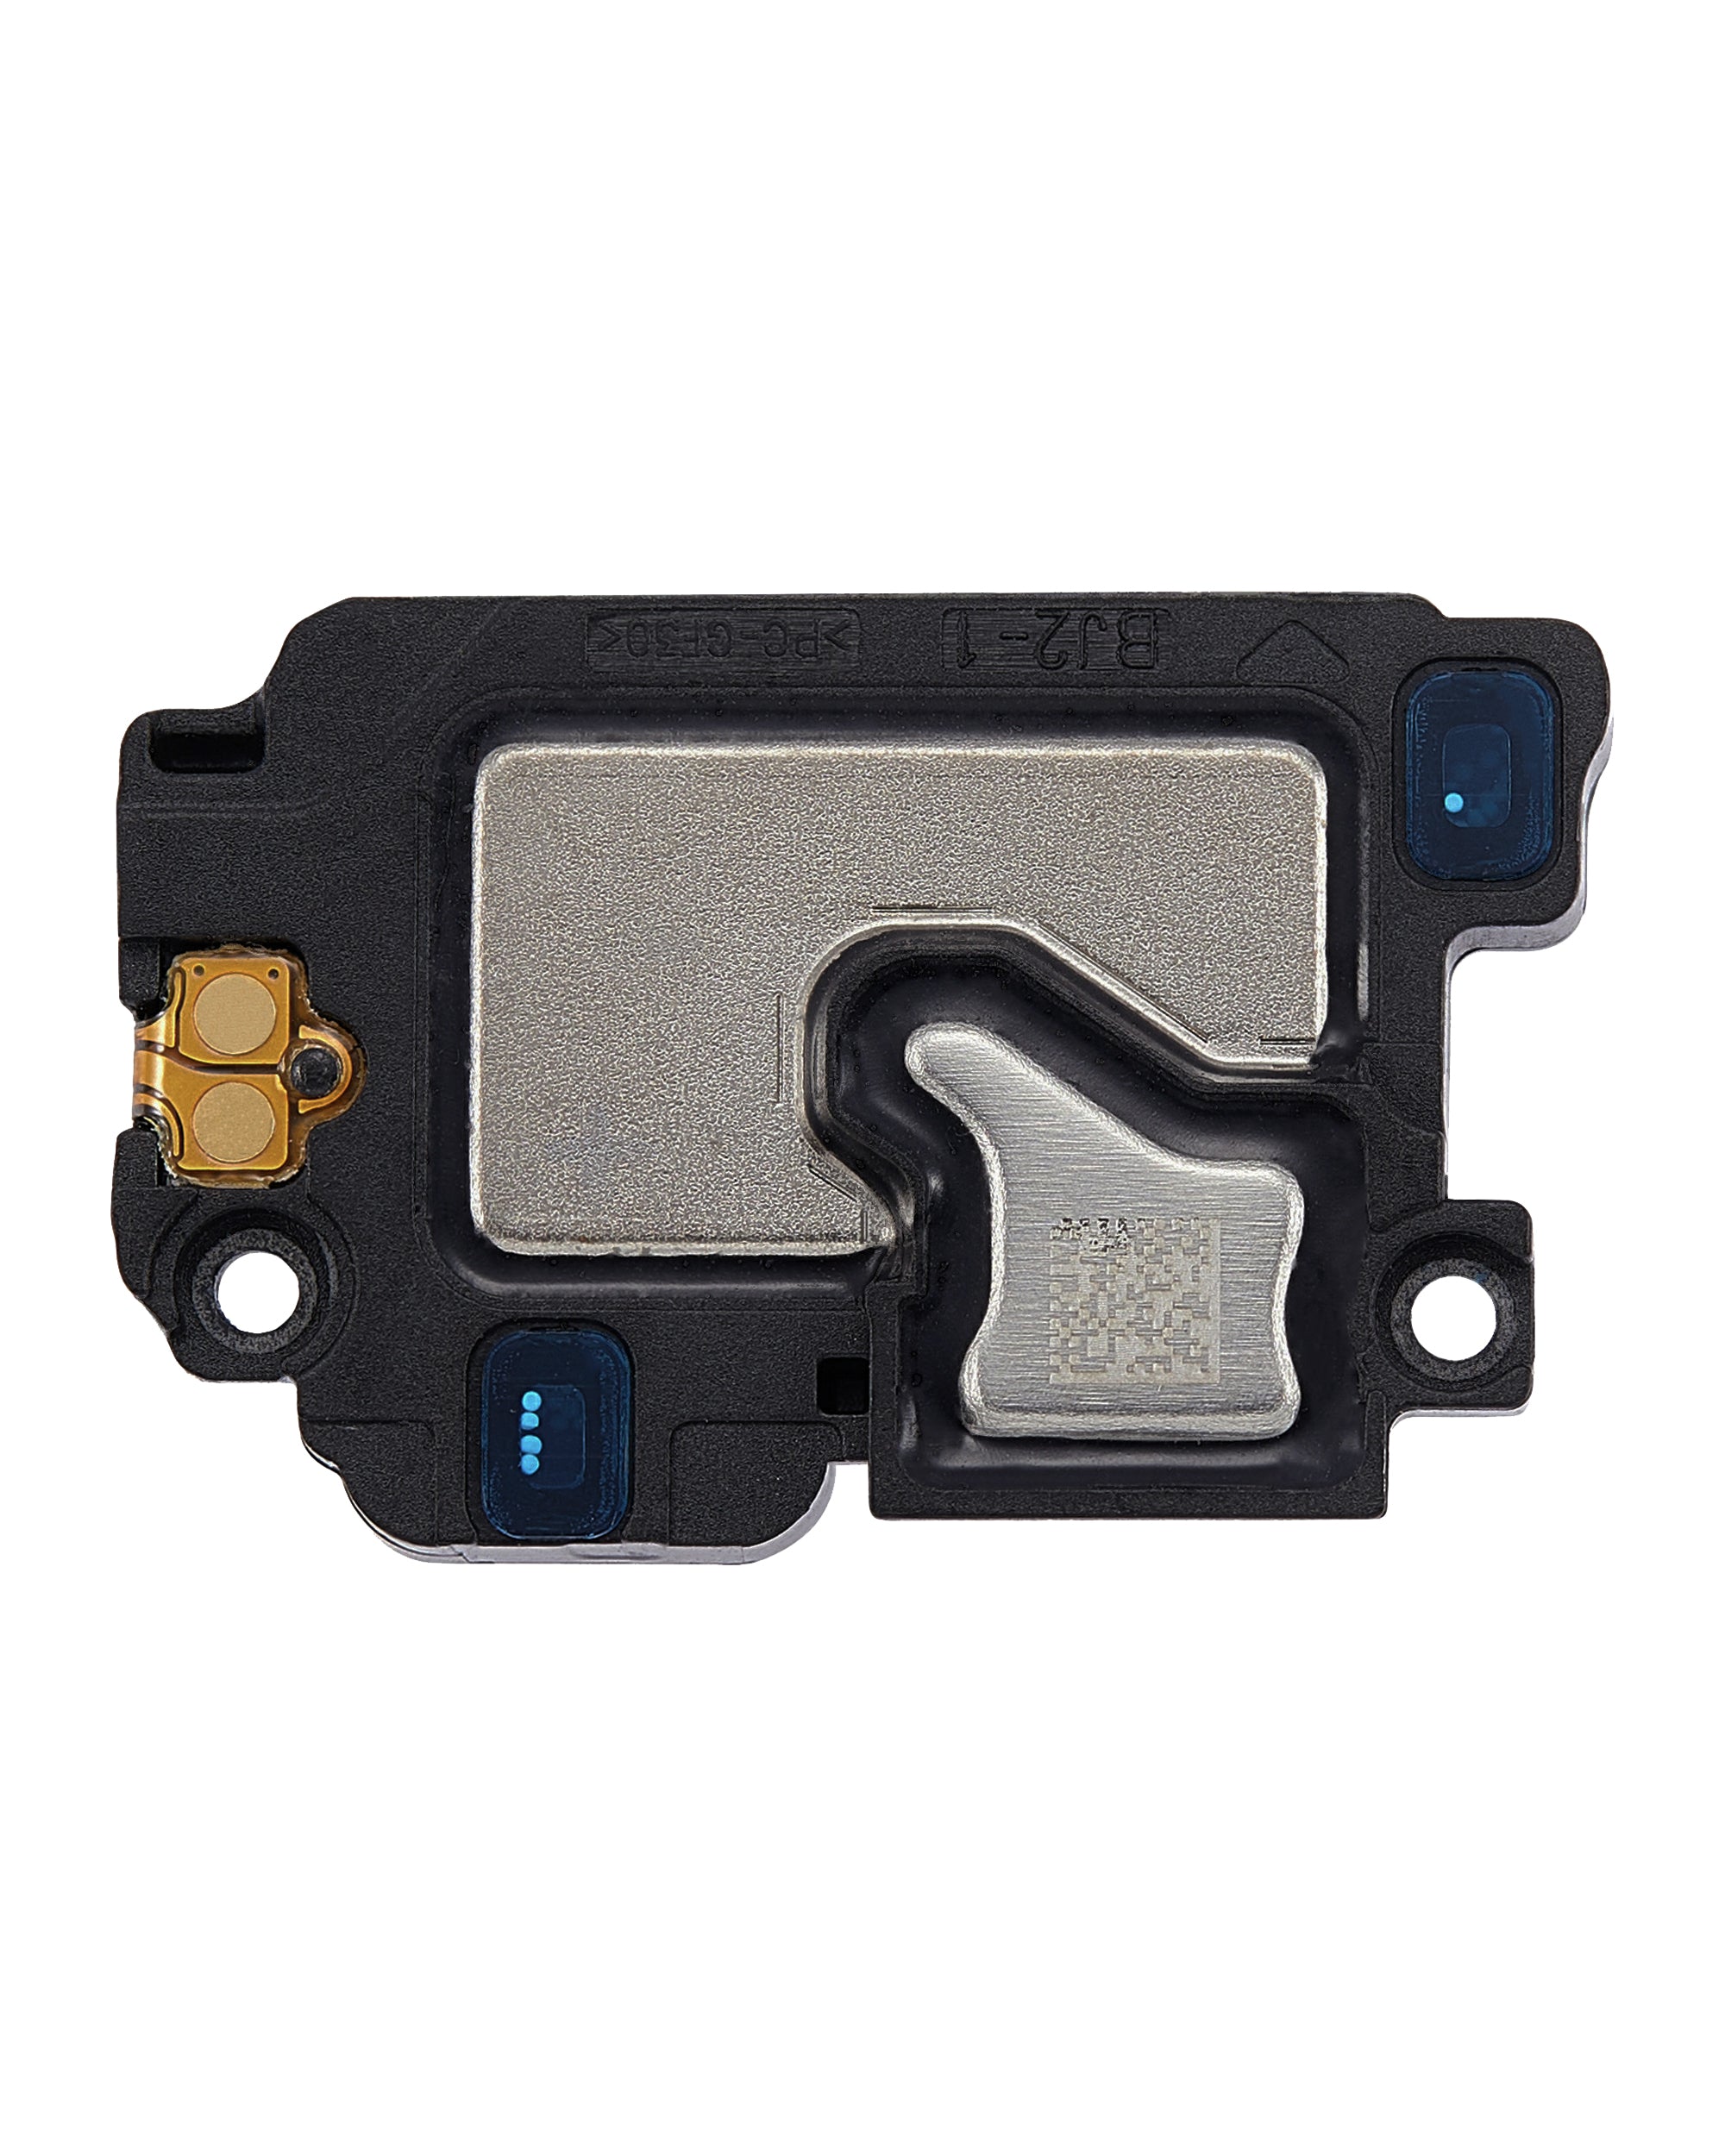
– Let’s get those speakers singing! Use your trusty Phillips screwdriver to remove the six 3.5 mm screws holding the loudspeaker in place. If you need help, you can always schedule a repair
Step 21


– Gently slide the sharp tip of your spudger into the upper right corner where the loudspeaker meets the frame.
– Carefully pry upwards to release the loudspeaker from its snug spot in the frame.
– When putting everything back together, give the loudspeaker a little press around its edges to snap it back into place.
Tools Used
Step 22


The wireless charging coil is the key to keeping all these parts in place. If you need help, you can always schedule a repair
– Alright, let’s get these components out of the frame. Carefully grab the NFC, wireless charging coil, and loudspeaker. Gently lift them off the frame. You’ve got this!


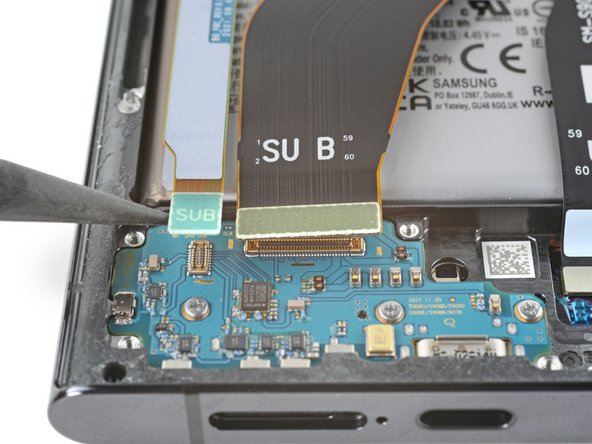
Step 24


– Alrighty, tech enthusiasts! Let’s keep this journey fun and easy. Now, grab your trusty spudger and give a little nudge with its pointy side to disconnect the lower 5G mmWave antenna press connector. Keep going, you’re almost there! If you need help, you can always schedule a repair.
Tools Used
Step 25

– Time to bust out that trusty Phillips screwdriver! Give those two 3.5 mm-long screws holding the antenna bracket a little twist and send ’em packing. You got this!
Step 26


– Let’s get this antenna bracket out! Use the pointed end of your spudger to gently slip it between the lower screw mount of the antenna bracket and the frame.
– Now, give that bracket a little pry up until you can grab it with your trusty tweezers or fingers.
– And there you go! You’ve successfully removed the lower 5G mmWave antenna. If you need help, you can always schedule a repair
Tools Used
Step 27
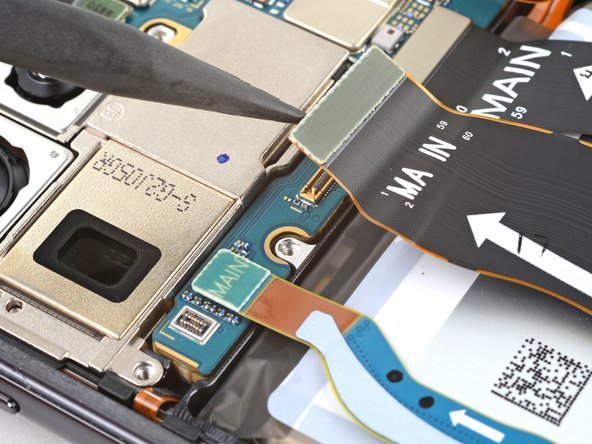
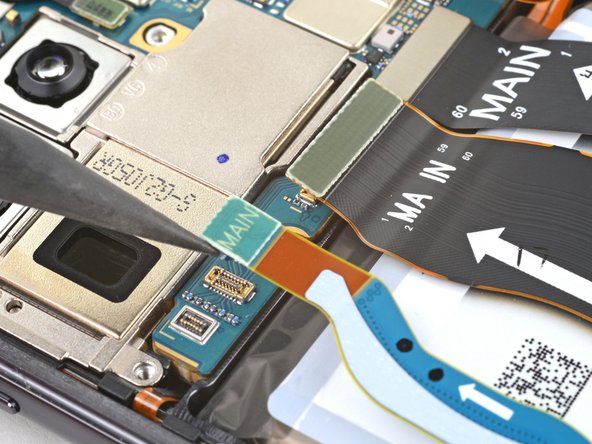

– Grab your trusty spudger and gently use the pointed end to lift and disconnect the main interconnect cable from the motherboard. You’ve got this!
– Now, let’s move on to the secondary interconnect cable, which is just to the left of the primary one. Give it a gentle pry just like you did before.
Tools Used
Step 28

Step 29

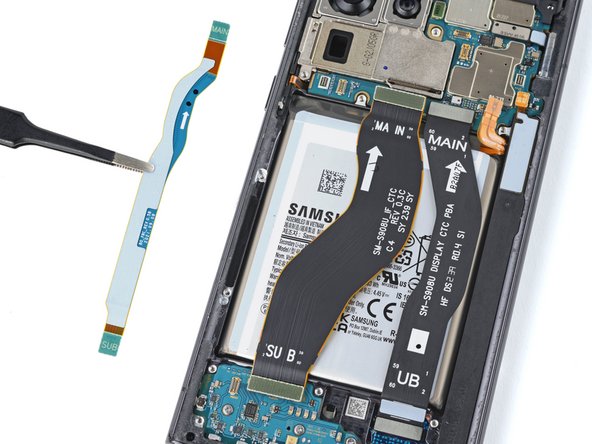

– Alright, let’s get those interconnect cables out of the frame. Grab ’em and give ’em a little wiggle. They’ll come right out.
Step 30

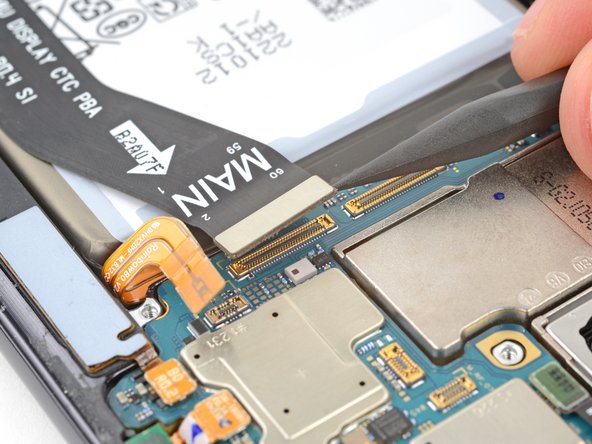
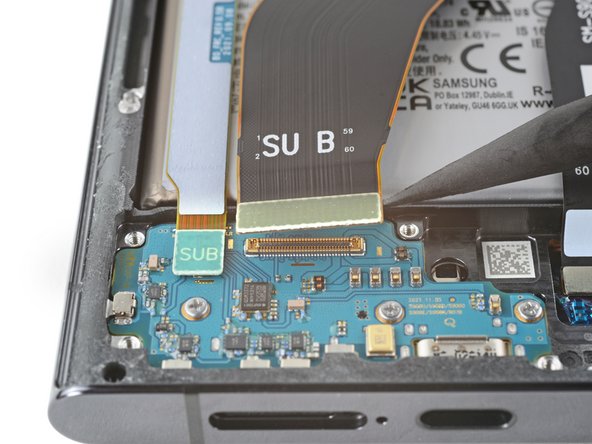
– Grab your trusty spudger and gently nudge up that screen press connector from the motherboard. You’ve got this!
Tools Used


Step 32

– Disconnect the screen cable with care.
Step 33

Too much alcohol can be a bit too much for your display – let’s keep it safe and sound!
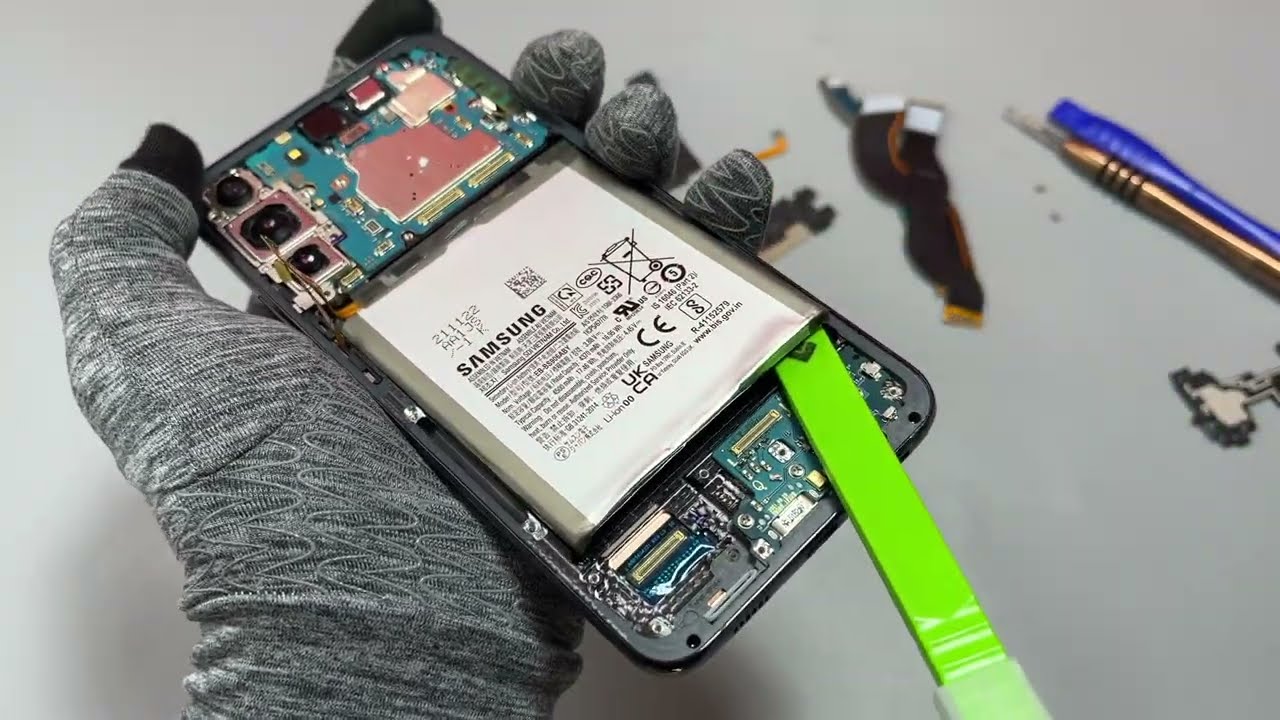
The battery is stuck to the frame with some pretty strong adhesive, so be prepared to use a bit of elbow grease to get it out. If you need help, you can always schedule a repair
– Time to get this repair started. Use a pipette or syringe to carefully apply 1-2 drops of high-concentration isopropyl alcohol (we’re talking 90% or higher) between the left edge of the battery and the frame. This will help loosen things up.
– Now, gently elevate the left edge of your phone for about a minute. This will give the isopropyl alcohol time to seep under the battery and soften the adhesive. If you need help, you can always schedule a repair
Step 34
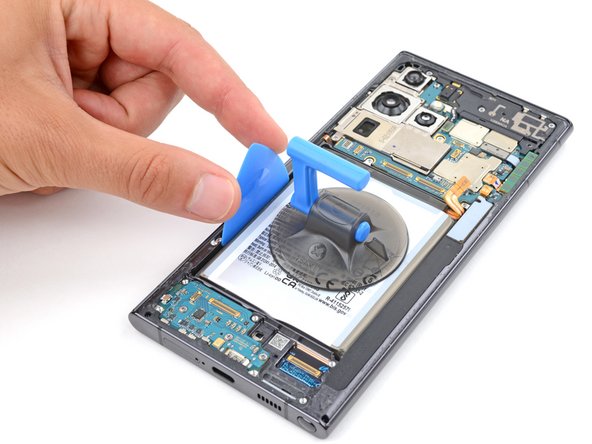

Be careful when handling the battery – it can leak harmful chemicals or even catch fire if punctured. If you’re not comfortable with this step, don’t worry, you can always schedule a repair
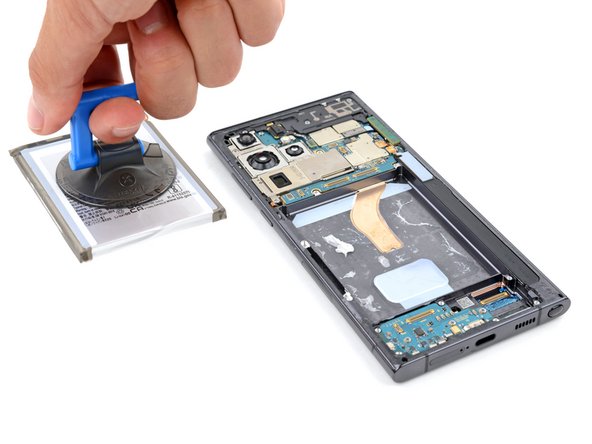
– First, attach a suction cup to the battery, positioning it as close to the center of the left edge as you can – this will give you a good grip.
– Next, carefully insert the tip of an opening pick between the left edge of the battery and the frame, making sure not to push too hard.
– Now, gently push the opening pick down and rotate it so the long end is between the battery and frame – you’re making great progress! If you need help, you can always schedule a repair
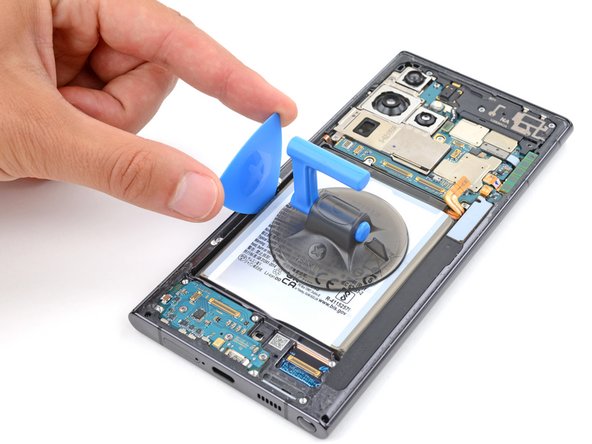
Step 35
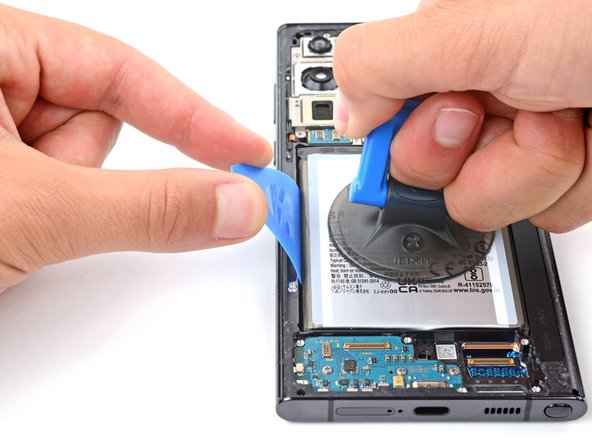

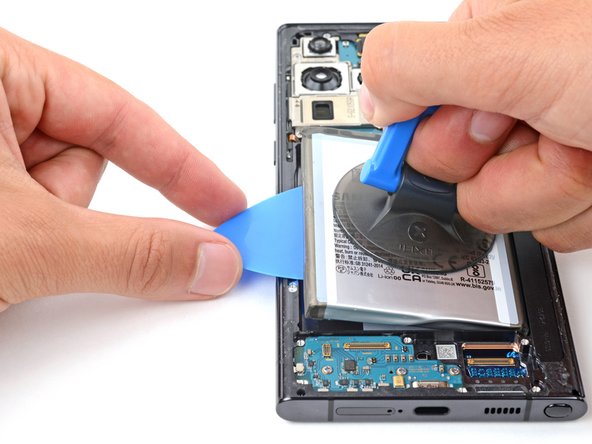
Be careful not to crease or bend the battery—it can leak dangerous chemicals and/or catch fire. If you need help, you can always schedule a repair.
Hang tight and give that adhesive a little time to chill out. If the battery isn’t moving, just give it a few more drops of isopropyl alcohol and try again. You got this! And remember, if you need help, you can always schedule a repair.
– Give the suction cup a firm, steady pull upwards while using the opening pick to gently pry the battery away from the frame.
– Keep a steady hand and maintain constant pressure on both the pick and suction cup until the battery comes loose from the frame. If you need help, you can always schedule a repair
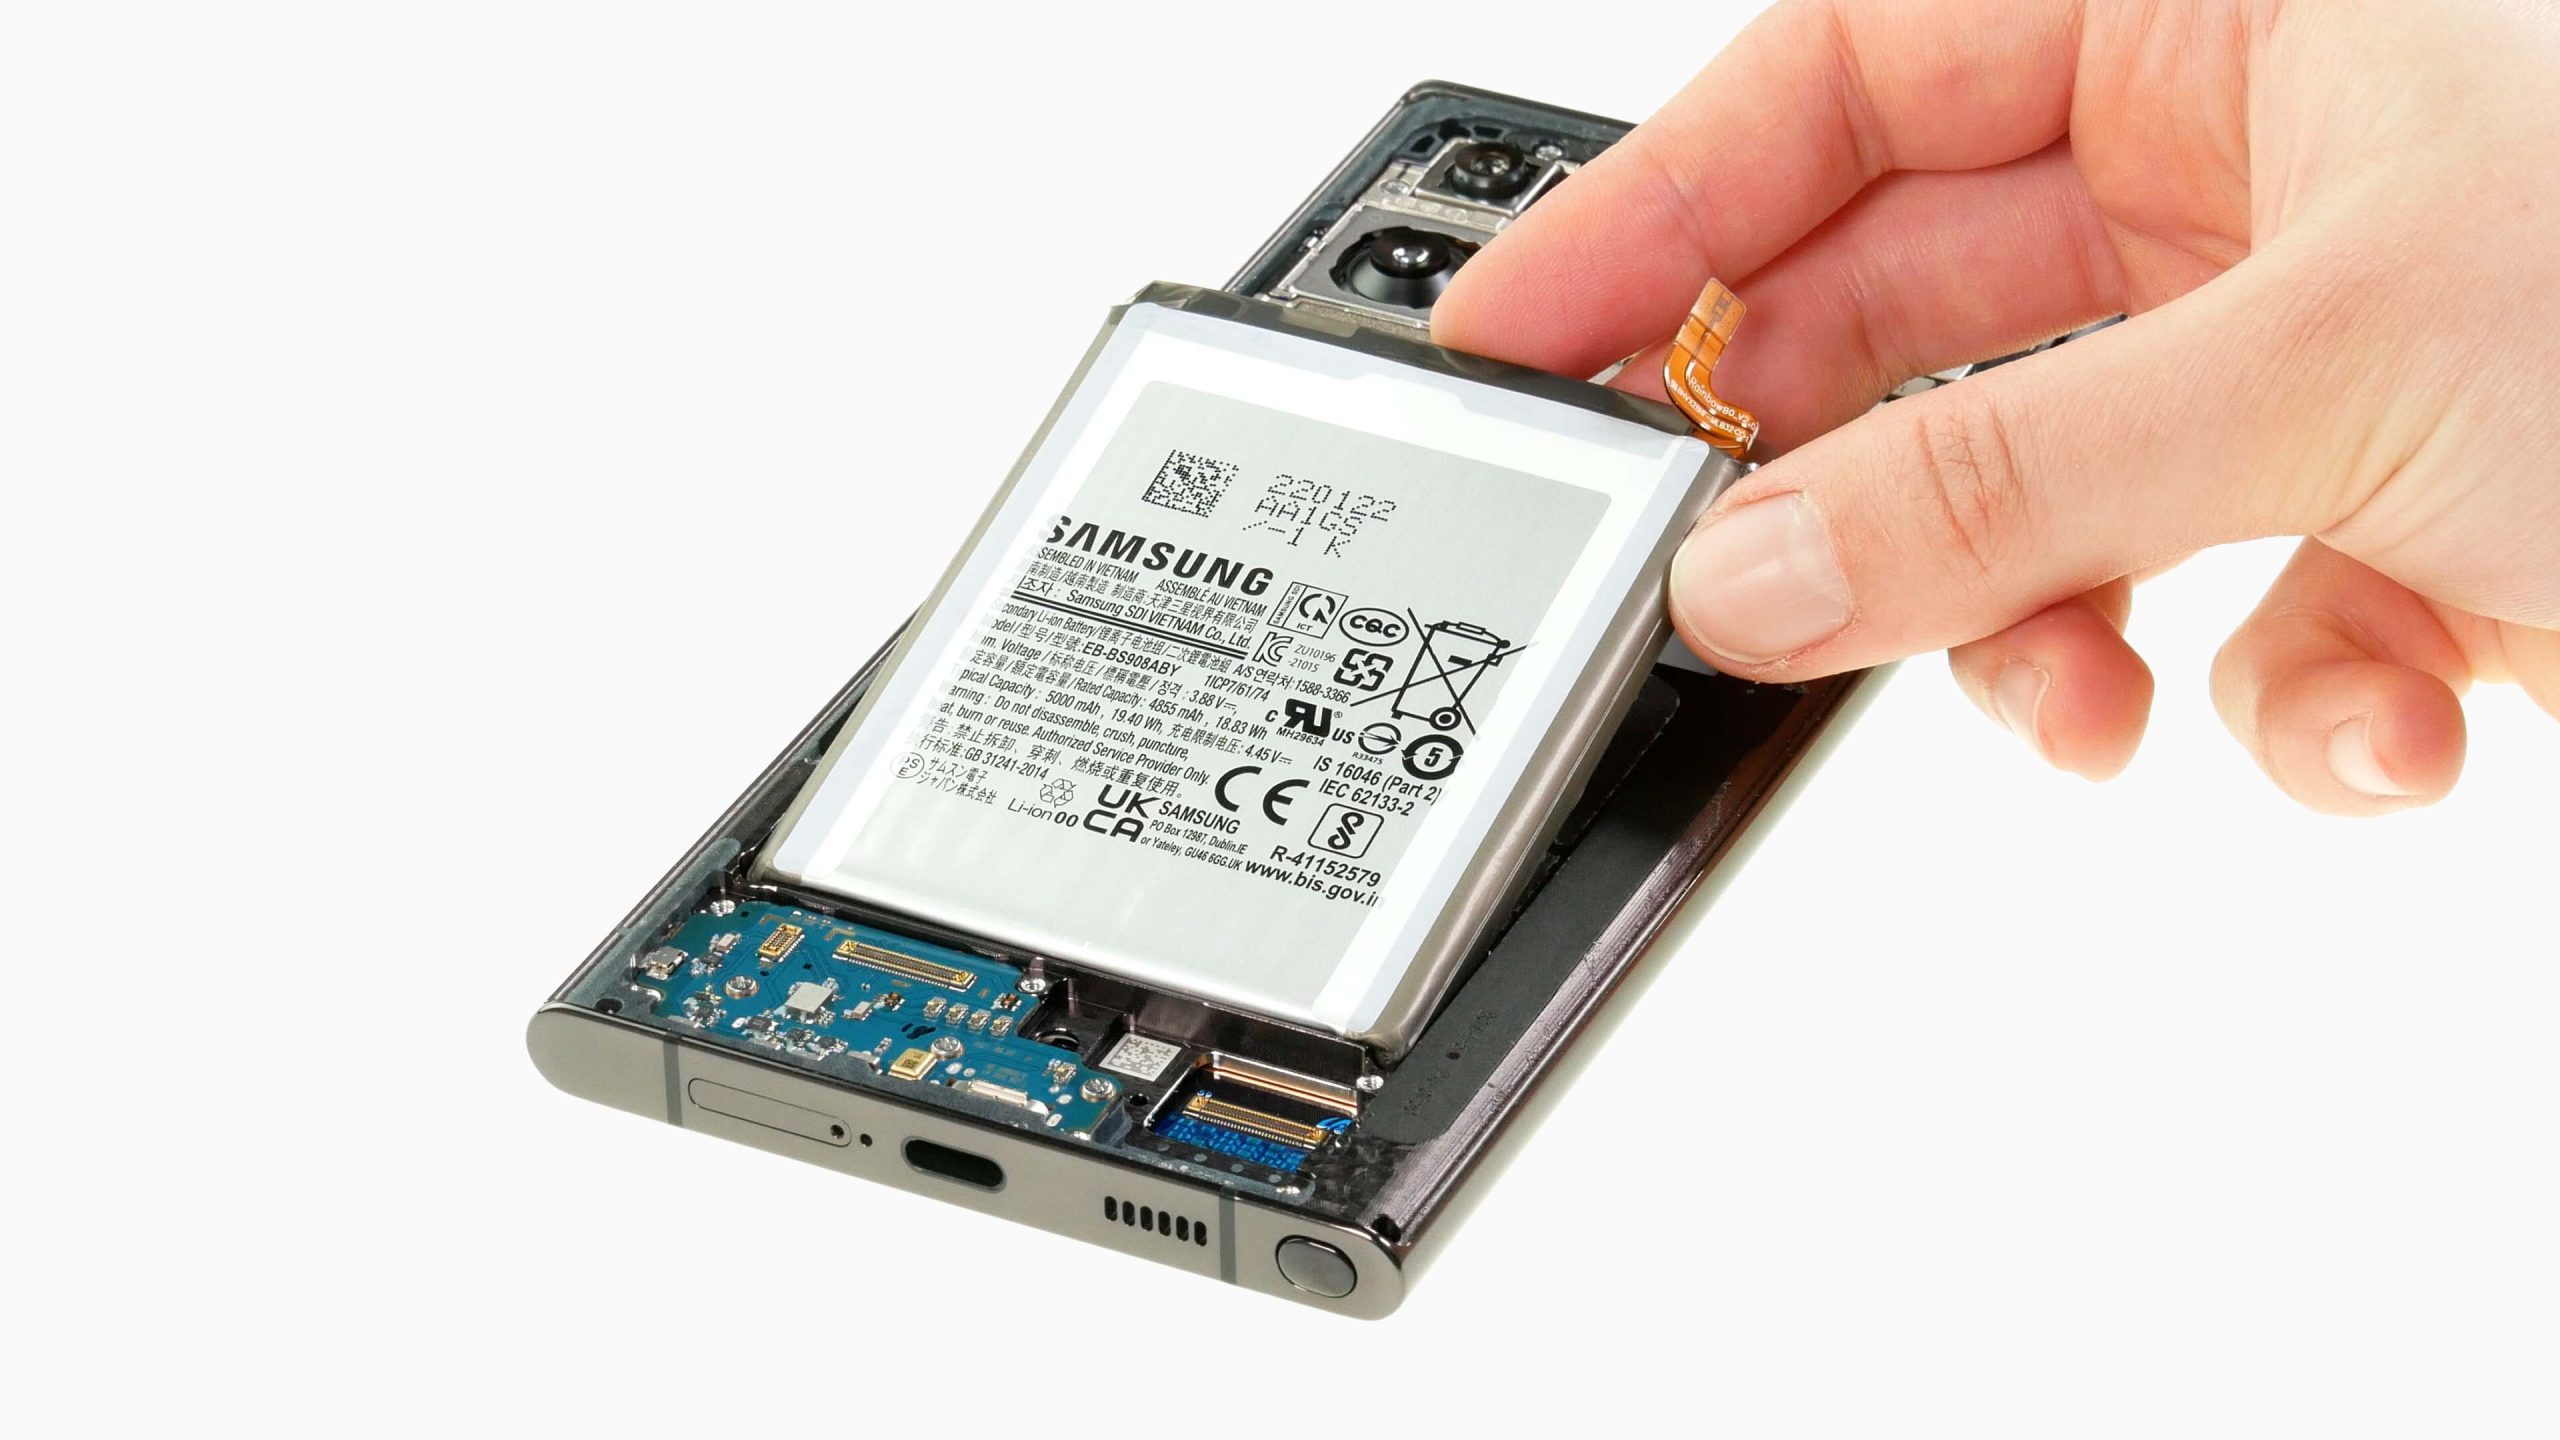
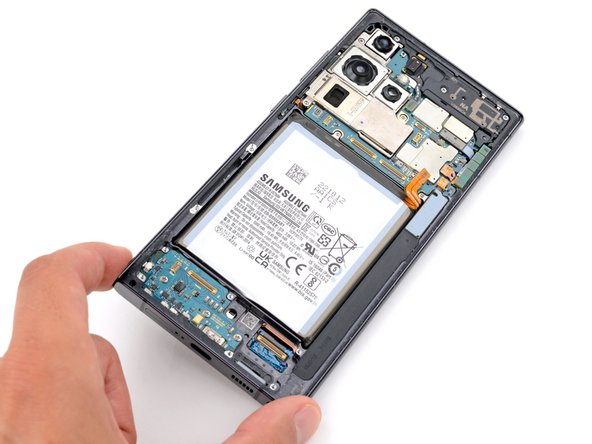
Step 36
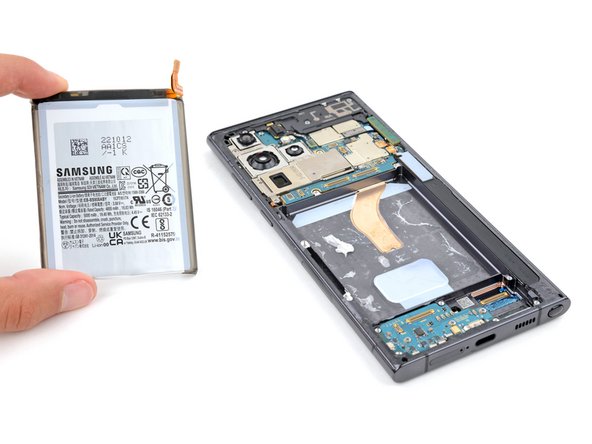

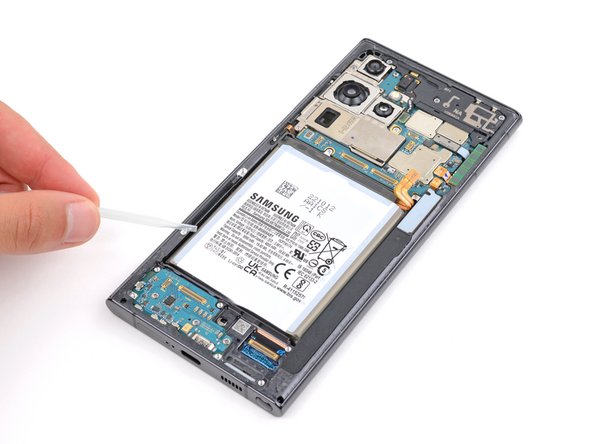
– Take out the battery – it’s time to give your device a new power source.
– If you used isopropyl alcohol, hang tight for ten minutes to let it fully evaporate before putting in the new battery.
– Now, follow our step-by-step guide to install your new battery. If you need help, you can always schedule a repair