Samsung Galaxy S22 Ultra USB-C Port and Charging Board Replacement
Duration: 45 minutes
Steps: 30 Steps
Get ready to breathe new life into your Samsung Galaxy S22 Ultra by replacing the USB-C port and charging board. Before you dive in, make sure to fully discharge the battery to minimize the risk of any unexpected thermal events. If your battery is looking a little swollen, take the necessary precautions to keep things safe. Keep in mind that while you'll be able to get your device up and running again, the repair might affect its water resistance - but with a little care when reapplying the adhesive, you can get it pretty close to its original state. Your device will no longer have its IP rating, but it'll be functioning like new.
Step 1


Oops! If you accidentally poked the microphone hole with the SIM eject tool, no worries—your microphone probably didn’t take any damage. Just a little misadventure, and you’re all set to move on. If you need a hand with anything else, you can always schedule a repair.
- Grab a SIM eject tool, a bit, or even a straightened paperclip, and gently insert it into the tiny hole on the bottom edge of your phone where the SIM tray hides. Give it a little push—don’t force it—and the tray will pop out. Carefully pull out the SIM card tray, and you’re all set for the next step. If you need a hand, you can always schedule a repair.
Step 2

Before diving into this repair adventure, let your phone's battery chill down to below 25%. A fully charged lithium-ion battery can be a bit of a wild card if it gets damaged, so let's keep things safe and sound.
A hair dryer, heat gun, or hot plate can step in as your warm-up act—just keep the temp cozy so the screen and battery don’t throw a heat tantrum.


Step 3


The strongest adhesive grip is found in the bottom right and top left corners—so give those areas a little extra attention to get things started.
- While the adhesive takes its sweet time to get soft, here are a couple of things to keep in mind:
- The back cover is held tight with some sticky stuff all around the edge of the frame.
Step 4


If the gap just isn't happening, try adding a bit more heat to loosen up that stubborn adhesive. Keep an eye on the iOpener instructions so things don’t get too toasty.
- Stick the suction handle on the back cover, aiming for the center of the right edge—right in the sweet spot.
- Give the handle a steady, strong pull to pop open a gap between the cover and the frame. Slow and steady wins here!
- Slide an opening pick into that gap like a pro.
Tools Used

Step 5


- Slide that little pick like you’re buttering toast along the right edge—keep it nice and smooth to slice the sticky stuff.
- Park the pick near the bottom right corner so the adhesive doesn’t try to sneak back together while you’re busy elsewhere.
Step 6

- Warm up the bottom edge of the back cover with a heated iOpener for about two minutes—think of it as giving your device a little spa treatment before the real work begins.
Tools Used
Step 7


Watch your fingers around those corners—glass is super delicate there. Take your time and work gently to keep from cracking it.
- Place a second opening pick near the bottom right corner. Tilt the pick upward to match the curved edge and gently rotate it around that corner, easing it apart.
Step 8


- Gently slide your opening pick into the bottom left corner to cut through the adhesive. Keep the pick in that corner to stop the adhesive from sealing back up. If you need a hand, you can always schedule a repair.
Step 9

- Warm up the left edge of the back cover with a heated iOpener for about two minutes—think of it as giving your device a little spa treatment before we get hands-on.
Tools Used
Step 10


Corners are the drama queens of glass—super delicate! Take it slow when slicing around them to keep things in one piece.
- Slip a third opening pick into the bottom left corner—like you're sliding a bookmark into a good novel.
- Tilt the pick so it hugs that smooth edge, then swing it around the corner like you’re tracing a cool curve.
Step 11


Be careful to only insert the pick up to 5 mm, as going too far could mess with the antenna flex cable or the power button cable. Keep it light and gentle, and you'll be golden!
- Gently slide your opening pick along the left edge to cut through the adhesive, stopping right when you reach the power button. Keep the pick in place on the left side to prevent the adhesive from sealing back up.
Step 12

- Warm up your iOpener and let it hang out on the top edge of the back cover for about two minutes.
Tools Used
Step 13


Corners are extra delicate—go slow and steady when slicing here to keep the glass happy and intact. No rush, just smooth moves!
- Slide an opening pick into the gap up at the top-right corner—think of it as sneaking a VIP pass past the velvet rope.
- Tilt the pick upward to hug that curved edge, then sweep it around the corner like you’re drawing a smile on a selfie.
Step 14


Only insert the pick-up tool up to 4 mm—go too deep, and you risk messing up the cameras or sensors. Keep it light and precise, and you'll do just fine. If you need help, you can always schedule a repair.
- Gently slide the pick into the top left corner to cut through that sticky adhesive like a pro.
- Keep the pick in place to stop the adhesive from sealing back up. You've got this!
Step 15


Be careful when inserting the pick! Only go up to 4mm to avoid any accidental damage to the cameras.
- Slip an opening pick into the little gap at the top left edge—like you're sneaking into a secret club.
- Tilt the pick upward so it hugs the curve, and smoothly spin it around that top left corner.
Step 16


Keep that pick shallow—no deeper than 4 mm—so you don’t accidentally photobomb your camera with a scratch.
- Gently slide the pry tool toward the bottom camera to cut through the remaining adhesive, stopping just before you reach the power button.
Step 17


Still feeling clingy vibes from that cover? Glide an opening pick around the edge like you’re tracing the rim of your favorite coffee cup—soon it’ll pop off clean and drama-free.
- First things first, let's get that back cover off! Grab it and give it a gentle pull.
- Now, as you put everything back together:
- Here's a pro tip: power on your phone and check that everything's working like a charm before you seal it up. Just remember to turn it off completely before diving back in!
- If you find any stubborn adhesive bits, don't sweat it! Use tweezers or your fingers to remove them. A little heat can help if you're having a tough time getting them off.
- Using custom-cut adhesives? Be sure to follow this guide.
- If double-sided tape is your jam, check out this guide.
Step 18


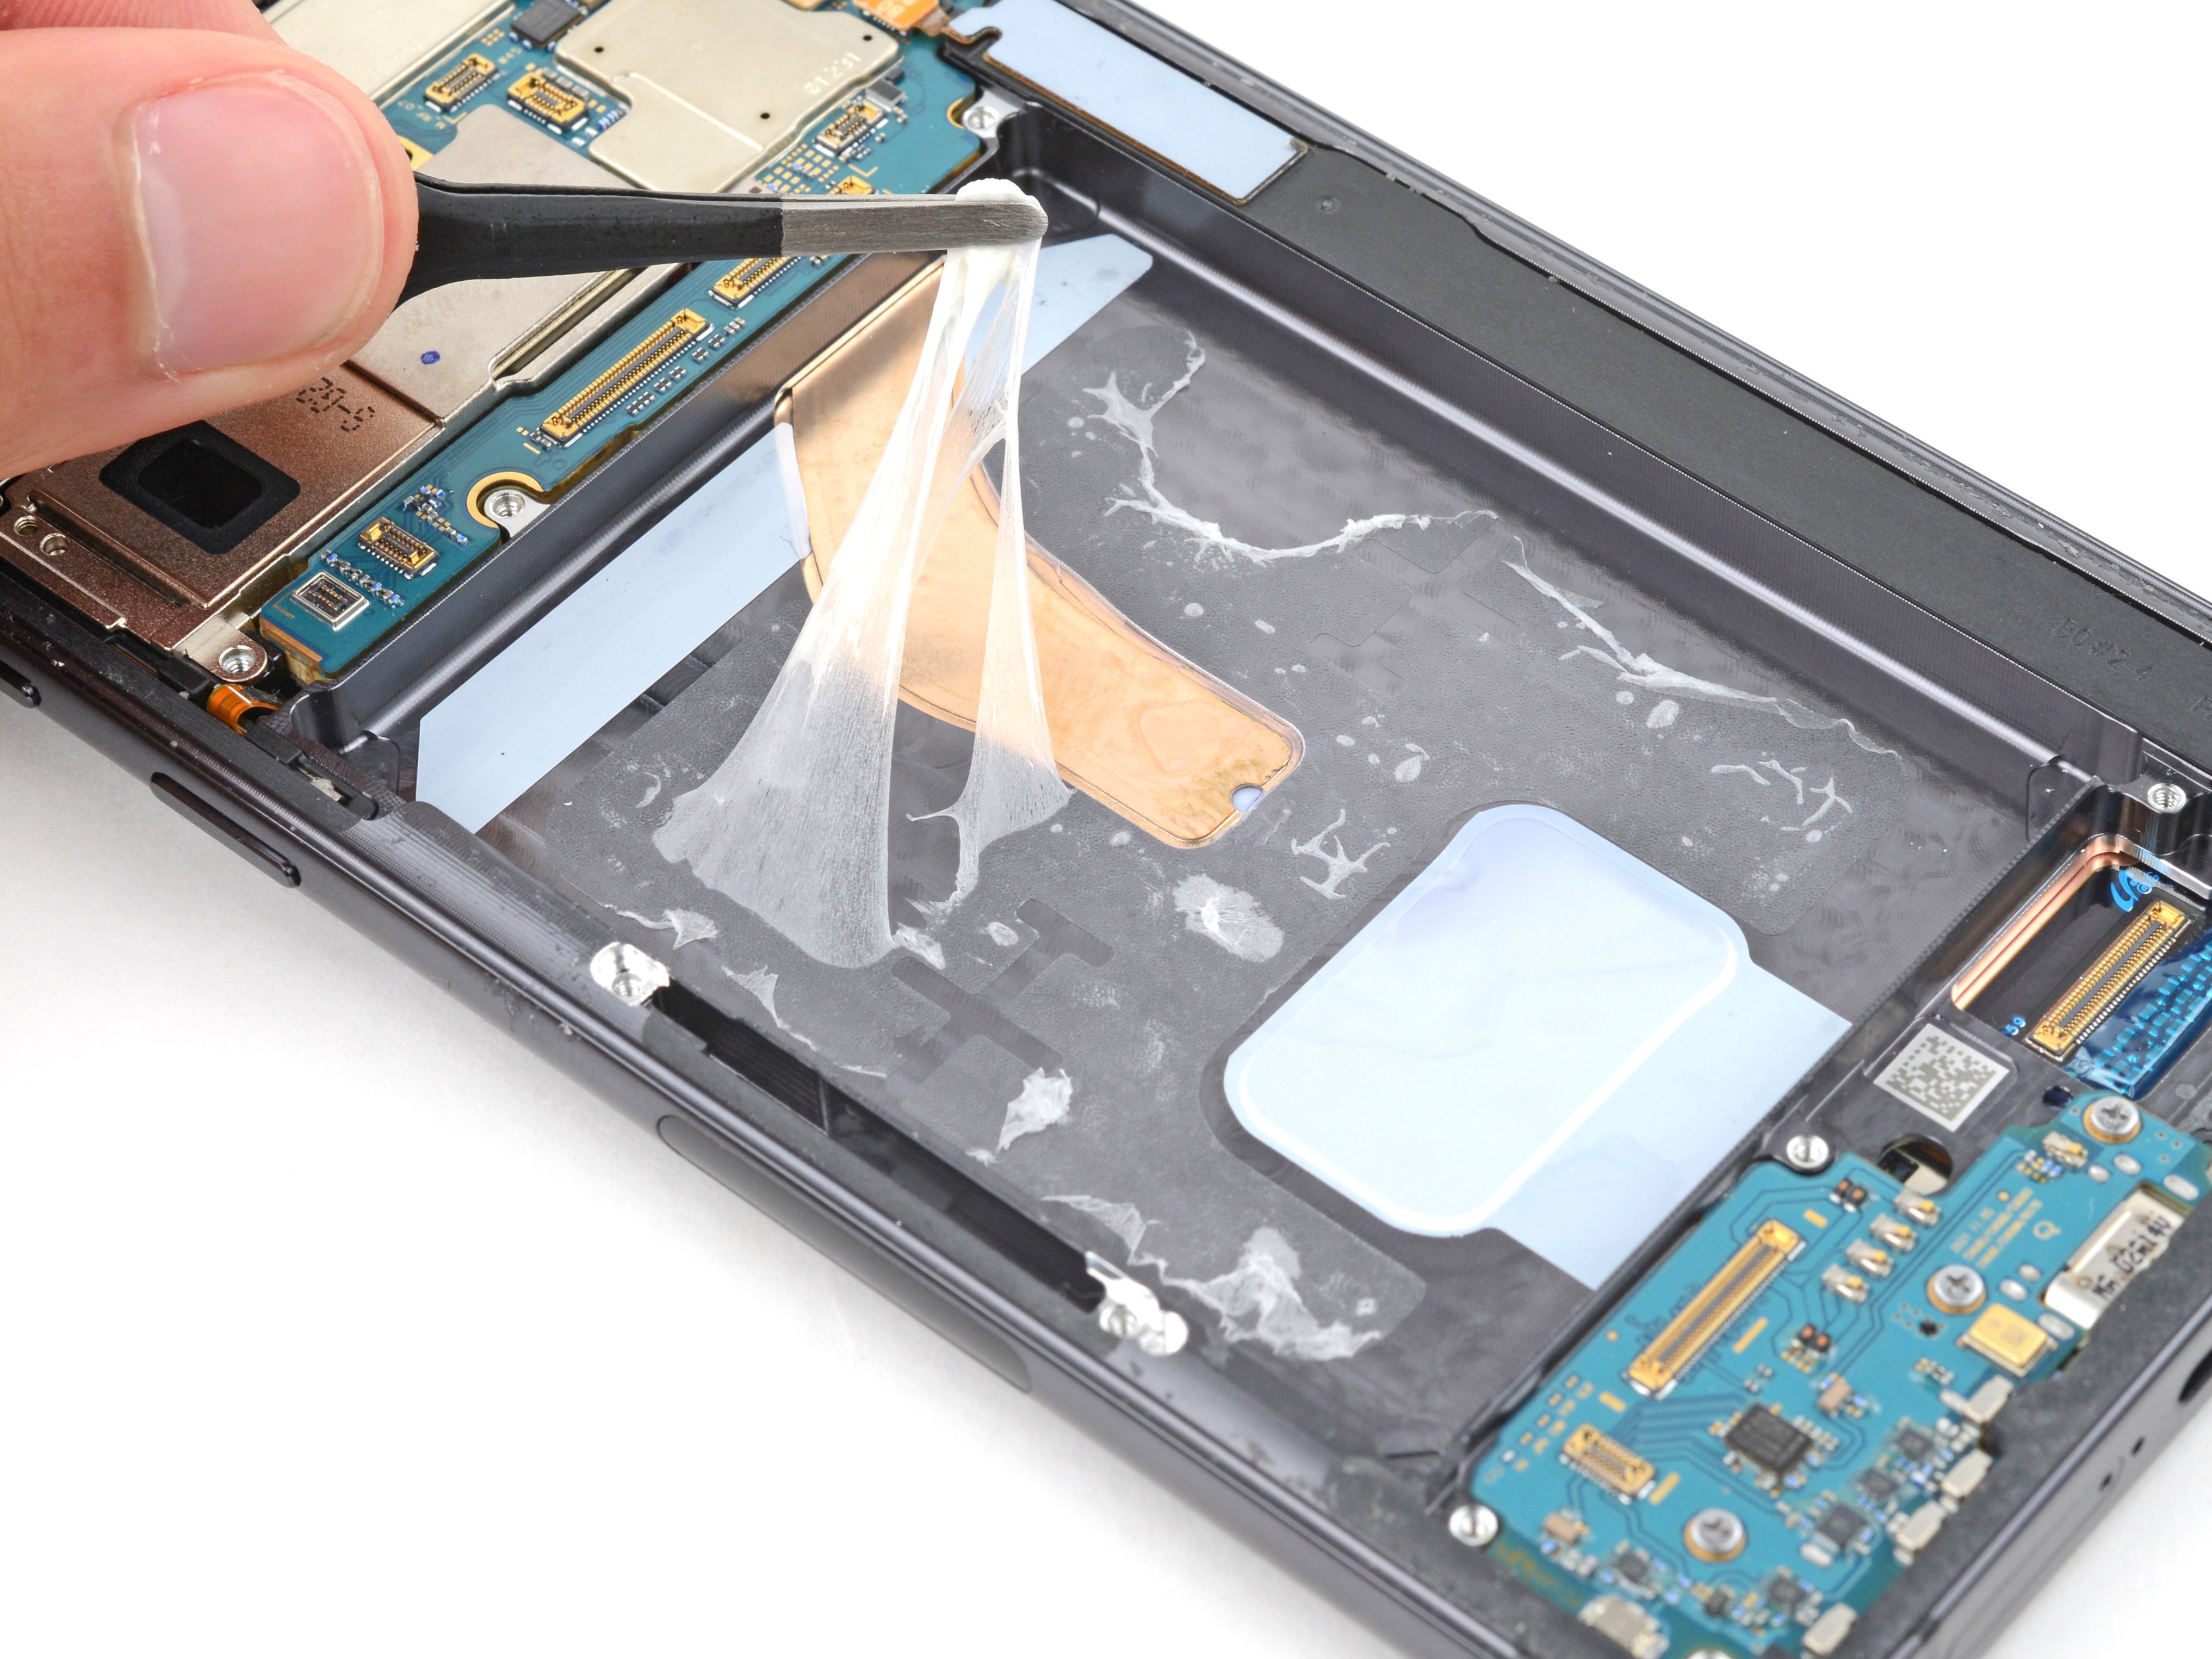
Take care not to tug or tear the display interconnect cable on the right side of the charging coil—gentle hands make for happy repairs.
The wireless charging coil is gently stuck to the battery, like it just can't let go.
- Start by gently wedging an opening pick right between the right edge of the wireless charging coil and the battery. Then, glide the pick along the right side to carefully loosen and separate the adhesive holding everything in place.
Step 19


To re-attach the connectors, gently line them up and press one side down until it clicks into place, then do the same on the other side. Avoid pressing on the middle – we don’t want any pins getting bent or damaged. Take your time, alignment is key!
- Gently use the pointy end of your trusty spudger to pop off that NFC antenna press connector from the motherboard – it’s like giving it a little hug goodbye!
- Now, go ahead and show some love to the wireless charging coil press connector too; a little pry and you’ll have it free in no time!
Tools Used

Step 20

- Grab your Phillips screwdriver and back out the five 3.5 mm screws holding down the NFC antenna and charging coil. Easy does it—no need to rush.
Step 21

- Grab your Phillips screwdriver and loosen those six 3.5 mm screws holding the loudspeaker in place. Once they're out, you're all set to move forward. If you need a hand at any point, you can always schedule a repair.
Step 22


Skip prying straight against the battery—use the frame's little ridges for a boost instead.
- Slide the pointy end of your spudger into the upper right corner between the loudspeaker and the frame—like you’re sneaking a cookie from the jar.
- Gently pop up the loudspeaker to release it from its cozy frame spot.
- When it’s time to put things back together, press around the loudspeaker’s edge to snap it snugly into place.
Tools Used
Step 23


The wireless charging coil is the glue that keeps these pieces hanging out together.
- Lift out the NFC antenna, wireless-charging coil, and loudspeaker—think of it as popping the last three toppings off a pizza slice. They’ll come away together, no drama.
Step 24


- Gently use the pointed end of your spudger to lift and detach the battery press connector. You're doing great!
Tools Used
Step 25


- Grab your spudger and gently use the pointed end to lift and disconnect the main interconnect cable from the motherboard. Easy does it!
- Do the same for the secondary interconnect cable. A little extra care here, and you'll be golden!
Tools Used
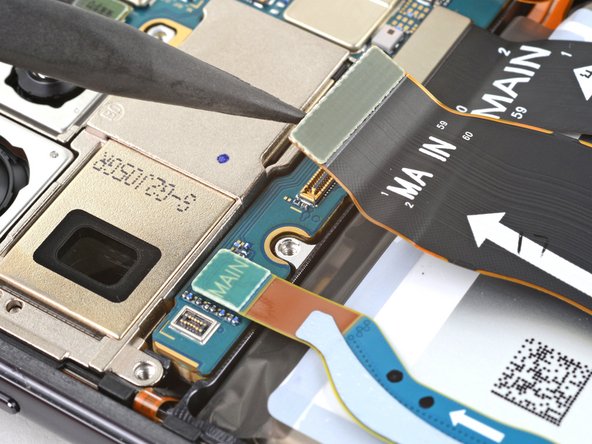
Step 26


- Grab your trusty spudger and gently pop up the press connector for the primary interconnect cable from the charging board. Easy does it!
- Now, do the same for the secondary interconnect cable—just a quick lift and you're good to go.
Tools Used
Step 27
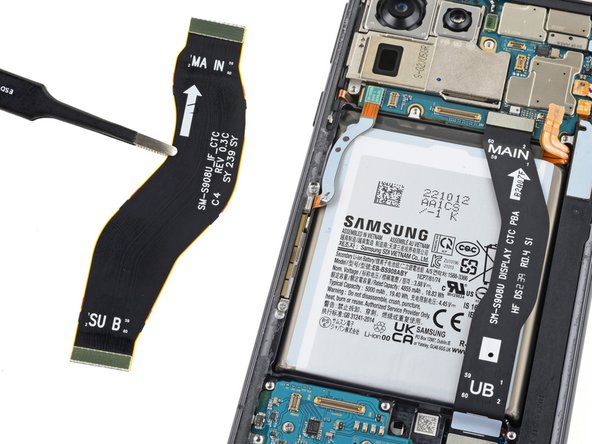
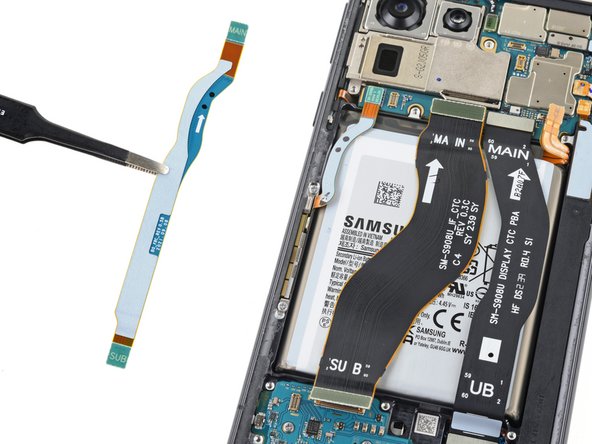

- Unplug those interconnect cables from the frame and set them aside. You've got this!
Step 28

- Grab your Phillips screwdriver and take out the three 3.5 mm screws holding down the charging board. Easy does it—don’t lose those little guys!
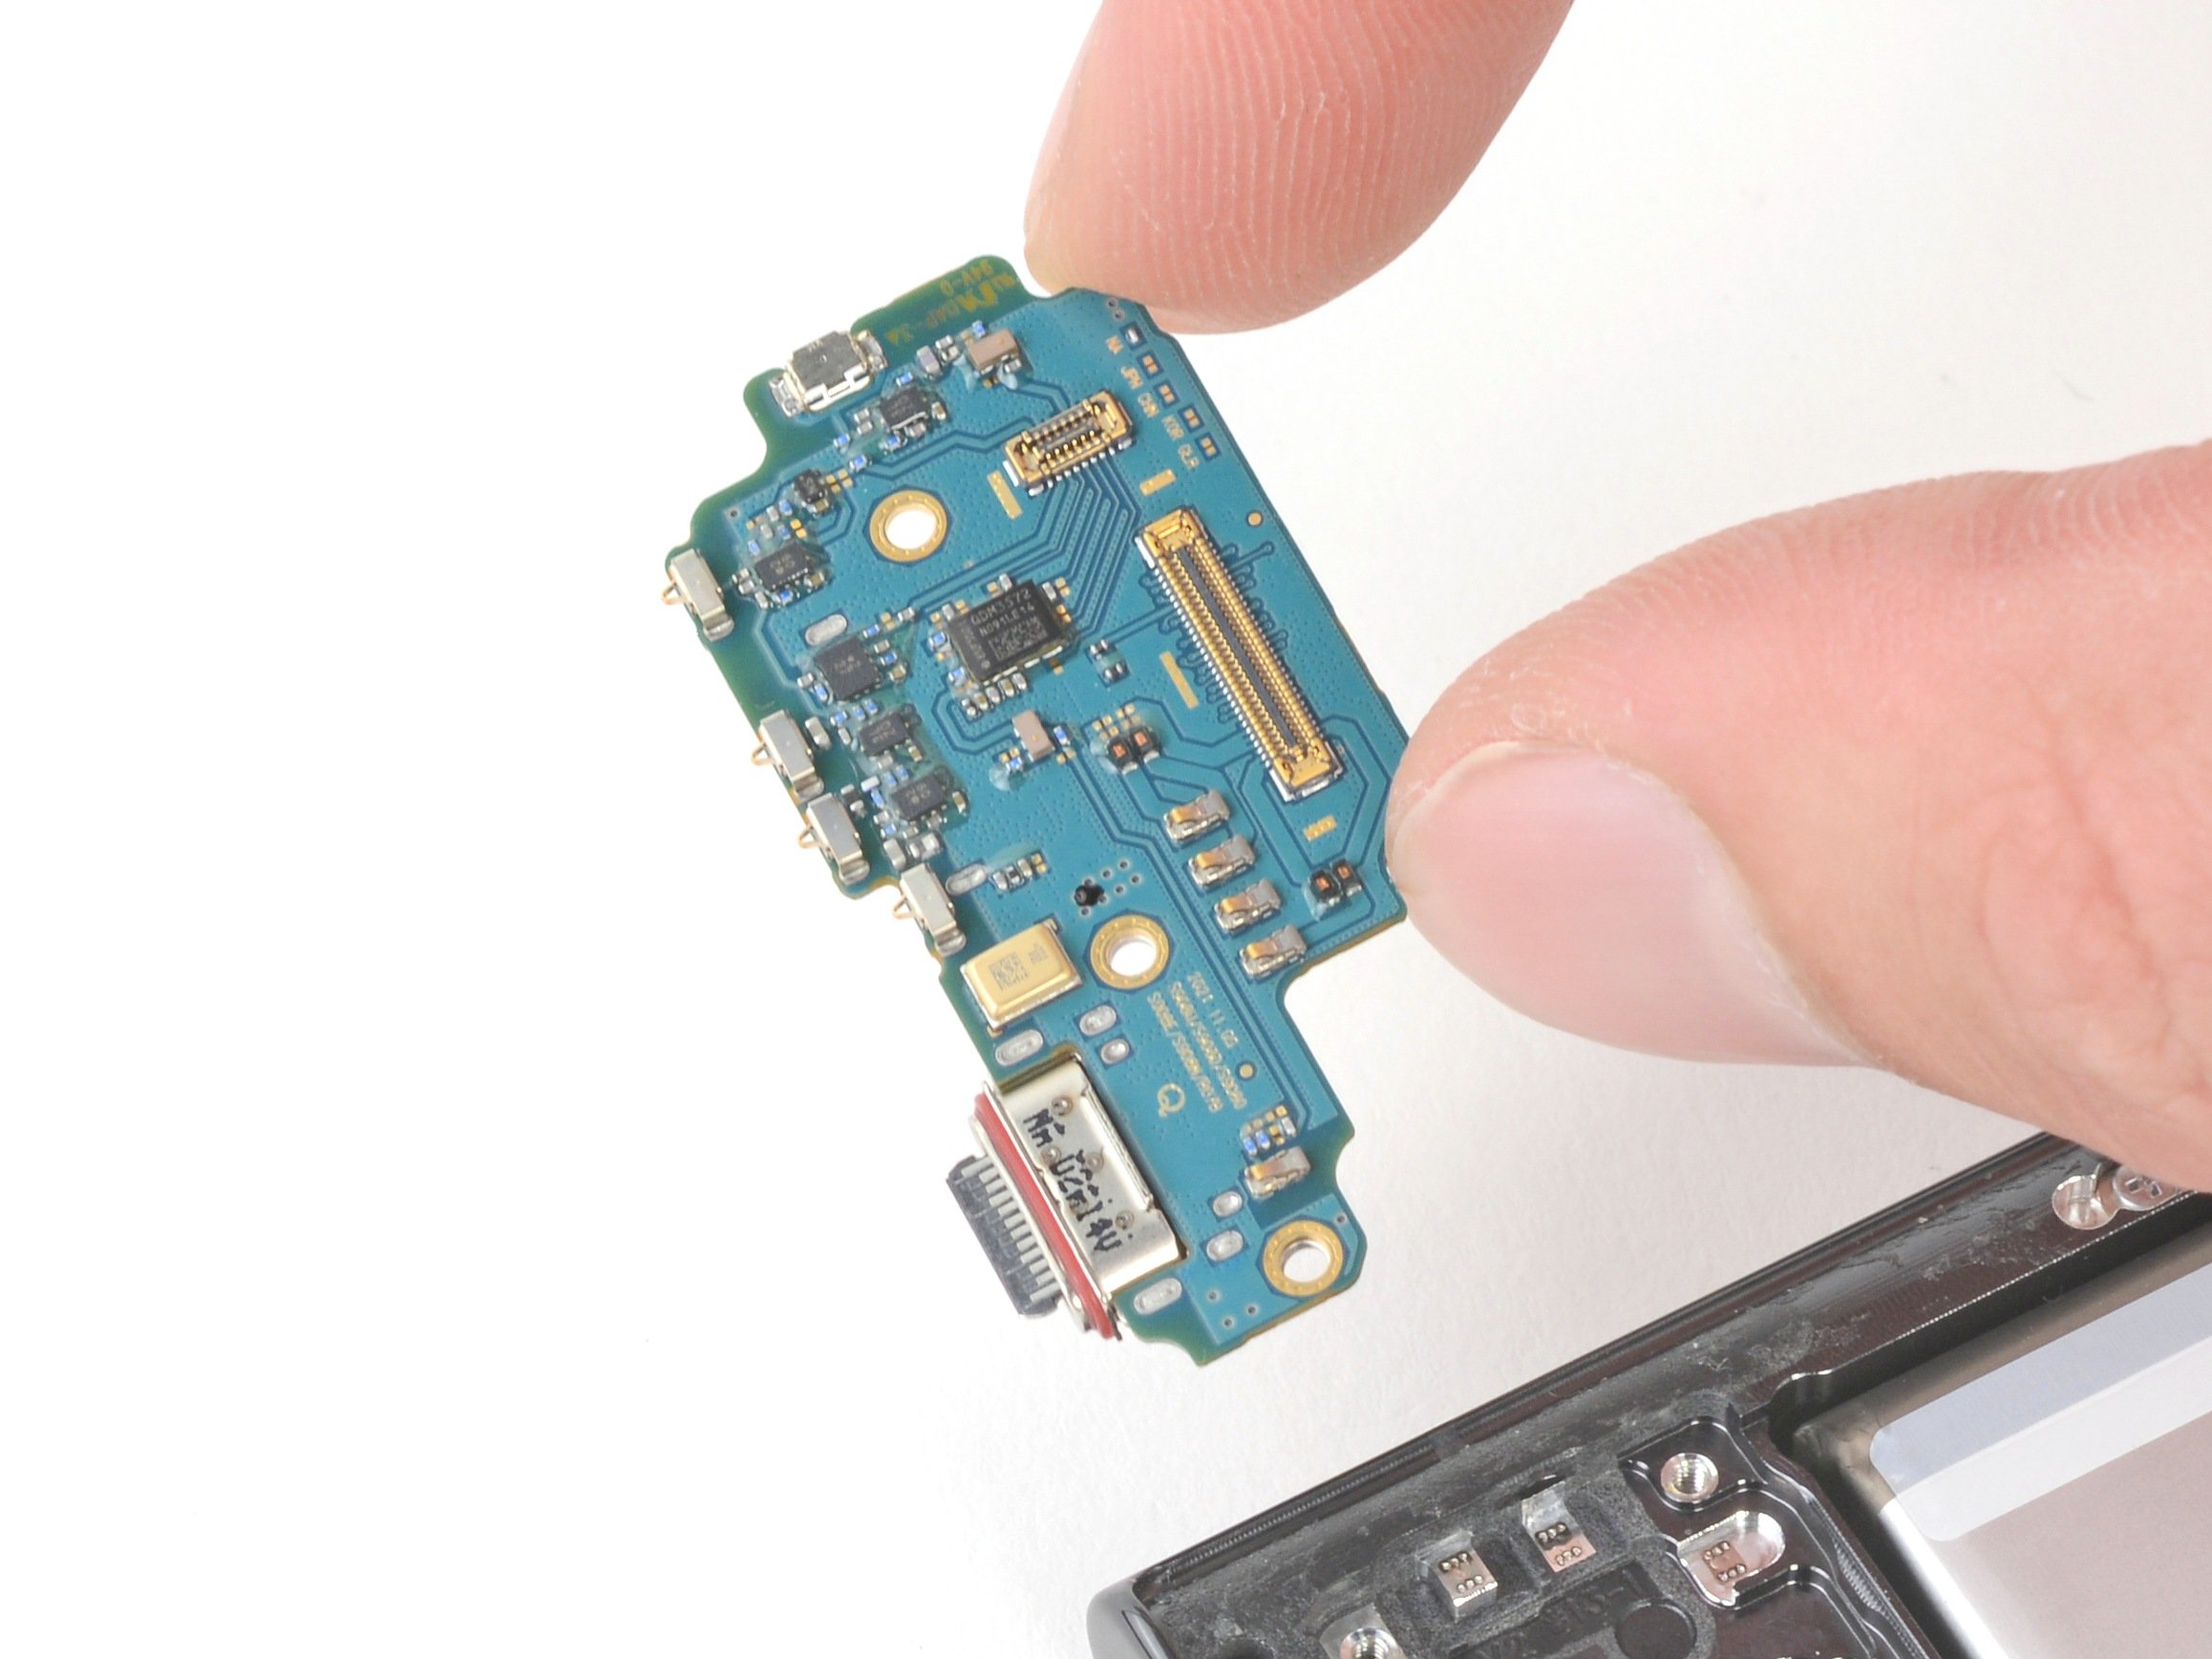
Step 29

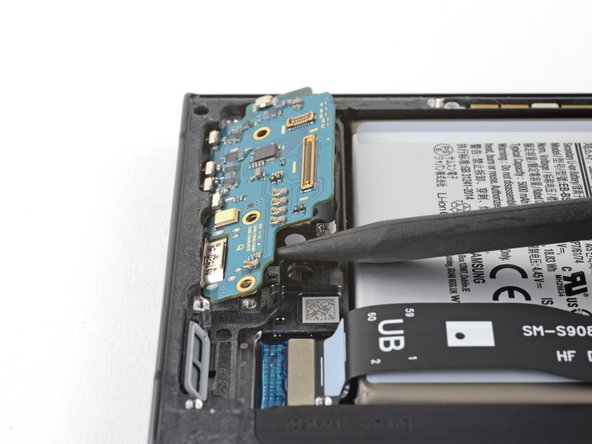
- Take the pointy end of your spudger and slide it under the charging board—go for the side opposite the USB-C port.
- Gently lift the charging board out of its spot until you can grab it with your fingers. Easy does it!
Tools Used
Step 30


- Now that you've made it through the repair, reassemble your device by reversing these steps - easy peasy!
- Don't forget to responsibly recycle your e-waste at an R2 or e-Stewards certified recycler.
- If things didn't quite go as planned, no worries! You can always schedule a repair or check out our Answers community for some troubleshooting help.