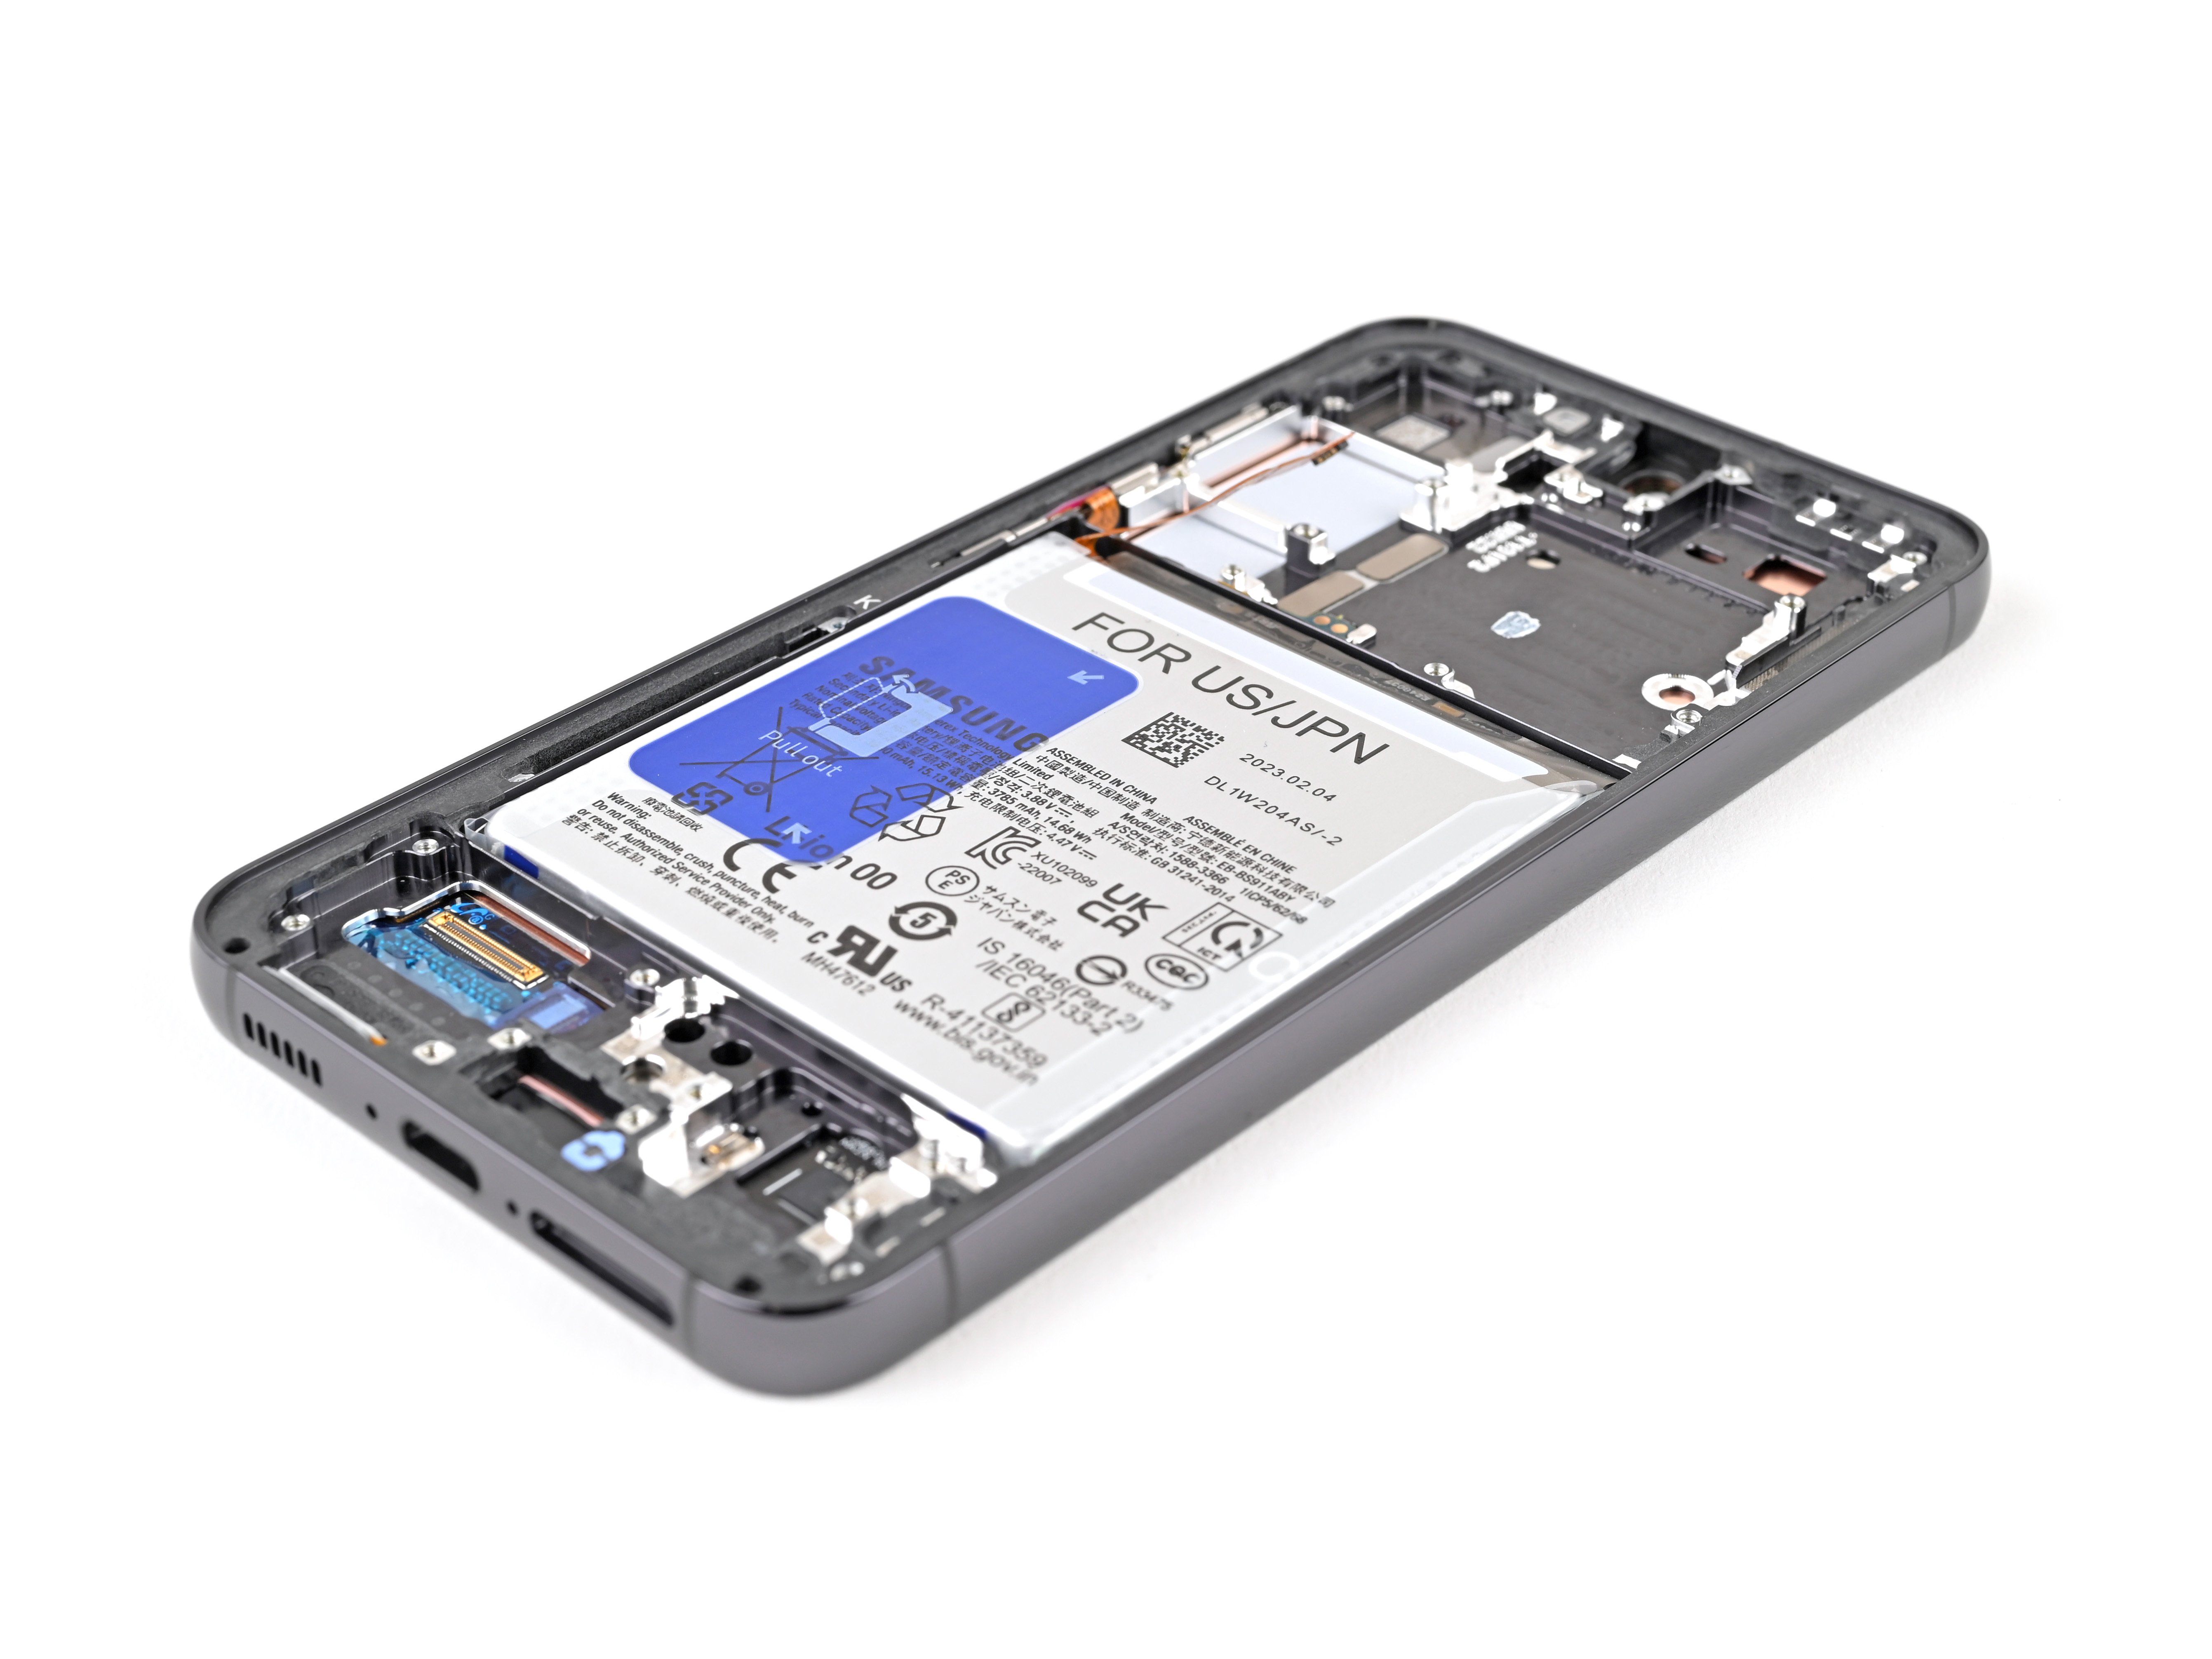
Samsung Galaxy S23 Battery Replacement Guide
Duration: 45 minutes
Steps: 30 Steps
This guide is all about fixing that battery of yours!
Ready to breathe some new life into your Samsung Galaxy S23? Let’s get that battery swapped out! This guide is all about giving your phone’s battery a fresh start. If you’re tackling a whole new screen and battery assembly (that’s the frame, screen, and battery all in one), check out this other guide. You know how those lithium-ion batteries have a lifespan, right? If your phone’s energy is fading fast, it’s time to upgrade that battery. And hey, if your battery’s looking a little puffy, be careful! Heads up: After the repair, your phone’s water resistance depends on how well you apply that back cover adhesive. You’ll lose the IP rating (Ingress Protection) but hey, at least you’ll have a fresh battery! If you need a helping hand, you can always schedule a repair.
Step 1


– First, let’s get started by unplugging any cables from your phone – we want to make sure it’s safe to work on.
– Now, press and hold the side key and the volume down button, then select ‘Power off’ to shut down your phone. If you need help, you can always schedule a repair
Step 2

A hair dryer, heat gun, or hot plate can also be used to gently warm things up. Just be careful not to cook your phone! Overheating can damage the display and the battery inside. If you need help, you can always schedule a repair
– Get your iOpener nice and toasty and place it on the right edge of the back cover for two minutes. This will help loosen up the adhesive and make things easier to work with. If you need help, you can always schedule a repair.
Tools Used


Step 3


If you’re having a tough time making a gap, don’t sweat it! Just add a little more heat to melt that adhesive away. Be sure to check the iOpener instructions so you don’t go overboard with the heat.
– Grab your suction handle and give that back cover a big ol’ hug, placing it as close to the center of the right edge as you can.
– Now, give that handle a good, strong pull! You want to create a little gap between the cover and the frame – think of it as giving your device a little breathing room.
– With that gap open, gently slide an opening pick in there. You’re almost ready to rock and roll!
Tools Used

Step 4


– Let’s wiggle that pick! Slide it back and forth along the right edge to loosen up that sticky situation.
– Keep that pick party going! Leave it near the bottom right corner to stop the adhesive from getting all clingy again.
Step 5

– Let’s get this party started! Warm up the back cover by applying a heated iOpener to the bottom edge for two minutes. It’ll make things a bit easier for you.
Tools Used
Step 6


– Let’s get that bottom right corner separated! Insert a second opening pick, and then gently rotate it around the corner to loosen that adhesive. You got this!
Step 7


– Let’s slip that opening pick down to the bottom left corner, just like sliding into home base! We want to separate the adhesive, so keep moving that pick along.
– Hold that pick in the bottom left corner – like a champ! That’ll keep the adhesive from sealing back up.
Step 8

– Time to get this repair started! Apply a heated iOpener to the left edge of the back cover for about two minutes. If you need help, you can always schedule a repair
Tools Used
Step 9


– Now it’s time to get this repair started – gently rotate the opening pick around the bottom left corner to loosen the adhesive and get things moving.
Step 10


– Pop in a third opening pick at that bottom left corner — you got this!
– Gently slide your pick up to the top left corner to break free from that sticky adhesive.
– Keep the pick snug in the top left corner to stop the adhesive from making a comeback.
Step 11

– Get your iOpener nice and toasty, and hold it against the top edge of the back cover for a couple of minutes. It’s like a mini spa day for your phone!
Tools Used
Step 12


– Let’s pop that top left corner open! Insert your fourth opening pick at the top left corner.
– Now, give it a little spin! Rotate the pick around the top left corner to gently separate the adhesive.
Step 13


– Now, slide your handy-dandy opening pick to the top right corner of your device. This will gently separate the adhesive holding things together.
– Leave that pick in place, like a little guard dog, to keep that adhesive from sticking back together. It’s like a tiny party for your phone, and we don’t want anyone crashing it!
Step 14


Be careful not to touch the rear cameras with your pick, as the lenses can be easily damaged if you apply too much pressure. If you need help, you can always schedule a repair
There’s still a bit of sticky adhesive hanging out right under the flash.
You should be able to spot the opening pick peeking through the flash cutout.
– Alright, let’s get this party started! Line up the tip of your opening pick with the flash cutout. It’s like a dance, see?
– Now, slide the opening pick under the top of the back cover. Keep sliding until you feel it catch on the adhesive. You got this!
– Keep sliding that pick down towards the bottom of the phone. Keep going until the adhesive is totally separated from the back cover. You’re a pro!
Step 15


If your cover’s being a bit stubborn and still stuck to the frame, grab that opening pick and gently slide it around the edges. You’ll know you’re winning when it’s completely separated. Go ahead and power it up. It’s a great time to check everything’s working like a charm before we seal it up. Make sure it’s totally off before moving on to the next step.
If you’re getting stuck and need a helping hand, you can always schedule a repair.
– Time to get cozy with your device! Start by gently taking off that back cover.
– During the reassembly party:
– If you spot any sticky adhesive remnants, no worries! Use some tweezers or your fingers to clear those out. If they’re being stubborn, a little heat and some isopropyl alcohol (90% or more) should do the trick to loosen them up.
– For those using custom-cut adhesives, just follow the guide linked here.
– And if double-sided tape is your go-to, be sure to check this guide out!
Tools Used


Step 16


– Grab your trusty spudger and gently lift up to disconnect the wireless charging coil press connector from the motherboard. You’re doing great!
– When it’s time to reconnect those press connectors, just take a moment to line them up nicely. Press down on one side until you hear that satisfying click, then do the same on the other side. Remember, no pressing down in the middle! If things get out of alignment, those little pins can bend and that’s a big no-no.
Tools Used

Step 17


– Grab your trusty Phillips screwdriver and get ready to remove thirteen 3.5 mm-long screws. These screws hold down the wireless charging coil and the loudspeaker.
– Six of these screws are keeping the wireless charging coil in place. You got this!
– The other seven screws are holding down the loudspeaker. Keep going, you’re doing great!
Step 18


– Time to get started. Insert the point of your trusty spudger into the notch at the top left corner of the loudspeaker – it’s the perfect little spot to begin.
– Gently pry up to unclip the loudspeaker from the frame. Remember, if you need help, you can always schedule a repair
Tools Used
Step 19


– Gently pry the loudspeaker away from the frame with your fingers to completely detach it.
– Next, carefully remove the wireless charging coil and loudspeaker from the frame.
– When putting everything back together, press around the loudspeaker’s edges to securely clip it to the frame. If you need help, you can always schedule a repair


Step 21


– Grab your trusty spudger to gently lift and disengage the primary and secondary interconnect cable press connectors from the daughterboard. You’ve got this!
Tools Used
Step 22


– Alright repair champion, let’s keep this momentum going! Just like before, connect the primary and secondary interconnect cable connectors on the motherboard. If you need help, you can always schedule a repair.
Step 23


– Let’s get those interconnect cables outta there! Give ’em a gentle tug and they’ll come right out.
Step 24
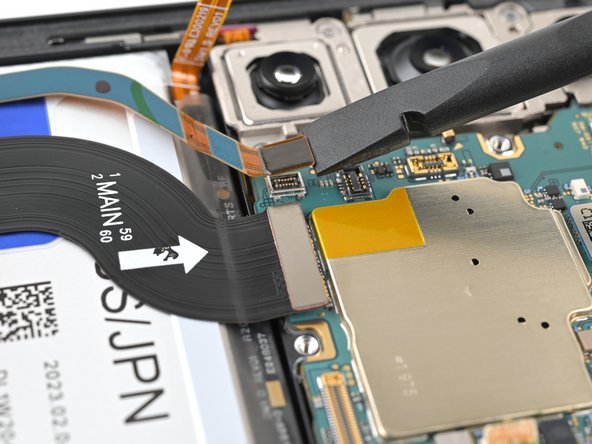

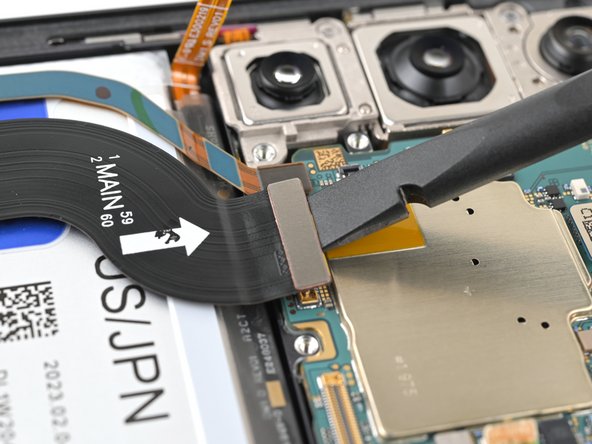
– Now, let’s gently nudge those display and 5G mmWave cable press connectors away from the motherboard using your trusty spudger. You’ve got this! If you need help, you can always schedule a repair.
Tools Used


Step 27


Handle the battery with care for the next few steps – it’s super important not to bend, crease, or puncture it. A damaged battery can be seriously hazardous, leaking chemicals and even catching fire. If you’re not feeling confident, don’t worry – you can always schedule a repair
Step 28

Make sure those tabs are fully separated, or you’ll hit a roadblock when trying to lift the battery in the next step. If you need help, you can always schedule a repair
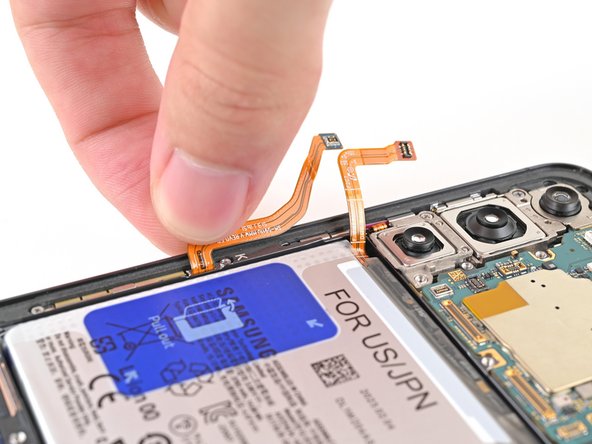
– Let’s get started by peeling off the two small tabs located at the top and bottom corners of the battery’s left edge. If you need help, you can always schedule a repair
Step 29

– With one hand, gently push the upper and lower tabs aside to clear the path for the battery while keeping a firm grip on the frame.
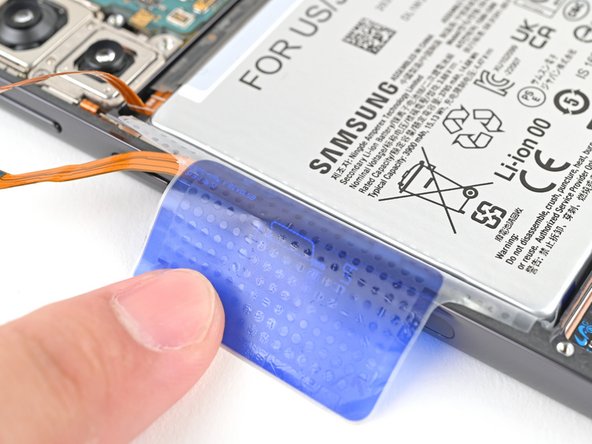
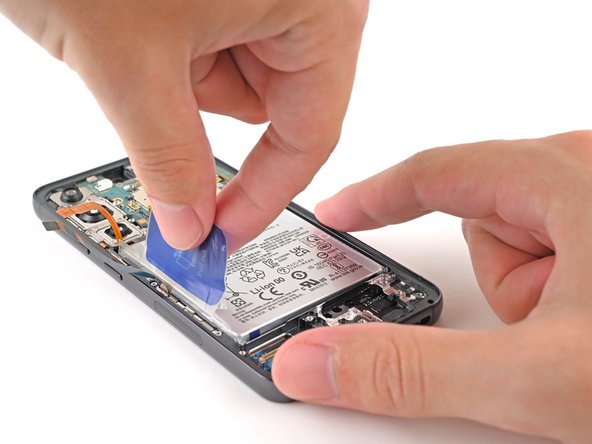
– Using your other hand, grab the blue center pull tab and give it a confident pull straight up to break that battery adhesive free.
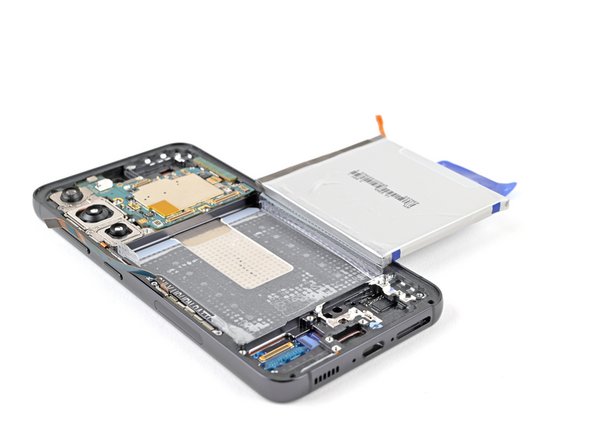
– Now, let’s lay that battery down on the right edge of your phone like it’s ready to party.
Don’t sweat it, mate! If you’re having a tough time with those tabs, just fold ’em under your phone and tape ’em to the screen. And if the adhesive’s not budging, don’t lose hope – keep pulling with steady force until the battery breaks free from that pesky frame. If you’re still stuck, give the left edge a little boost with some high-concentration isopropyl alcohol. Then, wait a minute and watch the magic happen! If you need help, you can always schedule a repair.
Step 30


– Let’s give that battery some fresh air! Carefully peel off the plastic film covering the battery.
– Time to say goodbye to the old battery. Pop it out and give its film a farewell wave.
– If you used a little isopropyl alcohol to clean things up, hang tight for ten minutes while it dries completely. We want a fresh start for our new battery!