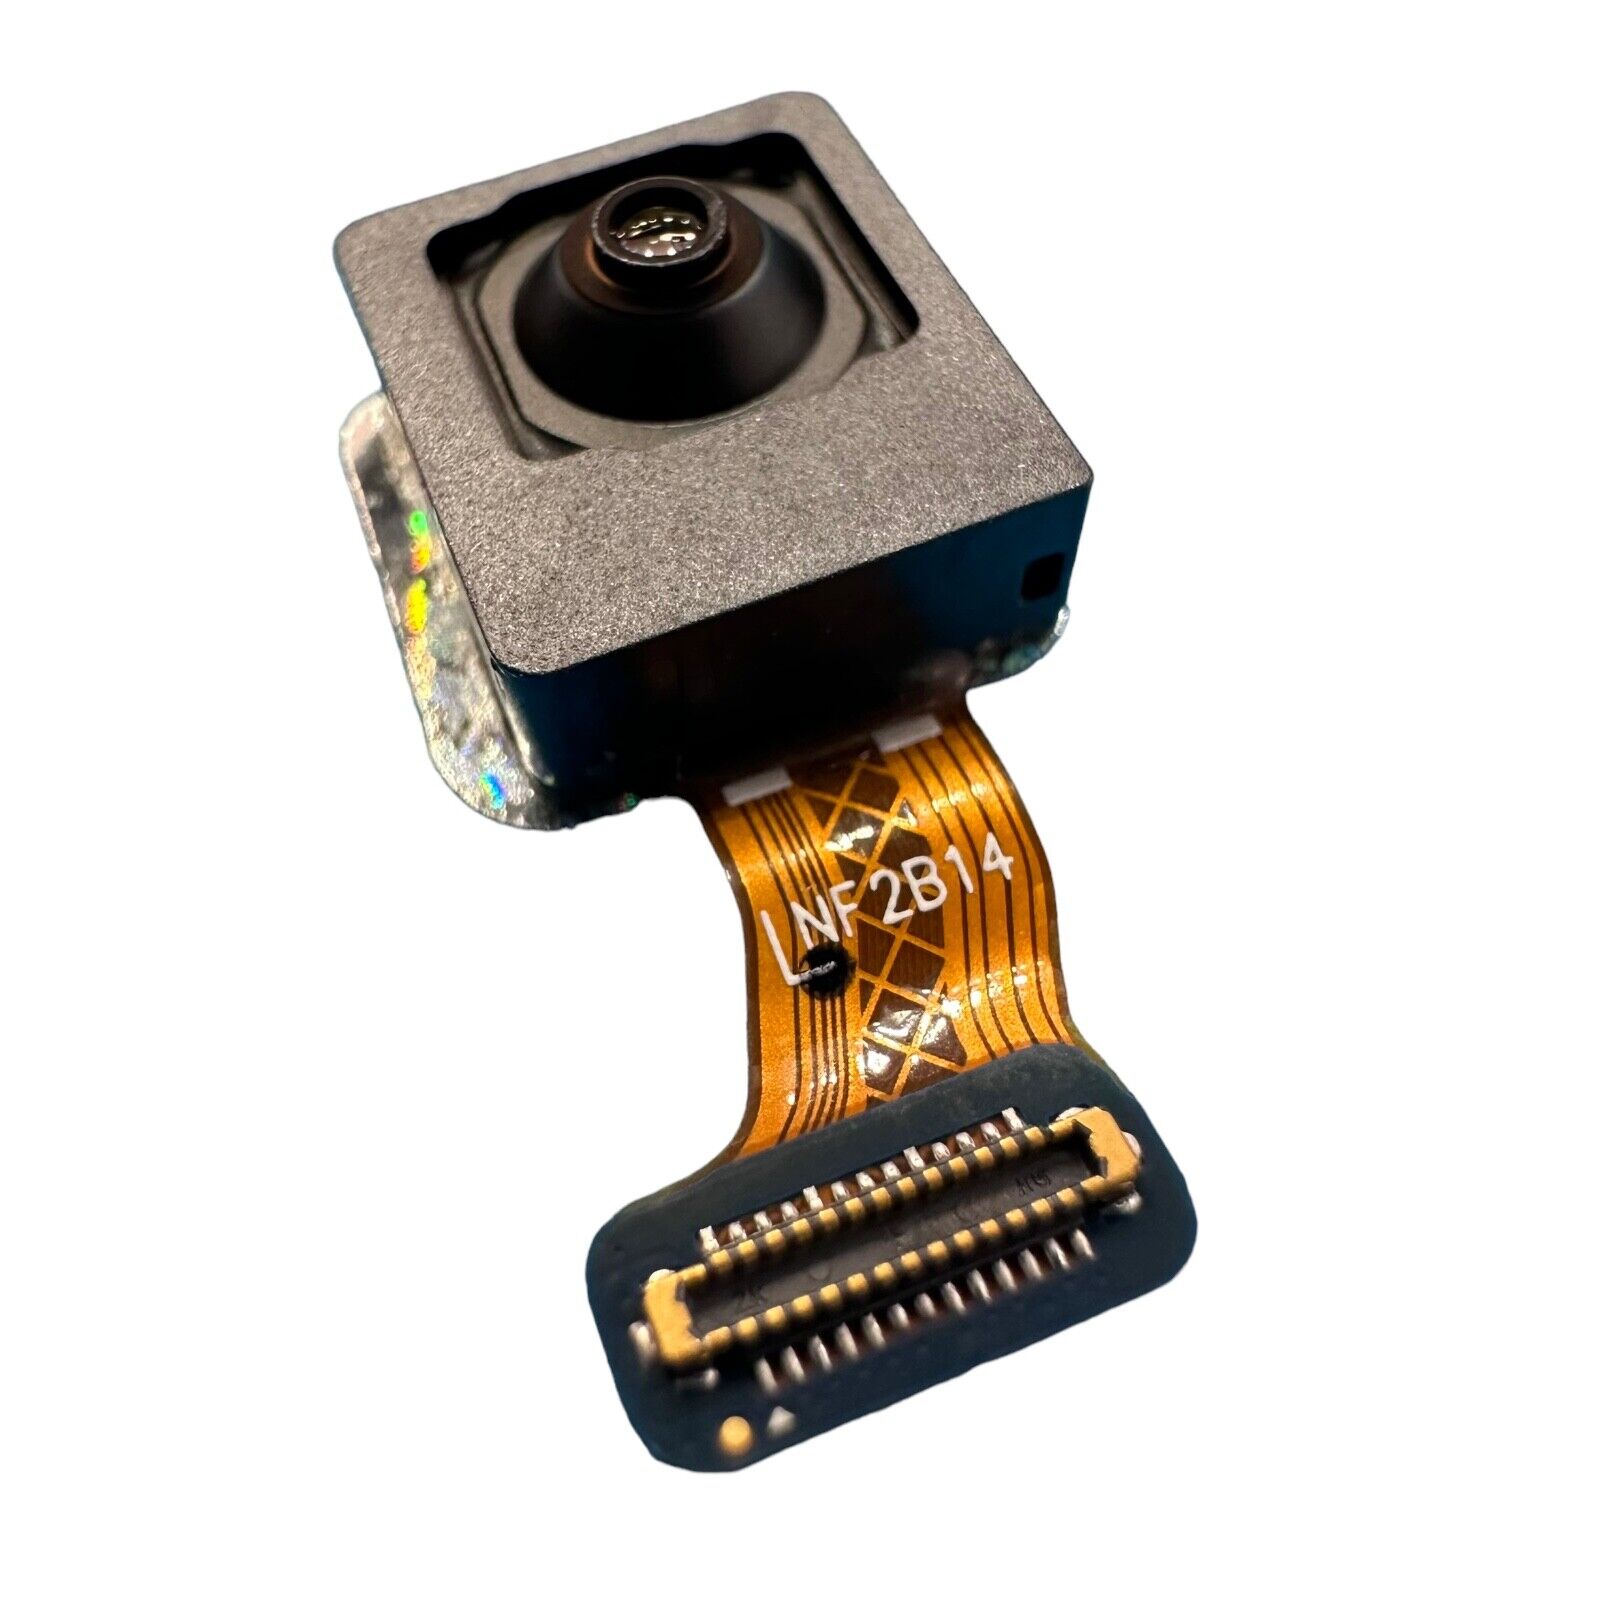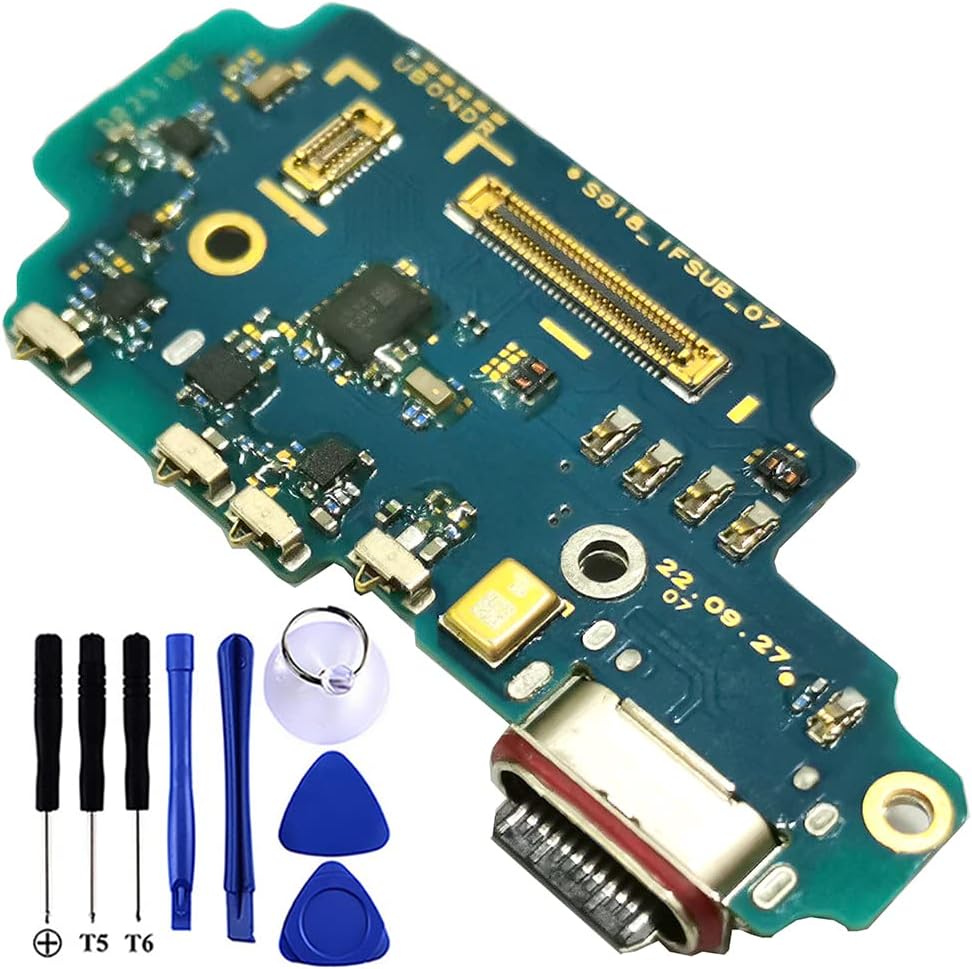
Samsung Galaxy S23 USB-C Port and Daughterboard Replacement
Duration: 45 minutes
Steps: 26 Steps
Get ready to tackle the replacement of the USB-C port and daughterboard in your Samsung Galaxy S23! Since these two components are joined at the solder hip, swapping out one means you’ll be swapping out the whole crew. And just a heads up, while you’re reapplying that back cover adhesive, keep in mind that how well it seals will influence your device’s water resistance. After all, your device might take a dip in the IP (Ingress Protection) rating pool, but with a little care, you can still keep it snug!
Step 1


Alright, cool cat, let’s give your phone a little power nap. Go ahead and let the battery drain down below 25%. It’s safer for you, for us, and for the phone. Just remember, if that battery looks like it’s got a little bulge going on, be careful and handle it with kid gloves. And if you need a helping hand, you can always schedule a repair.
– First things first, let’s detach any cables from your phone. They’re not going anywhere without you!
– Now, press and hold the side button along with the volume down button. When you’re ready, give a little tap on ‘Power off’ to turn your phone off and take a little break!
Step 2


No worries if you accidentally poked the SIM eject tool into the microphone hole! Chances are, your microphone is still just fine.
– Time to get started – insert a SIM eject tool, a trusty paper clip, or a specialized bit into the tiny hole on the bottom edge of your phone to release the SIM card tray.
– Give it a firm press to eject the tray – it’s like a little secret door!
– Now, carefully remove the SIM card tray and you’re one step closer to getting your phone back in action. If you need help, you can always schedule a repair
Step 3

Be careful with heat sources like hair dryers, heat guns, or hot plates—too much heat can damage that glossy screen and zappy battery. If you’re feeling stuck, check out schedule a repair for a hand!
– Let’s warm things up! Heat up an iOpener and put it on the right edge of the back cover for about two minutes to loosen the adhesive. You got this!
Tools Used


Step 4


If you’re having trouble making that gap, just give it a little more heat to loosen things up. Remember to follow the iOpener instructions to keep things from getting too toasty! If you need help, you can always schedule a repair.
– Grab your trusty suction handle and stick it to the back cover, aiming for the center of the right edge.
– Now, give that suction handle a good pull! You’re aiming to create a little space between the cover and the frame.
– Slide an opening pick into that gap you just made – you’re almost there!
Tools Used

Step 5


– Now, let’s get that phone open! Slide the pick back and forth along the right edge to loosen up that adhesive.
– Don’t worry about things sticking back together, keep the pick in place near the bottom right corner and we’ll be good to go!
Step 6

– Let’s get this repair started! Apply a heated iOpener to the bottom edge of the back cover for about two minutes. If you need help, you can always schedule a repair
Tools Used
Step 7


– Now it’s time to add a second opening pick at the bottom right corner – this will help you get started on separating the adhesive.
– Gently rotate the pick around the bottom right corner to loosen the adhesive and make progress on your repair. If you need help, you can always schedule a repair
Step 8


– Slide your opening pick to the bottom left corner to loosen the adhesive holding the case together.
– Leave the pick in the bottom left corner to keep the case open and prevent the adhesive from sticking back together. If you need help, you can always schedule a repair.
Step 9

– Let’s get that back cover off! Start by warming up the left edge with a heated iOpener for about two minutes.
Tools Used
Step 10


– Now, let’s get that phone open! Take your opening pick and gently slide it around the bottom left corner. You’re basically giving the adhesive a little nudge to say “see ya later!”
Step 11


– Let’s get this party started! Slide a third opening pick into the bottom left corner.
– Now, slide your pick towards the top left corner, gently separating the adhesive. It’s like a little dance for your phone!
– Keep that pick in the top left corner. It’ll make sure the adhesive doesn’t get all clingy again. No need to worry, we’re almost there.
Step 12

– Warm up that iOpener and give the top edge of the back cover a nice, cozy two-minute hug.
Tools Used
Step 13


– Let’s get this party started! Slide your fourth opening pick in at the top left corner, just like you’re trying to open a secret treasure chest.
– Now give that pick a little twist! Rotate it around the top left corner to loosen up that sticky adhesive. You’re almost there, just a few more moves and you’ll be a repair pro!
Step 14


– Gently slide your trusty opening pick to the top right corner to break that pesky adhesive seal.
– Keep the pick lodged in that sweet spot to ensure the adhesive doesn’t get any funny ideas about sticking back together.
Step 15


Hey there, be careful not to touch the rear cameras with your pick. We don’t want any accidental lens scratches! If you need help, you can always schedule a repair.
Hey, there’s a little bit of adhesive left under the flash.
You’ll be able to see your trusty opening pick through the flash cutout. You got this!
– Let’s get started by lining up the tip of an opening pick with the flash cutout – it’s the perfect spot to begin.
– Now, gently slide the opening pick under the top of the back cover until you feel it catch on the adhesive. Don’t worry, it’s supposed to do that!
– Keep sliding the pick down toward the bottom of the phone. You’ll know you’re making progress when the adhesive starts to release from the back cover. If you need help, you can always schedule a repair
Step 16


Still stuck? No worries, just slide an opening pick around the edges until your cover comes off completely.
Now’s a great time to turn your phone back on and make sure everything’s working smoothly. Just remember to power it back down before moving forward. If you need help, you can always schedule a repair
– Let’s get started by removing the back cover. Take a firm grip and gently pull it off.
– When it’s time to put everything back together, remember:
– Use a pair of tweezers or your fingers to carefully remove any leftover adhesive chunks. If they’re being stubborn, try applying some heat and isopropyl alcohol (90% or greater) to help loosen them up.
– If you’re working with custom-cut adhesives, be sure to check out our guide for some helpful tips.
– And if you’re using double-sided tape, we’ve got a guide for that too. If you need help along the way, you can always schedule a repair with Salvation Repair.
Tools Used


Step 17


– Use the tip of your spudger to gently pry up and disconnect the wireless charging coil press connector from the motherboard.
– To re-attach press connectors, carefully align and press down on one side until it clicks into place, then repeat on the other side. Don’t press down in the middle! If the connector is misaligned, those tiny pins could get bent and that would be a bummer. If you need help, you can always schedule a repair.
Tools Used

Step 18


– Grab your trusty Phillips screwdriver and remove the thirteen 3.5mm-long screws that hold the wireless charging coil and loudspeaker in place:
– You’ll find six screws securing the wireless charging coil – take those out first
– Next, remove the seven screws that keep the loudspeaker firmly in its spot. If you need help, you can always schedule a repair
Step 19


– Slide the tip of your spudger into the little notch at the top left corner of the speaker, like you’re giving it a high-five.
– Gently pry up to release the speaker from its comfy spot in the frame. It’s like giving it a little nudge to say ‘peace out!’
Tools Used
Step 20


– Time to give that loudspeaker some freedom! Gently lift it away from the frame using your fingers. You’ve got this!
– Now, it’s time to say goodbye to the wireless charging coil and loudspeaker – they’re coming out!
– When you’re putting everything back together, press around the edges of the loudspeaker to make sure it’s nice and snug in its spot. You’re almost done!
Step 21


– Now, it’s time to carefully disconnect the battery connector. Use the tip of your spudger to gently pry it up. Think of it like giving the battery a little high-five! If you’re feeling a little unsure, you can always schedule a repair with us. We’re here to help!
Tools Used
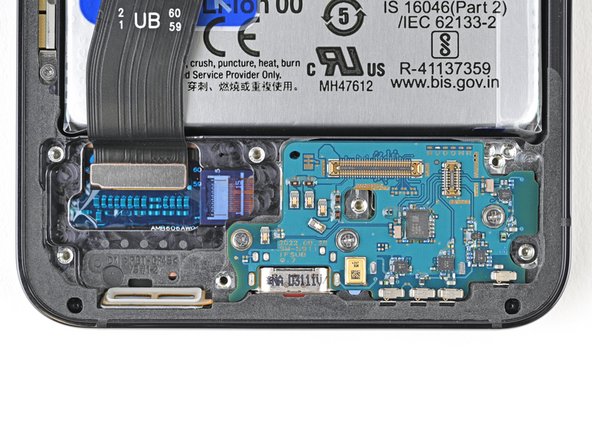
Step 22


– Grab your spudger and gently pop up those little press connectors of the primary and secondary interconnect cable attached to the daughterboard, and disconnect them like a pro!
Tools Used
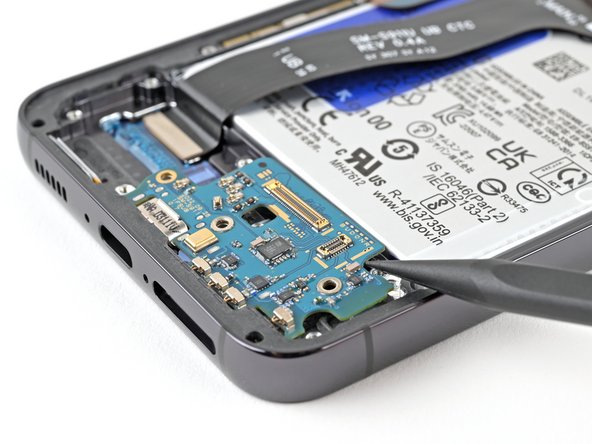
Step 23


– Give the primary and secondary interconnect cable connectors on the motherboard some love by repeating the previous step, and remember, you’ve got this!
Step 24


– Let’s get started by removing both of those interconnect cables.
Step 25

– Let’s get those screws outta there! Use a Phillips screwdriver to remove the three 3.5 mm-long screws holding the daughterboard in place. If you need help, you can always schedule a repair
Step 26
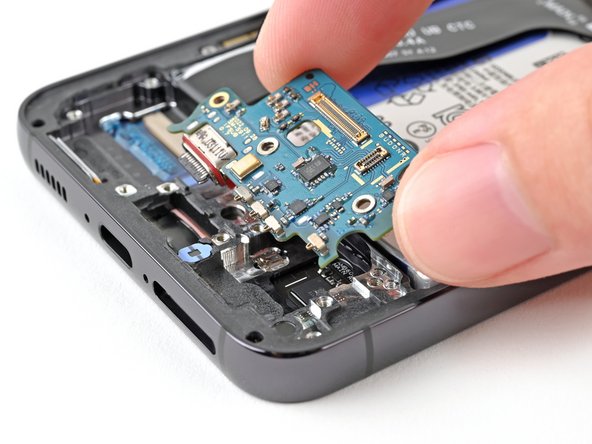

Hey there, slick! Don’t go all Hulk Smash on that battery! You’ll want to use that spudger to gently pry against the frame.
– Let’s get started by using the point of a spudger to carefully pry up the top right corner of the daughterboard – just enough to unclip it from the frame.
– Now it’s time to remove the daughterboard completely.
– When you’re putting everything back together, make sure to reinsert the USB-C port into its recess at an angle before pressing the daughterboard flat onto the frame. If you need help or feel unsure at any point, you can always schedule a repair with Salvation Repair for some expert assistance.
Tools Used