Samsung Galaxy S24 Back Cover Replacement Guide – DIY Repair
Duration: 45 minutes
Steps: 15 Steps
Get ready to tackle the back cover replacement on your Samsung Galaxy S24! Just a heads up: keeping that water resistance intact after your repair hinges on how well you reapply the back cover adhesive. Remember, your device will lose its IP (Ingress Protection) rating, but with a little care, you can make it shine again! If you need help, you can always schedule a repair.

Step 2

Alright, don’t go overboard with the heat here! We don’t want to fry that battery. It’s pretty sensitive to overheating. If you need help, you can always schedule a repair.
Feel free to grab a hair dryer or heat gun and warm up the right edge of that back glass until it’s nice and toasty!
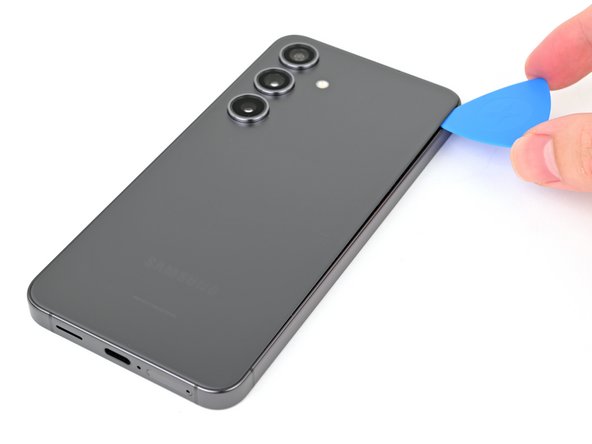
– Let’s get started by heating up an iOpener and applying it to the right edge of the back cover for about two minutes. This will help loosen things up and make the repair process smoother. If you need help, you can always schedule a repair
Tools Used


Step 3

Don’t worry, sometimes you gotta give it a little extra love! Apply some more heat to make those stubborn adhesives behave. It’s like a warm hug for your device, and then it’ll come right off. 😉
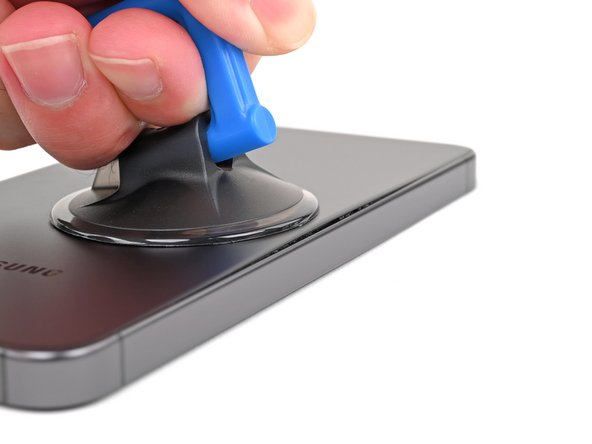
– Let’s get this show on the road! Attach a suction handle to the back cover. Aim for the center of the right edge – right in the sweet spot.
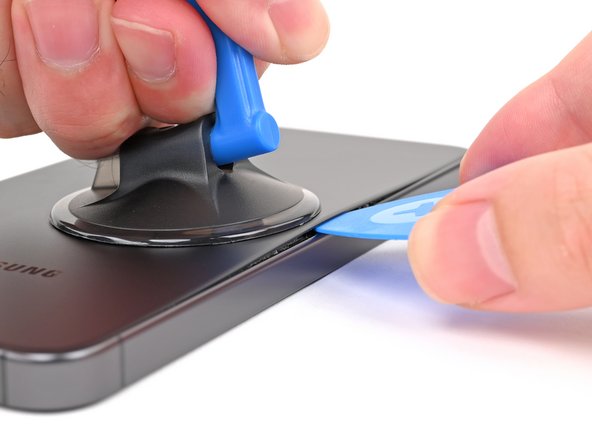
– Now, give that suction handle a good pull! Use steady force to create a little space between the cover and the frame. You’ve got this!
– Time to sneak in a little help. Slide an opening pick into that gap you just made. You’re almost there!
Tools Used

Step 4


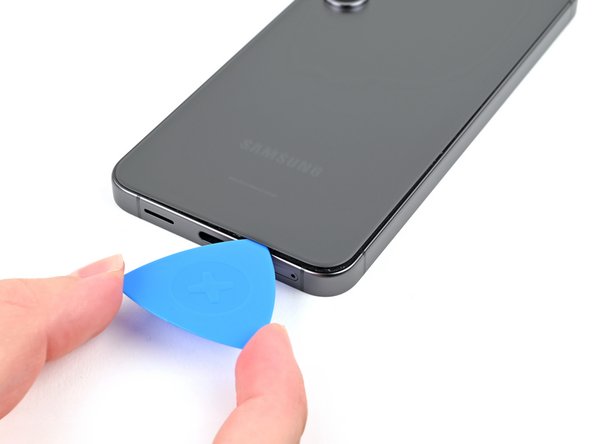
– Now it’s time to get this repair started – slide your opening pick along the right edge, gently prying the back cover away from the frame to break through the adhesive.
– Leave that opening pick in the bottom right corner – it’ll keep the adhesive from sealing back up, making the rest of your repair a whole lot easier. If you need help, you can always schedule a repair
Step 5

– Warm up your iOpener and place it on the bottom of the back cover for a cozy two minutes.
Tools Used
Step 6

– Now it’s time to get this repair started – gently rotate the opening pick around the bottom right corner to loosen the adhesive and get things moving.
Step 7
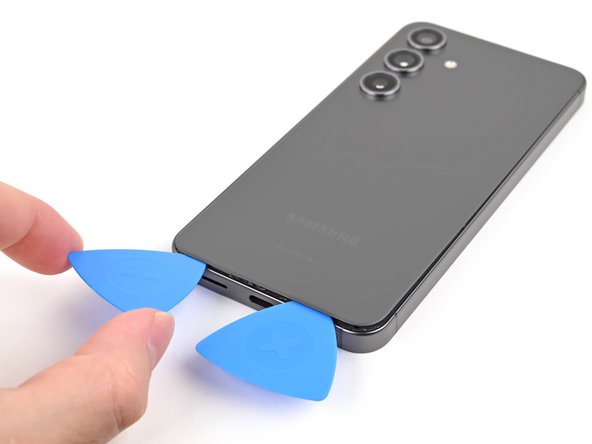

– Pop in a second opening pick right next to the first one, then glide it along the bottom edge to cut through that pesky adhesive like a pro.
– Keep your opening pick snugly in the bottom left edge to stop the adhesive from sealing back up on you.
Step 8

– Warm up your iOpener and cozy it up against the left side of the back cover for a solid two minutes.
Tools Used
Step 9

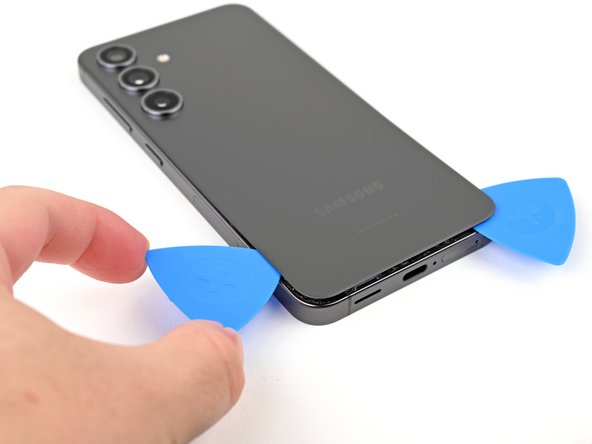
– Now, let’s get this party started! Slide that opening pick around the bottom left corner to loosen up that sticky situation. We’re gonna give this device a little freedom!
Step 10

Be careful not to insert your pick more than 4 mm deep to keep those rear cameras and flash safe and sound!
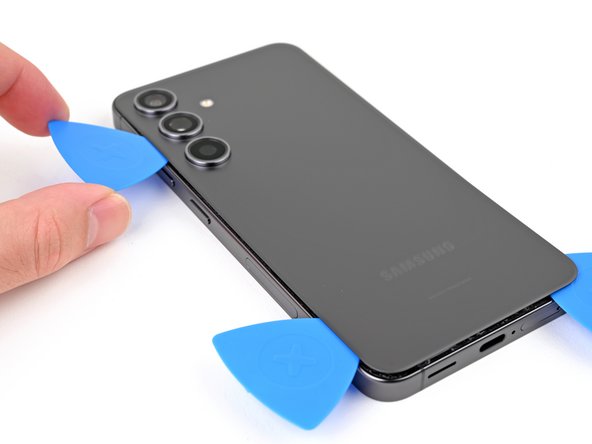
– Now it’s time to bring in some extra help – insert a third opening pick above the last one and gently slide it along the left edge to cut through the adhesive. You’re making great progress!
– Leave that opening pick right where it is, in the top left corner, to keep the adhesive from sealing back up. You’re doing a great job so far! If you need help, you can always schedule a repair
Step 11

– Warm up your iOpener and place it on the top of the back cover for a solid two minutes.
Tools Used
Step 12

– Let’s get this party started! Now, take that trusty opening pick and give it a little spin around the top left corner. We’re gonna loosen up that adhesive like it’s nobody’s business. Keep on twistin’ and turnin’ until you feel it start to separate.
Step 13


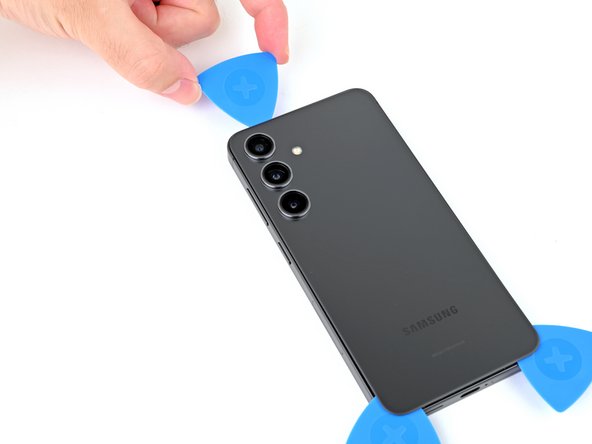
– Now, let’s get this party started! Pop a fourth opening pick into the top left corner, making sure it’s snug. Slide it along the top edge, like you’re showing off your dance moves, and around the top right corner. We’re cutting through that adhesive, one smooth move at a time!
Step 14


Be careful not to insert the pick too far – stop at its center point to keep those rear cameras safe and sound. If you need help, you can always schedule a repair
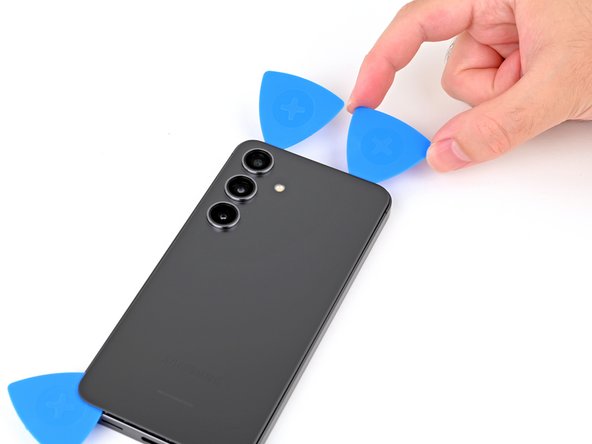
– Slide a fifth opening pick right above the camera flash cutout, just like a pro!
– Gently slide the opening pick under the top edge of the back cover until you feel it catch on the flash adhesive. You’re doing great!
– Push the pick a bit deeper into the phone until you feel that adhesive let go of the back cover. Almost there!
Step 15

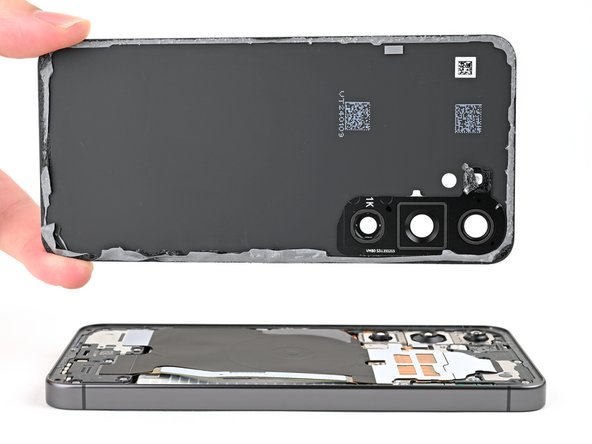
If your cover is still clinging to the frame, gently slide the tip of an opening pick around the edges until the cover pops off completely.
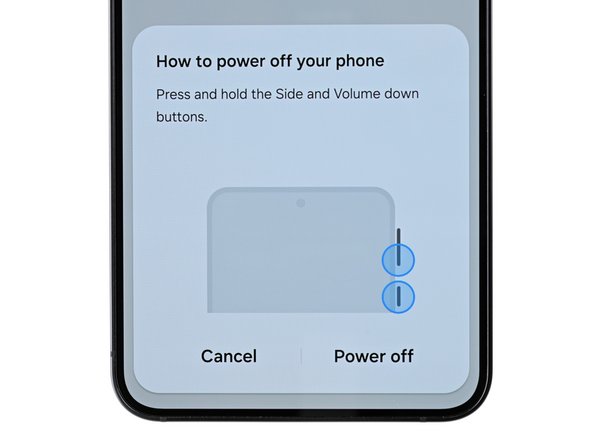
Now’s a perfect moment to power your phone on and check all the functions before sealing it back up. Just remember to turn your phone off completely before you dive back into the repair!
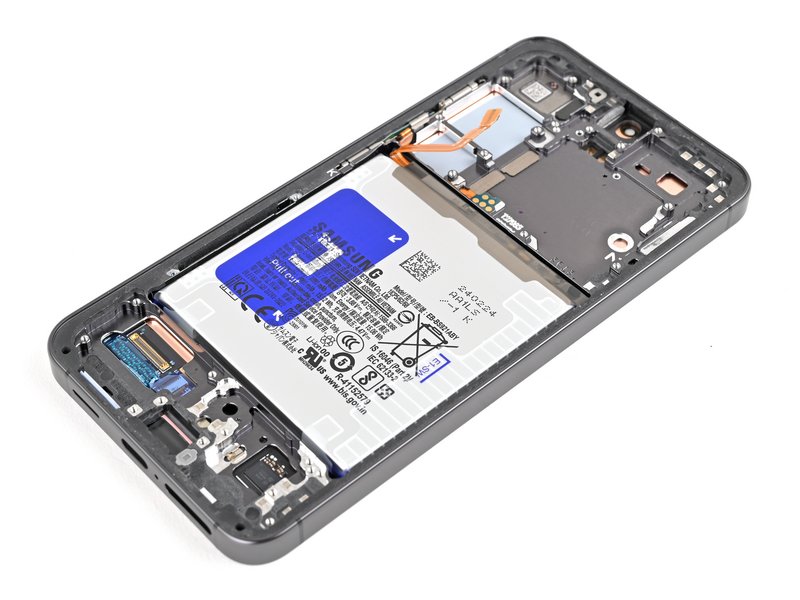
– Let’s get started by carefully picking up the back cover by its edges and gently removing it from the phone.
– When it’s time to put everything back together, remember:
– Use a pair of tweezers or your fingers to remove any leftover adhesive chunks. If the adhesive is being stubborn, try applying some heat and isopropyl alcohol (90% or greater) to help loosen it up.
– If you’re working with custom-cut adhesives, be sure to follow our guide for the best results.
– And if you’re using double-sided tape, we’ve got a guide for that too. Just follow along and you’ll be all set. If you need help along the way, you can always schedule a repair with Salvation Repair.
Tools Used