Samsung Galaxy S24 Battery Replacement Guide
Duration: 45 minutes
Steps: 29 Steps
This guide focuses on the battery replacement process itself
Get ready to breathe new life into your Samsung Galaxy S24 with a brand new battery. This step-by-step guide from Salvation Repair will walk you through replacing the battery itself. If you’re looking to replace the entire screen and battery assembly, we’ve got a separate guide for that. Your phone’s lithium-ion battery won’t last forever, and if it’s dying quickly or not holding a charge, it’s probably time for a swap. Just a heads up: to keep your device water-resistant after the repair, you’ll need to reapply the back cover adhesive just right. And keep in mind, your device’s IP rating will be affected. If you need help, you can always schedule a repair.
Step 1
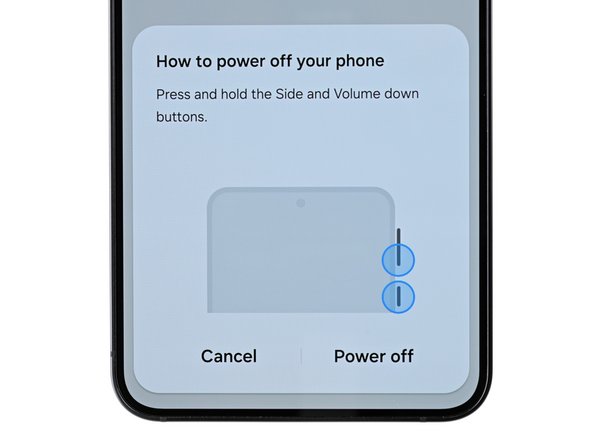

Hey, before you get started, it’s super important to let your phone’s battery drain below 25%. A charged lithium-ion battery could get a little too excited if it gets damaged during the repair. You don’t want fireworks, right? If you need help, you can always schedule a repair
– First things first, make sure your phone is completely powered down and all cables are unplugged. Let’s get this repair party started the right way!
Step 2

– Warm up an iOpener and place it on the right edge of the back cover for a cozy two minutes.
Whoa, be sure not to rev the phone up past this temp—chicken butt gets mighty mad at high heat, ya know?
Why not have some fun with it? Grab a hair dryer or heat gun, and warm up the right edge of the back glass until it’s hot to the touch. Feeling adventurous? If you need help, you can always schedule a repair.
Tools Used


Step 3

If you’re having a little trouble, don’t worry! Just give it a little more heat to loosen things up. It’s like giving the adhesive a warm hug.
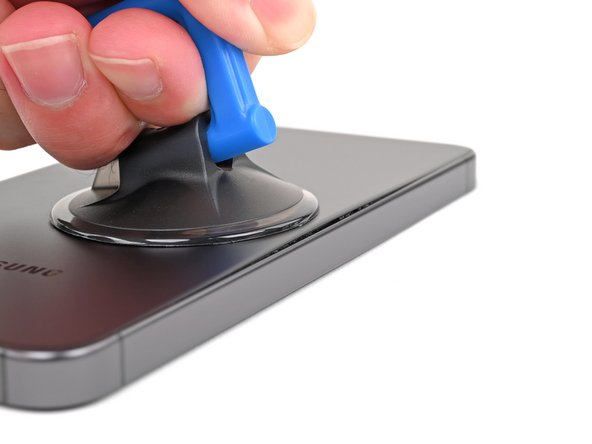
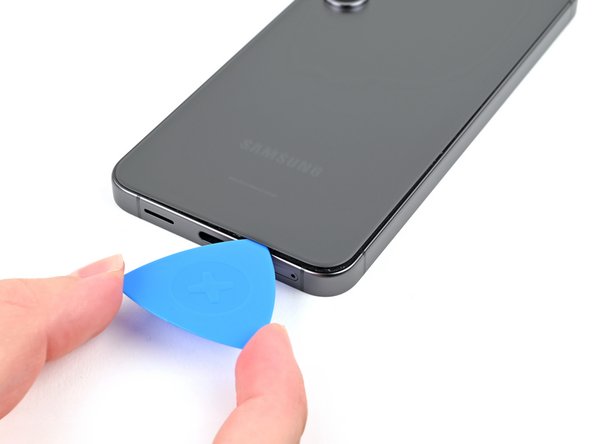
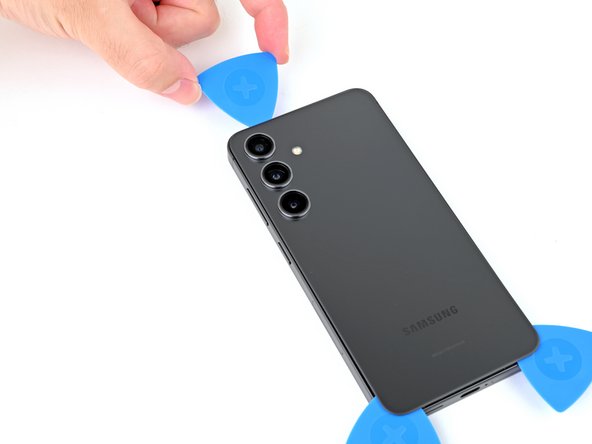
– Let’s get this party started! Stick a suction handle right on the back cover, aiming for the middle of the right edge. Make sure it’s nice and secure.
– Now, give that suction handle a good pull! We want to create a little space between the cover and the frame. Steady as she goes!
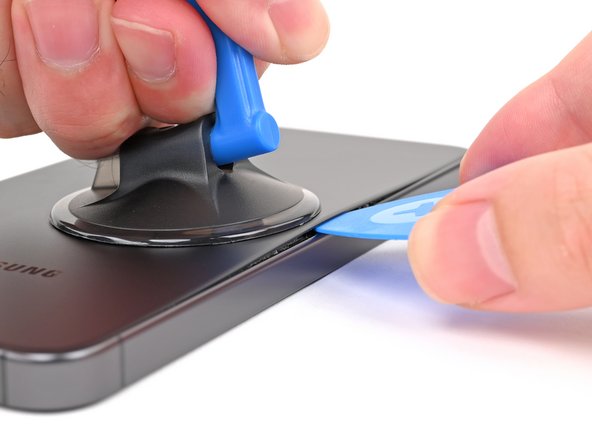
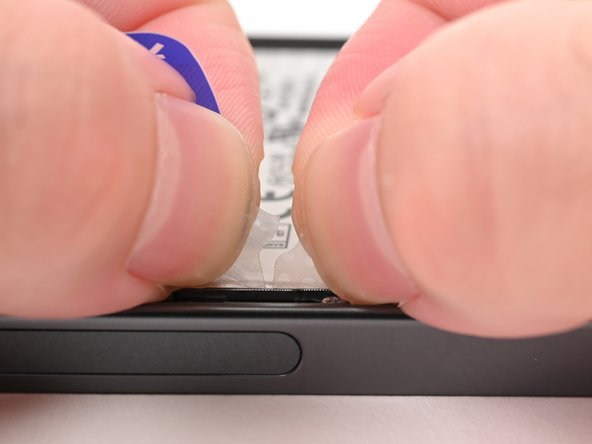
– Slide an opening pick into that gap we just created. It’s like slipping into a cozy nook!
Tools Used

Step 4


– Gently glide your opening pick along the right edge, slipping it between the back cover and the frame to cut through that sticky adhesive like a pro.
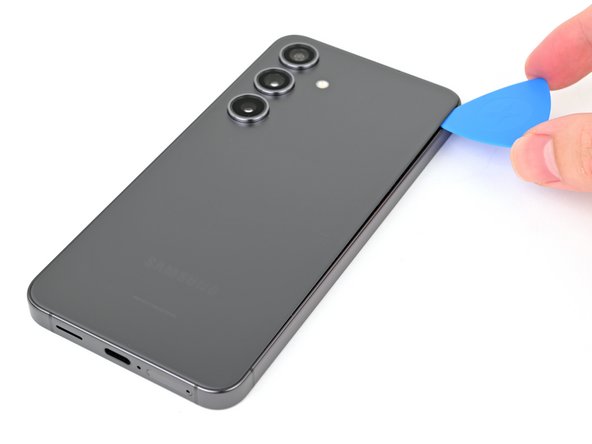
– Keep your opening pick snug in the bottom right corner to prevent the adhesive from sealing back up. You’ve got this!
Step 5

– Get your iOpener nice and toasty by reheating it. Then, place it on the bottom of the back cover and let it hang out for two minutes.
Tools Used
Step 6

– Twist that opening pick around the bottom right corner to break free the adhesive like a pro!
Step 7
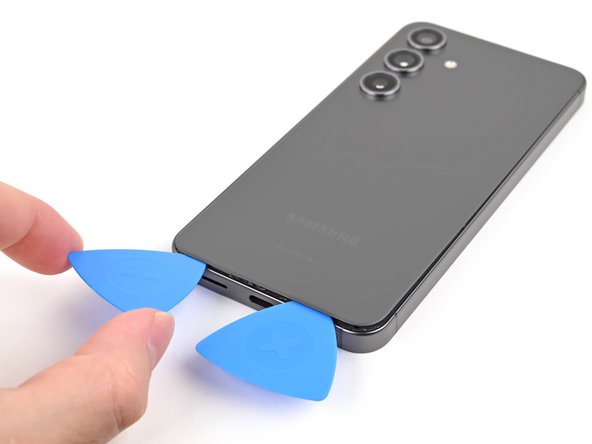

– Now it’s time to bring in some backup – insert a second opening pick to the left of the first one and gently slide it along the bottom edge to cut through the adhesive. You’re making great progress!
– Leave that opening pick right where it is, at the bottom left edge, to keep the adhesive from sealing back up. You’re doing a great job so far! If you need help, you can always schedule a repair
Step 8

– Time to get this repair started. Reheat your iOpener and apply it to the left side of the back cover for about two minutes. If you need help, you can always schedule a repair
Tools Used
Step 9

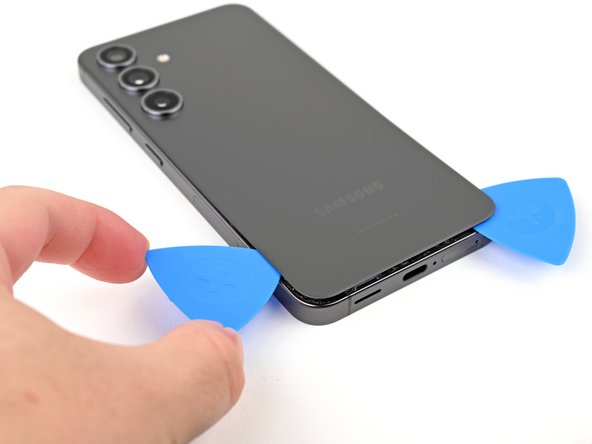
– Now it’s time to get this repair started – gently rotate the opening pick around the bottom left corner to loosen the adhesive and get things moving.
Step 10

Hey, careful! Keep that pick close to the surface. We don’t want any accidental camera mishaps! Just a gentle nudge up to 4mm, and you’ll be golden. If you need help, you can always schedule a repair.
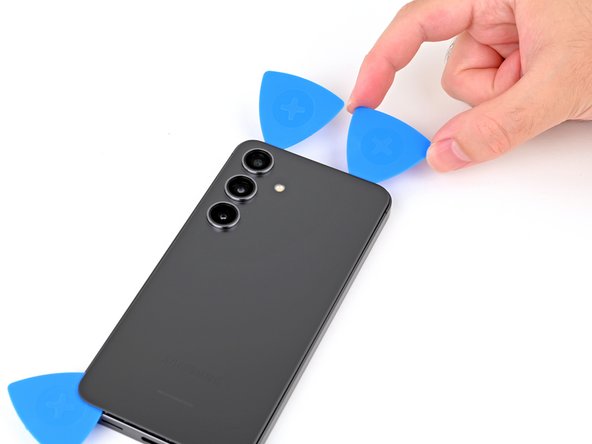
– Let’s get this party started! Slide a third opening pick above the last one along the left edge to cut through the adhesive.
– Hold your pick in the top left corner so the adhesive doesn’t stick back together.
Step 11

– Time to get this repair started. Reheat your iOpener and apply it to the top of the back cover for about two minutes. If you need help, you can always schedule a repair
Tools Used
Step 12

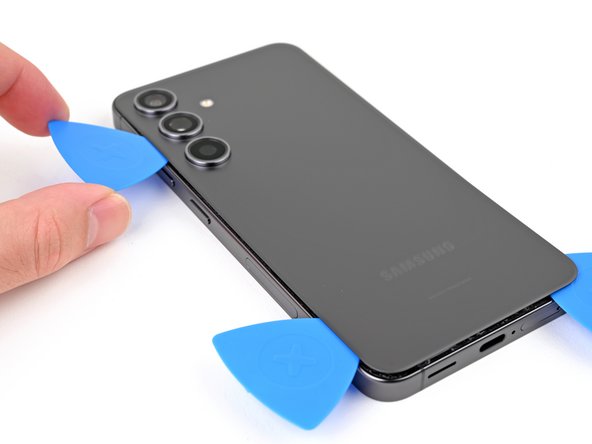
– Let’s get this party started! Gently wiggle the opening pick around the top left corner to loosen up that sticky adhesive. It’s like a little dance for your phone.
Step 13


– Alright, let’s keep this momentum going! Slide another opening pick into the top left corner, just like before. Make sure it’s at the same depth. Now, gently slide it along the top edge and around that top right corner. We’re cutting through the adhesive, one little slice at a time. You got this! If you need help, you can always schedule a repair
Step 14


Be careful not to slide the pick in deeper than its center point to keep those rear cameras safe and sound!
– Slide a fifth opening pick just above the camera flash cutout.
– Ease the opening pick under the top of the back cover until you feel it catch on the flash adhesive.
– Push the pick further into the phone until you feel the adhesive fully release from the back cover.
Step 15

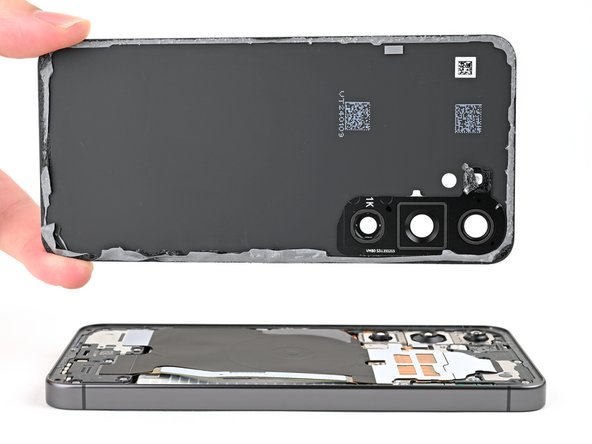
Way to go, tech wizard! Now, slither that opening pick all around the edges until the cover separates completely from the frame. Time to put your phone through its paces and test all its features. Don’t forget to turn it off before you keep going. Need help? You can always schedule a repair.
– Gently grab the back cover by its edges and lift it off the phone like a pro!
– During reassembly:
– If you find any pesky adhesive bits hanging around, use tweezers or your fingers to evict them. A little heat and some isopropyl alcohol (90% or greater) can work wonders if they’re being stubborn.
– Got custom-cut adhesives? Check out this guide for all the deets.
– Using double-sided tape? No worries, just follow this guide.
Tools Used


Step 16

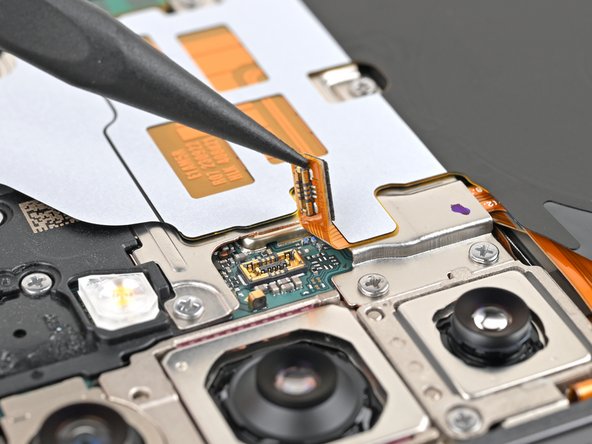
– Grab your trusty spudger and gently lift up the wireless charging coil press connector from the motherboard like a pro! It’s all about that delicate touch.
– When you’re ready to reattach those press connectors, make sure to line them up just right over their sockets. Give a gentle press with your fingertip—first on one side, then the other—until you hear that satisfying click! Remember, no need to muscle it; if it’s being stubborn, just reposition and give it another go. And if you find yourself in a pickle, you can always schedule a repair.
Tools Used

Step 17
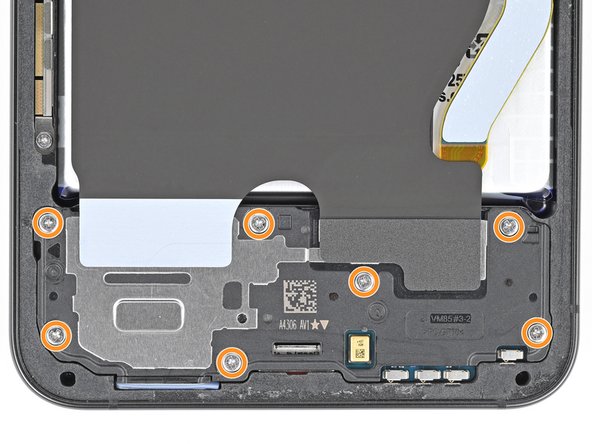
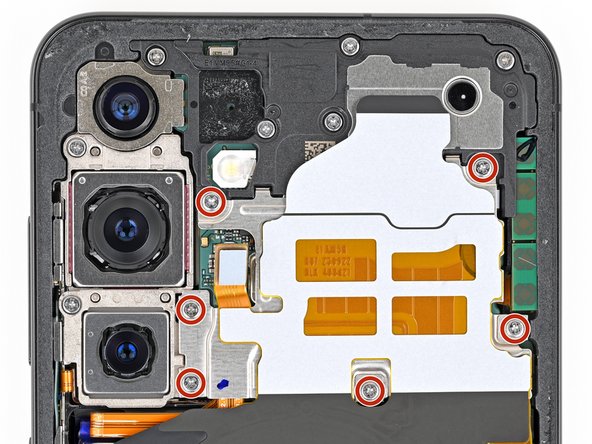

– Let’s get this party started! Grab your trusty Phillips screwdriver and give those thirteen 3.5 mm long screws a good twist. Six of them are holding onto the wireless charging coil, and the remaining seven are keeping the loudspeaker in place. You’ve got this!

Step 19
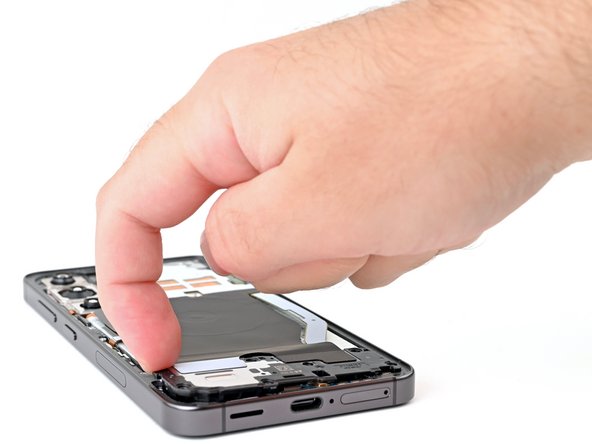

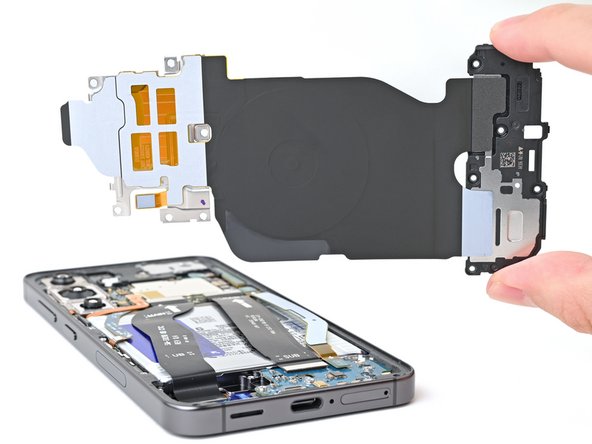
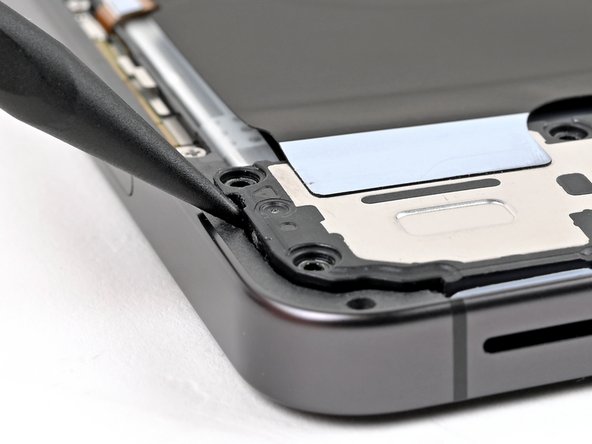
– Gently pry the wireless charging coil and loudspeaker assembly away from the frame using your fingernail or a spudger – it’s like opening a little door to the inside of your phone.
– Now it’s time to remove the wireless charging coil and loudspeaker, taking care not to damage any surrounding components.
– When you’re putting everything back together, make sure to press the edges of the loudspeaker to secure it to the frame before replacing the screws – and you’re one step closer to having your phone up and running. If you need help, you can always schedule a repair
Tools Used
Step 20

– Gently slide the flat end of a spudger under the battery cable press connector on the motherboard and give it a little nudge to disconnect it. You’ve got this!
Tools Used
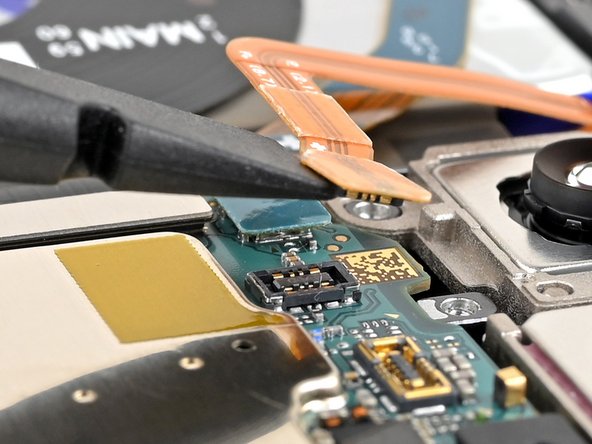
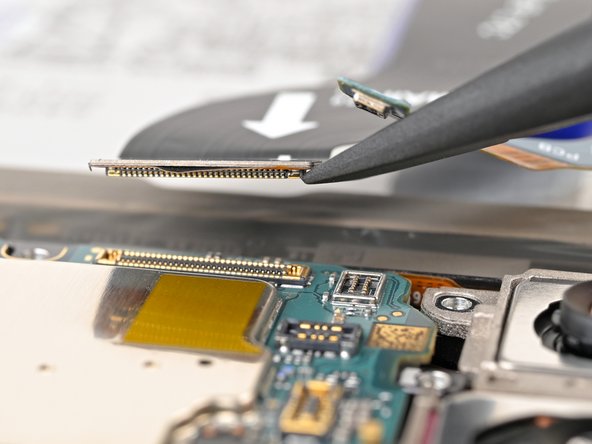
Step 21

– Alrighty tech folks! Let’s disconnect those cable connectors with some prying action. First, get a spudger and point it under that ‘MAIN’ labeled press connector on the motherboard’s bottom right corner, then give it a gentle lift. You’ve got this! Next, repeat the process for the primary interconnect cable. Did that look smooth? If you need help, you can always schedule a repair! But you’re doing awesome!
Tools Used
Step 22

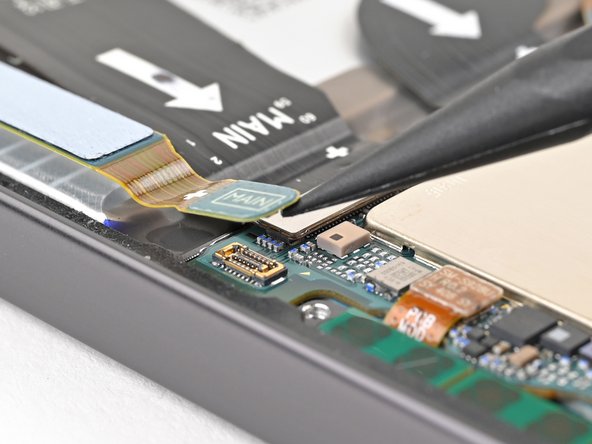
– Now, let’s repeat the process to give those display and 5G mmWave cable press connectors on the bottom left edge of the motherboard a little ‘goodbye hug’ and disconnect them. You got this!
Step 23
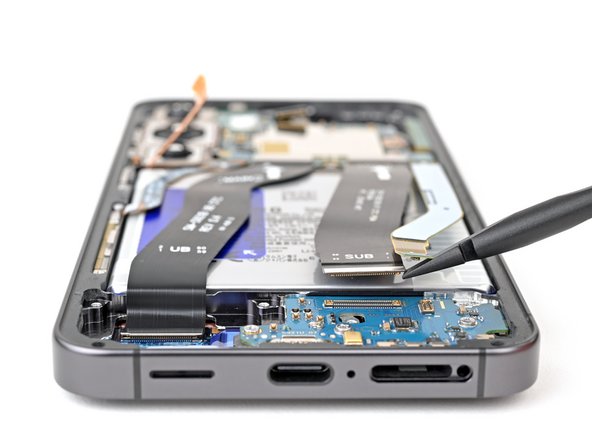

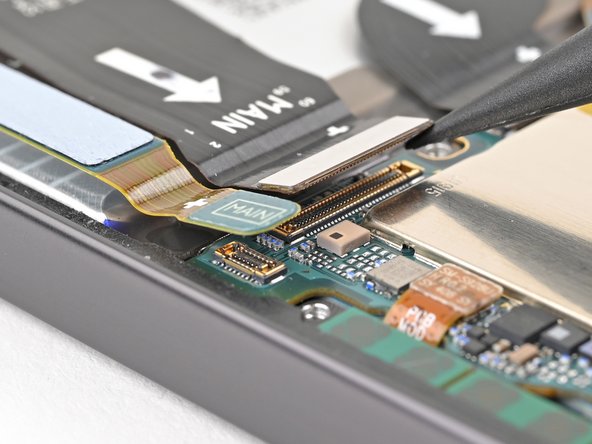
– Go ahead and repeat this process to unplug those two interconnect cable press connectors on the daughterboard, and don’t forget to disconnect the display cable connector just to the left of the daughterboard. You’ve got this!
Step 24
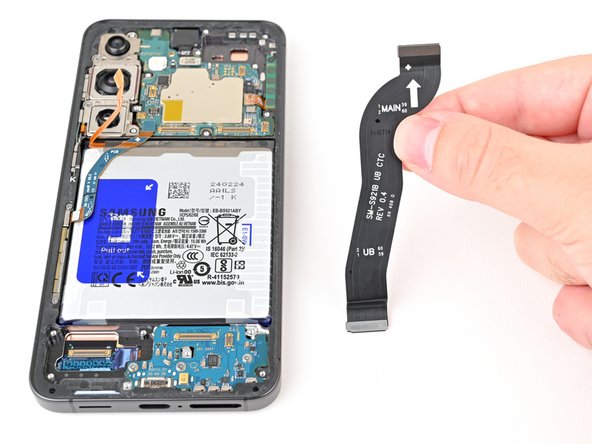


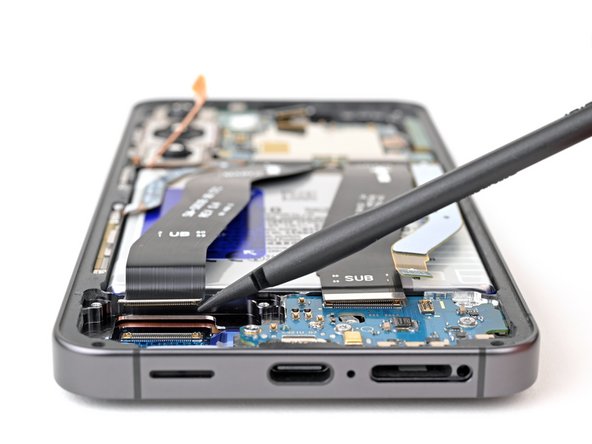
– Alright, let’s get those cables out of the way. Carefully remove the two interconnect cables and the display cable from your phone. You got this!
Step 25

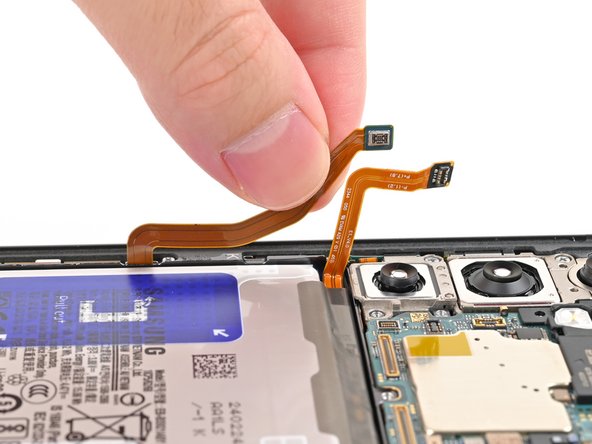
– Carefully curve the 5G mmWave antenna and battery cables so they stand tall and proud, pointing straight up.
Step 26

Handle the battery with care! It’s important to avoid bending, creasing, or puncturing it during the upcoming steps. A battery that’s been damaged can leak some nasty stuff and even spark a fire. Let’s keep things safe and sound!
Sometimes those pull tabs can be a little stubborn. Don’t worry, it happens! If you need a little extra help, you can use a thin plastic tool like an opening pick to gently lift up a corner. Just make sure you’re using a gentle angle. Once that corner is up, you can grab the pull tab with your fingers. Never use a metal tool, though! You don’t want to damage anything. And be careful not to press too hard on the battery – it’s sensitive. If you’re feeling a little unsure about any of this, you can always schedule a repair with us! We’re happy to help!
– Alrighty, let’s loosen up that trusty battery! Carefully peel the pull tab away from the battery, guiding it towards the left edge of your phone. Feeling a bit like a phone surgeon? If you need help, you can always schedule a repair!
Step 27

You might notice two extra tabs on the bottom edge of the battery – these are meant to come off easily in the next step, but if you’re having trouble getting the battery out, you can gently peel them up too.
If these tabs are still stuck together, you won’t be able to lift the battery out in the next step. To keep them from getting in the way, you can tape them to the side of your phone or screen. And remember, if you need help, you can always schedule a repair
– First, gently pry apart the tiny, clear tabs located above and below the blue section of the pull tab – we want to separate these from the rest of the tab.
– Next, carefully bend these small tabs away from the battery to ensure they don’t get in the way. If you need help, you can always schedule a repair
Step 28

Now it’s time to carefully remove the battery. You’ll notice the left edge will come up easily, but the right edge will stick around for a bit. Don’t worry, we’ll get to that in the next step.
Having a little trouble? No sweat. Just apply a tiny amount of high-concentration isopropyl alcohol (we’re talking 90% or higher) to the left edge of the battery. Then, gently lift the left edge of your phone and let the alcohol work its magic for about a minute. If you need help, you can always schedule a repair.
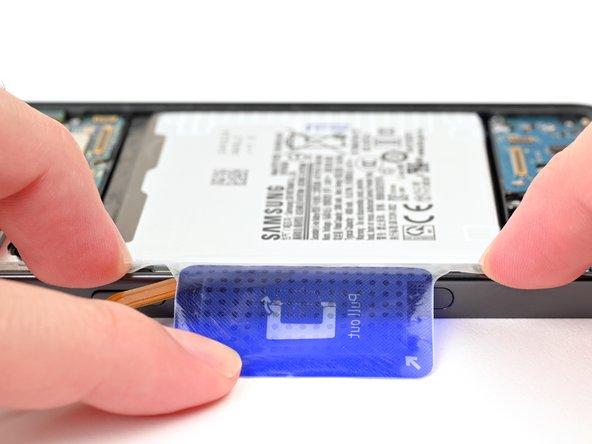
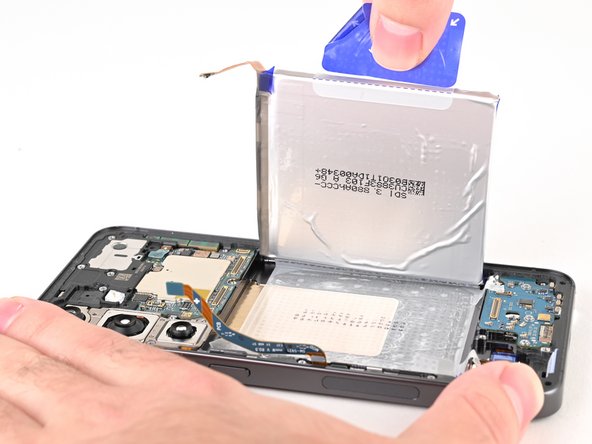
– Grab your phone and give it a solid hold while you take a firm grip on that blue center pull tab.
– With a steady hand, pull straight up to break free the battery adhesive—no need to rush, just keep it strong and steady.
– Now, lift that battery up until it’s standing tall and proud, then rest it gently against the right edge of the frame.
Step 29
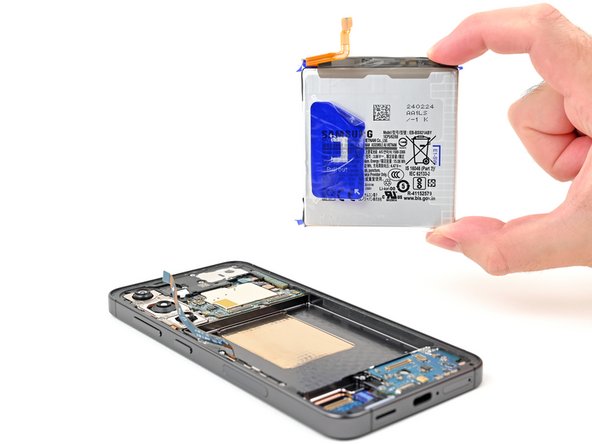
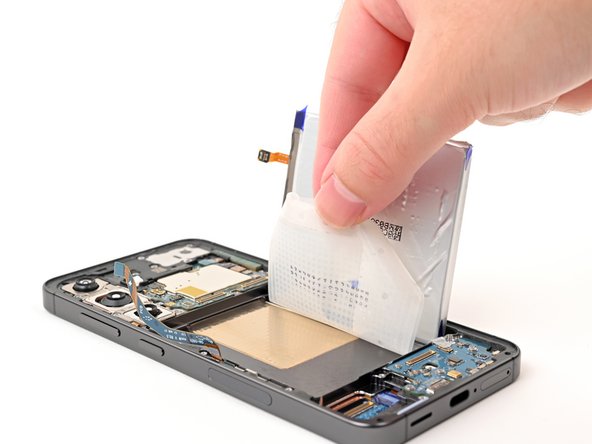

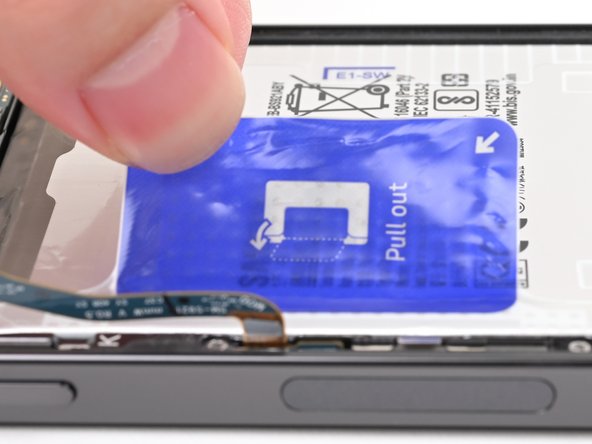
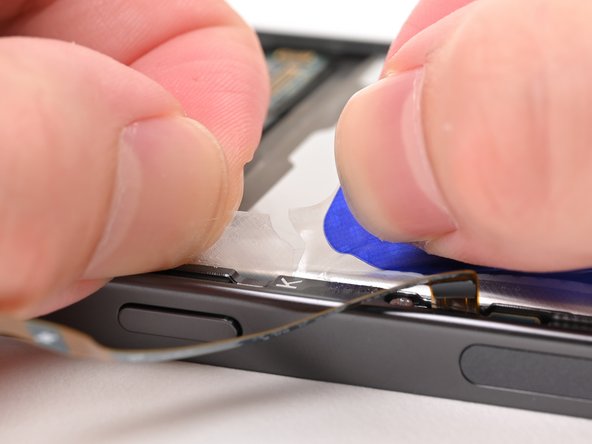
– Gently peel away the adhesive film from the frame using your fingers—like unwrapping a present!
– Carefully take out the battery along with its film, just like a magician revealing their next trick.
– If you’ve used isopropyl alcohol, hang tight for ten minutes before popping in the new battery. This gives the alcohol time to evaporate completely, ensuring a smooth installation.