Samsung Galaxy S24+ Battery Replacement Guide: Step-by-Step DIY
Duration: 45 minutes
Steps: 30 Steps
Hey there, this guide is just for the battery, so let’s get this done, shall we?
Get ready to breathe new life into your Samsung Galaxy S24+ by replacing that dead or worn-out battery. This guide is all about swapping out the battery only, so if you’re looking to replace the entire screen and battery assembly, we’ve got a different guide for that. Follow these easy steps and you’ll be back up and running in no time. If you need help or want some extra guidance, you can always schedule a repair.
Step 1


Before you start, make sure your phone’s battery is below 25% charged. A charged lithium-ion battery can be a safety hazard, so it’s better to be safe than sorry. If your battery is swollen, take the necessary precautions to avoid any accidents. If you need help, you can always schedule a repair
– First things first, let’s disconnect any cables from your phone. Give it some space!
– Now, press and hold the side button along with the volume down button, and then choose ‘Power off’ to gracefully shut down your device.
Step 2

When using heat to loosen things up, remember that a hair dryer, heat gun, or hot plate can be your best friend – just be gentle and don’t overdo it. Your phone’s display and internal battery are sensitive to heat, so keep an eye on the temperature. If you need help, you can always schedule a repair
– Grab your trusty iOpener, heat it up, and give the right edge of the back cover a nice warm hug for two minutes. It’s like a spa treatment for your phone!
Tools Used


Step 3

If you’re having a tough time making a gap, just heat things up a bit more to loosen that stubborn adhesive. Remember to check out the iOpener guidelines to keep everything cool. You’ve got this!
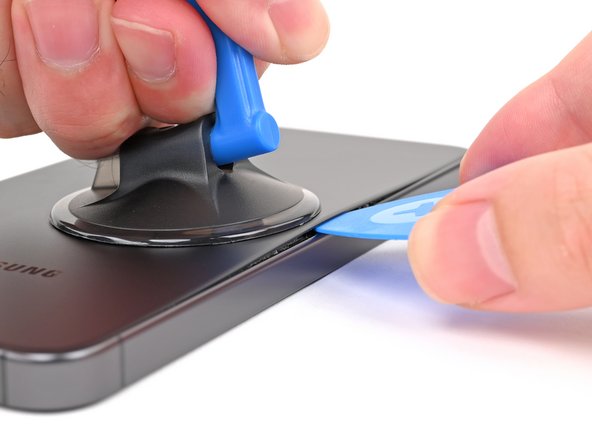
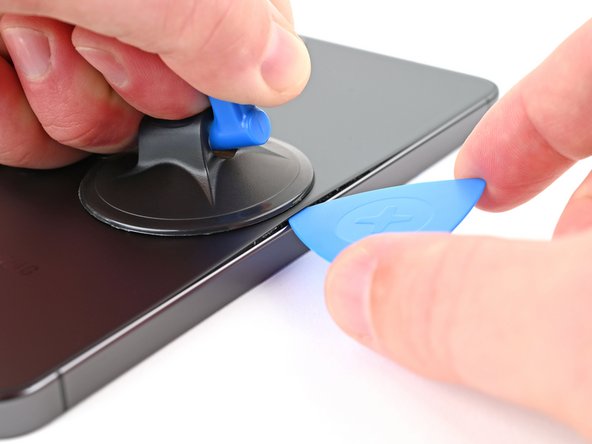
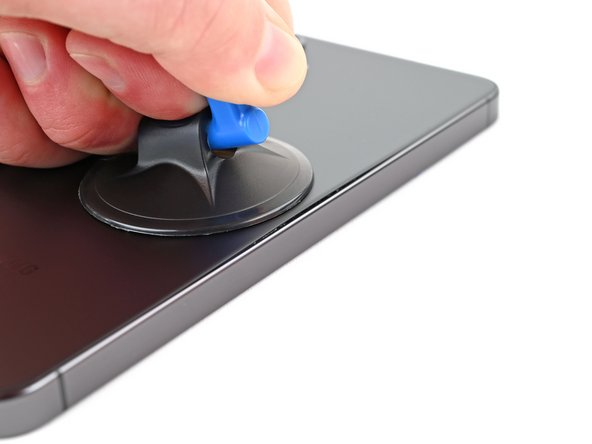
– Grab a suction handle and stick it on the back cover, aiming for the center of the right edge like a pro.
– Give that suction handle a good pull with some solid, steady force to open up a little gap between the cover and the frame.
– Slide an opening pick into that gap and get ready to work your magic!
Tools Used


Step 5

– Warm up that trusty iOpener and give the bottom edge of the back cover a cozy two-minute hug. You’ve got this!
Tools Used
Step 6


– Let’s get this party started! Rotate the opening pick around the bottom right corner to gently separate the adhesive.
Step 7

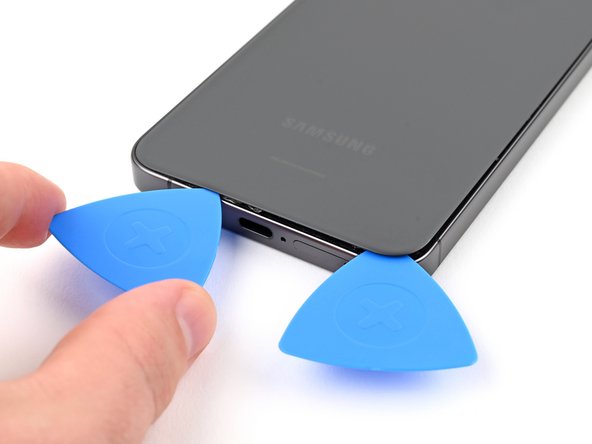
– Let’s get this party started! First, slide a pick into the bottom right corner. It’s gonna be a tight squeeze, but we’ve got this. Now, slide the pick over to the bottom left corner, gently prying the adhesive apart. Think of it like opening a super-secret door. Leave the pick in place to keep the adhesive from sticking back together. You got this!
Step 8

– Time to get this repair started. Apply a heated iOpener to the left edge of the back cover for about two minutes. If you need help, you can always schedule a repair
Tools Used
Step 9


– Give that opening pick a little spin around the bottom left corner to break free the adhesive. You’re doing great!
Step 10


– Now it’s time to add a third opening pick – slide it into the bottom left corner and get ready to loosen things up.
– Gently push the pick upwards towards the top left corner to break the adhesive seal – you’re making great progress!
– Leave that pick right where it is, near the top left corner, so the adhesive doesn’t try to reseal itself. If you need help, you can always schedule a repair
Step 11

– Warm up your iOpener and give the top edge of the back cover a cozy two-minute hug.
Tools Used
Step 12


– Now, let’s get this party started! Gently twist your opening pick around the top left corner. This will help loosen up that sticky adhesive holding everything together.
Step 13


– Now it’s time to add a fourth opening pick – slide it into the top left corner and get ready to make some progress.
– Gently push the pick towards the top right corner to loosen the adhesive, you’re doing great!
– Leave the pick hanging out near the top right corner, this will help prevent the adhesive from sneaking back into place. If you need help, you can always schedule a repair
Step 14


Hey there! You’ll spot a little square of adhesive surrounding the rear microphone, just above the flash.
– Position the tip of your trusty opening pick right above the flash.
– Gently slide the pick beneath the top edge of the back cover until you can feel it catching on the adhesive.
– Continue gliding the pick towards the bottom of the device while gently lifting the cover until it finally breaks free from the sticky stuff.
Step 15


Having trouble getting the back cover to budge? No worries, just grab an opening pick and gently pry away any adhesive that might be sticking around.
Now’s a great time to power on your phone and make sure everything is working smoothly before you seal it back up. Just remember to shut it down completely before moving on.
To keep your device water-resistant, you’ll want to reapply the back cover adhesive with care. Keep in mind that the repair will affect your device’s IP rating, but with a little patience, you’ll be back in business. If you need help, you can always schedule a repair
– First things first, let’s get that back cover off! Grab it and give it a gentle pull.
– Now, as we put everything back together:
– Use tweezers or your fingers to carefully peel away all the sticky stuff from both the back cover and the phone. If you’re having a tough time with the adhesive, a little heat or some isopropyl alcohol (90% or higher) along with a coffee filter or lint-free cloth can work wonders.
– And if you’re using custom-cut adhesives, be sure to check out this guide.
Tools Used


Step 16

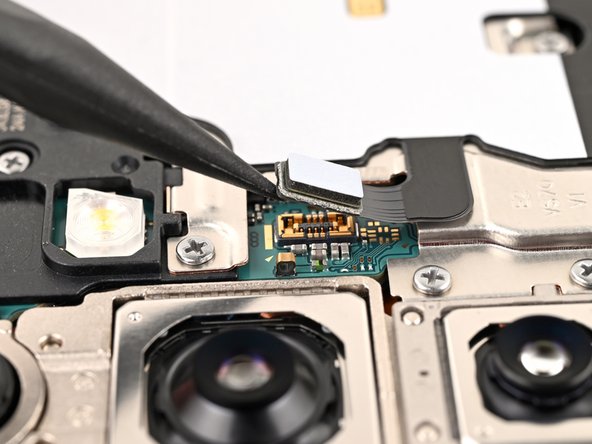
Take a peek at the board near each press connector – you’ll spot an arrow that shows you exactly where to pry, making the process a whole lot easier. If you need help, you can always schedule a repair
– Grab your trusty spudger and gently pry up the wireless charging coil connector from the motherboard. It’s like a little dance; just be smooth and careful! Remember, we don’t want any hurt feelings here.
– When it’s time to reconnect those pesky press connectors, aim for the connector and line it up just right over its socket. Give it a soft press with your fingertip—start on one end, then shimmy over to the other—until you hear that satisfying click! If it doesn’t want to cooperate, don’t sweat it! Just readjust and give it another go. You’ve got this!
Tools Used

Step 17


– Time to unleash your inner tech wizard and get those screws out! Grab your trusty Phillips screwdriver and let’s tackle those 13 little guys securing the wireless charging coil and loudspeaker. We’re talking six screws holding down the charging coil and seven keeping the loudspeaker in place. You got this! And remember, if you need a hand, you can always schedule a repair.
Step 18


– Time to get started. Insert the point of your trusty spudger into the notch at the top left corner of the loudspeaker – it’s marked with an arrow to help you out.
– Gently pry up to unclip the loudspeaker from the frame. If you need help, you can always schedule a repair
Tools Used
Step 19


– Lift the loudspeaker off the frame using your fingers. It’s like giving it a gentle nudge.
– Take the wireless charging coil and loudspeaker out of the frame. Easy peasy!
– While putting it back together, press around the edges of the loudspeaker to snap it onto the frame before reinserting the screws.

Step 21


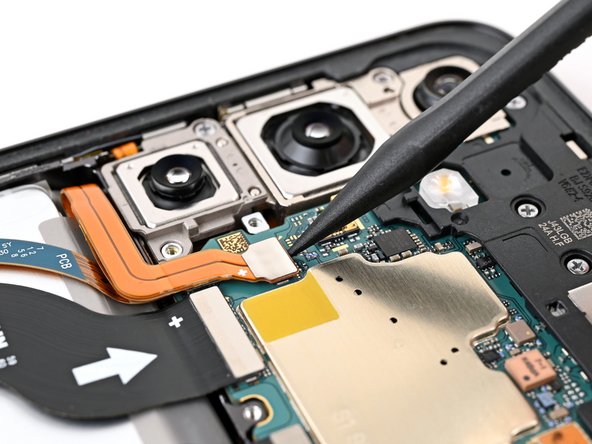
– Grab your trusty spudger and give those interconnect cable press connectors a little nudge to disconnect them from the daughterboard. It’s like a friendly goodbye to the old part!
Tools Used
Step 22


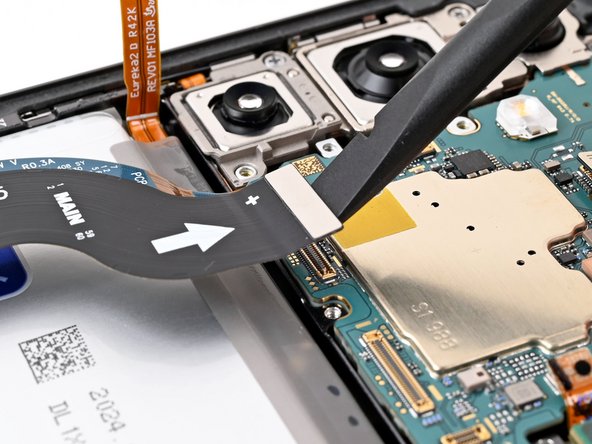
– Grab your trusty spudger and gently lift to disconnect those interconnect cable press connectors from the motherboard. If you need help, you can always schedule a repair
Tools Used
Step 23


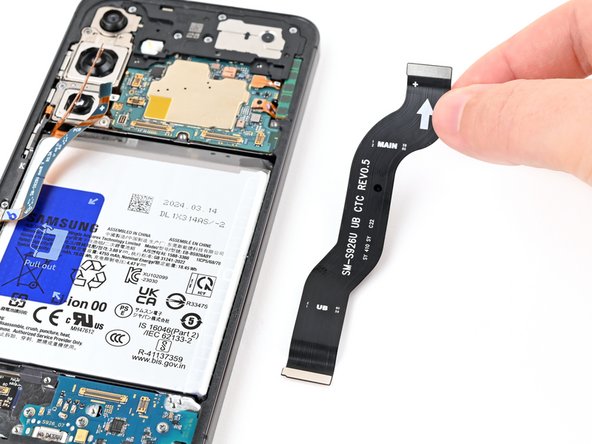
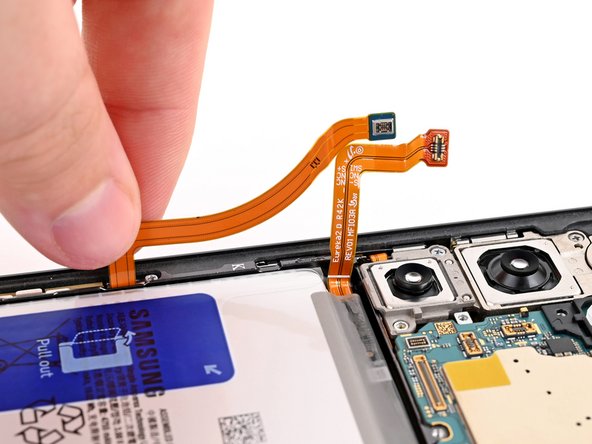
– Alright, let’s disconnect those cables. Grab those interconnect cables and gently pull them out of the phone. No need to be rough – we want those cables to stay in good shape for their next adventure!
Step 24


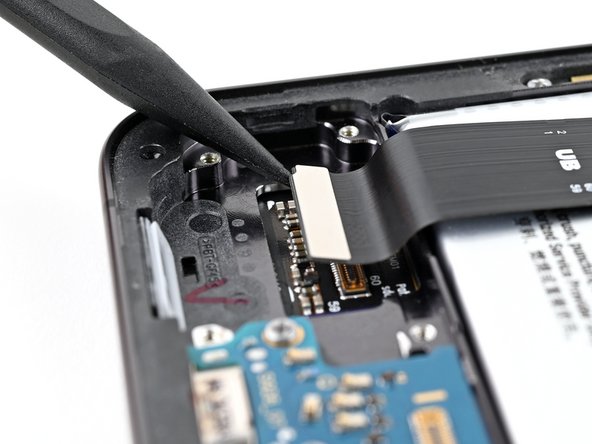
– Time to give those cables a little nudge! Using a spudger, gently pry up and disconnect the display cable and lower antenna cable press connectors from the motherboard. It’s like a gentle dance, just a little wiggle and they’ll come right off! If you need help, you can always schedule a repair.
Tools Used


Step 27

Handle the battery with care over the next few steps – it’s super important not to bend, crease, or puncture it. A damaged battery can be seriously hazardous, leaking chemicals and even catching fire. If you need help, you can always schedule a repair
If that pull tab is being a little stubborn, don’t worry! Just grab a thin plastic tool like an opening pick and gently pry up a corner. Just a little wiggle and it should come right up. Remember, always be gentle with your device and never use a metal tool on the battery. If you’re ever feeling unsure, you can always schedule a repair.
Step 28

Step 29
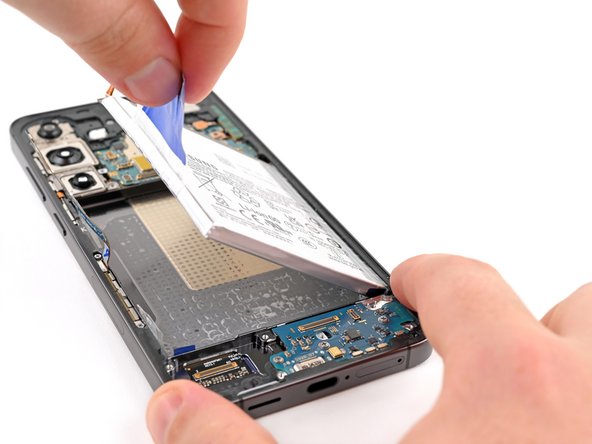

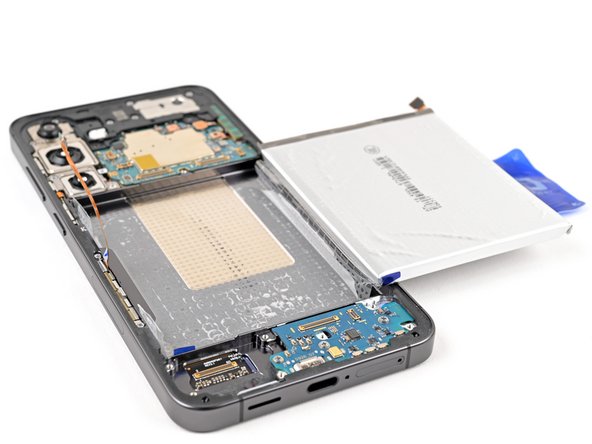
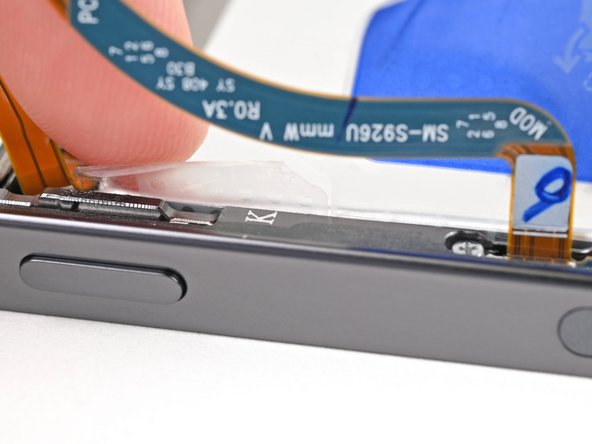
Be gentle when handling the battery’s right edge to avoid any damage. You may need to lift the battery a bit to remove the adhesive film before laying it properly. For more help, you can always schedule a repair!
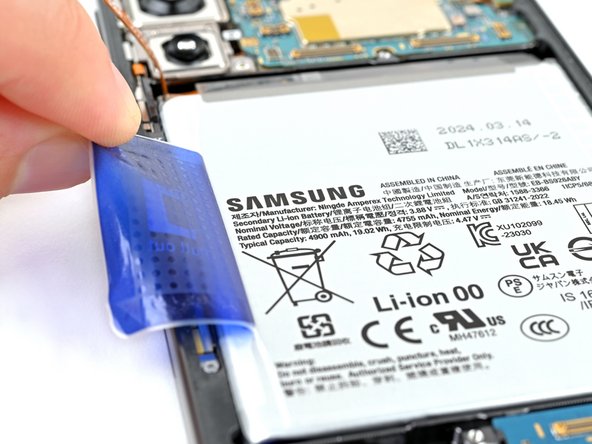
This battery is held down with a little strip of sticky tape, you know, the kind that’s doubled over on itself. When you pull on the tab, the left side will lift up, but the right side will stay put. Don’t worry, we’re gonna get it out in the next step!
– So you’re feeling adventurous today and want to tackle that battery removal like a pro? Alright, let’s do this! First, take your super strong hand, place it firmly on the phone frame, and with the other hand, gently give a big ol’ lift to that bright blue pull tab. Keep it nice and straight so the battery can fly free from those sticky adhesive winds. Once that’s done, it’s time to make a bed for our little battery, so place it cozily on the right edge of your phone. And hey, if you ever need some more guidance, you can always schedule a repair!
Step 30
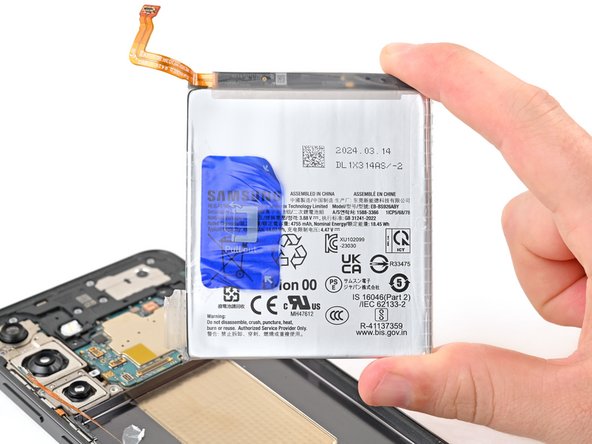


– Carefully peel off the last bit of film from the frame—make sure it’s in one smooth motion, like a pro!
– Next up, let’s remove the battery. Give it a gentle tug and it should come right out.
– If you’ve used isopropyl alcohol, take a breather and wait about ten minutes before you pop in the new battery. This helps the alcohol evaporate completely, ensuring a smoother installation!