Samsung Galaxy S24 Front Camera Replacement Guide: Step-by-Step DIY
Duration: 45 minutes
Steps: 26 Steps
Get ready to swap out the front camera on your Samsung Galaxy S24! Just a heads up: keeping that water resistance intact after your repair is all about how well you stick that back cover adhesive back on. Remember, your device might lose its IP (Ingress Protection) rating, but with a little care, you can still make it shine! If you need help, you can always schedule a repair.
Step 1

Before you start, make sure your phone’s battery is below 25%. This is a safety precaution – a charged lithium-ion battery can be a fire hazard if it’s damaged. If you need help, you can always schedule a repair
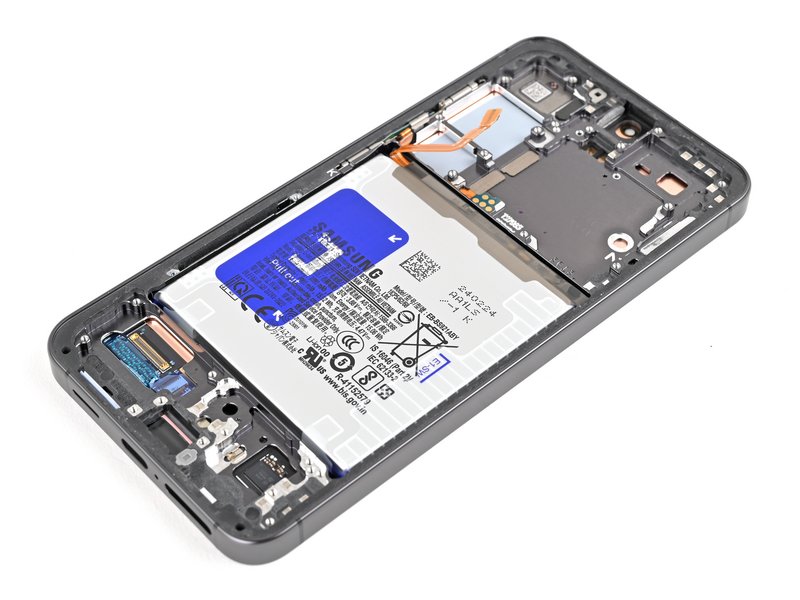
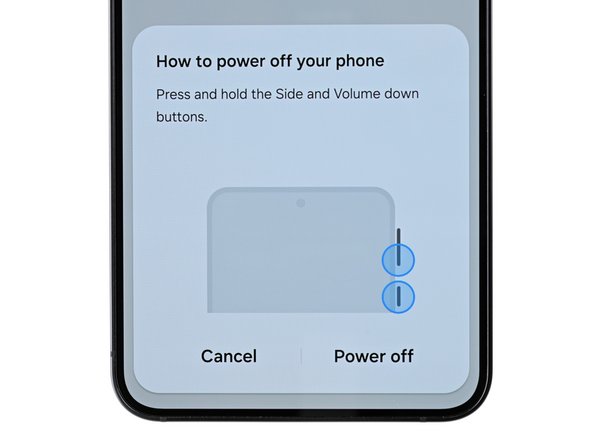
– First things first, let’s give your phone a little break! Power it down completely and make sure all those pesky cables are unplugged.
Step 2

Don’t go overboard with the heat, okay? We don’t want to toast your phone’s battery. If you need help, you can always schedule a repair.
Want to get that back glass nice and loose? You can give it a little love with a hairdryer or a heat gun! Just warm up the right edge of the glass until it’s hot to the touch. If you need help, you can always schedule a repair
– Let’s warm up that back cover! Get your iOpener nice and toasty, then apply it to the right edge of the back cover for a couple of minutes. You’ll want to give it a good two minutes to make sure everything’s nice and loose.
Tools Used


Step 3

If you’re having a tough time, try cranking up the heat a bit more to help loosen that pesky adhesive.
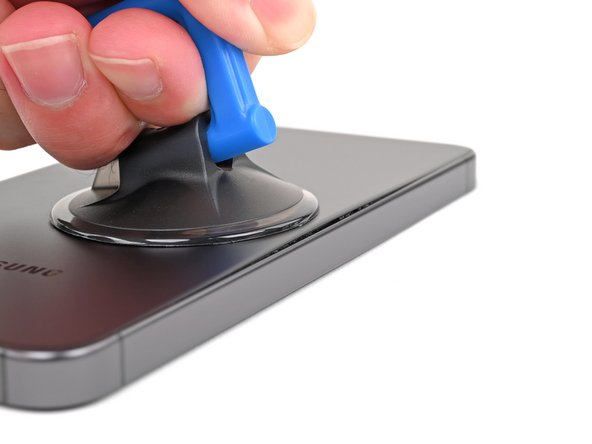
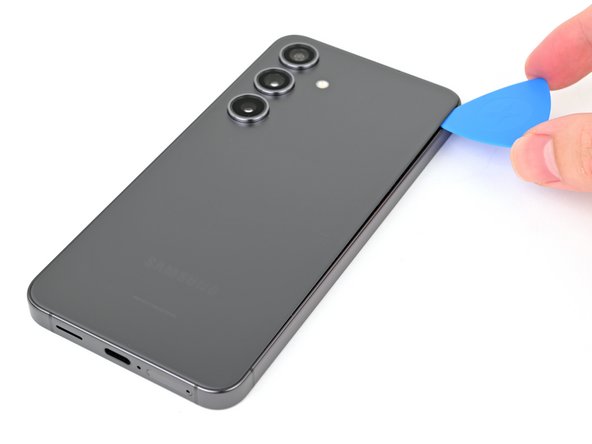
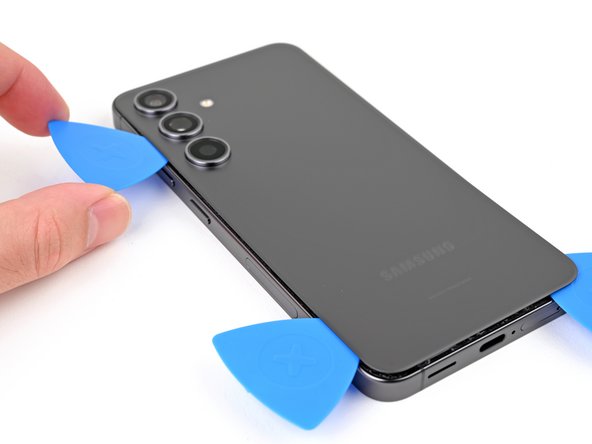
– First, attach a suction handle to the back cover, positioning it as close to the center of the right edge as you can.
– Next, give the suction handle a firm, steady pull to create some space between the cover and the frame. You got this!
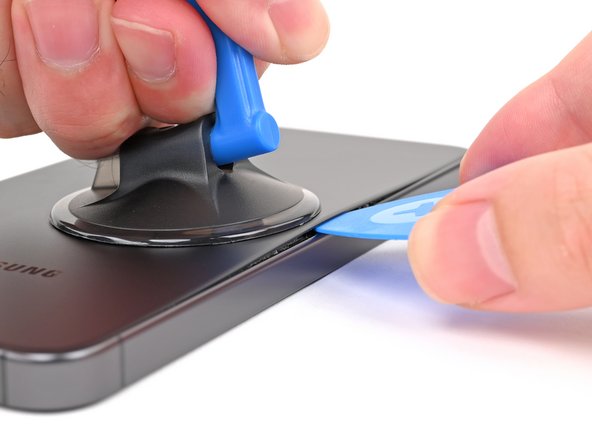
– Now, take an opening pick and carefully insert it into the gap you just created. If you need help, you can always schedule a repair
Tools Used

Step 4


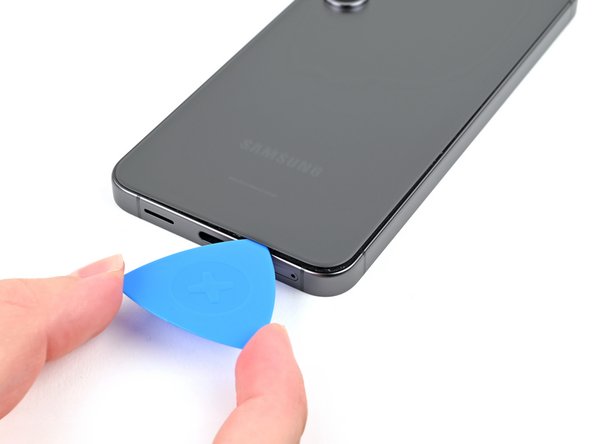
– Let’s loosen things up! Slide your opening pick along the right edge between the back cover and the frame to slice through the adhesive. It’s like a little dance between your tool and the phone.
– Keep the adhesive from sneaking back together by leaving your opening pick in the bottom right corner. Don’t worry, it’ll be our little secret.
Step 5

– Get that iOpener nice and toasty and press it against the bottom of the back cover for two minutes. Let’s get this party started!
Tools Used
Step 6

– Now, let’s gently wiggle that opening pick around the bottom right corner. We’re just trying to loosen up that adhesive a bit, like giving it a little dance party!
Step 7
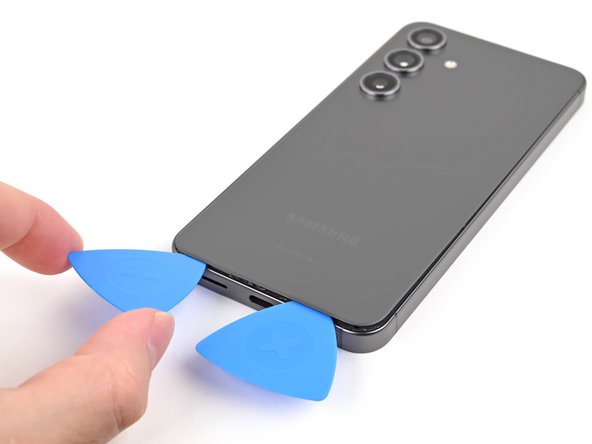

– Let’s get this party started! Take your second opening pick and slide it in next to the first one, along the bottom edge. Slide it along to cut through that sticky adhesive.
– Now keep that opening pick in place on the bottom left edge. You don’t want the adhesive to stick back together, so keep that tool in place.
Step 8

– Let’s heat things up! Apply your iOpener to the left side of the back cover for two minutes. You’ve got this!
Tools Used
Step 9

– Now it’s time to get this repair started – gently rotate the opening pick around the bottom left corner to loosen the adhesive and get things moving.
Step 10

Hey, cool it with the pick! Don’t go deeper than 4mm, or you might end up with a camera flash that’s dimmer than your future. 😉 If you need help, you can always schedule a repair.
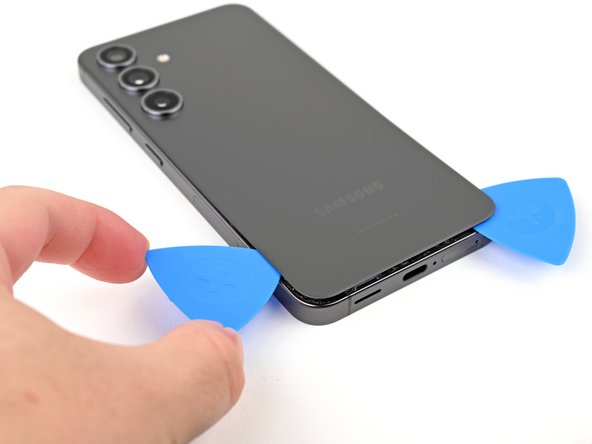
– Slide in a third opening pick just above the last one and gently glide it along the left edge to break through that stubborn adhesive.
– Keep your opening pick snug in the top left corner to stop the adhesive from sticking back together.
Step 11

– Warm up your iOpener and press it gently against the top of the back cover for a cozy two minutes.
Tools Used
Step 12

– Swing that pick around the top left corner to loosen up the adhesive. If you need help, you can always schedule a repair
Step 13
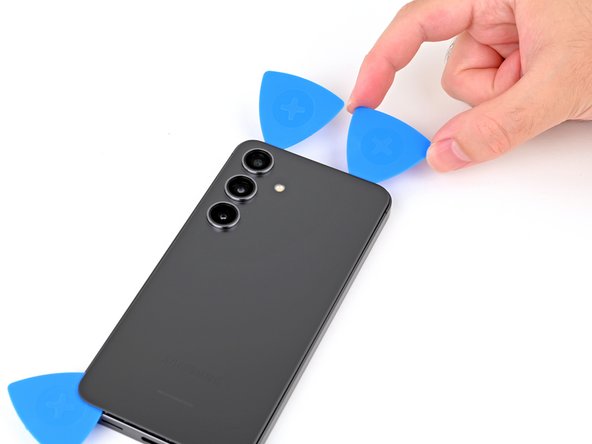


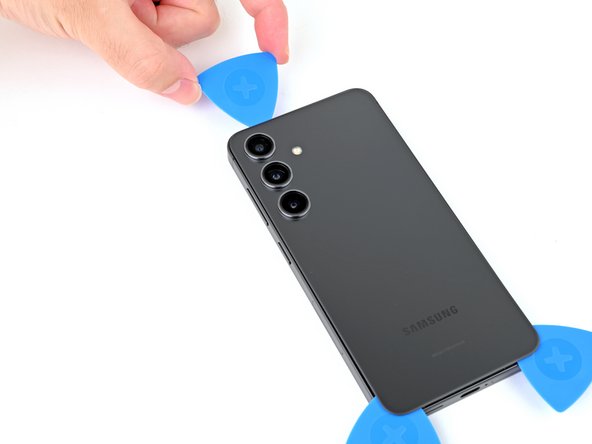
– Pop a fourth opening pick into the top left corner, keeping it at the same depth, and gently glide it along the top edge, wrapping it around the top right corner to cut through that pesky adhesive.
Step 14


Be careful not to insert the pick too far – stop at its center point to keep those rear cameras safe and sound. If you need help, you can always schedule a repair
– Now it’s time to add a fifth opening pick – slide it in just above the camera flash cutout, nice and smooth.
– Gently push the opening pick under the top edge of the back cover until you feel it catch on the flash adhesive, then stop for a sec.
– Keep going, inserting the pick a bit deeper into the phone, until the adhesive lets go of the back cover completely – you got this! If you need help, you can always schedule a repair
Step 15

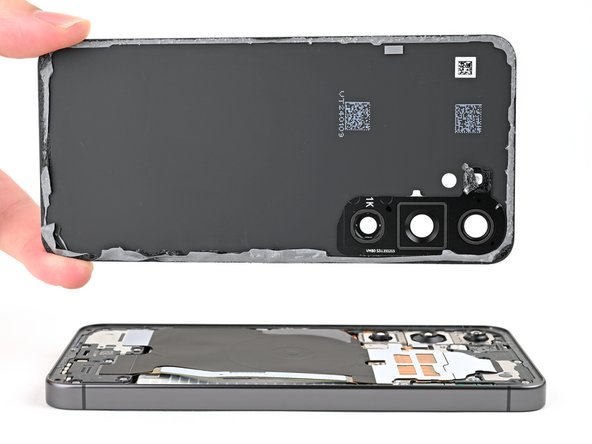
If your cover is still playing hard to get with the frame, gently slide the tip of an opening pick around the edges until it decides to part ways completely.
Now’s a perfect time to power up your phone and give everything a quick test run before sealing it back up. Just remember to turn your phone off completely before diving back in.
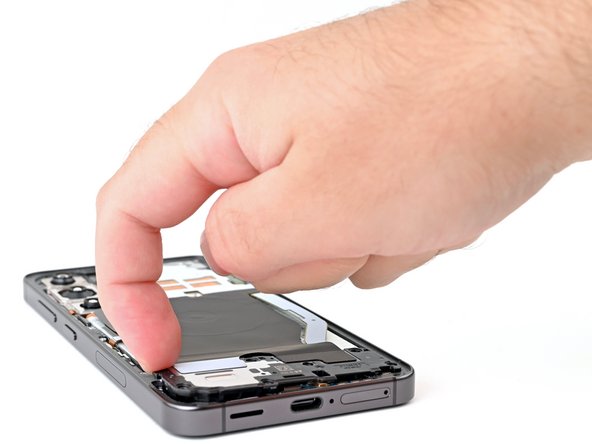
– Grab the back cover by its edges and give it a little lift to take it off. It’s like a dance move!
– Now, get ready for reassembly:
– If you see any stubborn adhesive chunks, grab your trusty tweezers or fingers and give ’em the boot! If it’s being stubborn, a bit of heat and some 90% isopropyl alcohol will help loosen it up.
– For our custom-cut adhesive fans, check out this guide! schedule a repair
– And for those rocking the double-sided tape, this guide will be your best friend! schedule a repair
Tools Used


Step 16

– Feelin’ savvy? Use the pointy end of your trusty spudger to gently unplug the wireless charging coil’s press connector from the motherboard’s socket. And don’t stress if it feels tricky—just take a deep breath and try again. Once you’ve got that done, it’s time to re-attach those press connectors. Simply align ’em carefully over their sockets and give ’em a little press with your fingertip on each side until they click into place—they won’t go anywhere else, don’t worry! If it’s just not clickin’ with you, no worries – give ’em a little nudge and try again. Still need a hand? No biggie, you can always schedule a repair!
Tools Used

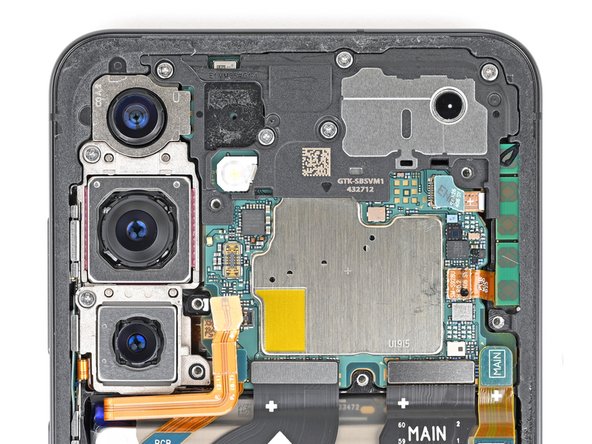
Step 17
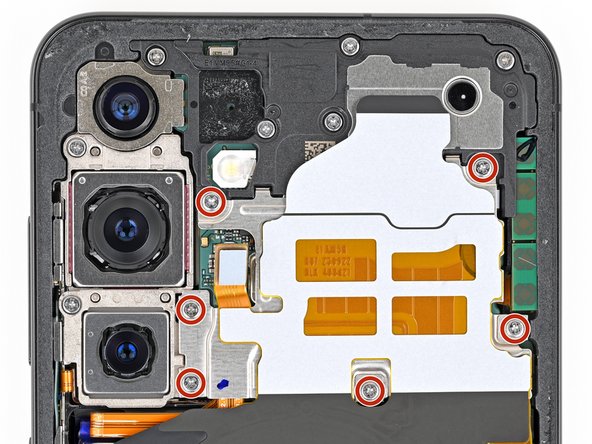

– Alright, let’s loosen those screws! Grab your trusty Phillips screwdriver and pop off those thirteen 3.5mm screws holding down the wireless charging coil and the loudspeaker.
– Six of these little guys are keeping the wireless charging coil in place.
– The remaining seven screws are holding the loudspeaker in place.
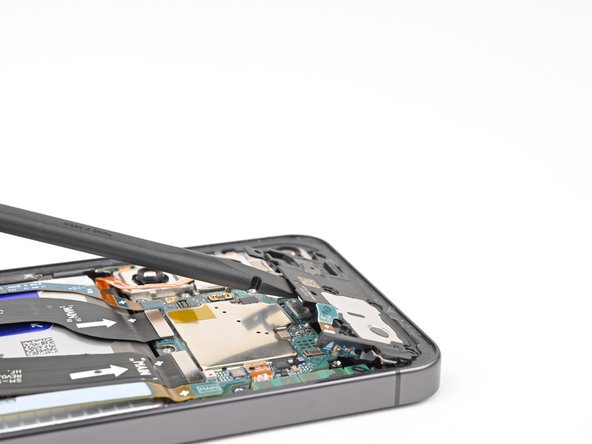
Step 18
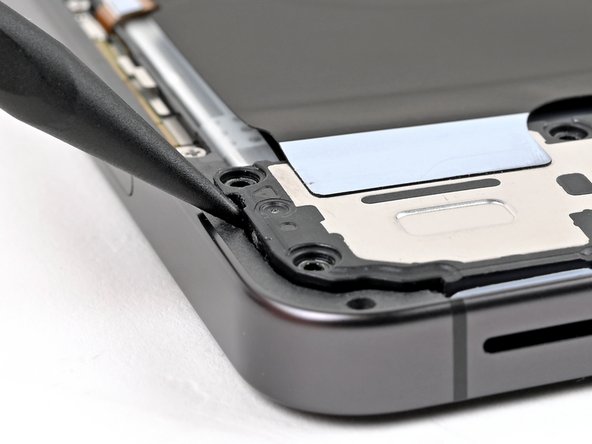

– Let’s get this speaker out! First, grab your trusty spudger and gently insert the tip into the notch on the left edge of the loudspeaker assembly.
– Now, give that speaker a little nudge, prying it up to release those clips holding it in place. It’s like giving it a high-five!
Tools Used
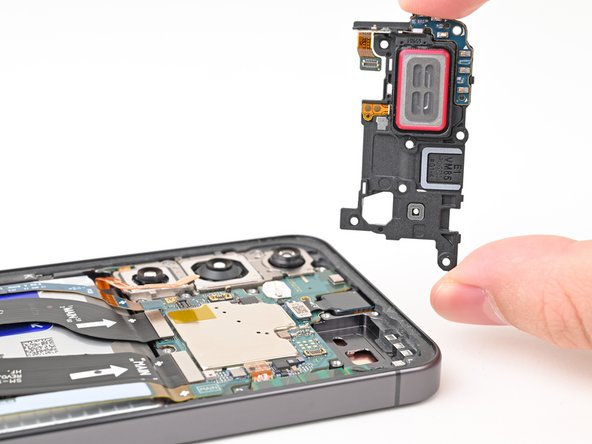
Step 19

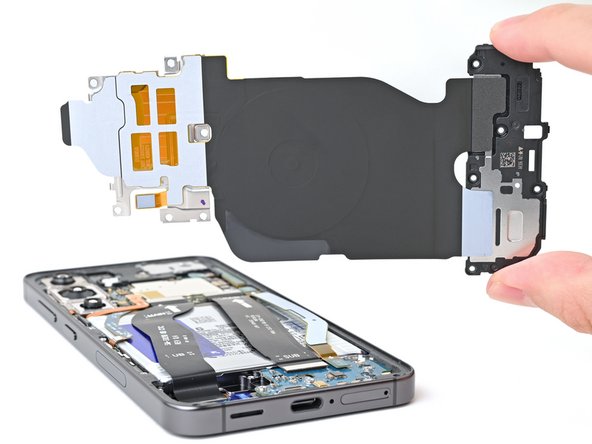
– Gently pry the wireless charging coil and loudspeaker assembly away from the frame using your fingernail or a spudger – it’s like opening a little door to the inside of your phone.
– Now it’s time to remove the wireless charging coil and loudspeaker, taking care not to damage any surrounding components.
– When putting everything back together, make sure to press around the edges of the loudspeaker to secure it to the frame before replacing the screws. If you need help, you can always schedule a repair
Tools Used
Step 20

– Time to give that battery cable a little nudge! Gently slide the flat end of your spudger under the battery cable press connector (it’s hanging out on the motherboard), and give it a little lift to disconnect it. No worries, it’s just a friendly separation.
Tools Used
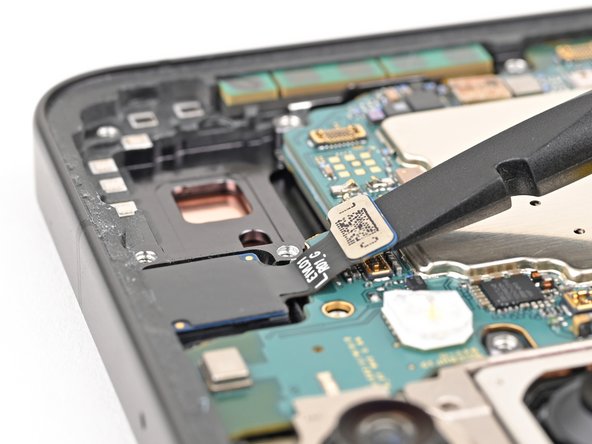
Step 21

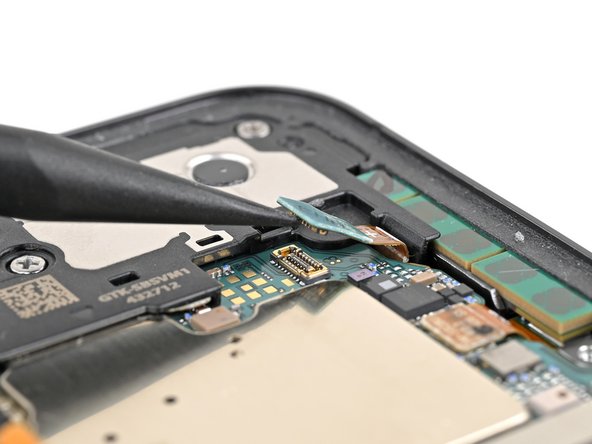
– Slide the spudger’s tip gently under the left side of the earpiece speaker connector and give it a little nudge to pop it free. You’ve got this!
Tools Used
Step 22

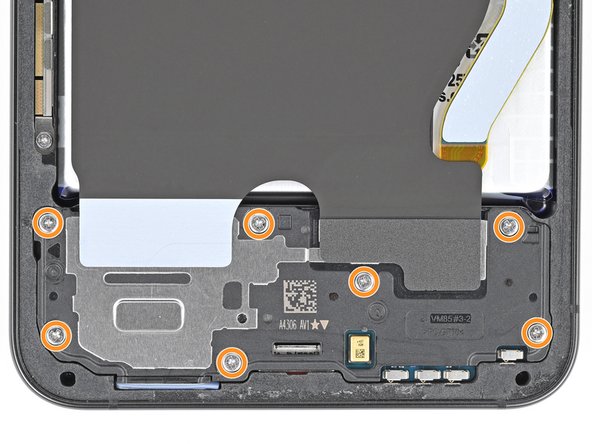
– Grab your trusty Phillips screwdriver and carefully unscrew the five 3.5mm screws holding the earpiece speaker in place. If you need help, you can always schedule a repair.
Step 23

– Now, let’s give that earpiece speaker a little nudge! Use the flat end of a spudger to gently pry it up from the chassis.
– Time to say goodbye to the earpiece speaker – carefully remove it from the device.
Tools Used
Step 24

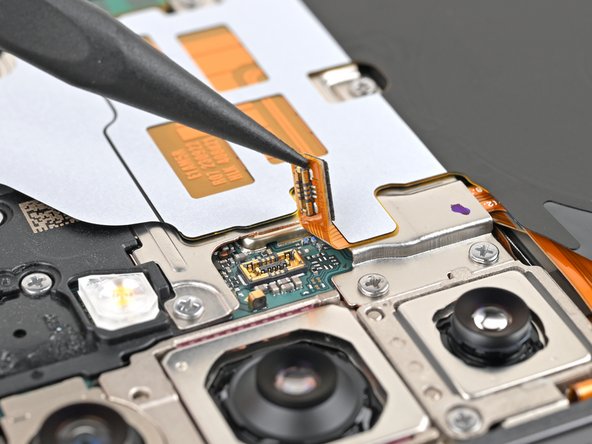
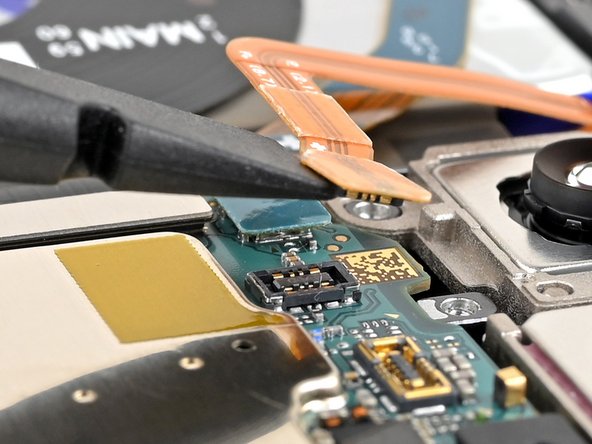
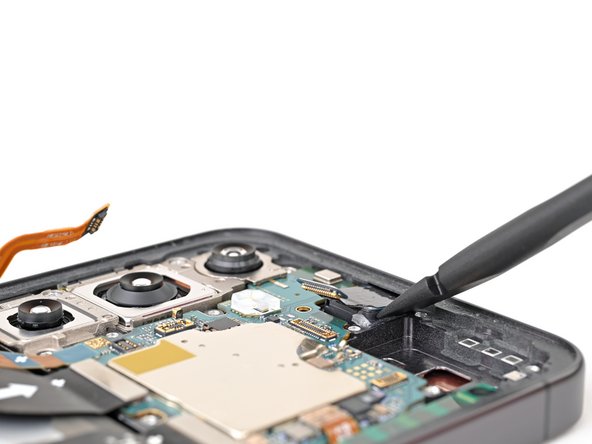
– Grab a spudger and gently wiggle it to lift up and disconnect the front camera press connector. You’ve got this!
Tools Used
Step 25

Alrighty, tech-savvy pals, work slowly and steady here when applying heat, as that camera loves to stick! Be sure not to pull that circuit board from its cute little camera housing. Think you need a hand? No worries – we’re here for ya! Schedule a repair and let the experts handle it!
– Now it’s time to get this camera loose. Use a hair dryer or a heat gun to warm up the front camera for about 90 seconds. If you’re not comfortable with this step, don’t worry – you can always schedule a repair and let the pros at Salvation Repair handle it for you.
Tools Used
Step 26

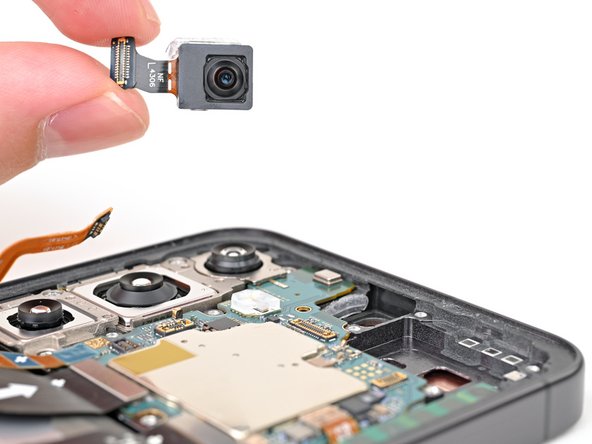
Applying a steady force will help the adhesive let go more easily.
If the camera is still stuck, gently use the tip of your spudger to scrape away the epoxy around it.
– Use the flat end of a spudger to gently pop the front camera out of its spot in the frame. It’s like giving it a little high-five to say goodbye!
– When you put everything back together, you’ll want to make sure that camera is secure. If your replacement part didn’t come with new adhesive, just use some thin, double-sided tape. We’ve got you covered! If you need help, you can always schedule a repair.
Tools Used