Samsung Galaxy S24 Ultra Rear Cameras Replacement Guide
Duration: 45 minutes
Steps: 47 Steps
Let’s get this camera swap going! This guide walks you through replacing any or all of the rear cameras in your Samsung Galaxy S24 Ultra. Follow the steps carefully, and you’ll be snapping pics like a pro in no time. If you need help, you can always schedule a repair.
Step 1


– Let’s get this party started! First things first, unplug your phone. We don’t want any unexpected sparks, right?
– Now, hold the side key and the volume down button. Yep, just like that! Then, select “Power off” to turn off your phone. You’re doing great!
Step 2

Want to use a hair dryer, heat gun, or hot plate? Go for it! Just be careful not to turn up the heat too high – we don’t want to fry your phone’s display or battery, now do we? If you need help, you can always schedule a repair.
– Grab your trusty iOpener and give the right edge of the back cover a nice, warm hug for two minutes. You got this!
Tools Used


Step 3

If you’re struggling to create that gap, don’t worry! Just give the adhesive a little more heat to loosen it up. Remember to follow our iOpener instructions to avoid overheating and make sure everything stays nice and cool.
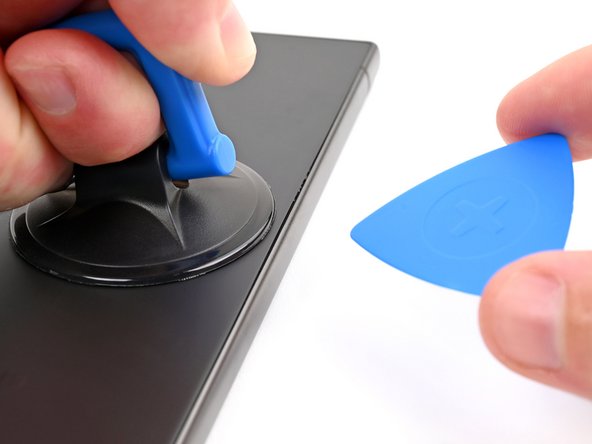
– First, attach a suction handle to the back cover, positioning it as close to the center of the right edge as you can.
– Now, pull up on the suction handle with a firm, steady force – you’re aiming to create a gap between the cover and the frame, so don’t be shy!
– Next, take an opening pick and carefully insert it into the gap you’ve just created. If you need help, you can always schedule a repair
Tools Used

Step 4


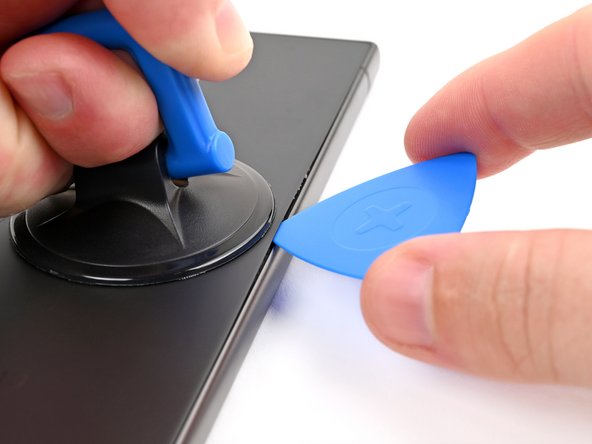
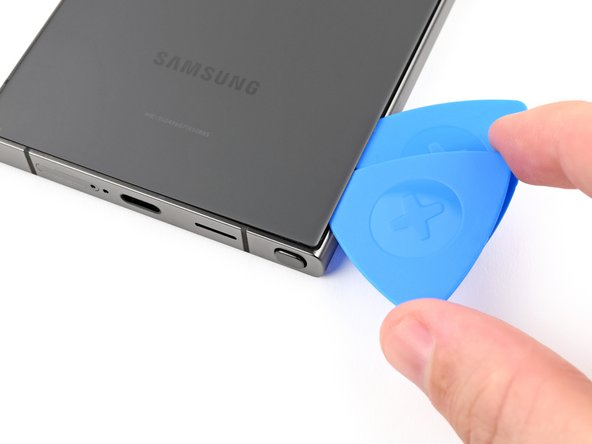
– Now, let’s slide that pick back and forth along the right edge – think of it like a little dance for your device! It’s time to separate that adhesive.
– Once you’ve got that adhesive separated, leave the pick tucked in near the bottom right corner. We don’t want that sticky stuff to get back together, do we?
Step 5

– Let’s heat up the back cover! Apply a heated iOpener to the bottom edge for two minutes. If you need help, you can always schedule a repair.
Tools Used
Step 6

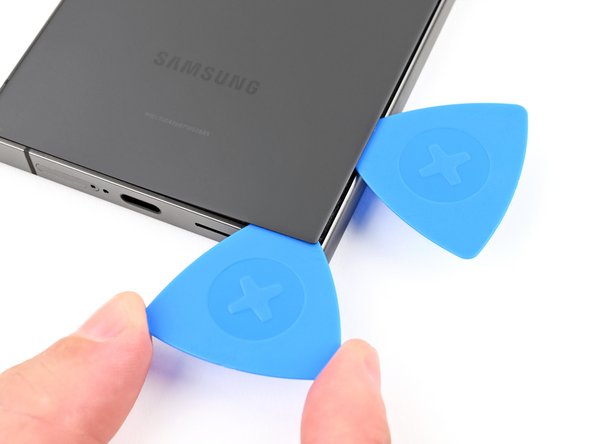
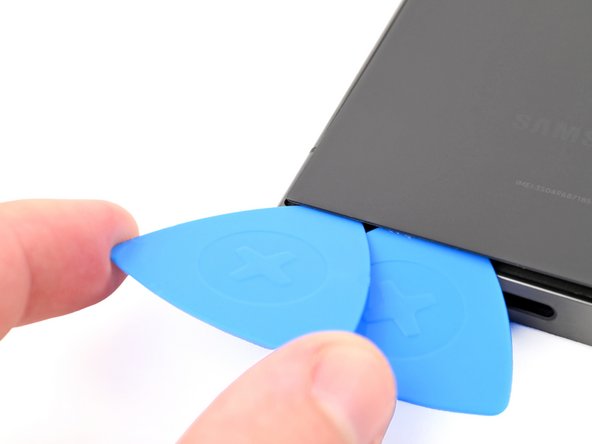
– Now it’s time to bring in some backup – insert a second opening pick next to the first one, near the bottom of the right edge. This will help you get a better grip on things.
– Gently rotate the opening pick around the bottom right corner to loosen the adhesive. Don’t worry if it takes a little bit of finesse – you’ve got this! If you need help, you can always schedule a repair
Step 7
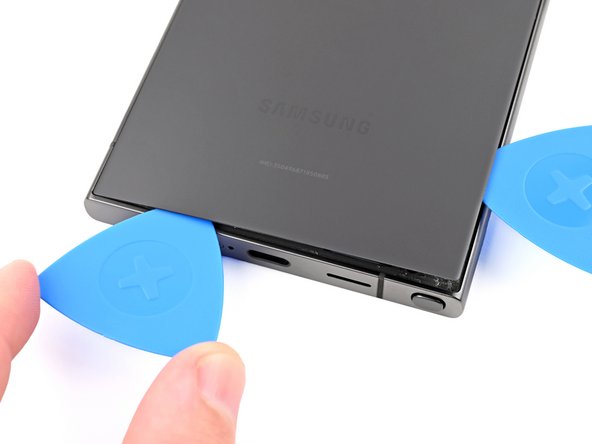

– Gently glide the opening pick along the bottom edge to break that adhesive seal.
– Keep the pick snugly in place near the bottom left corner to stop that adhesive from sticking back down.
Step 8

– Get that iOpener nice and toasty! Apply it to the left edge of the back cover for a couple of minutes. Let the heat work its magic. You got this! If you need help, you can always schedule a repair
Tools Used
Step 9
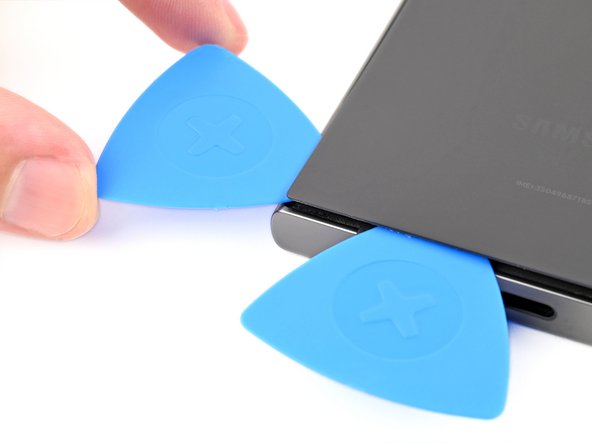

– Now it’s time to bring in some extra help – insert a third opening pick next to the second one, near the left side of the bottom edge. This will give you some extra leverage to get the job done.
– Gently rotate the opening pick around the bottom left corner to loosen the adhesive. Remember, patience is key, and don’t hesitate to take your time. If you need help, you can always schedule a repair
Step 10

Hey, don’t go crazy with that pick! Keep it under 4mm to keep the antenna cable happy and healthy. 😎 If you need a helping hand, you can always schedule a repair.
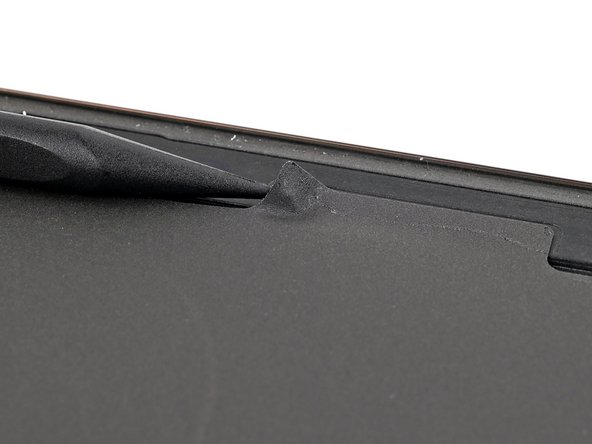
– Slide your opening pick along the left edge to separate the adhesive. Stop just before you reach the power button. It’s like a little dance party for your pick!
– Leave the pick inserted near the power button to prevent the adhesive from sticking back together. We wouldn’t want to spoil all your hard work! If you need help, you can always schedule a repair
Step 11

– Time to get this repair started. Apply a heated iOpener to the top edge of the back cover for about two minutes. If you need help, you can always schedule a repair
Tools Used
Step 12


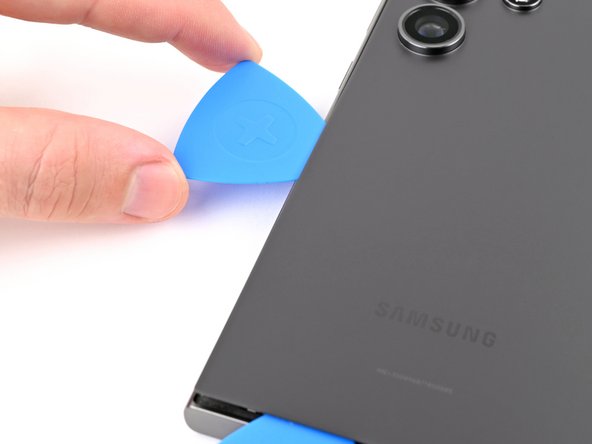
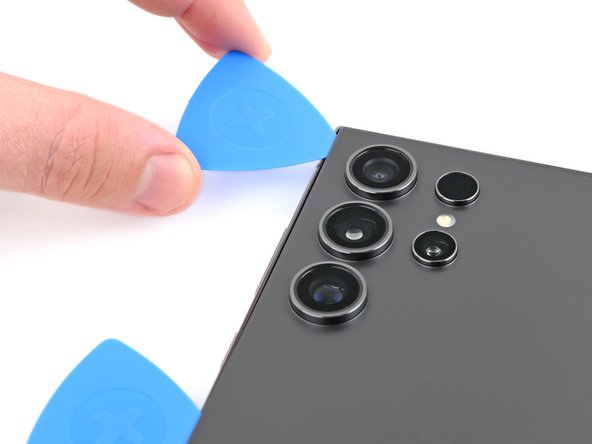
– Alright, let’s get this party started! Slide an opening pick into the gap at the top of the right edge.
– Now, give that pick a little twist around the top right corner to loosen up that adhesive. You’ve got this!
Step 13

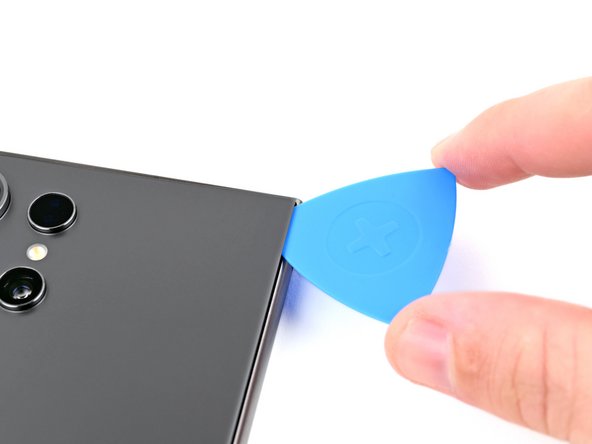
Keep that pick under 4 mm, alright? We want to avoid any accidental run-ins with the sensor or camera up top. You’ve got this!
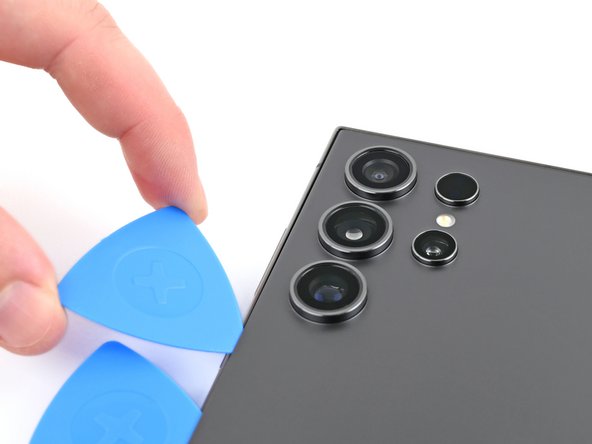
– Gently glide the pick along the top edge to break free the adhesive.
Step 14

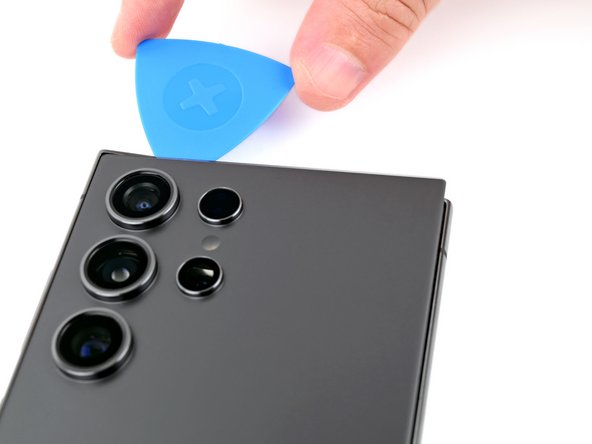
Keep the pick depth under 4 mm so you don’t mess up the cameras. If you need help, you can always schedule a repair.
– Gently guide the pick along the top left corner and down the left edge to break free the last bits of adhesive. You’ve got this!
Step 15


If your cover is still stuck to the frame, use an opening pick to gently pry around the edges. This will help break any adhesive that may have resealed.
Now’s the perfect time to test out all the buttons and features! Power up your phone, give it a quick check, and then power it back down before you move on. If you need help, you can always schedule a repair
– Let’s get this party started! Grab the back cover and give it a gentle lift. You’ve got this!
– Now, let’s put everything back together. Remember, it’s like a puzzle, but with more cool parts!
– If you see any sticky bits, just use your trusty tweezers or fingers to remove them. If those pesky adhesives are giving you a hard time, try giving them a little heat with a hairdryer.
– If you’re using those fancy custom-cut adhesives, check out this guide schedule a repair .
– If you’re working with double-sided tape, this guide will help you out schedule a repair . Need a little extra help? You can always schedule a repair
Tools Used

Step 16

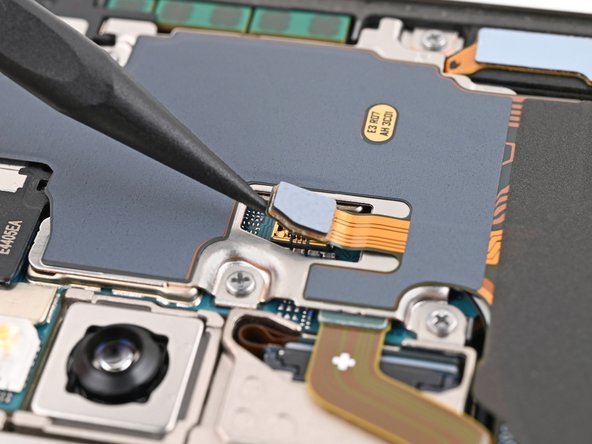
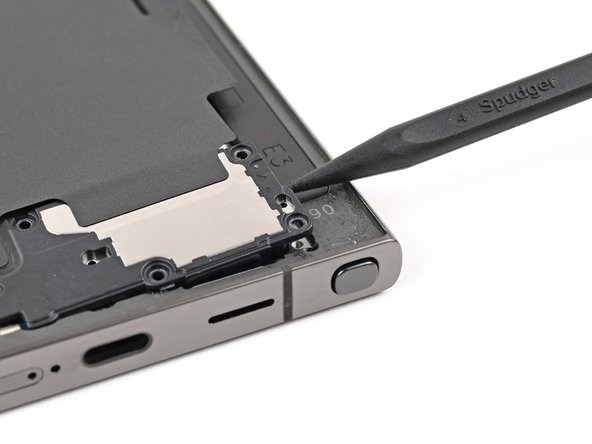
Look for the little arrow printed on the board next to each press connector – that’s your friendly guide to the perfect prying spot! Stick to prying in these spots to keep those delicate surface-mounted components snug and secure. You’ve got this!
– Grab your trusty spudger and gently pry up to disconnect the wireless charging coil press connector from the motherboard. Take it easy, no need to rush!
– When it’s time to reconnect those press connectors, just align it oh-so-carefully over its socket. Then, with a light touch from your fingertip, press down on one side, followed by the other, until you hear that satisfying click. Remember, no forcing allowed! If it’s being a bit stubborn, just reposition it and give it another go.
Tools Used

Step 17
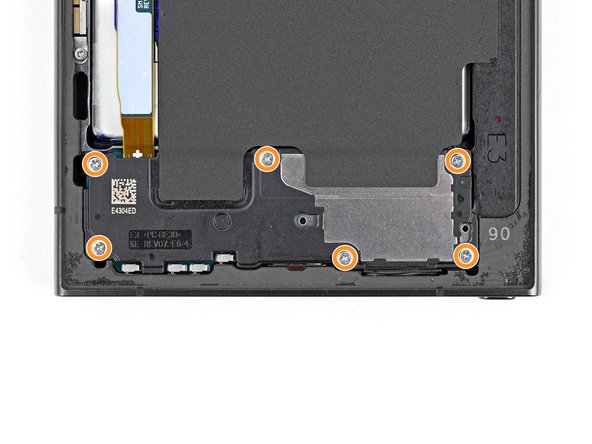

– Grab your trusty Phillips screwdriver and remove the ten 3.5mm-long screws that hold the wireless charging coil and loudspeaker in place:
– You’ll find four screws securing the wireless charging coil – take those out first
– Next, remove the six screws that keep the loudspeaker locked down. If you need help, you can always schedule a repair
Step 18

– Grab your trusty spudger and gently lift a corner of the tab on the wireless charging coil that’s stuck to the right edge of the frame. You’ve got this!
Tools Used
Step 19


– Time to get a little pry-happy! Use an opening pick to gently separate the tab from the frame. No need to be rough, just a little nudge is all it takes. If you need help, you can always schedule a repair.
Step 20

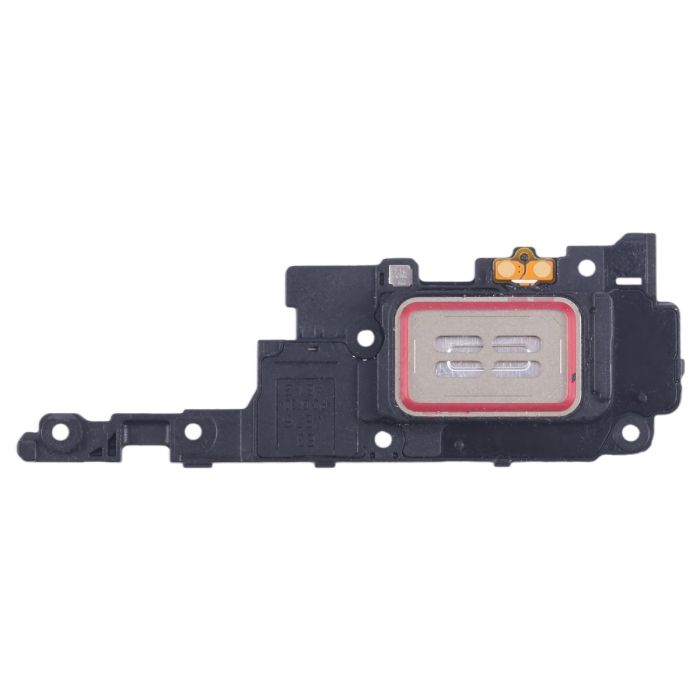
Look for a little arrow etched into the loudspeaker. It’s like a secret signal, pointing you to the perfect spot to start prying open your device.
– Time to get this repair started. Insert the point of a spudger into the gap between the right edge of the loudspeaker and the frame – it’s a tight spot, but you’ve got this.
– Gently pry up to unclip the loudspeaker from the frame. Remember, if you need help, you can always schedule a repair
Tools Used
Step 21
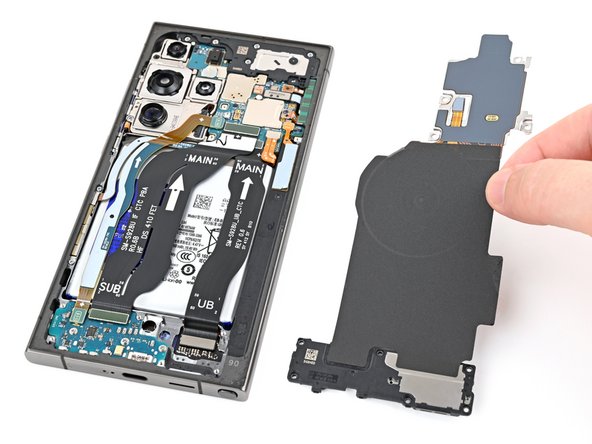

– Time to give those wireless charging coils and loudspeakers a little freedom! Gently remove them from the frame.
– Now, when you’re putting everything back together, remember to give the loudspeaker a little love tap around the edges. This will help it clip back into the frame before you snuggle those screws back in.


Step 23

– Grab your trusty spudger and gently pry up to disconnect that earpiece speaker press connector. You’ve got this!
Tools Used
Step 24

– Grab your trusty Phillips screwdriver and get ready to unscrew those five 3.5 mm-long screws holding the earpiece speaker in place.
Step 25


– Let’s get that earpiece speaker out! Slide the pointed end of your trusty spudger under the bottom edge of the speaker, right beneath that cute little engraved arrow.
– Now, gently pry up with the spudger to release the speaker from its cozy little home. Don’t be shy – give it a little nudge!
– When you’re ready to put everything back together, make sure the top edge of the speaker is snuggled in first before you press down and clip it back in place. Like a puzzle piece, you’ve got this!
Tools Used
Step 26
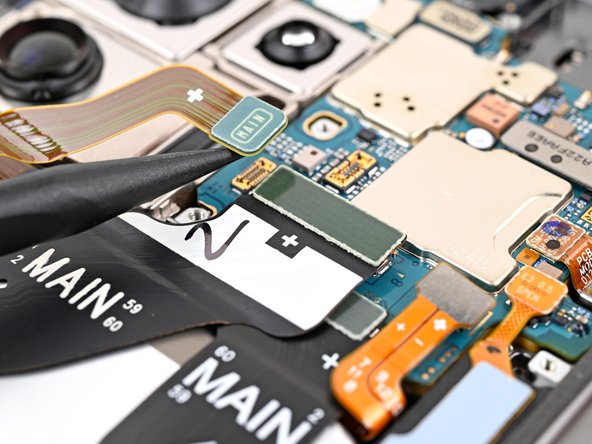
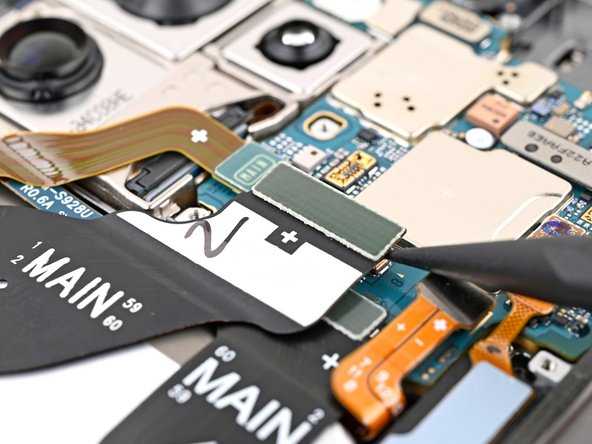

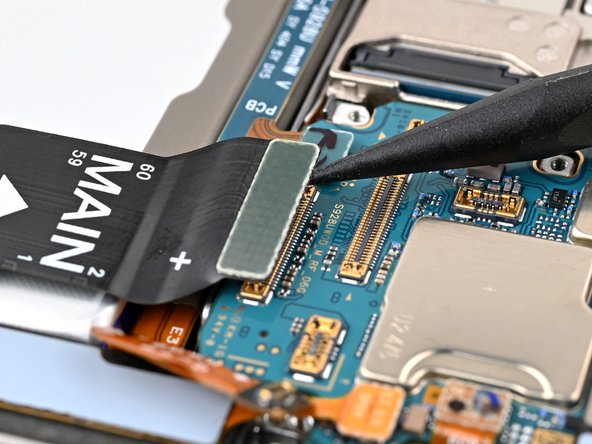
– Now, grab your trusty spudger and gently pry up those interconnect cable press connectors. They’re connected to the motherboard, so give them a little wiggle to disconnect them. Don’t worry, it’s like a little dance! If you need help, you can always schedule a repair
Tools Used
Step 27
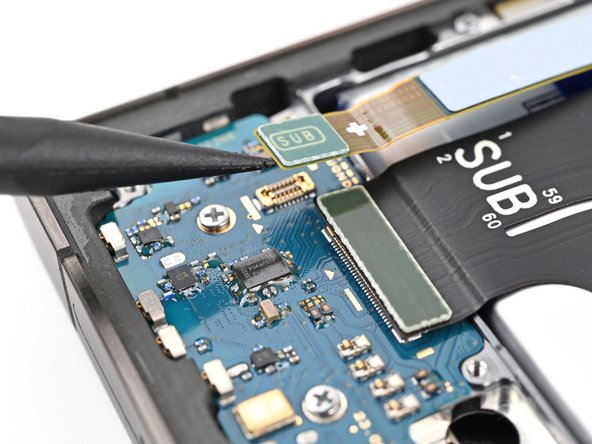

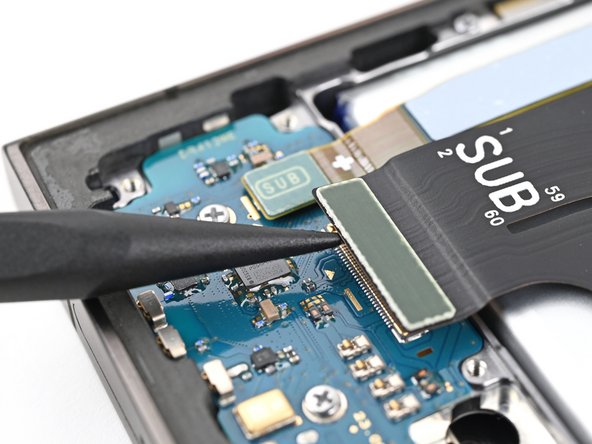
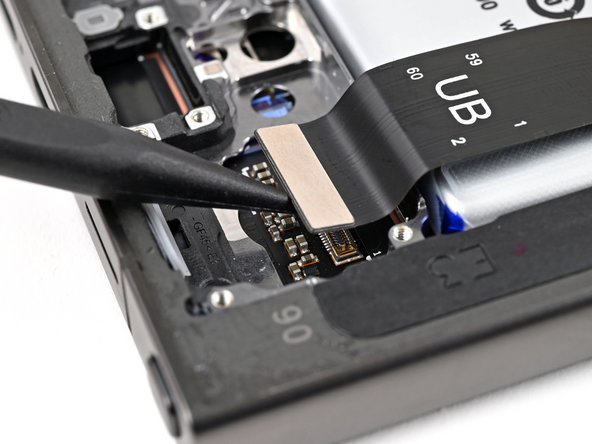
– Time to get disconnected – carefully use a spudger to pry up and release both interconnect cable press connectors from the daughterboard. If you need help, you can always schedule a repair
Tools Used
Step 28
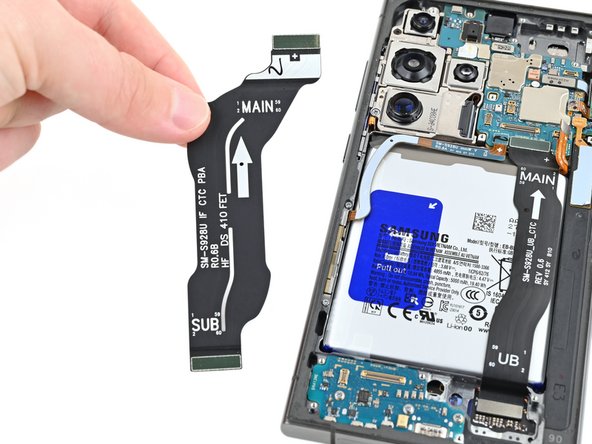

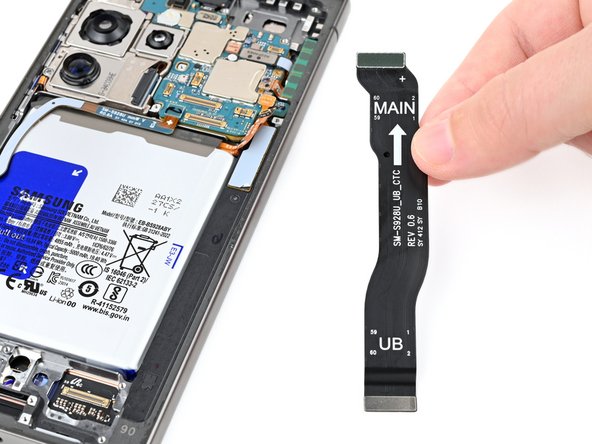
– Let’s get those interconnect cables out of the way! Grab ’em and gently remove them from the phone.
Step 29

– Alrighty, tech-savvy folks! Let’s unplug that lovely display cable from the motherboard. It’s like playing a digital game of Operation! If you need some help, you can always schedule a repair.
Tools Used
Step 30

– Time to get started – use a spudger to carefully pry up and disconnect the display cable press connector from the daughterboard. Take your time, it’s easier than it sounds!
– Now, gently remove the display cable. You’re making great progress! If you need help, you can always schedule a repair
Tools Used
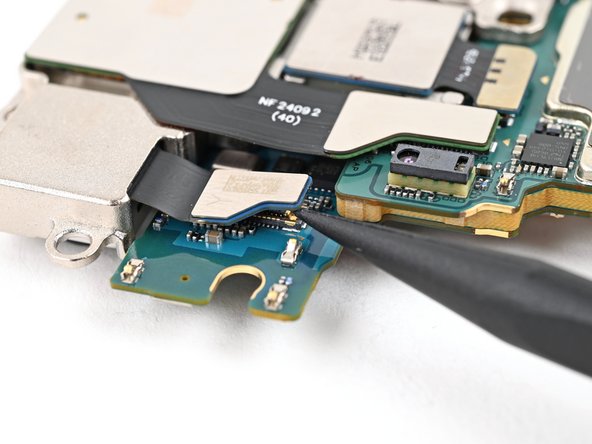
Step 31

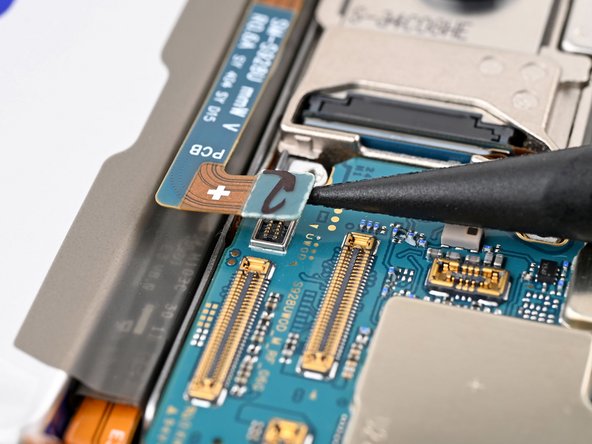
– Now, let’s gently nudge that lower antenna press connector off the motherboard using your trusty spudger. Think of it like giving it a little high-five to say goodbye! If you need a little help, you can always schedule a repair.
Tools Used
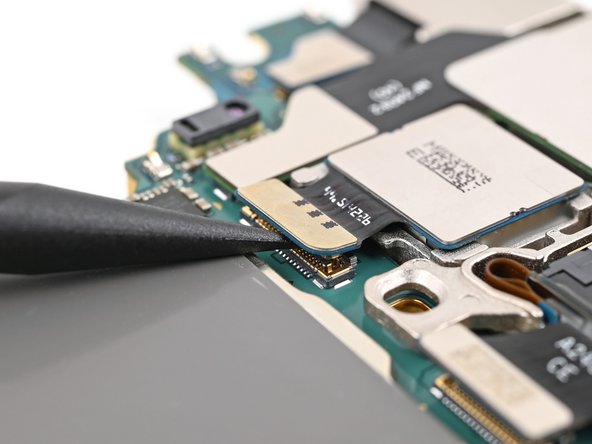
Step 32

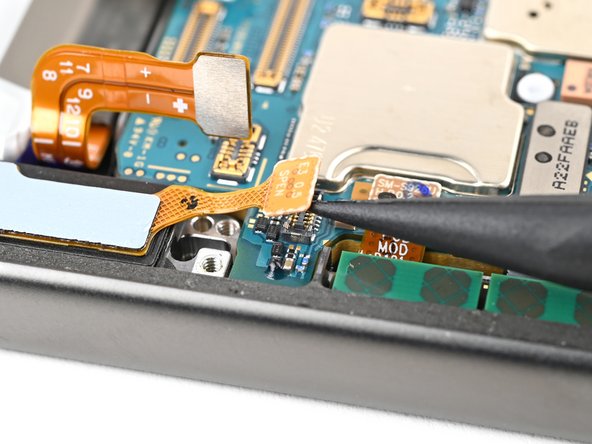
– Time to get started with your repair. Use a spudger to carefully pry up and disconnect the stylus port press connector from the motherboard. If you need help, you can always schedule a repair
Tools Used
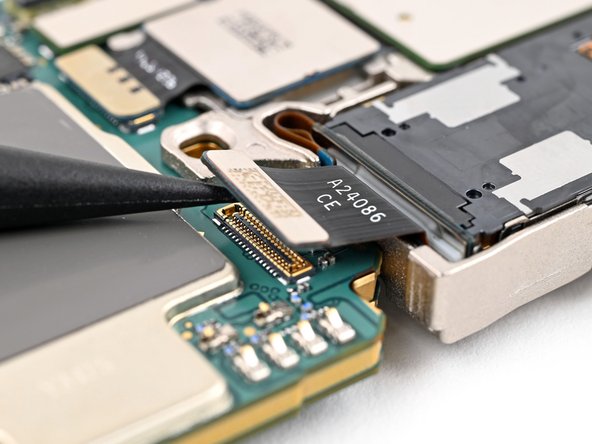
Step 33

– Grab your trusty spudger and gently nudge up to disconnect the upper antenna press connector from the motherboard. You’re doing great!
Tools Used
Step 34


– Use a spudger to gently pry up and disconnect the fingerprint scanner press connector from the motherboard. It’s like giving the scanner a little high-five, but without the cheering crowd.
Tools Used
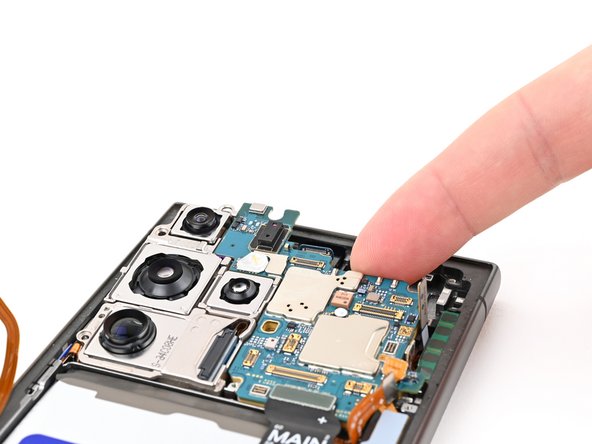
Step 35


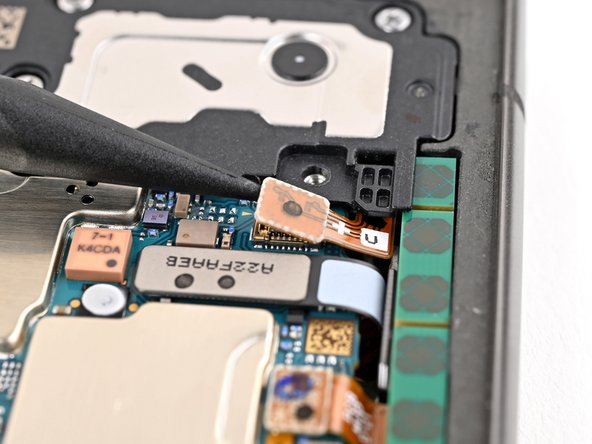
– Time to get that front camera out! Use a spudger to carefully pry up and disconnect the front camera press connector from the motherboard. Don’t worry, it’s like a gentle dance with the tech world. 😉 If you need help, you can always schedule a repair.
Tools Used
Step 36

– Grab your trusty Phillips screwdriver and let’s get those screws out to free the motherboard:
– First up, there’s a 4.0 mm-long screw hanging out to the left of the top camera. Give it a twist!
– Next, you’ll find a 3.5 mm-long screw chillin’ to the left of the bottom camera. Time to remove that one too!
Step 37
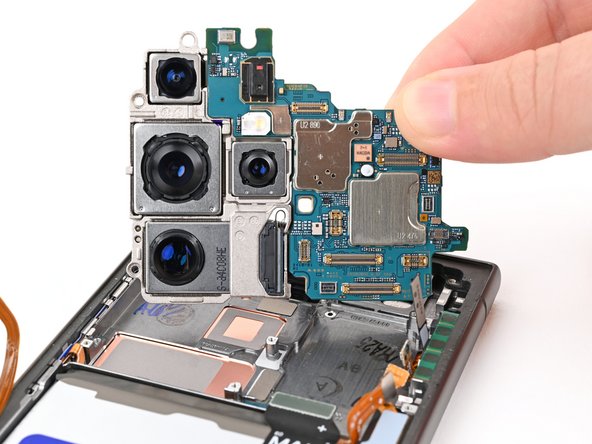

Watch out for any loose cables, or you might end up tangling with them!
– Gently pry the top of the motherboard up with your finger or a trusty spudger – you got this!
– Now it’s time to remove the motherboard, taking care not to damage any surrounding components.
– When you’re putting everything back together, just remember to keep those press connectors above the motherboard – easy does it! If you need help, you can always schedule a repair
Tools Used
Step 38

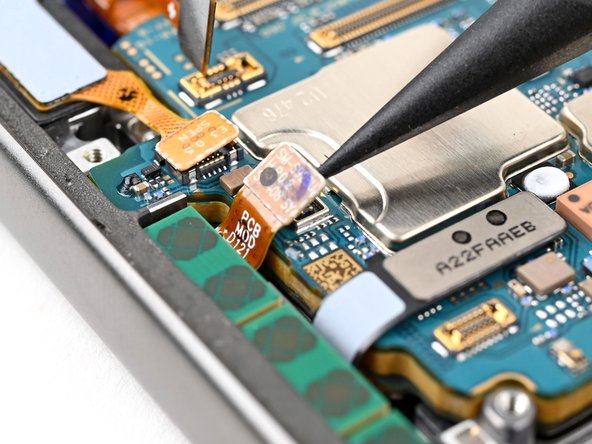
– Alrighty, buddies! Let’s turn the motherboard over and reveal the rear camera press connectors. Now, use a spudger and carefully disconnect the primary telephoto camera press connector. If you need help, you can always schedule a repair!
Tools Used


Step 41

– Time to give that ultrawide camera a little break! Gently pry up the connector using your trusty spudger, and disconnect it. No worries if you’re feeling a little unsure – if you need help, you can always schedule a repair.
Tools Used
Step 42

– Let’s get those cameras out! Use a Phillips screwdriver to remove the 3.5 mm long screw holding the cameras to the camera assembly housing. Easy peasy, right? If you need help, you can always schedule a repair.
Step 43

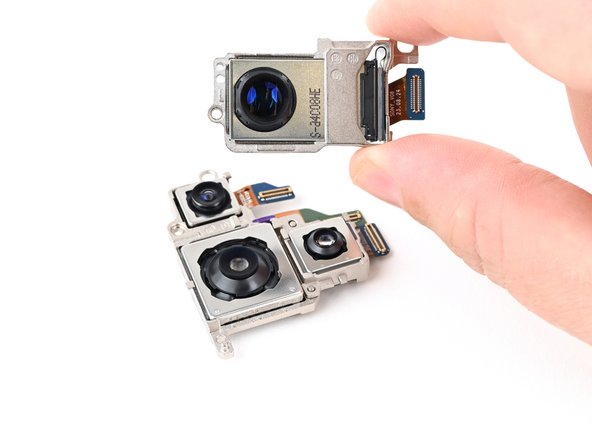
– Time to get started – flip those cameras over so the lenses are facing up and ready for action.
– Now, carefully lift and remove the primary telephoto camera from the camera assembly housing. If you need help, you can always schedule a repair
Step 44
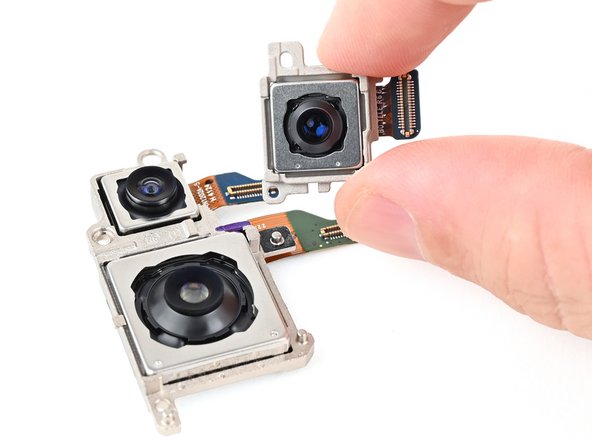

The camera is snugly held in place by a dab of adhesive around its alignment pin. If you need help, you can always schedule a repair.
– Gently lift the secondary telephoto camera out of the camera assembly housing and set it aside like a pro!
Step 45
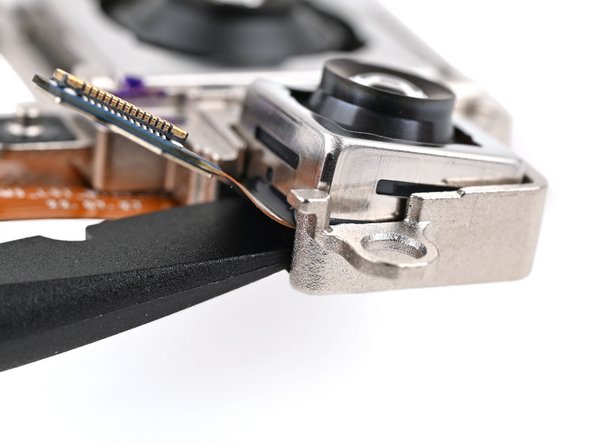

Ensure the spudger is nestled between the cable and the metal camera assembly housing, keeping it away from the camera itself. You’re doing great!
– Let’s get that ultrawide camera out! Use the flat end of a spudger to gently wedge it between the bottom of the camera and its metal housing.
– With a little wiggle and a bit of patience, you’ll pop the camera free from its adhesive grip. If you need help, you can always schedule a repair.
Tools Used
Step 46


– Let’s get started by carefully removing the ultrawide camera from its cozy home in the camera assembly housing. If you need help, you can always schedule a repair
Step 47

– Lay it on me, you’ve almost reached the end! Time to swap out those rear cameras like a modern day tech magician.