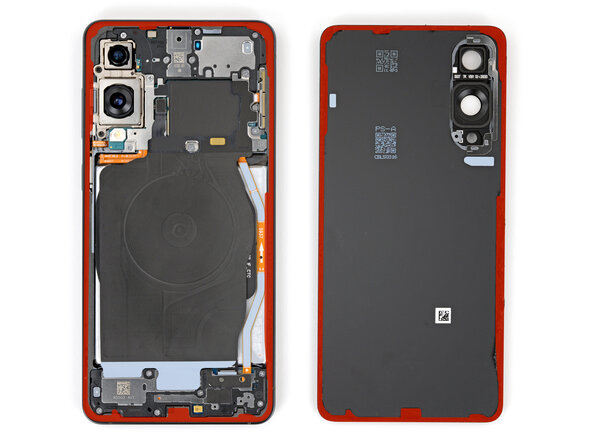
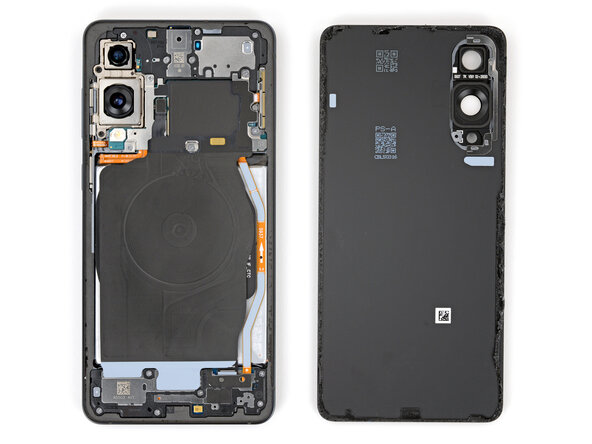
Samsung Galaxy S25 Edge Logic Board Replacement
Duration: 45 minutes
Steps: 26 Steps
Ready to get your Samsung Galaxy S25 Edge back in action? This guide walks you through replacing the logic board—also known as the main board or motherboard. If your device refuses to turn on or keeps shutting down unexpectedly, a new logic board might be just what it needs. Don’t forget, you’ll also need some replacement back cover adhesive to finish up. Follow these steps, and if you hit a snag, you can always schedule a repair to get professional help.
Step 1
Before diving into this repair adventure, let that battery dip below 25%! A fully charged lithium-ion battery can be a bit of a drama queen if it gets damaged, so let's keep things safe and sound.
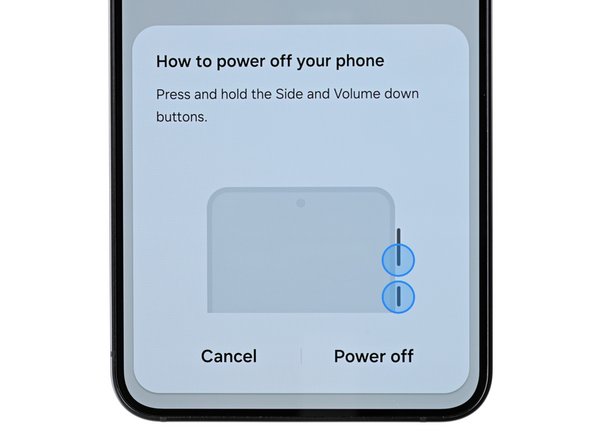
- Time to get started! Completely shut down your phone, and don't forget to unplug all those cables.
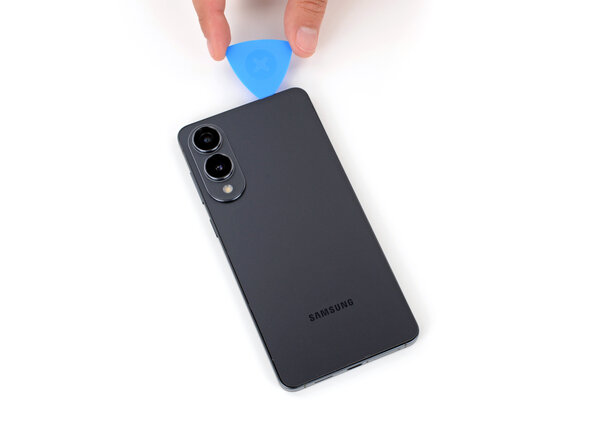
Step 2
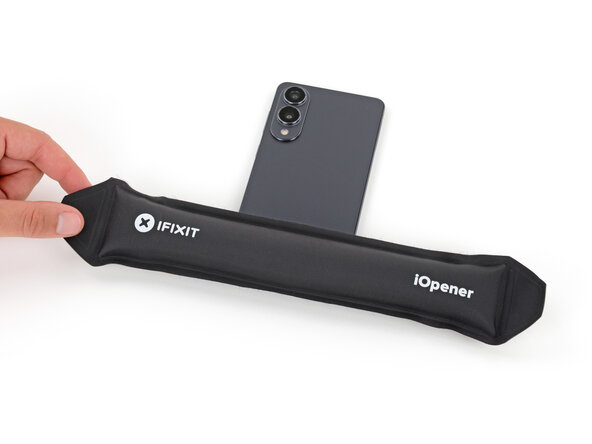
The back cover is held on with a mild adhesive. A little heat will loosen things up, making it much simpler to pop it off.
You can use a hair dryer, heat gun, or even a hot plate to warm up the cover.
- Warm up your iOpener and place it along the bottom edge of the back cover for about two minutes. This helps loosen up that stubborn adhesive.
Tools Used


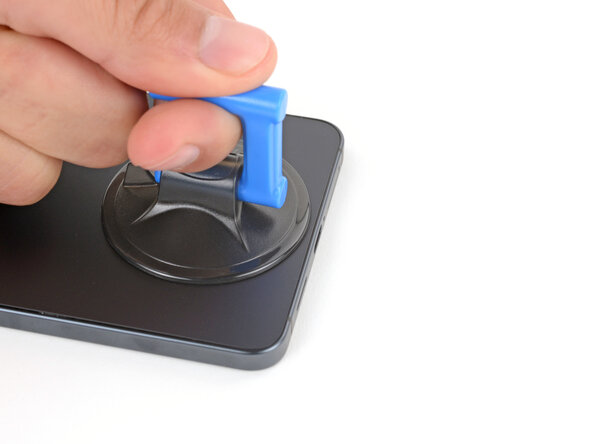
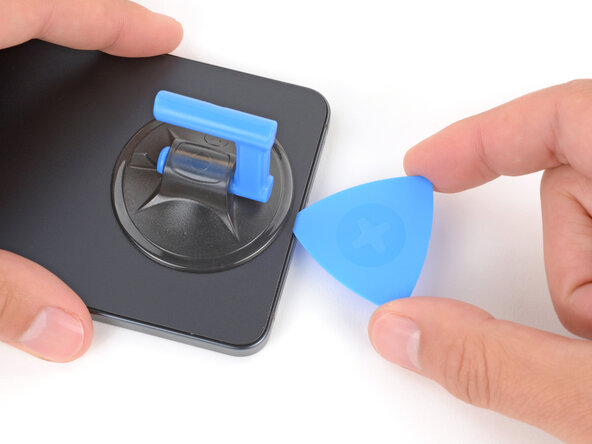
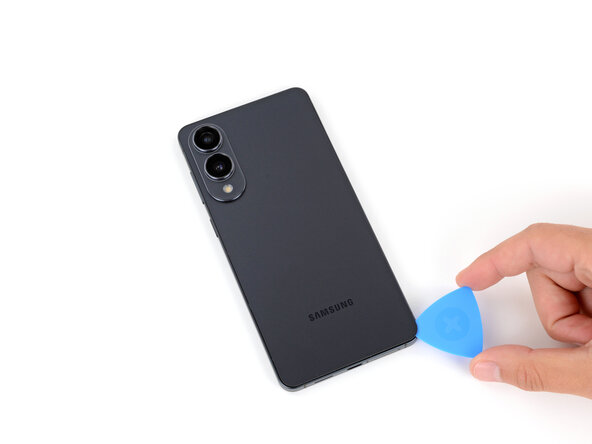
Step 3
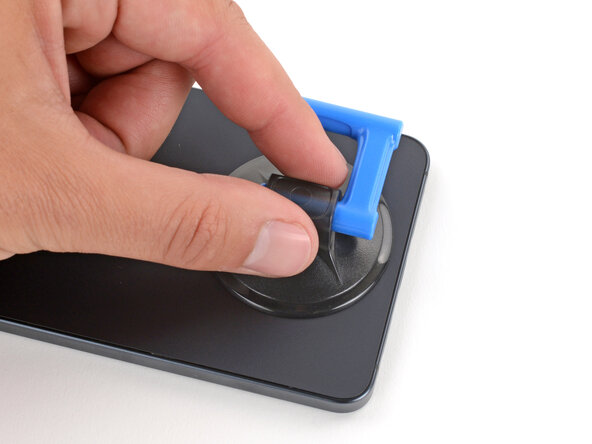
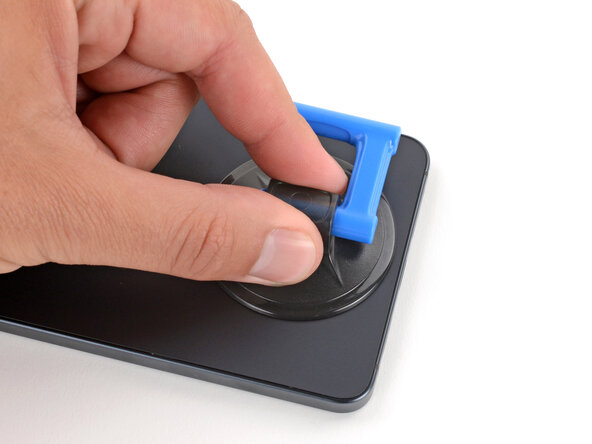
- Grab a suction handle and place it snugly near the center of the bottom edge of the back cover, as close to that edge as you can get!
Tools Used

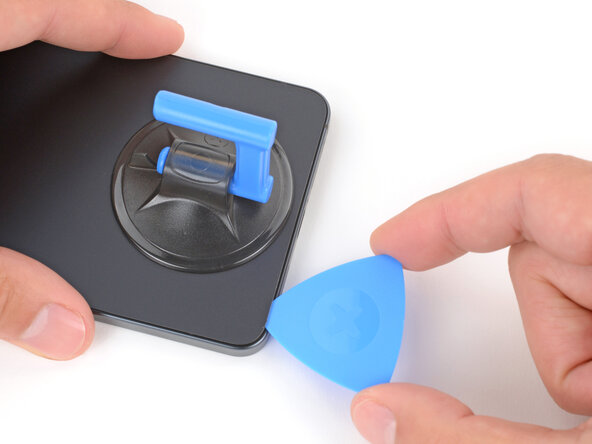
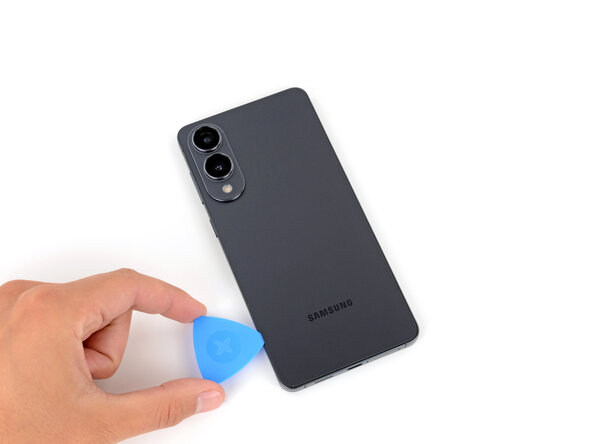
Step 4
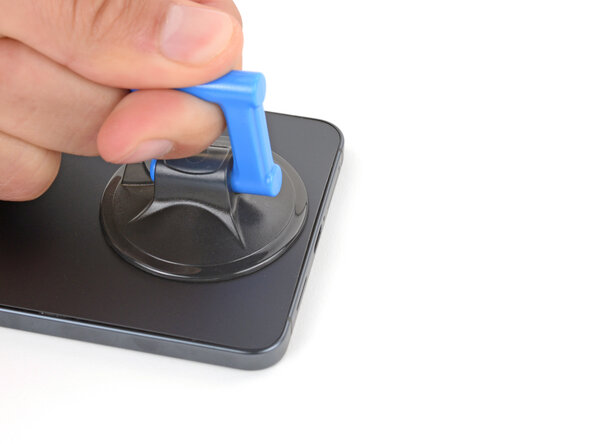
- Give that suction handle a good yank upwards with some solid force - you're aiming for a gap to appear between the cover and frame, so keep at it!
- Now it's time to get a little picky - literally! Take your trusty opening pick and slide the tip into the gap you just created.
Tools Used
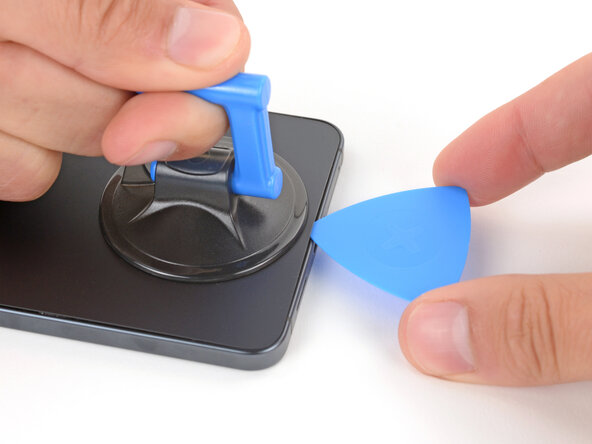
Step 5
When you're working on separating the left and right edge adhesive, remember to keep your pick under 3 mm deep. We want to keep the wireless charging coil and interconnect cable safe and sound!
- The back cover is stuck on with adhesive all around the edge of the frame. Check out this photo to see exactly where the sticky spots are as you work your way around.
Step 6

If that adhesive is still sticking around, hit it with a little more heat and give it another go. Persistence pays off!
- Gently slide your opening pick along the bottom edge to loosen the adhesive holding the back cover in place. Keep your movements steady and patient—this helps prevent any cracks or damage. If you need a hand, remember you can always schedule a repair with Salvation Repair.
Step 7
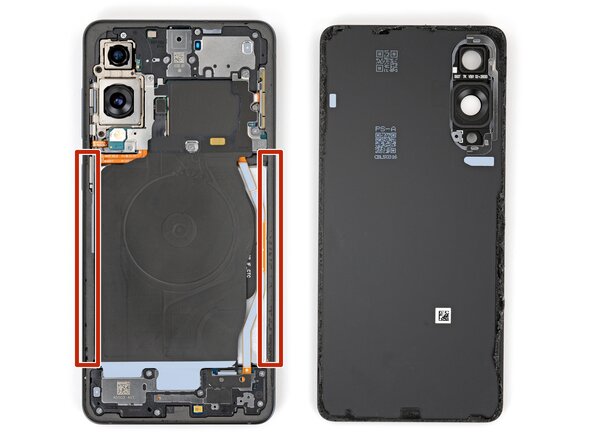
Hey there! Just a friendly reminder: don’t go jamming your pick too far under those long left and right edges. Keep it gentle and you'll be golden!
- Keep that pick moving along the edges of the back cover, gently working your way around to break free all the stubborn adhesive still holding it in place.
Step 8
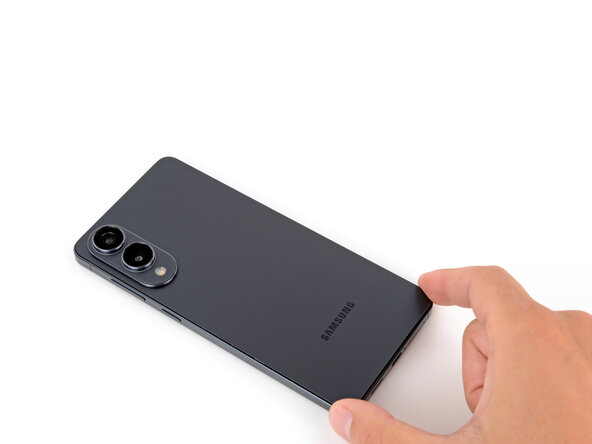
Running into some sticky situations? No worries! Take a peek around the edges for any leftover adhesive and grab your opening pick to gently pry it apart.
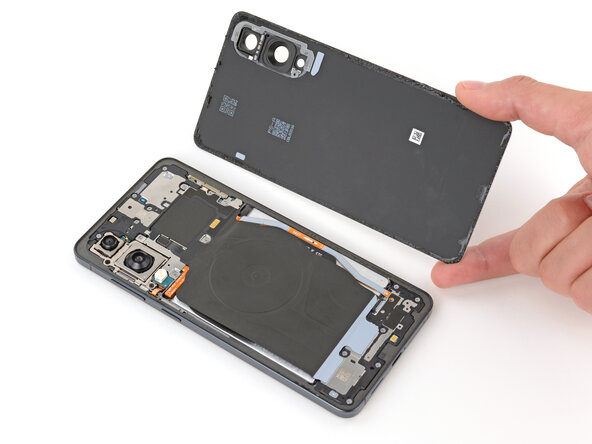
- Start by removing the back cover to get access to the inside. During reassembly, it's a smart move to power on your device and give everything a quick check—make sure all functions are working before sealing it back up. Just remember to power it all the way down again before you finish up. Take a moment to inspect your rear cameras for any smudges or fingerprints; a gentle wipe with a clean, lint-free cloth should do the trick. When applying the new adhesive for the back cover, target either the frame or the back cover itself—use the cutouts and contours to line everything up perfectly. If the adhesive matches the back cover, follow the corresponding guide; if it lines up with the frame, go that route. Need a hand? You can always schedule a repair with Salvation Repair.
Step 9

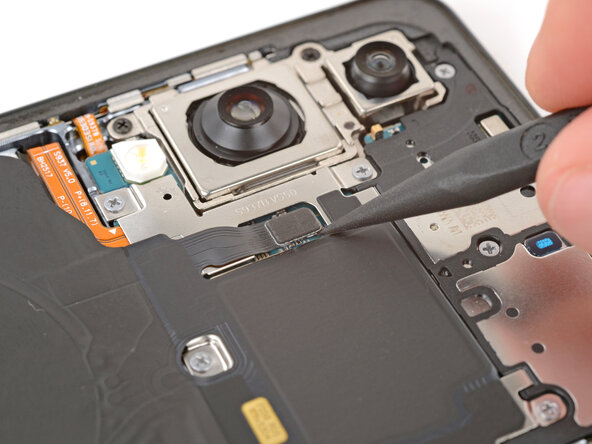
Getting your spudger under the connector can be a bit of a dance. If it’s not cooperating, swap in the tip of an opening pick and give it another go!
- Take your spudger and gently pop up the wireless charging assembly press connector from the top edge. Nice and easy does it!
Tools Used

Step 10
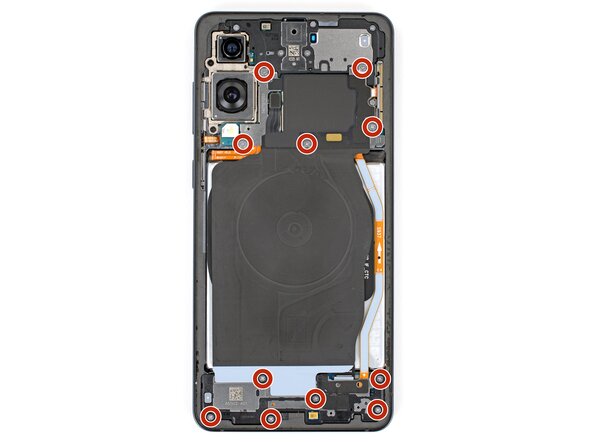
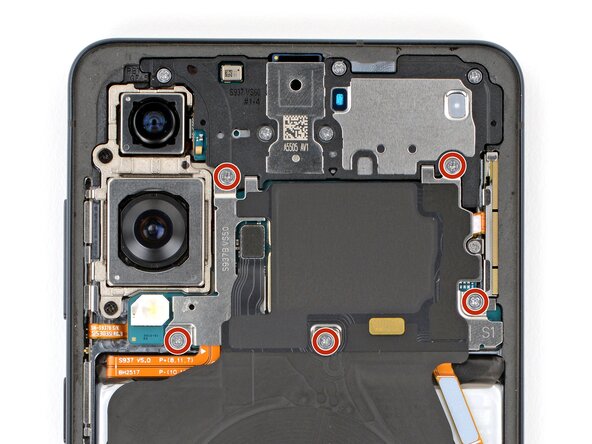
Keep those screws in check throughout the repair! Make sure each one finds its way back to its original home – it'll make putting everything together a breeze.
- Grab your Phillips screwdriver and take out the eleven 2.8 mm screws holding down the wireless charging pad and loudspeaker assembly.
Step 11
The wireless charging coil is lovingly attached to the loudspeaker with some delicate tape. For a smooth sailing experience, it's best to take out the coil and loudspeaker as a single unit to keep everything safe and sound.
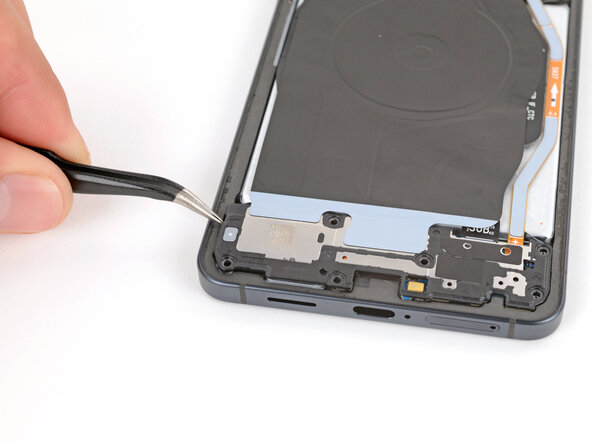
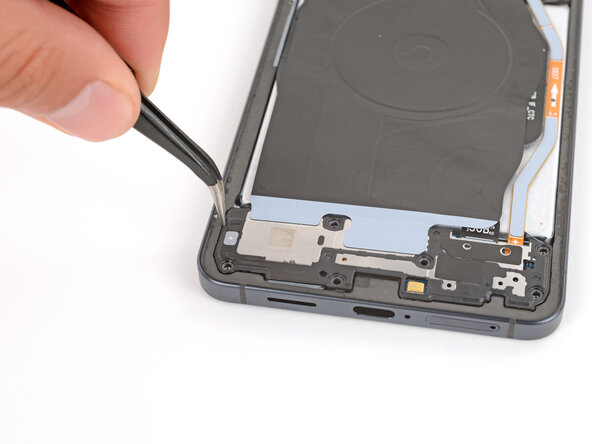
- Grab those angled tweezers and gently pry up the loudspeaker by its left edge notch—it's like giving it a little nudge to say, 'Hey there!'
- When you're putting everything back together, make sure to press down firmly around the loudspeaker's perimeter to snap those clips back into place. You've got this!
Tools Used

Step 12
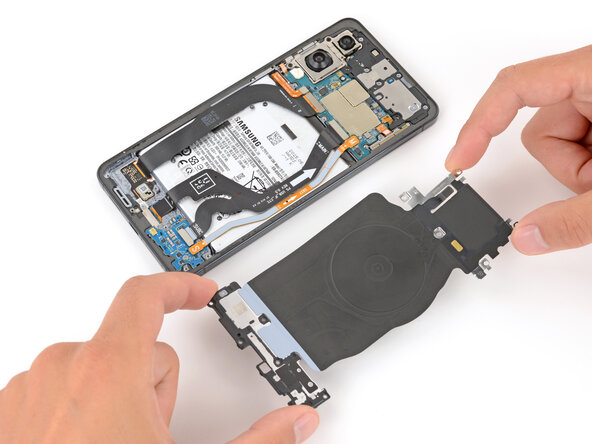
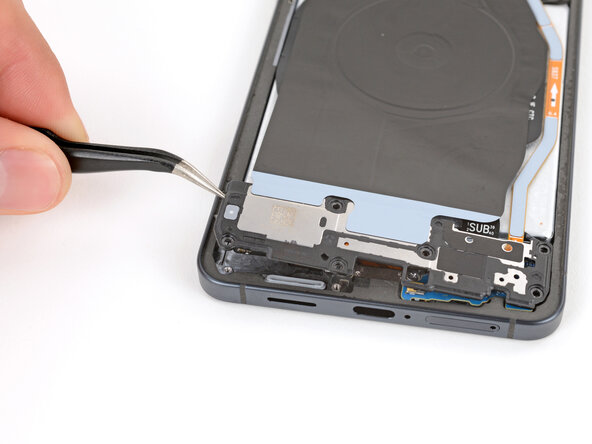
- Grab your trusty hands and gently lift away the wireless charging and loudspeaker assembly. You've got this!
Step 13
Each press connector comes with a handy gold arrow on the board that points you to the perfect spot to pry—how cool is that? But be careful! If you pry in the wrong place, you might end up hurting those delicate surface-mounted components on the board. Take your time and make it right! If you need help, you can always schedule a repair.
- Grab your trusty spudger and gently nudge the battery press connector up to disconnect it. You've got this!
Tools Used
Step 14
- Grab your trusty spudger and gently pry up to disconnect the earpiece speaker press connector. You've got this!
Tools Used
Step 15
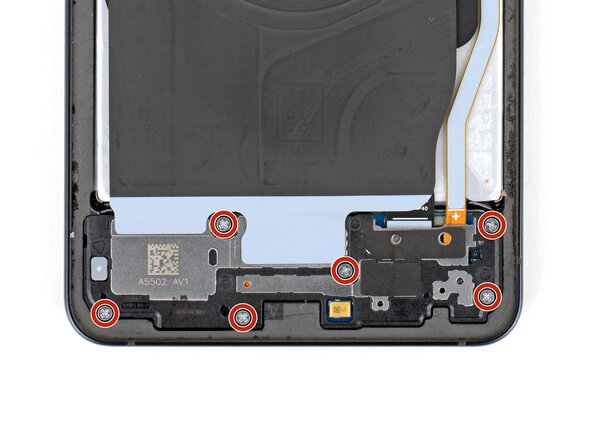
- Grab your Phillips screwdriver and gently unscrew the five 2.8 mm long screws holding down the earpiece speaker. Keep those screws safe—you'll need them to reassemble later. If you need a hand, you can always schedule a repair.
Step 16
- Gently pop the earpiece speaker out by sliding the flat end of a spudger under the center of its bottom edge and prying upward.
- When putting it back, press all around the edges of the earpiece speaker to snap those clips back into place.
Tools Used
Step 17
- Gently lift up and take out the earpiece speaker.
Step 18
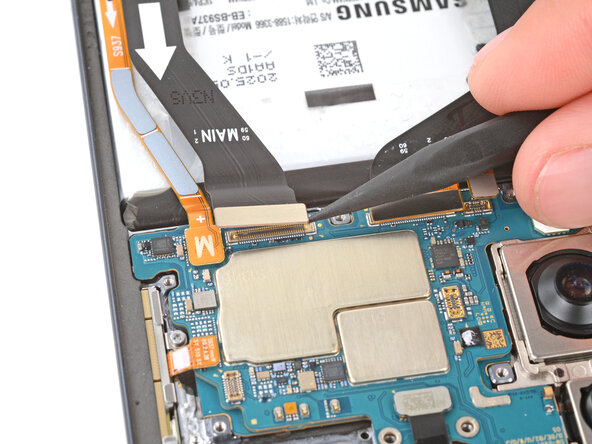

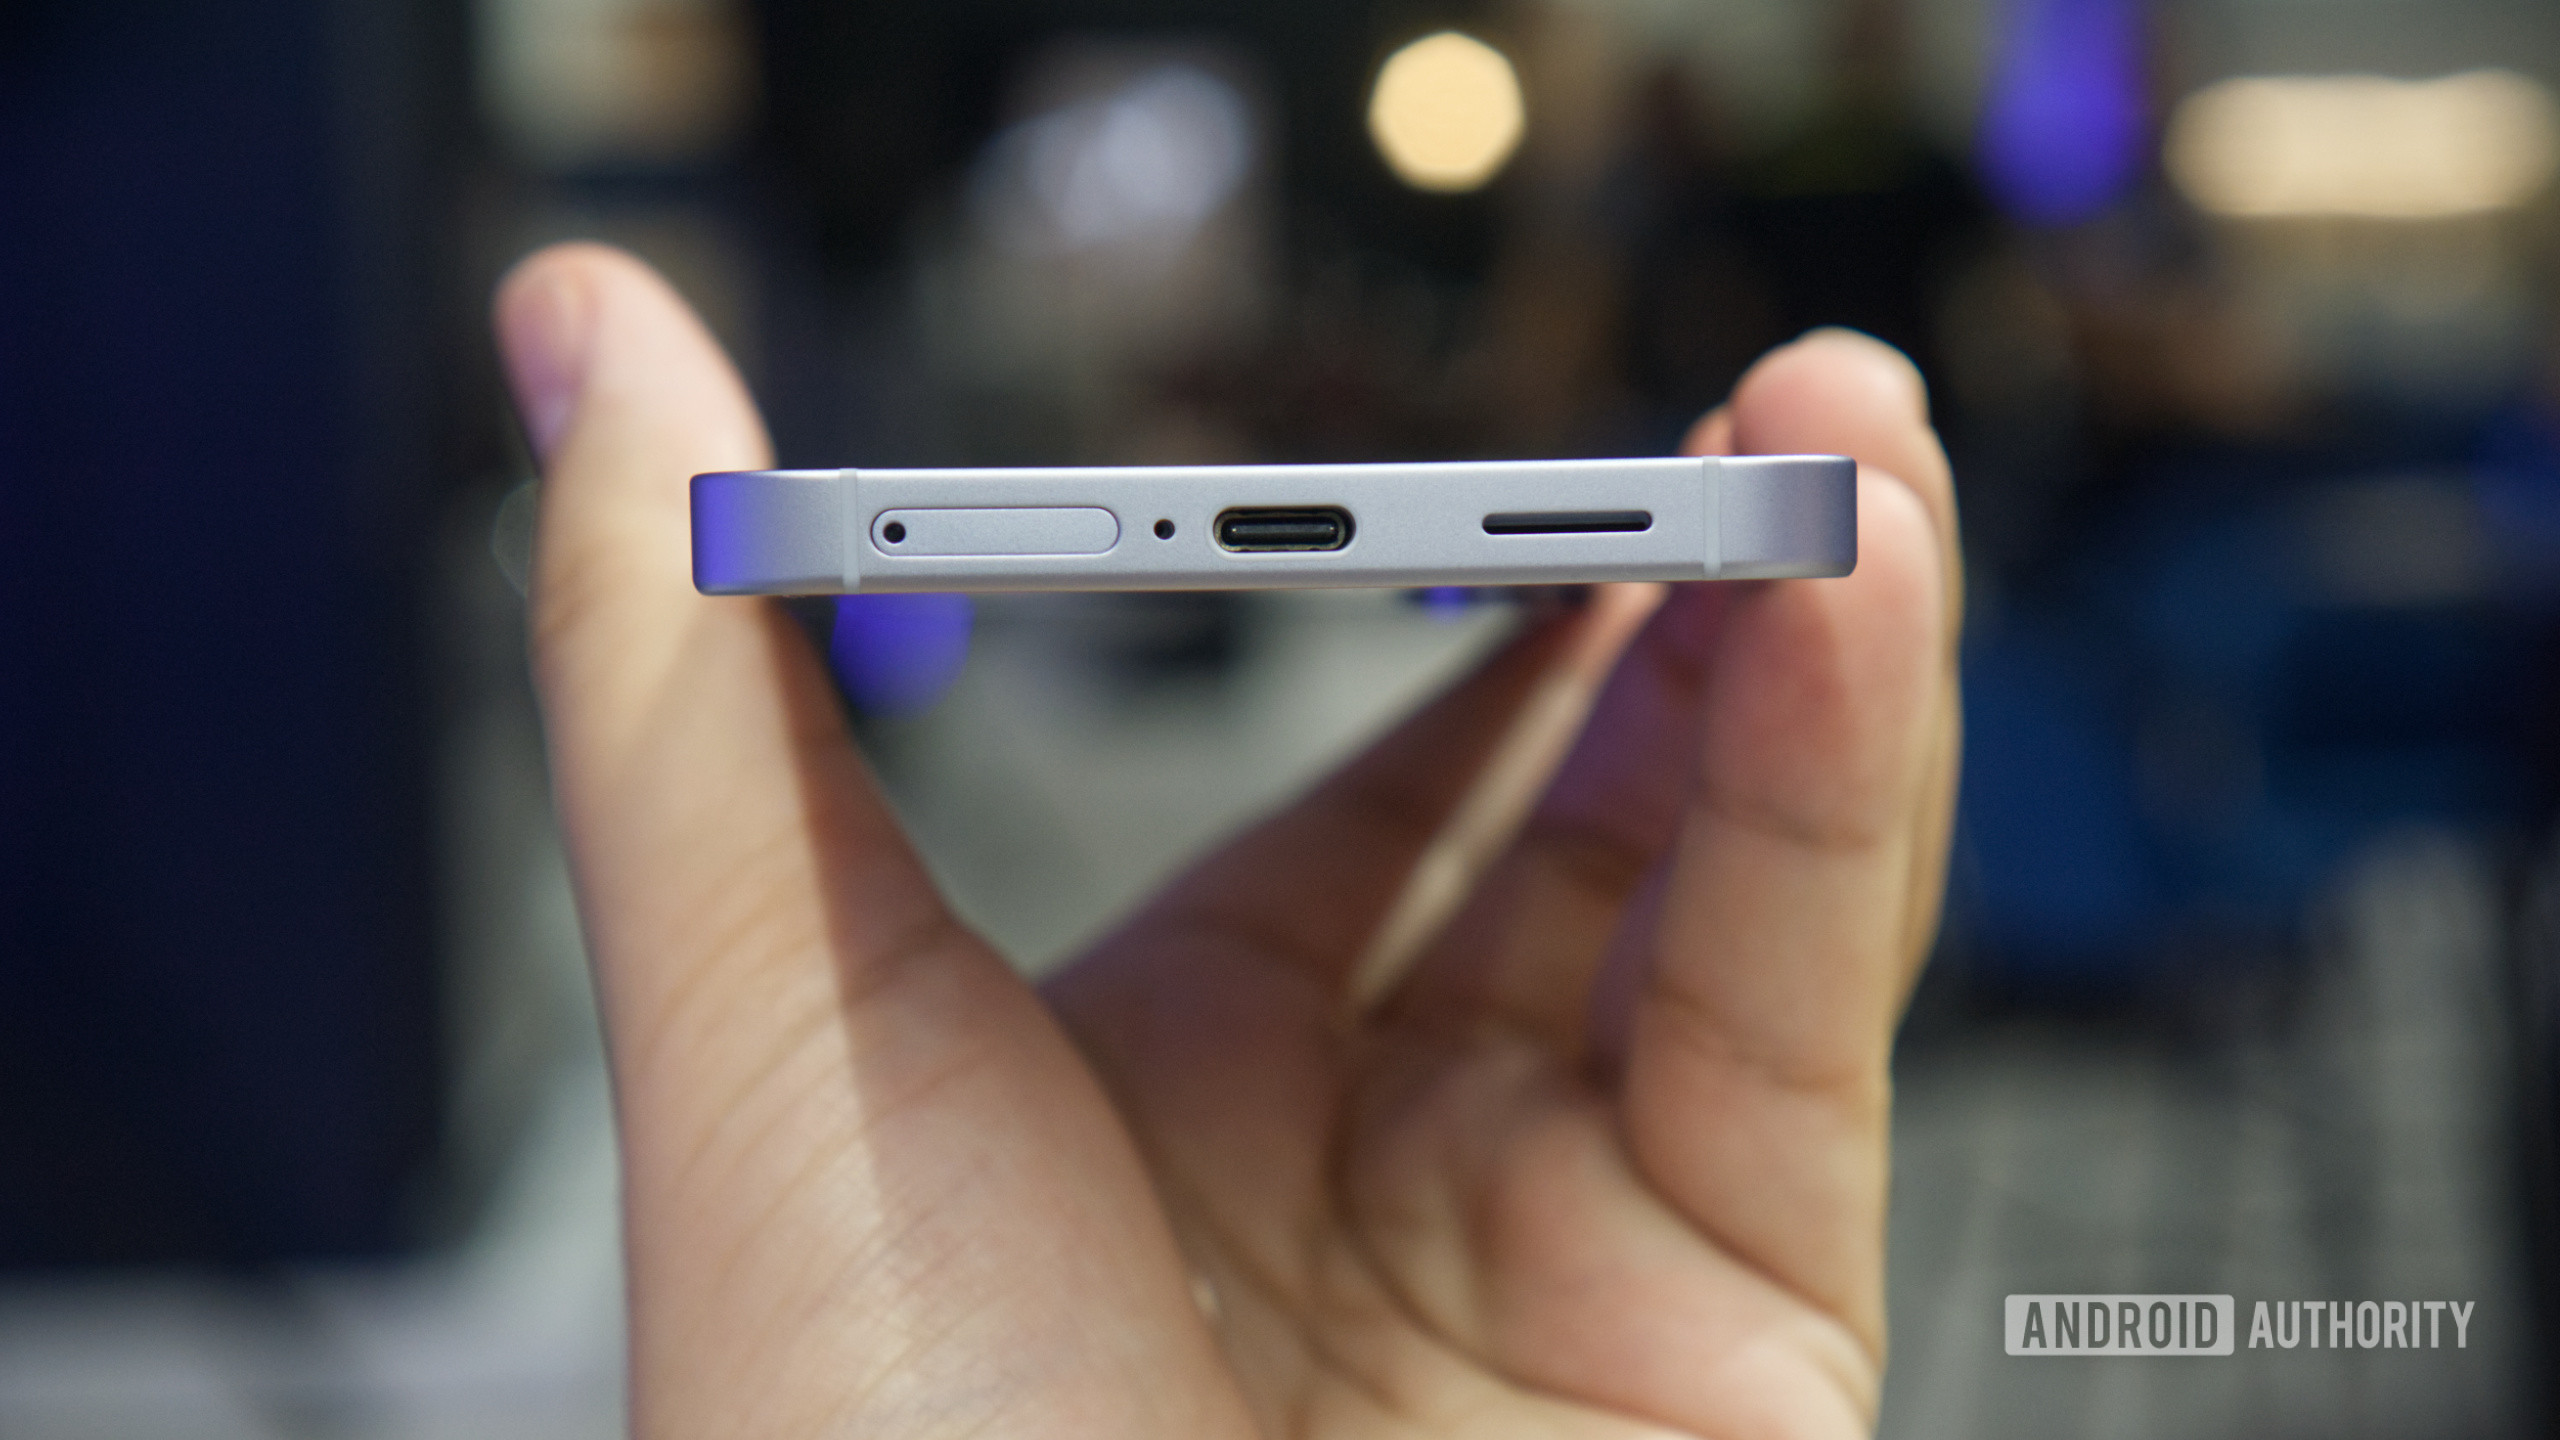
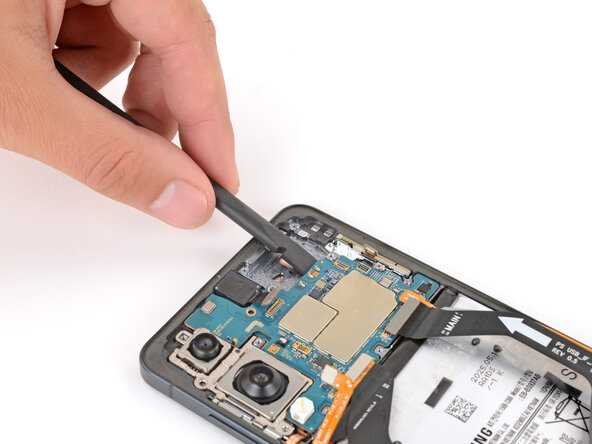
- Grab your trusty spudger and gently lift to disconnect the screen, USB-C, and interconnect cable press connectors (that's three in total!) from the logic board. You've got this!
Tools Used
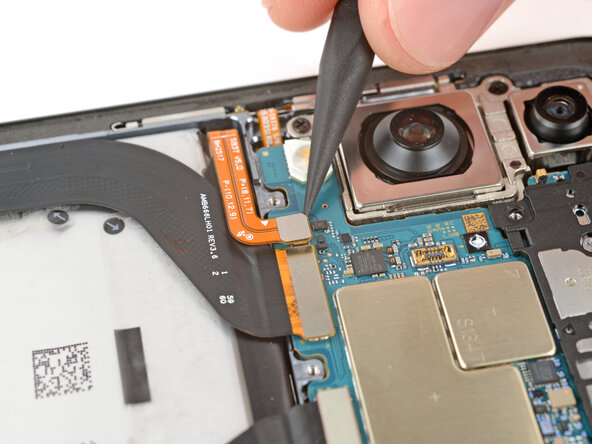
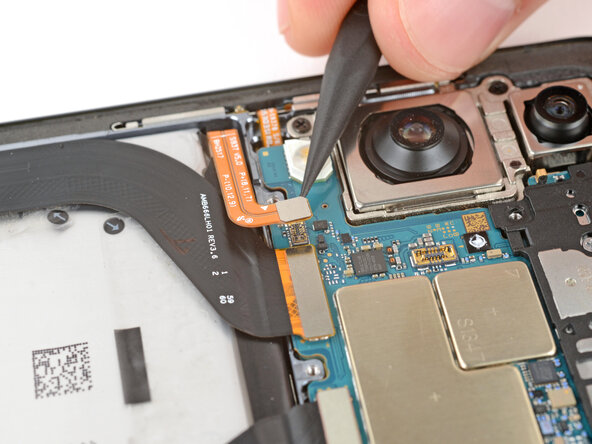
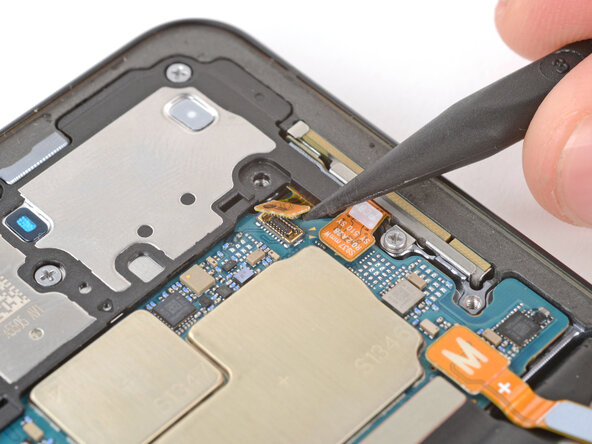
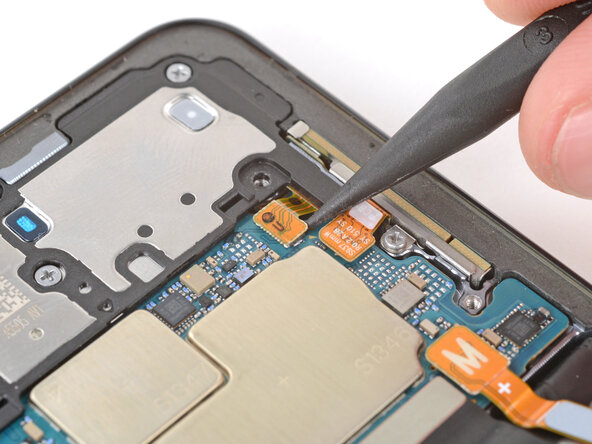
Step 19

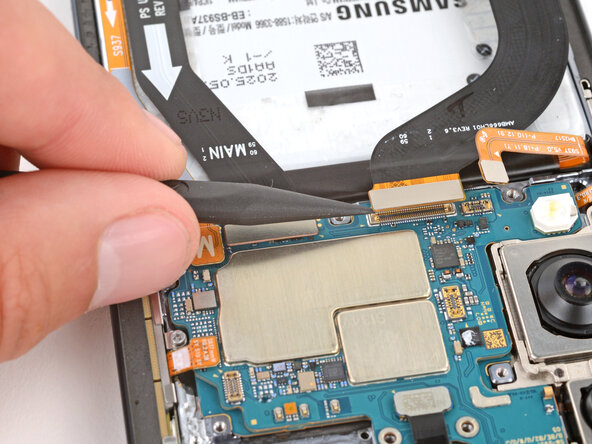
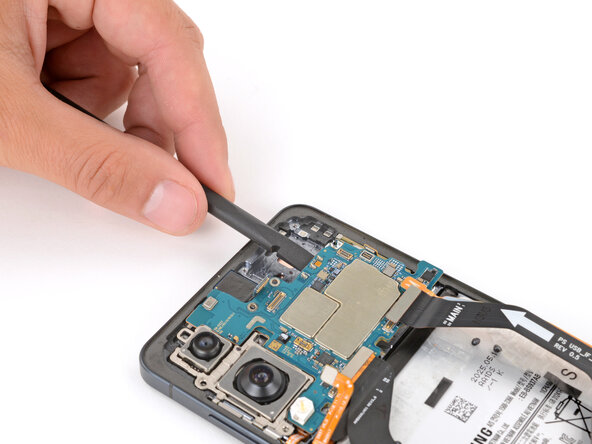
- Gently pry up the 5G mmWave antenna and front camera press connectors using the tip of a spudger. Take your time to disconnect them carefully—patience makes perfect.
Tools Used
Step 20

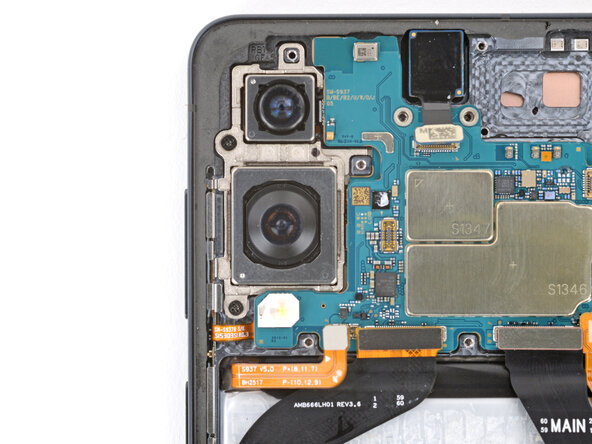
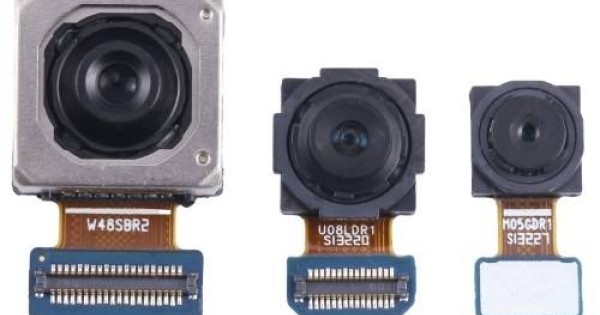
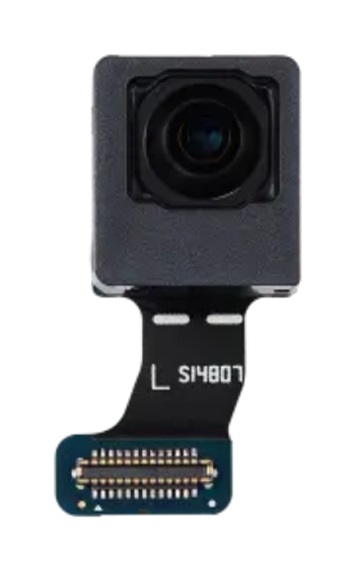
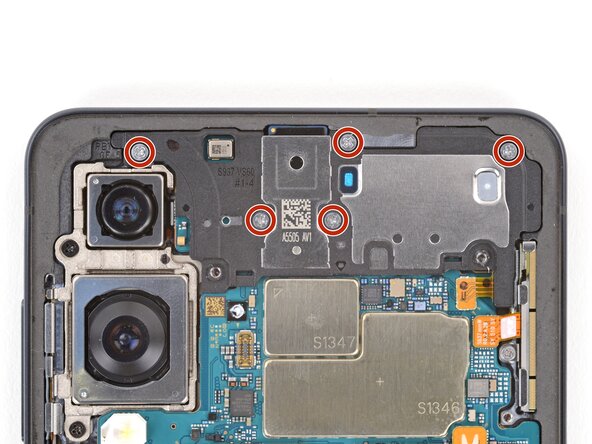
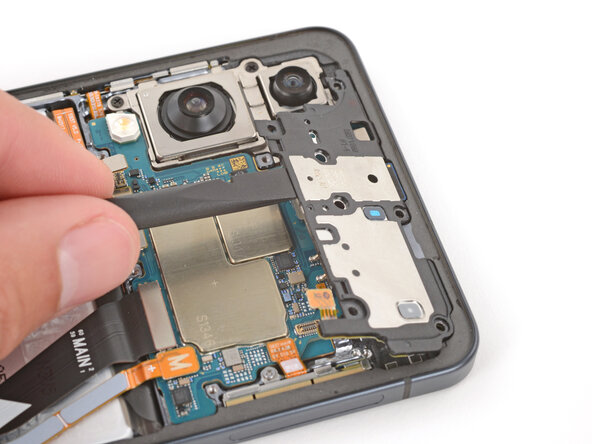
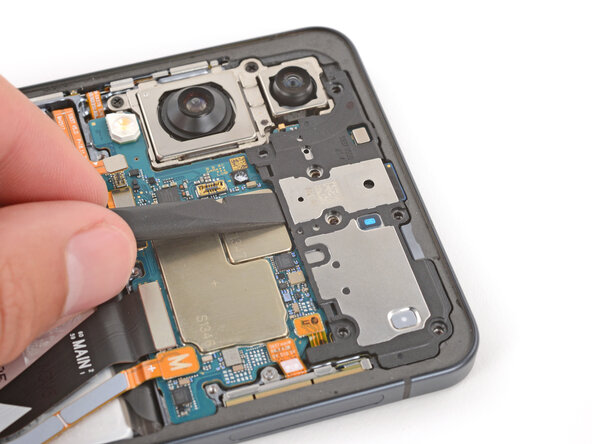
- Grab your Phillips screwdriver and take out the two 2.8 mm-long screws holding down the rear cameras.
Step 21
Be careful not to grip the board by the rear cameras, as this could cause smudges or damage - let's keep those cameras squeaky clean!
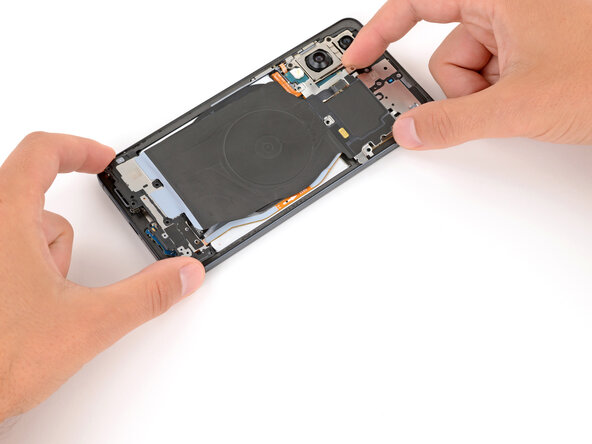
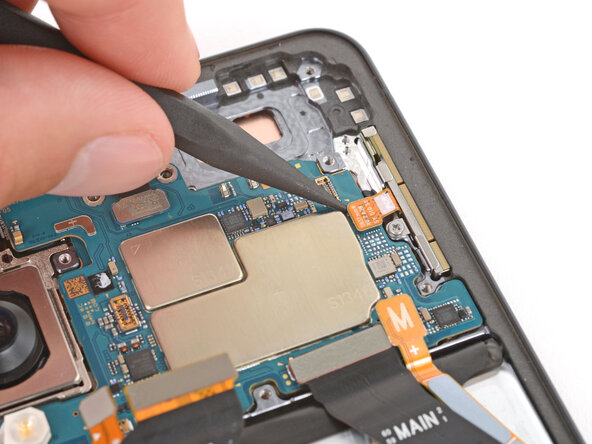
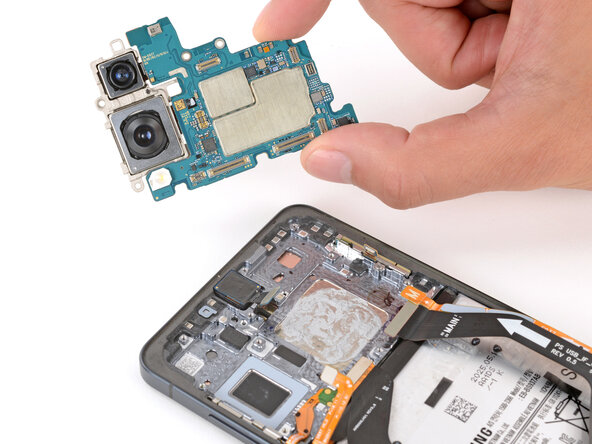
- Take the flat end of your spudger and gently nudge up the top edge of the logic board until you can get a good grip on it with your fingers.
- Hold onto the edges of the board and lift it out slowly—watch for any cables trying to tag along for the ride.
- When putting everything back together, make sure those cables don’t get trapped under the logic board. Use your spudger to keep them clear and in their lane.
Tools Used
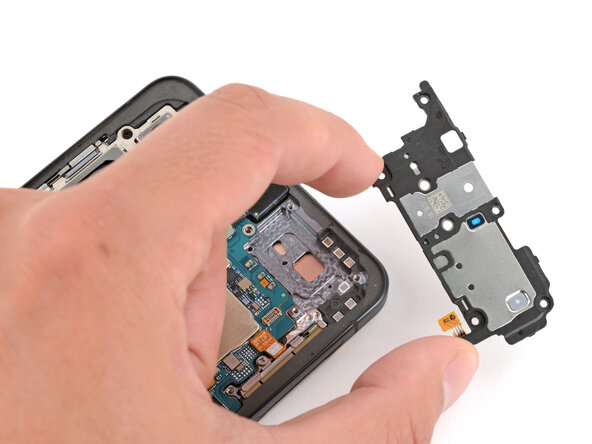
Step 22
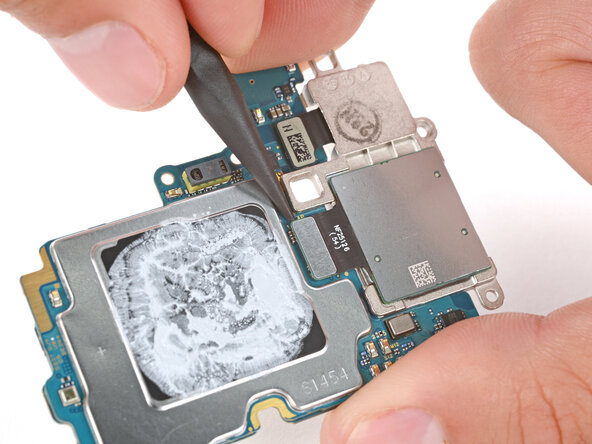
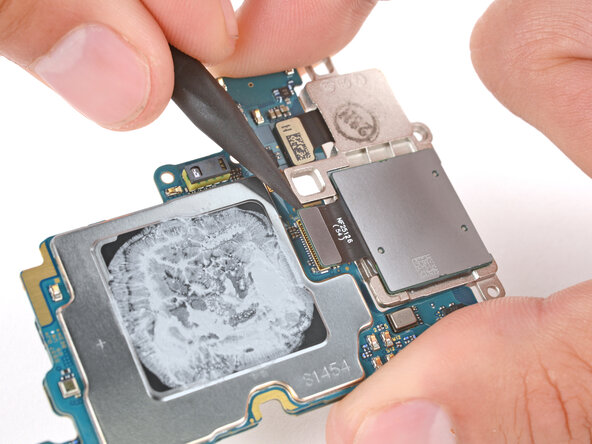
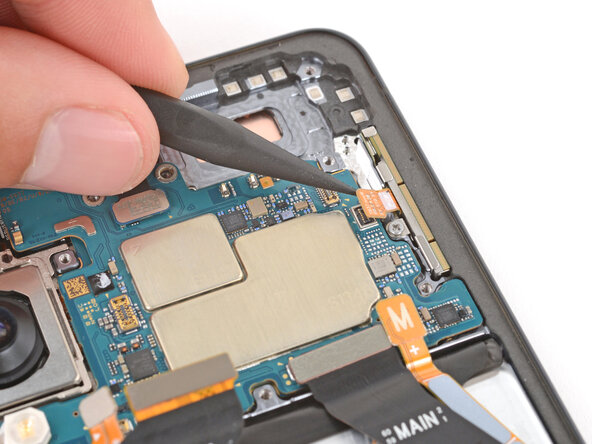
- Gently lift the logic board above your workspace while you tackle the cameras—just a heads up, pressing it down could hurt those delicate components!
- Grab your spudger and carefully use its point to pop up and disconnect both rear camera press connectors.
Tools Used
Step 23
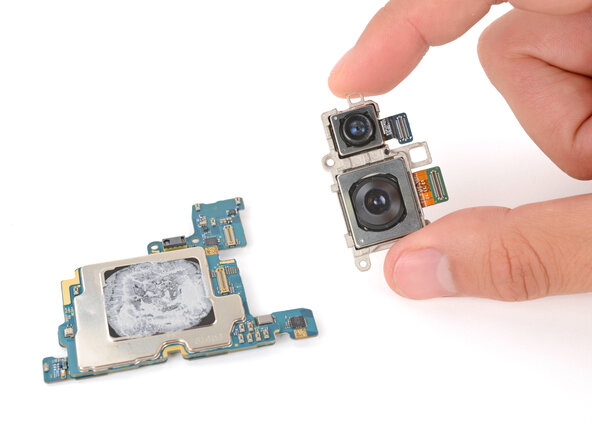
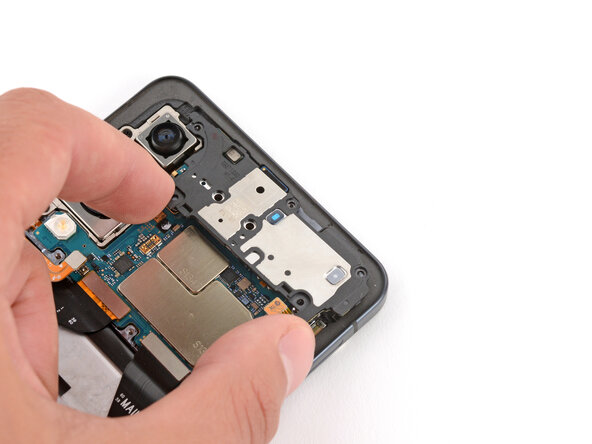
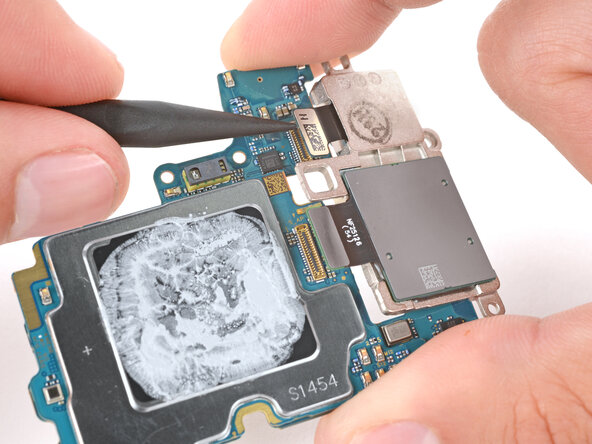
Depending on the specifics of your repair, you might have the option to replace one or both of these components - either way, you're one step closer to getting your device up and running again!
- Gently take those rear cameras off the logic board and set them aside.
- As you put everything back together, give your new part a side-by-side comparison with the original. Don’t forget, you might need to peel off some plastic liners, adhesive backings, or protective covers to make it fit just right.
Step 24
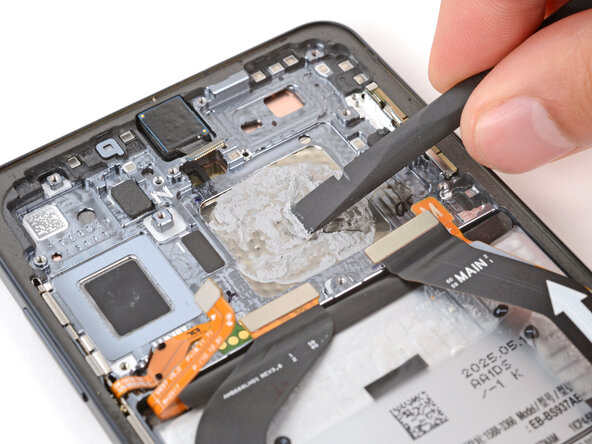
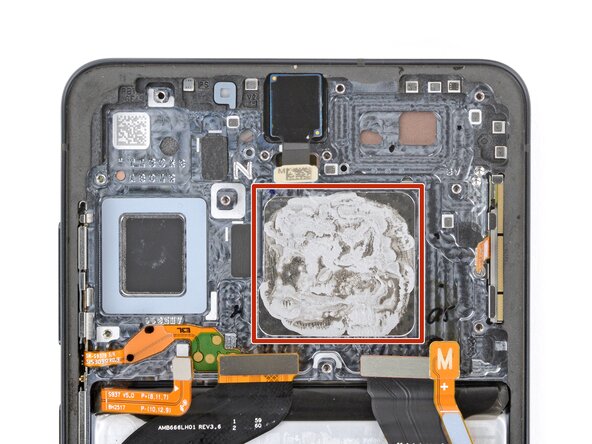
The thermal paste rests on the vapor chamber, which is pretty delicate and dents easily. Work gently and apply minimal pressure—no need to go all Hulk on it. And hey, if some paste stays behind, that's totally fine. No stress, just take your time.
- Take the flat end of your spudger and gently scoop away as much of the old thermal paste as you can—think of it as cleaning up after a wild thermal paste party.
Tools Used
Step 25
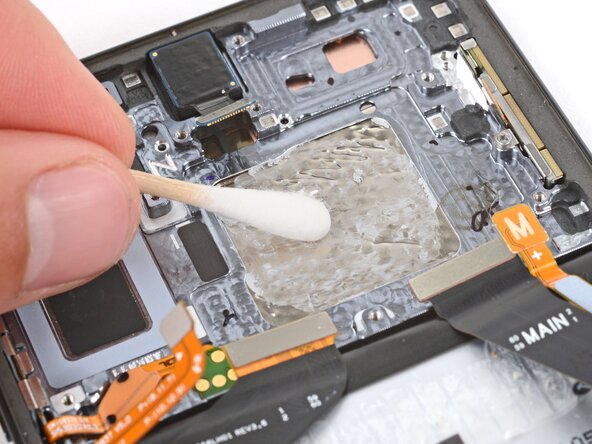
Skip pouring isopropyl alcohol straight onto your phone—that stuff loves to sneak into the screen where it doesn’t belong.
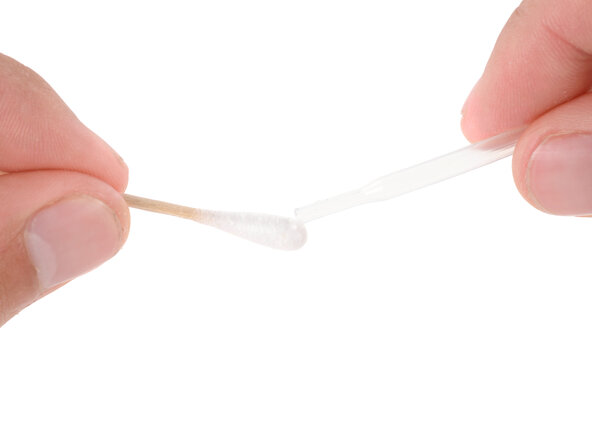
- Grab a cotton swab and put one or two drops of some potent (>90%) isopropyl alcohol on it.
- Now, use that swab to gently wipe away the leftover thermal paste from the vapor chamber. If your swab gets a bit dry, feel free to add a little more alcohol to keep things smooth!
Tools Used

Step 26

The film on the bottom of the logic board is delicate—so handle it with care!
- Take a moment to compare your shiny new replacement part with the original. You might need to swap over some components or peel off those adhesive backings before diving into the installation!
- To get your device back in action, simply retrace your steps and follow these instructions in reverse. You've got this!
- When it's time to say goodbye to your e-waste, make sure to drop it off at an R2 or e-Stewards certified recycler. It's the right thing to do!
- Uh-oh! If your repair didn't go as planned, don't sweat it. Try some basic troubleshooting, or check out our Answers Community for a helping hand!
-