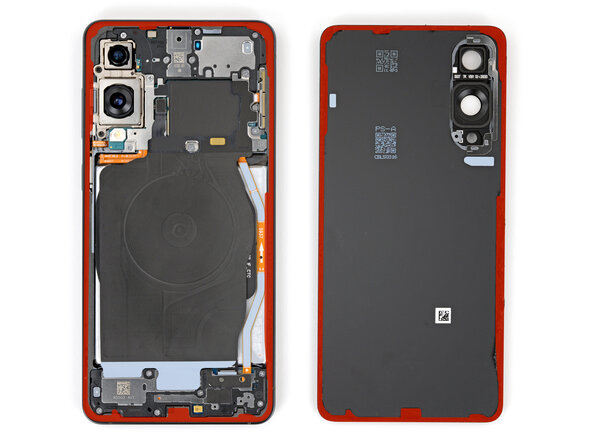
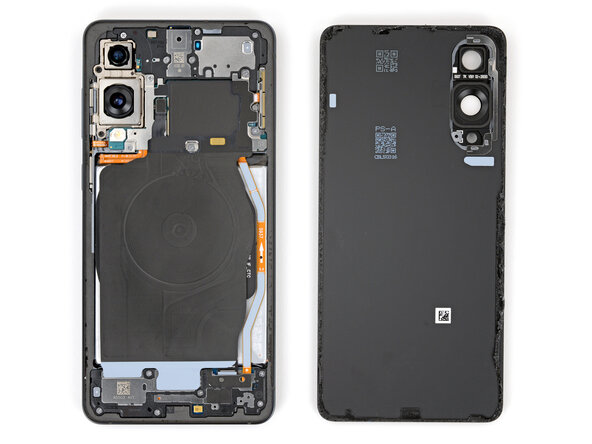
Samsung Galaxy S25 Edge Rear Cameras Replacement
Duration: 45 minutes
Steps: 26 Steps
Ready to give your Samsung Galaxy S25 Edge a little TLC? This guide will walk you through replacing those rear cameras. If your snaps are coming out fuzzy or your videos are more 'meh' than 'wow', it’s probably time for a swap! Don’t forget, you'll need some replacement back cover adhesive to seal the deal. If you need help, you can always schedule a repair.
Step 1
Before diving into this repair, make sure your phone's battery is below 25%. A fully charged lithium-ion battery could be a little too energetic and might catch fire if it gets bumped the wrong way. Play it safe, and let it chill for a bit.
- Shut down your phone completely and disconnect any cables—give it a quick tech-nap before you get started!
Step 2
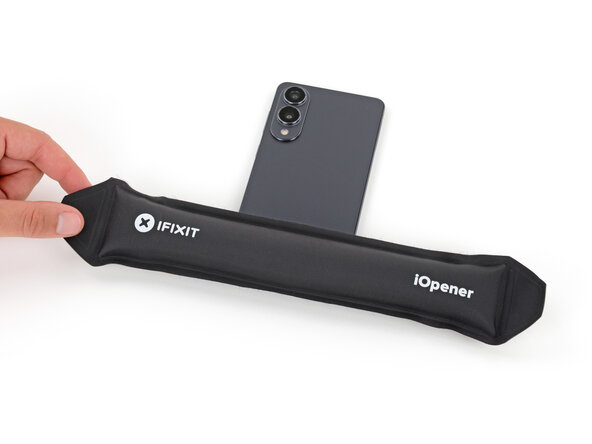
- Warm up your iOpener and let it chill on the bottom edge of the back cover for about two minutes. This will loosen up that stubborn adhesive and make your next steps a breeze.
The back cover is held on with a bit of mild adhesive. Heating it up will loosen things right up, making it way easier to pry off. You can use a hair dryer, heat gun, or even a hot plate to warm things up—just enough to soften that sticky stuff without melting anything. If you're unsure or need a hand, remember you can always schedule a repair to get professional help.
Tools Used


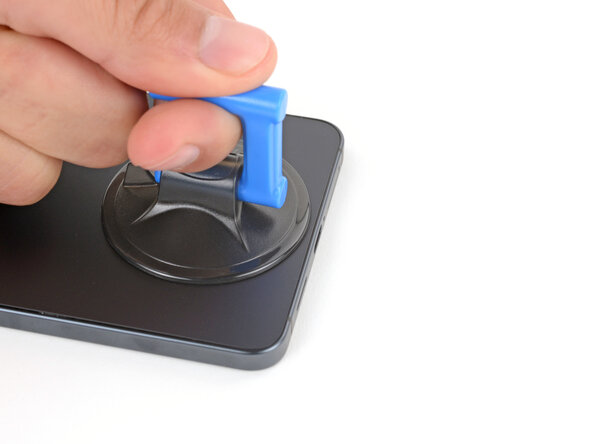
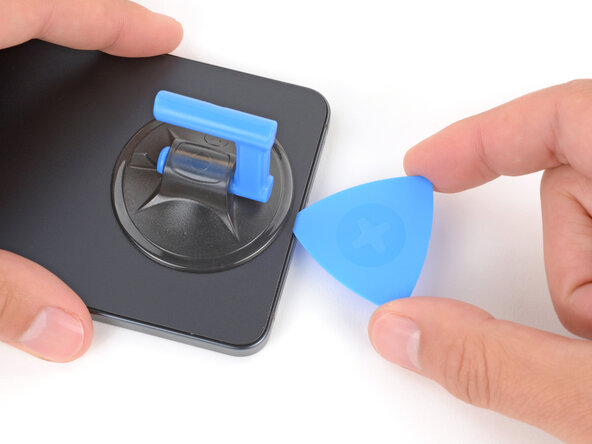
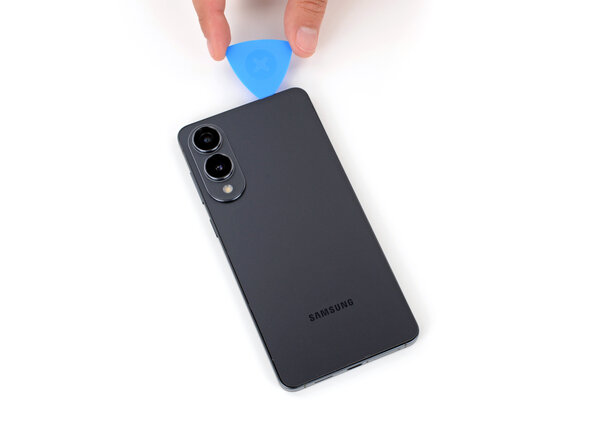
Step 3
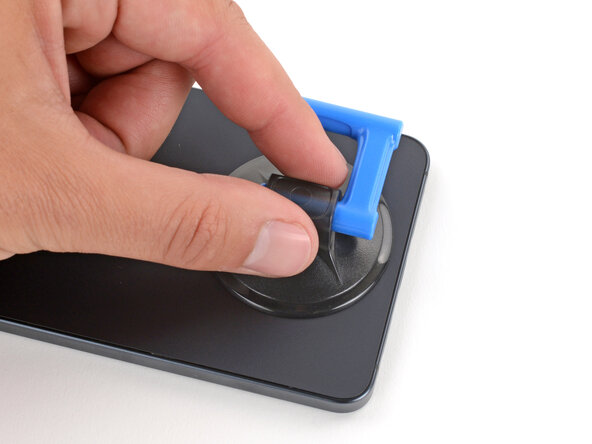
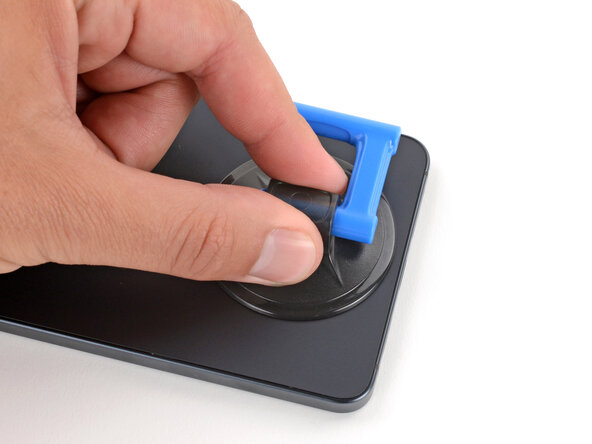
- Grab a suction handle and place it right near the center of the bottom edge of that back cover, getting as close to the edge as you can. You're doing great!
Tools Used

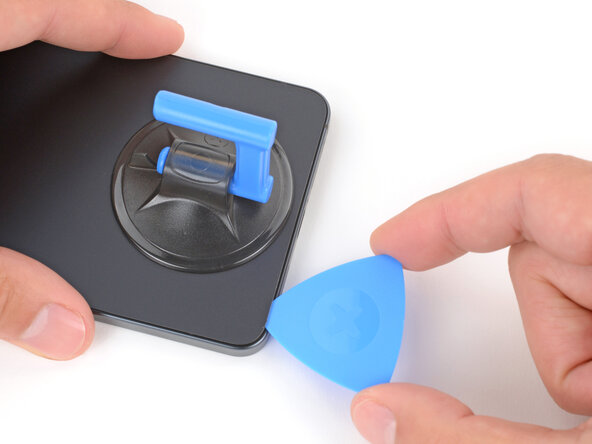
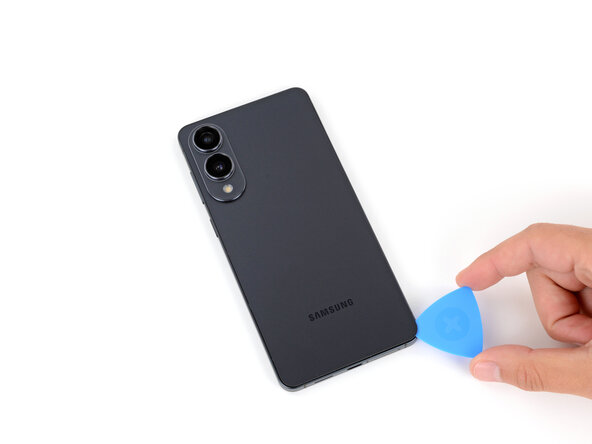
Step 4
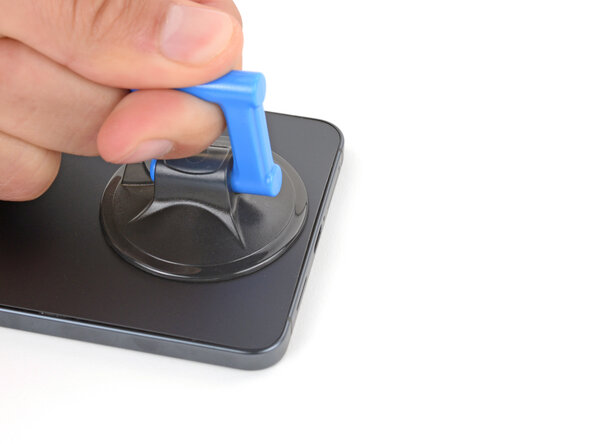
- Give that suction handle a good, steady pull until you spot a gap between the cover and the frame.
- Slide the tip of an opening pick into the gap to get things started.
Tools Used
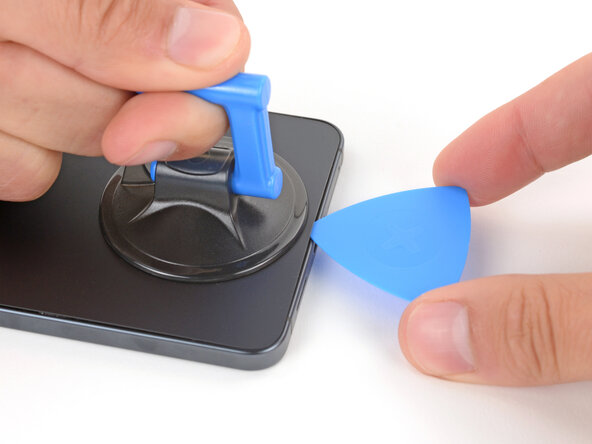
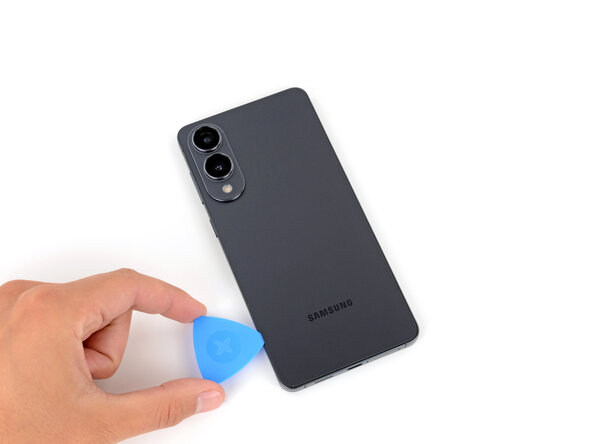
Step 5
Hey there! When you're peeling apart that left and right edge adhesive, remember to keep your pick under 3 mm deep. We want to keep that wireless charging coil and interconnect cable safe and sound. You got this!
- The back cover is held in place with adhesive all around the edge. Take a look at this picture while you work your way around and separate the sticky stuff.
Step 6

If you're having a tough time getting that adhesive to budge, just crank up the heat a bit and give it another go!
- Glide your opening pick along the bottom edge to loosen up that sticky adhesive and free the back cover.
Step 7
A quick tip—don't get too eager and slide your pick too far under those long edges on the sides. Keep it gentle and precise to avoid any mishaps.
- Keep that pick moving around the entire edge of the back cover to break free all the remaining sticky stuff!
Step 8
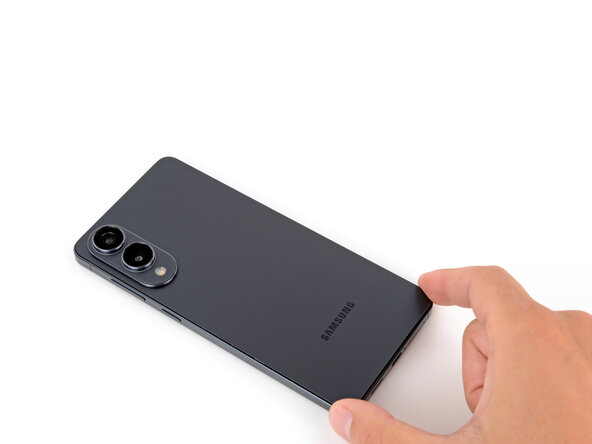
If you hit a snag, take a quick lap around the edge and check for any stubborn adhesive. Grab your opening pick and work it free—almost there!
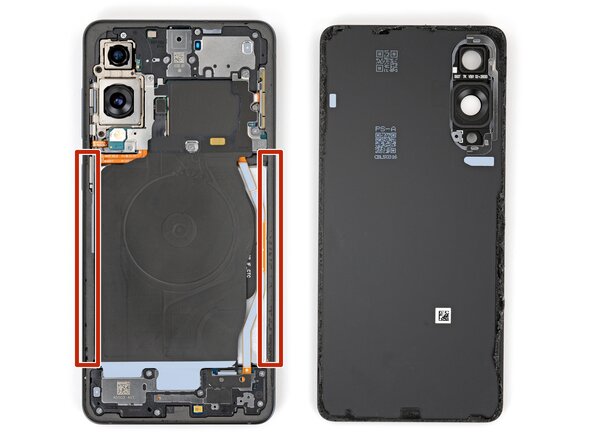
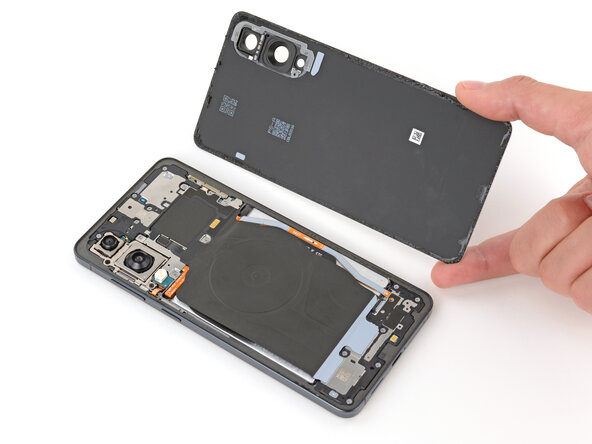
- Let's get started! Remove the back cover to begin the repair process.
- Reassembly tip: take a moment to power on your phone and test all functions before sealing it up. Remember to power it back down completely before moving forward.
- Give your rear cameras a quick once-over and gently wipe away any smudges with a clean, lint-free cloth if needed.
- Now it's time to apply the replacement back cover adhesive. Use the cutouts and contours to determine whether it lines up best with the frame or the back cover. If it matches the back cover, follow the corresponding guide. If it matches the frame, use the alternative guide.
- You're doing great! If you need help or have any questions, don't hesitate to schedule a repair with Salvation Repair.
Step 9

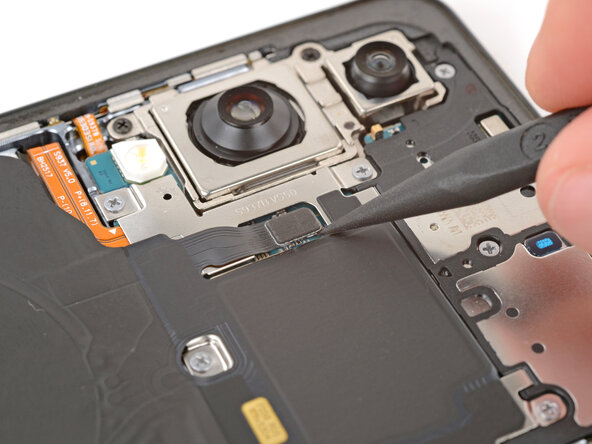
Sliding the spudger under the connector can be a bit of a puzzle. If you're facing some hiccups, give the tip of an opening pick a whirl instead!
- Gently use the tip of a spudger to lift and disconnect the wireless charging assembly press connector from the top edge. You're almost there!
Tools Used

Step 10
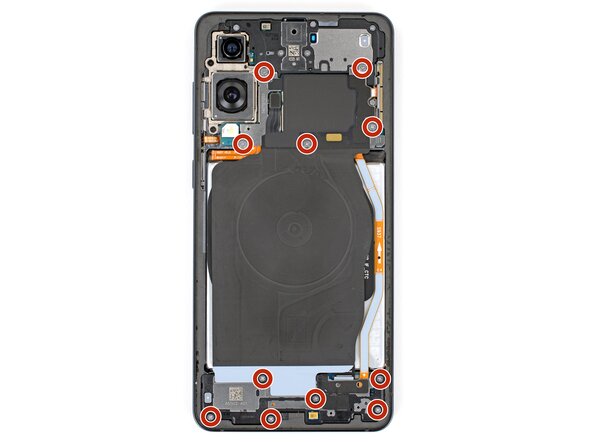
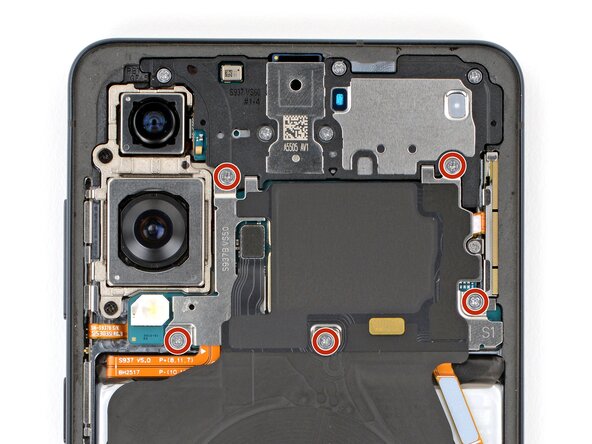
As you dive into this repair, remember to keep an eye on each screw. They all have their special spot, so let's make sure they find their way back home!
- Grab a Phillips screwdriver and remove the eleven 2.8 mm screws holding down the wireless charging and loudspeaker assembly. Easy does it—just unscrew and set those aside. If you need a hand along the way, you can always schedule a repair.
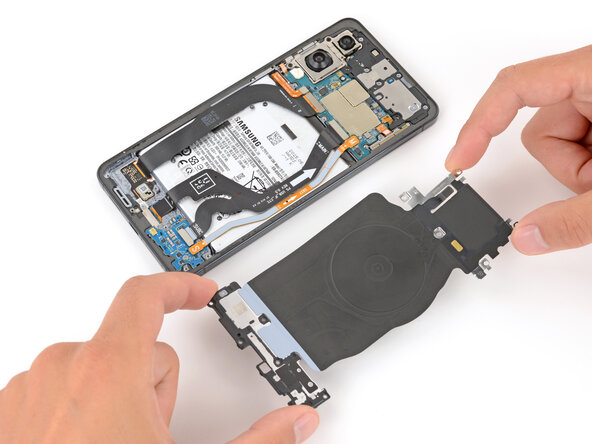
Step 11
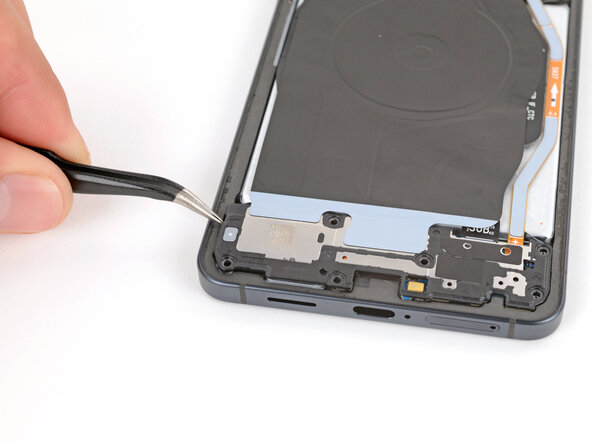
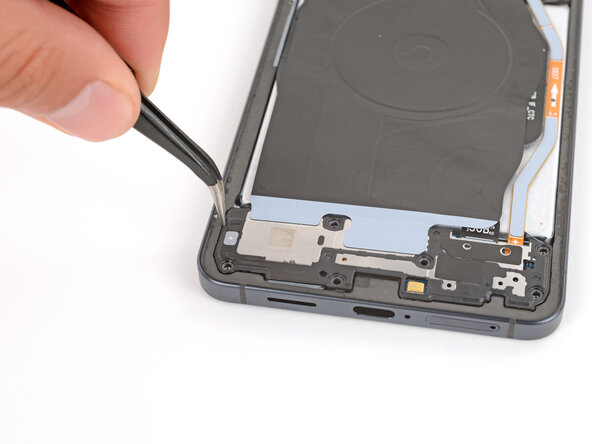
The wireless charging coil is attached to the loudspeaker with some delicate tape, so the easiest move is to lift both out together as a single unit. That way, you steer clear of any accidental damage.
- Grab your angled tweezers and gently nudge the loudspeaker up and off its perch using the notch on the left edge. You've got this!
- When you're piecing everything back together, give the loudspeaker a solid press around its edges to make sure those clips snap back into place. You're almost there!
Tools Used

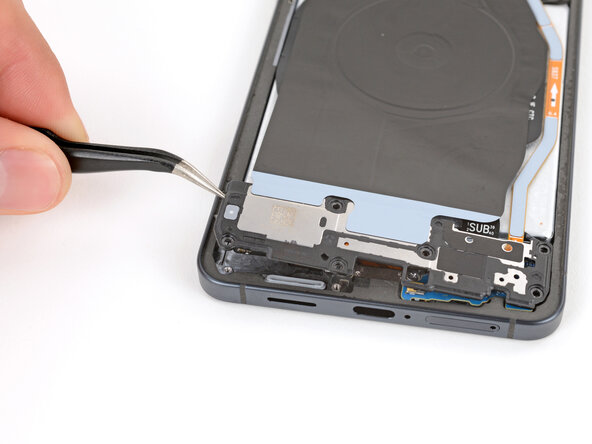
Step 12
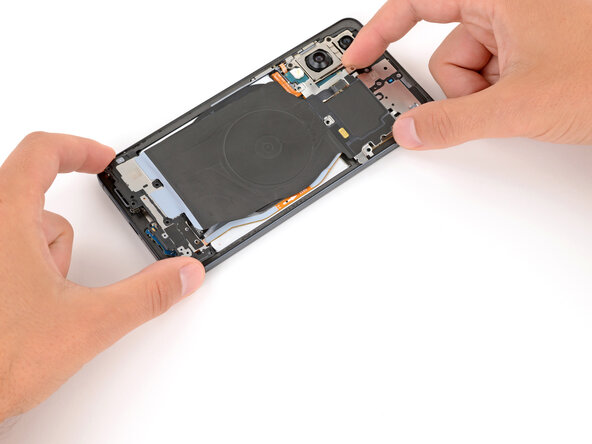
- Grab that wireless charging and loudspeaker assembly with both hands and give it a gentle lift to remove it. You're doing great!
Step 13
Each press connector has a handy gold arrow on the board to show you exactly where to pry—pretty slick! Avoid prying anywhere else, since that could mess up the delicate surface-mounted parts nearby.
- Gently pop up the battery connector with the pointy end of your spudger—just a little wiggle and it'll come right off.
Tools Used
Step 14
- Gently pop up the earpiece speaker press connector using the pointed end of your spudger—nice and easy does it!
Tools Used
Step 15
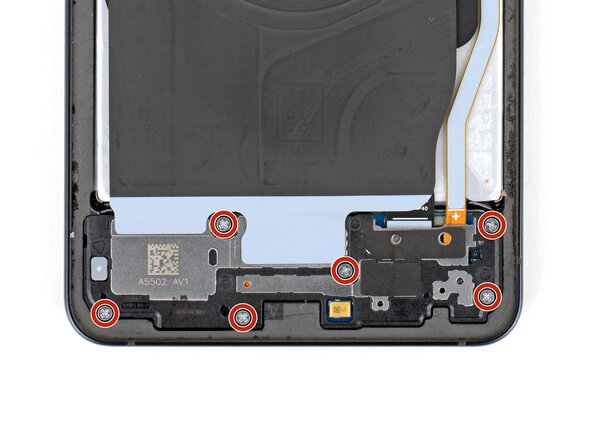
- Grab a Phillips screwdriver and loosen up those five 2.8 mm screws holding the earpiece speaker in place. Once they're out, you're on your way to the next step. If you need help along the way, you can always schedule a repair.
Step 16
- Gently pop the earpiece speaker free from the center of its bottom edge using the flat end of your spudger. It’s like opening a tiny treasure chest—just a little leverage and you’re in.
- When you’re putting it back together, press down all around the edge of the speaker to snap those clips back in place. Give it a little love tap; you’ll hear the satisfying click when it’s secure.
Tools Used
Step 17
- Carefully lift out the earpiece speaker to get it out of the way. If you need a hand with the repair, you can always schedule a repair.
Step 18
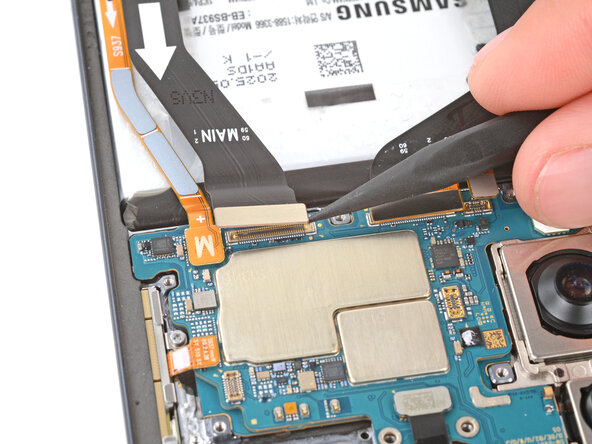
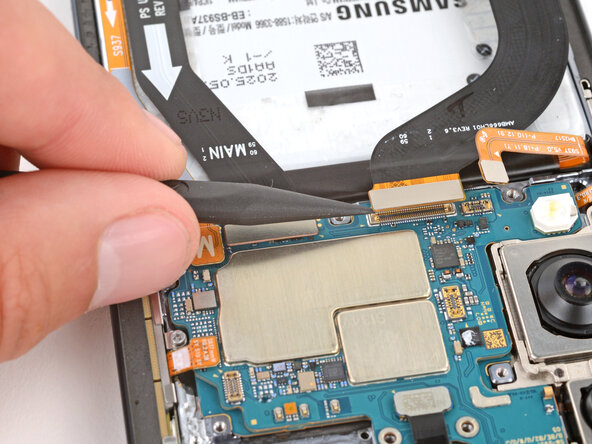

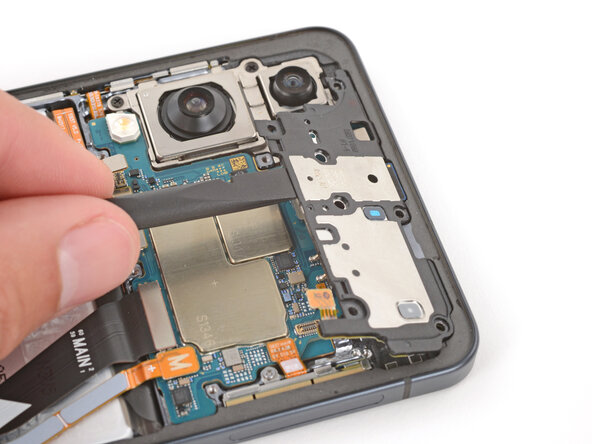
- Grab the point of a spudger and gently pry up to disconnect the screen, USB‑C, and interconnect cable press connectors (that's three in total) from the logic board. Easy does it—this is the way to keep things safe and sound.
Tools Used
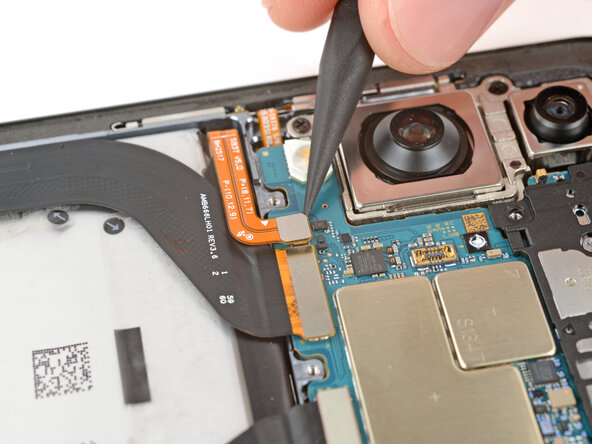
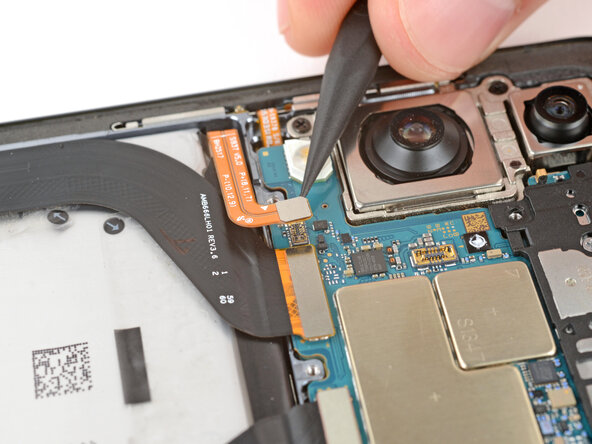
Step 19

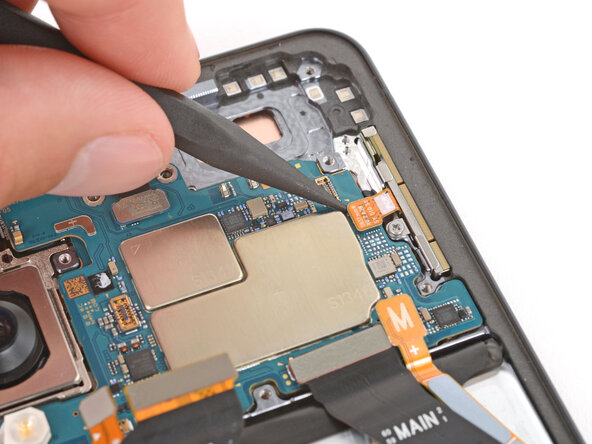
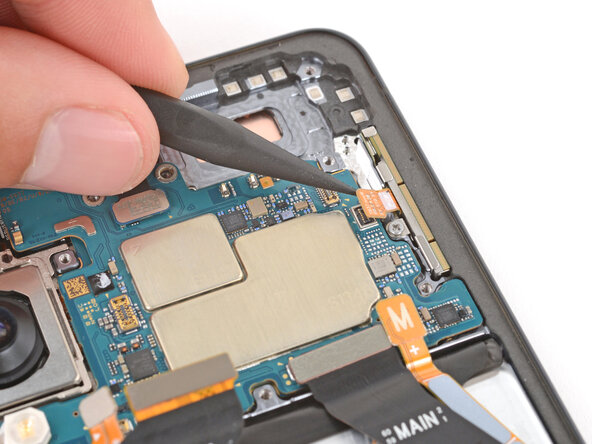
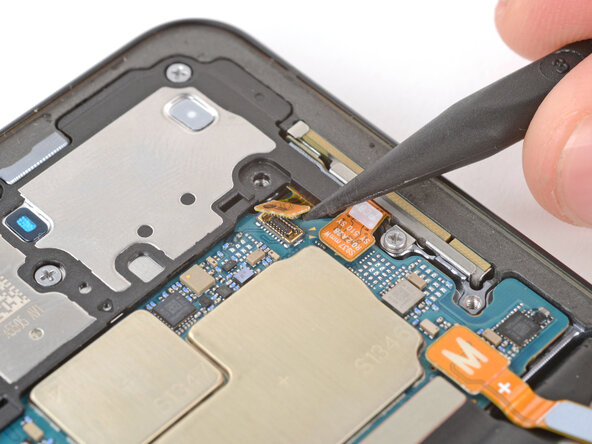
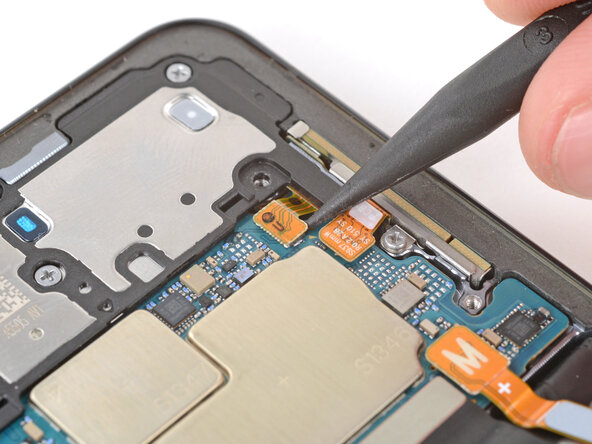
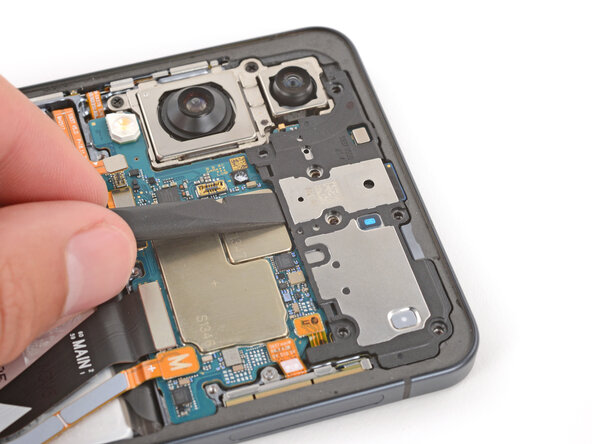
- Grab your spudger and gently pop up the 5G mmWave antenna and front camera press connectors—nice and easy, just like opening a bag of chips.
Tools Used
Step 20

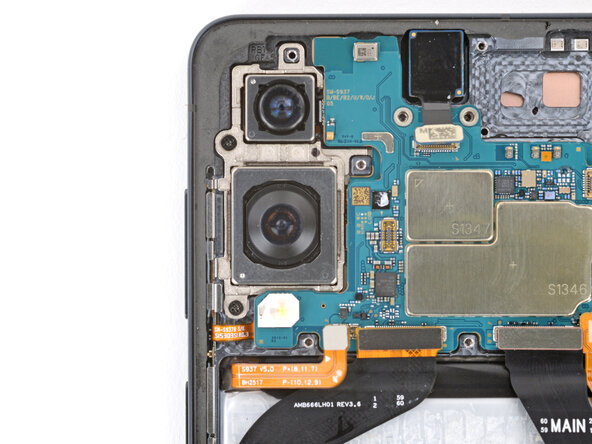
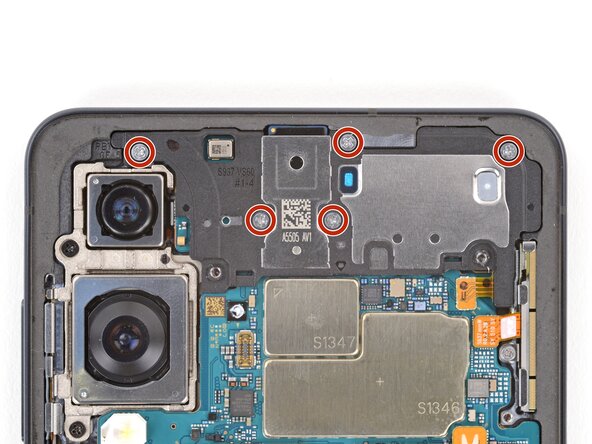
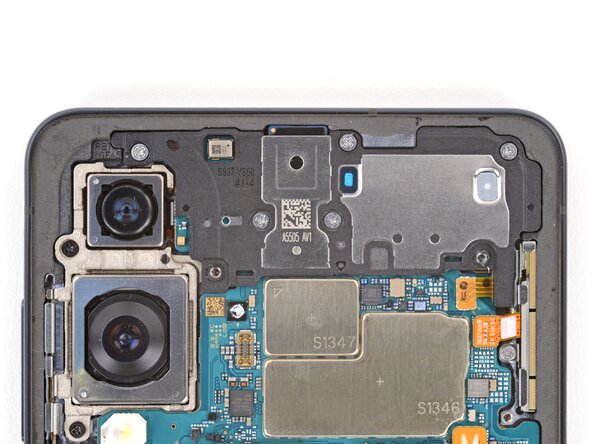
- Grab your Phillips screwdriver and remove those two 2.8 mm screws holding the rear cameras in place. Easy peasy—just a couple of turns, and you're on your way. If you need help, you can always schedule a repair.
Step 21
Avoid holding the board by the rear cameras, or you might end up with some unsightly smudges or even damage them. Keep it safe and sound!
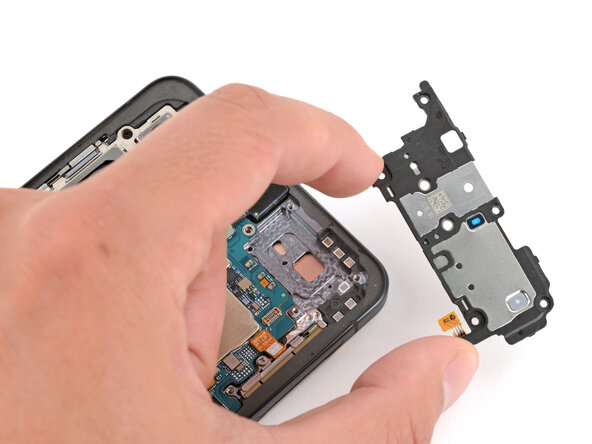
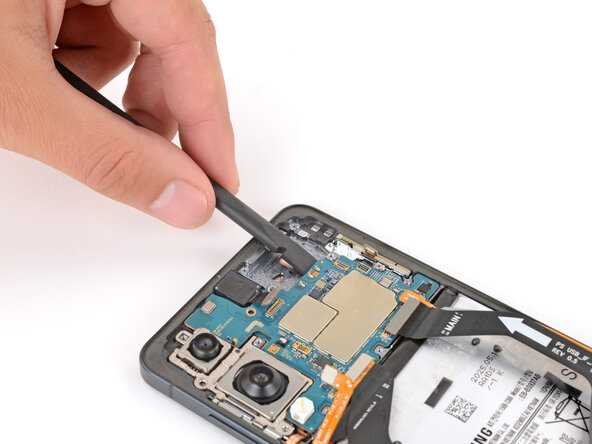
- Grab your trusty spudger and gently work the flat end under the top edge of the logic board. Lift it up just enough so you can get a good grip on the edges with your fingers.
- Once you've got a solid hold on the board, carefully lift it out. Just watch out for any cables that might want to tag along!
- When it's time to put everything back together, make sure those sneaky cables aren't getting trapped under the logic board. You can use the spudger to keep them out of the way while you lower it into place.
Tools Used
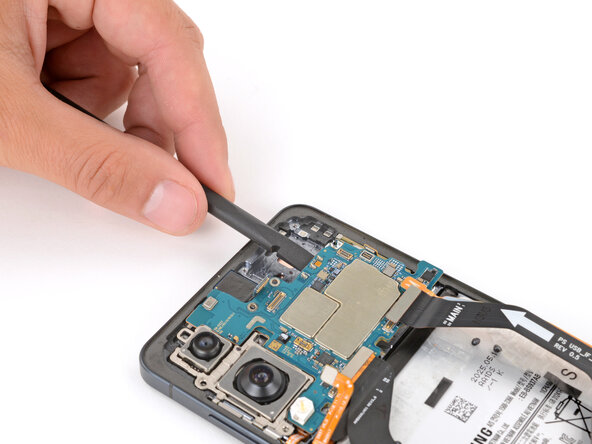
Step 22
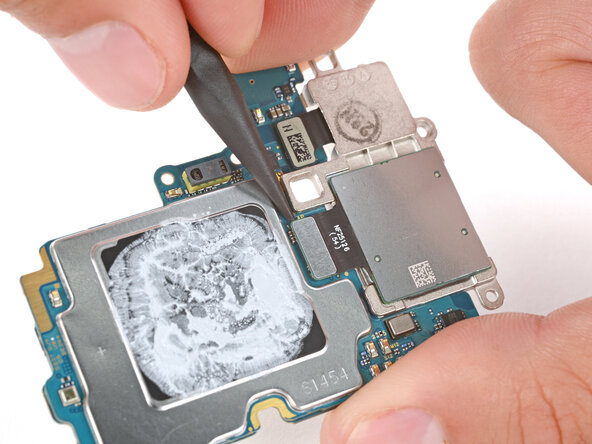
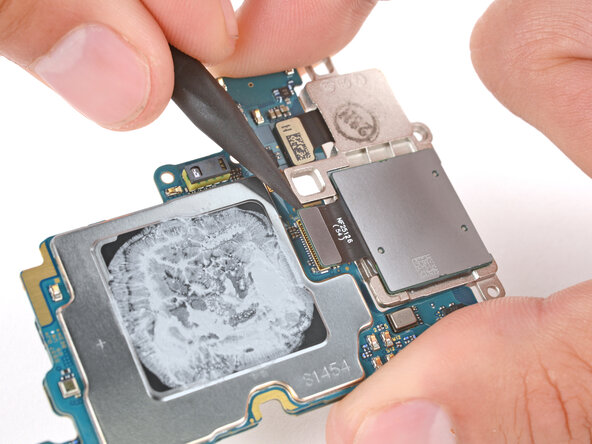
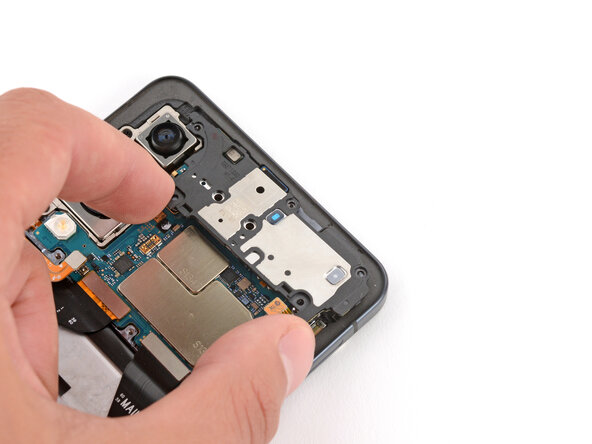
- Keep the logic board elevated just above your work surface while you work on the cameras—avoid pressing it down against the surface to prevent damaging those delicate parts.
- Use the tip of a spudger to gently pry up and disconnect both rear camera press connectors.
Tools Used
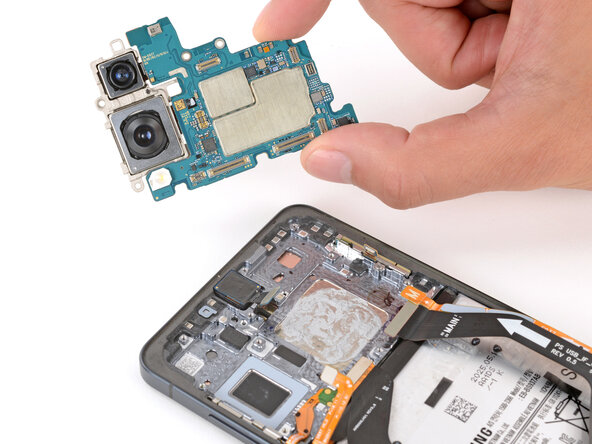
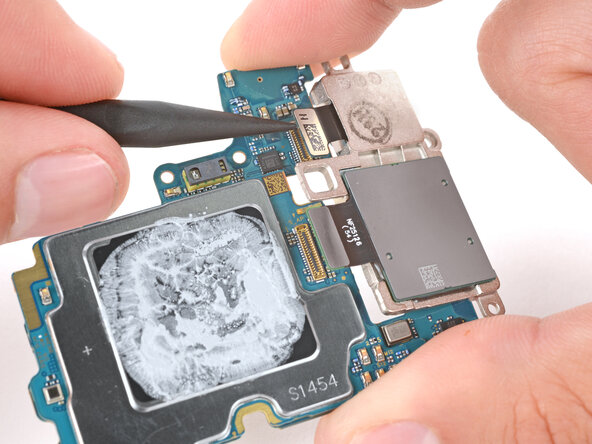
Step 23
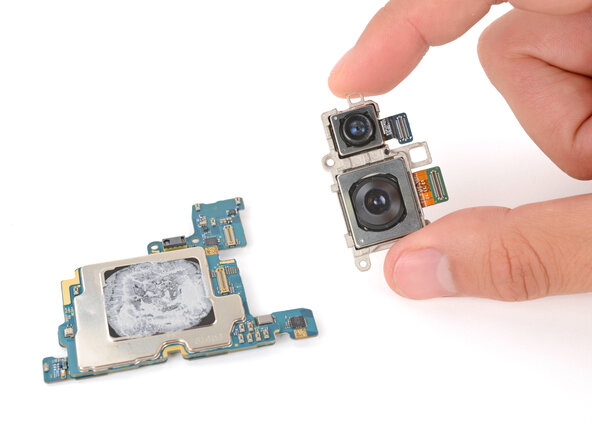
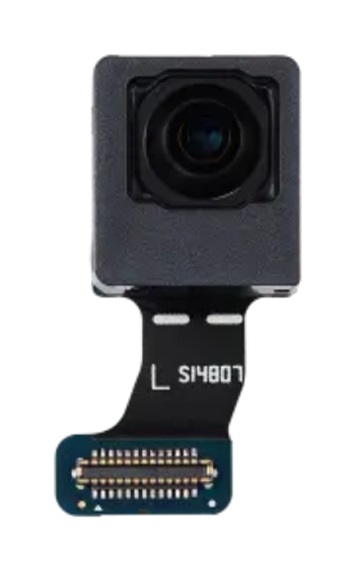
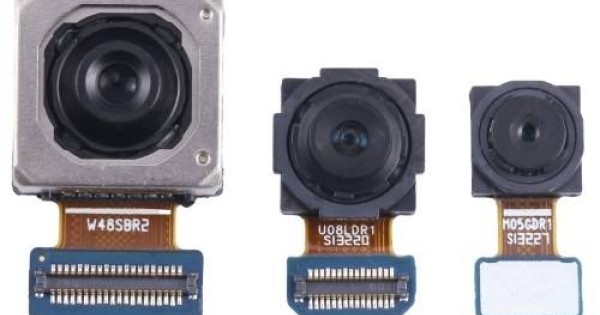
Depending on the repair you're tackling, you might have one or both of these components available for replacement.
- Gently lift the rear cameras off the logic board. Make sure you've got a steady hand—these parts are delicate, but you're totally up for it.
- When putting everything back together, line up your new part with the old one for a quick side-by-side check. Look out for any plastic films, sticky bits, or covers that need to come off before reassembly.
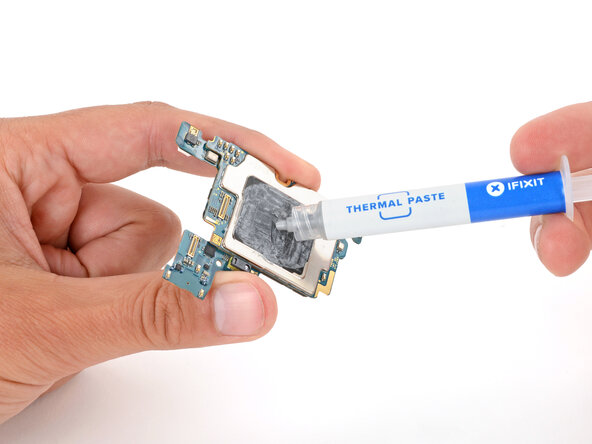
Step 24

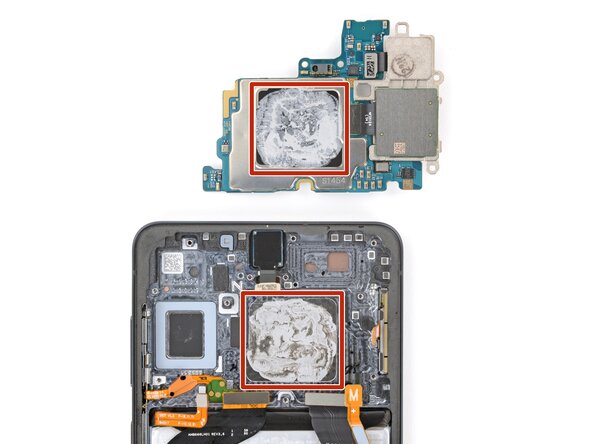
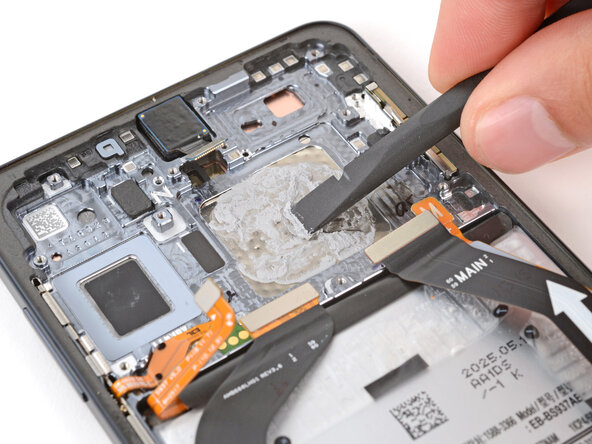
The thermal paste is like a delicate dancer on fragile surfaces—it's a light film on the logic board and cozying up in the vapor chamber. So, take it easy and apply just the right amount of love without pressing too hard. And hey, if you can’t get every last speck of that paste, no worries at all!
- Grab the flat end of your trusty spudger and gently coax away the thermal paste from both the logic board and the frame. You've got this!
Tools Used
Step 25
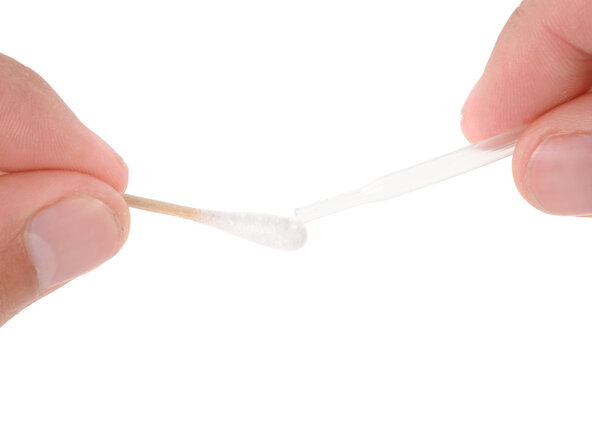
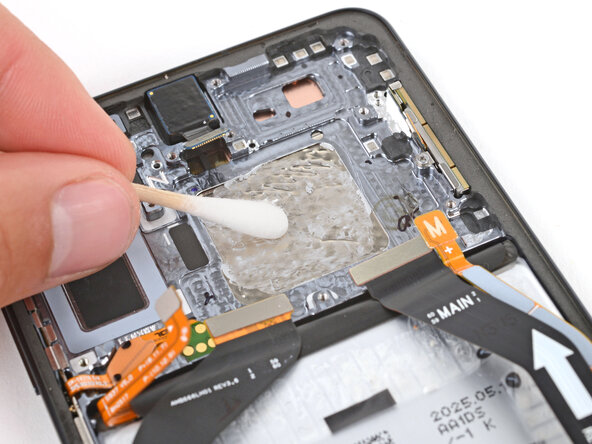
Avoid pouring isopropyl alcohol directly onto your phone; we don't want it sneaking onto the screen, do we?
At this stage, let's focus on giving that frame a good clean! Steer clear of the logic board with that alcohol, though—trust me, you don't want to risk messing with the delicate film.
- Drip a couple drops of high-strength (>90%) isopropyl alcohol onto a cotton swab—don’t be shy, but don’t go swimming in it either.
- Gently wipe away the leftover thermal paste from the vapor chamber using your swab, refreshing with more alcohol as needed. Keep going until it’s squeaky clean!
Tools Used

Step 26
Hey there! Just a heads-up: the film on the bottom of the logic board is delicate—so let’s keep those fingers off it, shall we?
- Alright, let's compare your shiny new replacement part with the original—don’t forget to transfer any sneaky components or peel off those adhesive backings before diving into the installation!
- To wrap things up, just follow these steps in reverse to reassemble your device. Easy peasy!
- Got some e-waste? Make sure to drop it off at an R2 or e-Stewards certified recycler. It’s the responsible thing to do!
- If things didn't go as smoothly as you hoped, no worries! Give troubleshooting a shot or reach out for some friendly help from our community. We’ve got your back!
- And hey, if you find yourself stuck on any of these tricky steps, you can always schedule a repair with us!