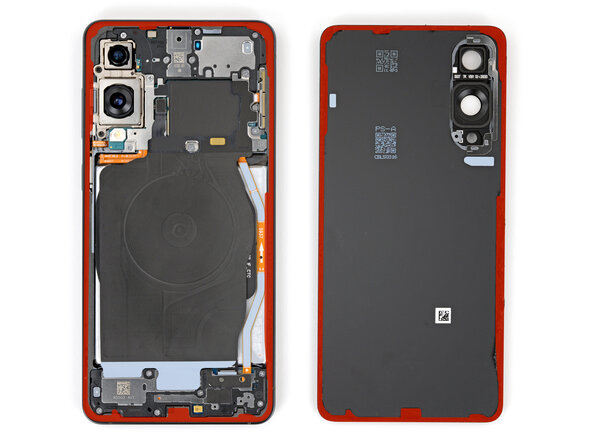
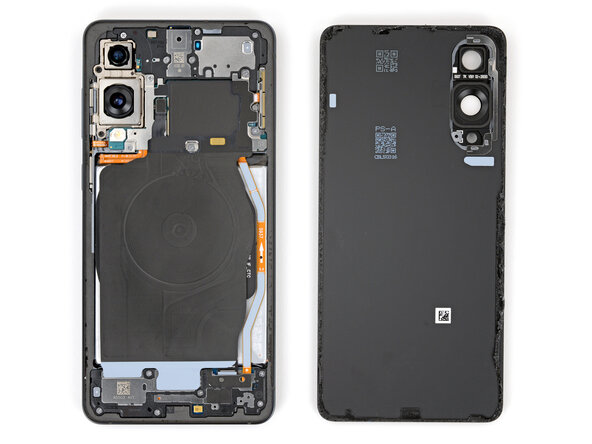
Samsung Galaxy S25 Edge USB‑C Port Replacement
Duration: 45 minutes
Steps: 20 Steps
Get ready to dive into this repair adventure! Before you jump in, take a moment to gather your tools and find a comfy workspace. If you need help, you can always schedule a repair.
Get ready to tackle the USB‑C port replacement on your Samsung Galaxy S25 Edge smartphone! If your device is acting like it’s on a rollercoaster ride with charging issues, unexpected disconnects, or if your USB-C cable seems to have a mind of its own when plugged in, it’s time for an upgrade. Before diving into the repair, give that port a little TLC with a clean-up to see if that does the trick. And don’t forget, you’ll need some replacement back cover adhesive to wrap things up nicely.
Step 1
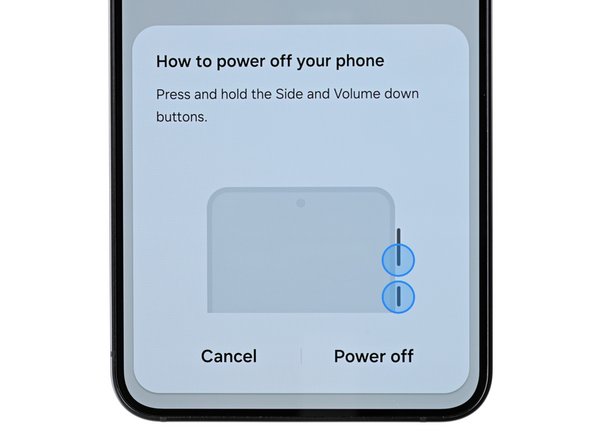
Before you start, make sure your phone’s battery is below 25%. A fully charged lithium-ion battery can be a bit lively if it gets nicked during the repair, so it’s best to keep it mellow.
- Shut down your phone all the way and disconnect any cables—let’s give it a proper nap before we dive in!
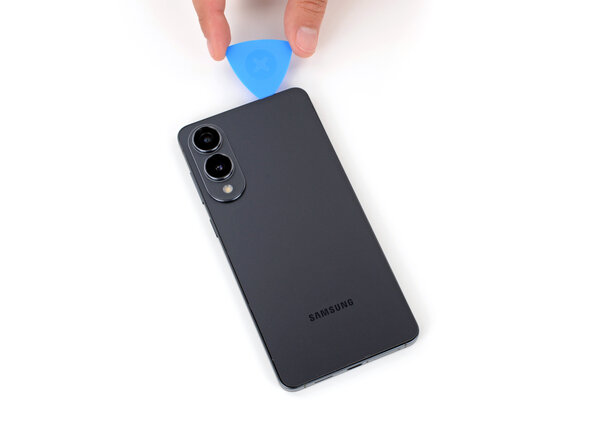
Step 2
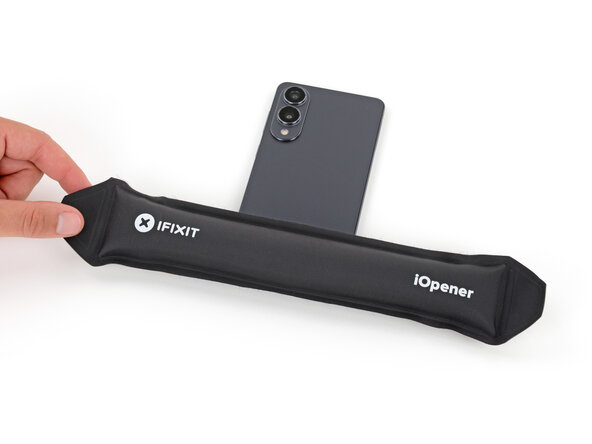
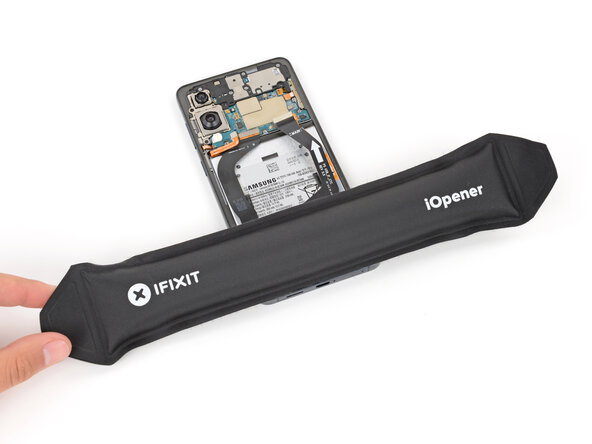
The back cover is held on with some mild adhesive. A little heat will do wonders to soften that sticky stuff, making it a breeze to peel away.
You can use a hair dryer, heat gun, or even a hot plate to warm up the cover and get it ready for easy separation!
- Grab your trusty iOpener and give it a little heat love. Place it right on the bottom edge of the back cover for two minutes. This will help loosen that stubborn adhesive so you can carry on with your repair adventure!
Tools Used


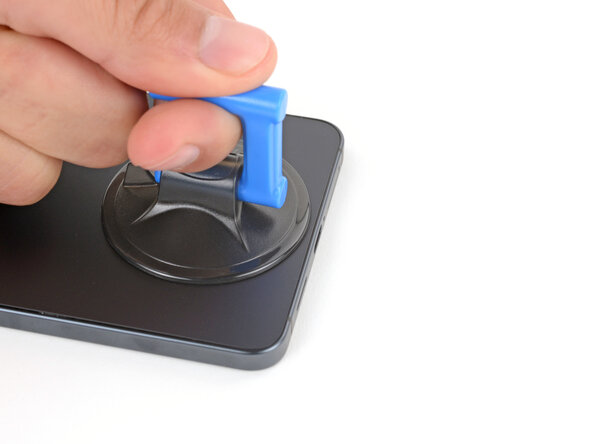
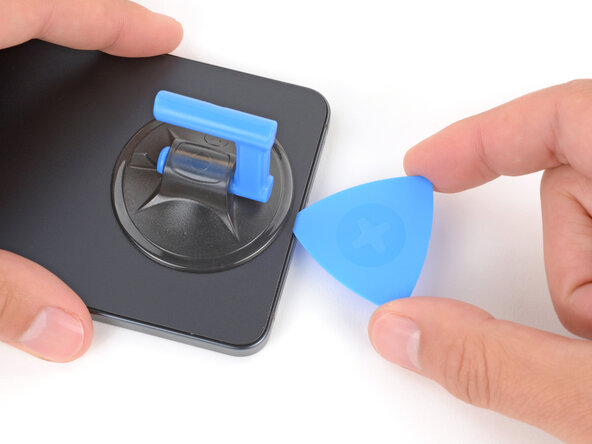
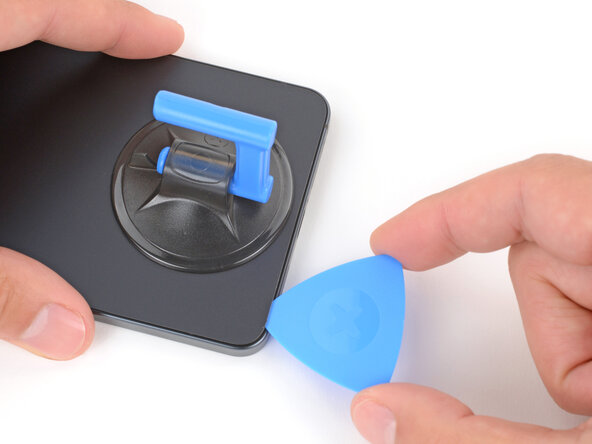
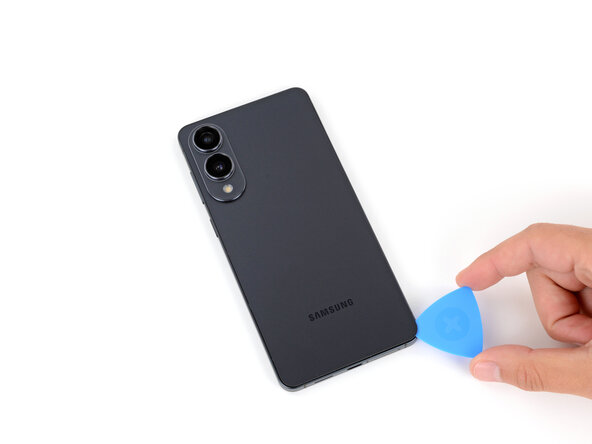
Step 3
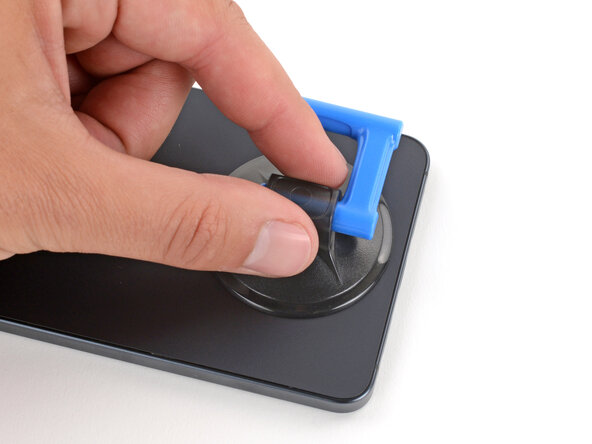
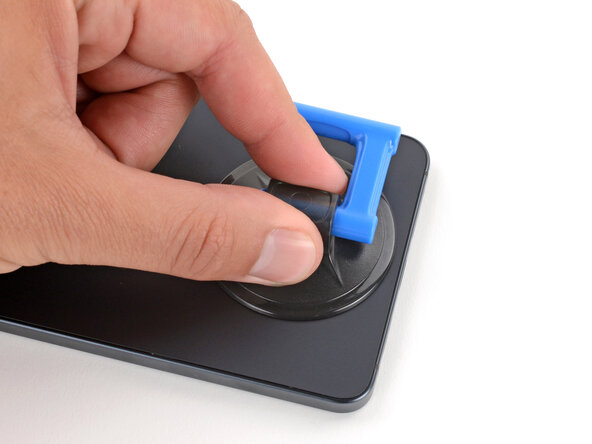
- Grab a suction handle and place it right in the middle of the bottom edge of the back cover, getting as close to the edge as you can. You've got this!
Tools Used

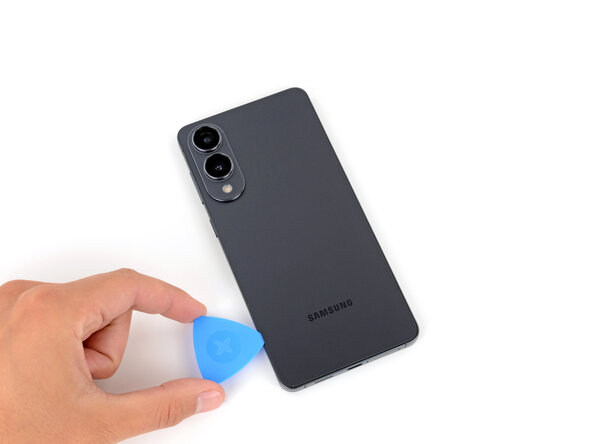
Step 4
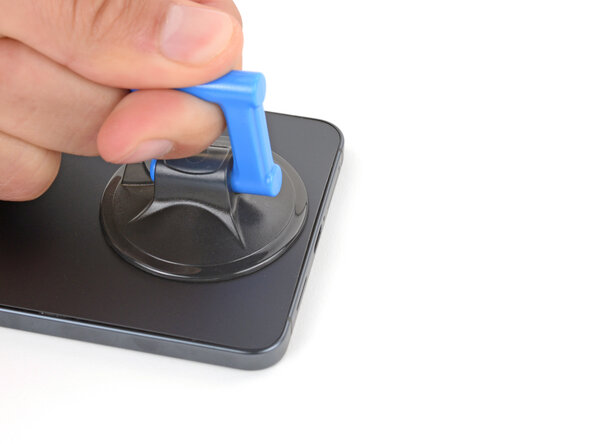
- Give a good, steady pull on that suction handle until you see a little gap open up between the cover and the frame. You're doing great!
- Now, slide the tip of your opening pick into that gap and get ready to work your magic.
Tools Used
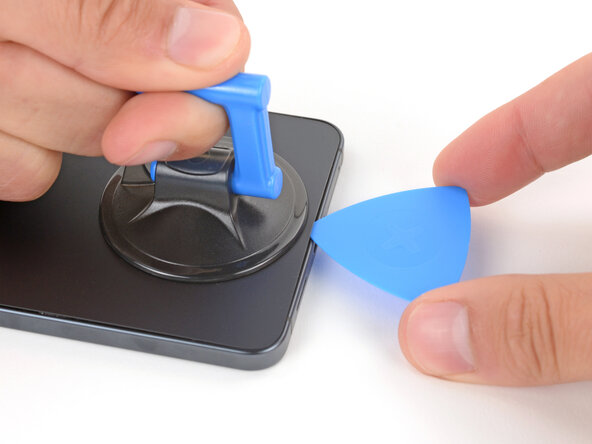
Step 5
As you peel apart the left and right edge adhesive, keep your pick under 3 mm deep – we wouldn't want to accidentally tickle the wireless charging coil or the interconnect cable!
- The back cover is stuck in place with some adhesive running all around the frame. Check out this image as a guide to help you peel away the adhesive like a pro!
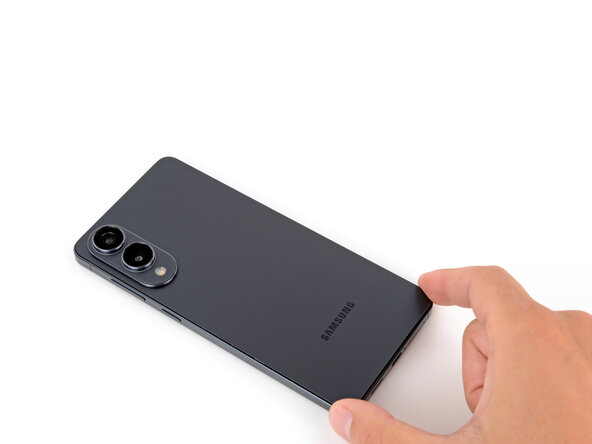
Step 6

If the adhesive is being stubborn, don't worry! Just apply some extra heat and try separating it again. It's an easy fix, and you've got this!
- Gently glide your opening pick along the bottom edge to break free the adhesive holding the back cover in place.
Step 7
Just a friendly reminder: keep your pick from diving too deep under those long left and right edges. We want to keep things smooth sailing!
- Keep gliding your pick along the whole edge of the back cover to break up any leftover adhesive.
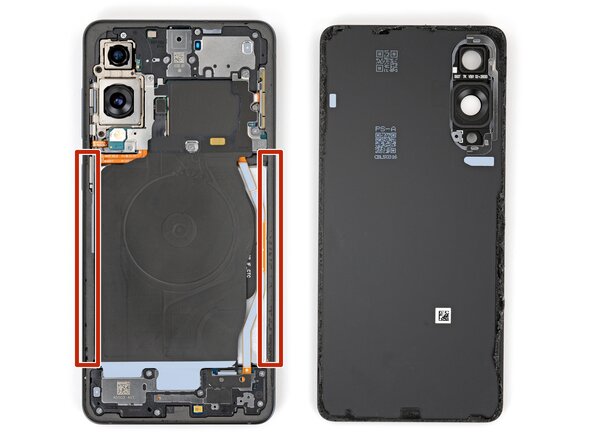
Step 8
Having a bit of a tough time? No worries! Just take a look around the edges for any leftover adhesive. Grab your trusty opening pick and gently work your way to separate it. You've got this!
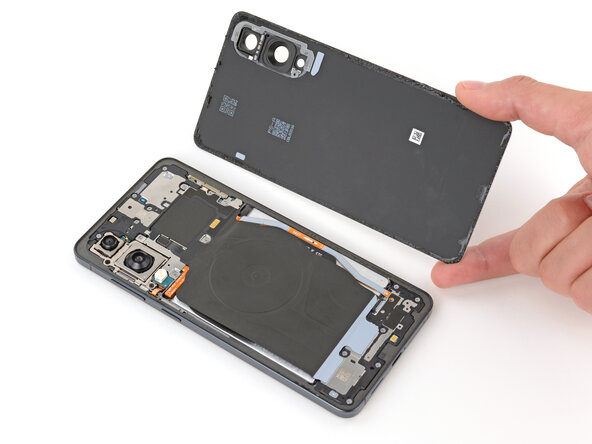
- Take off the back cover to get started. During reassembly, it's a good idea to power on your device and check all functions before sealing it back up. Just make sure to turn it off completely before moving forward. Give your rear cameras a quick wipe with a soft, lint-free cloth if they look smudgy—clear lenses make all the difference. When applying the new adhesive to the back cover or frame, use the cutouts and contours as your guide to ensure a perfect fit. Match the adhesive to the corresponding part—back cover or frame—and follow the appropriate guide. If you need a hand at any point, you can always schedule a repair to get professional help.
Step 9

Sliding the spudger under that connector might feel like a bit of a puzzle. If you're stuck, don’t fret! Try using the pointy end of an opening pick for some extra finesse.
- Grab a spudger and gently pry up to disconnect the wireless charging assembly's press connector from its top edge. Easy does it—you're just detaching a little connector to keep things moving smoothly. If you need help, you can always schedule a repair.
Tools Used

Step 10
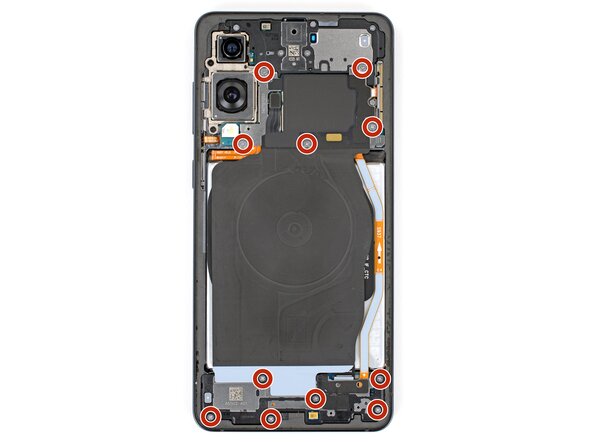
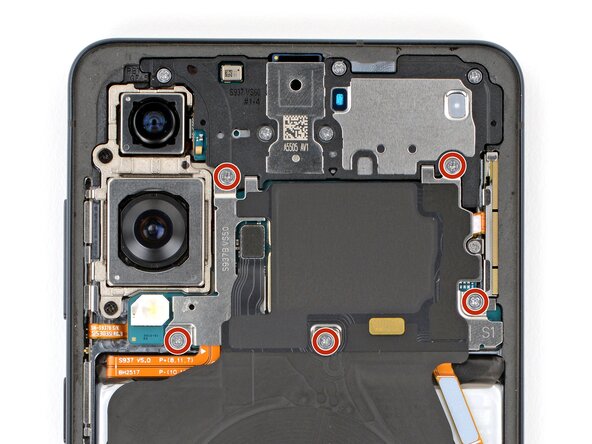
As you work through this repair, make sure to keep track of every screw and its spot. They'll want to go back exactly where they came from—just like a puzzle!
- Grab your Phillips screwdriver and loosen those eleven 2.8 mm screws holding in the wireless charging and speaker assembly. Keep it steady and remove them carefully—you're one step closer to the inside. If you need a hand, you can always schedule a repair.
Step 11
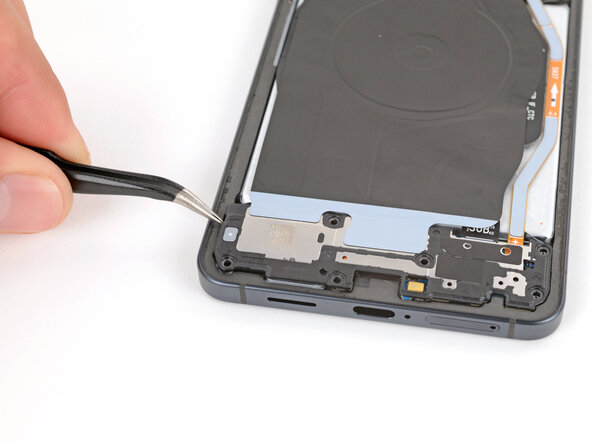
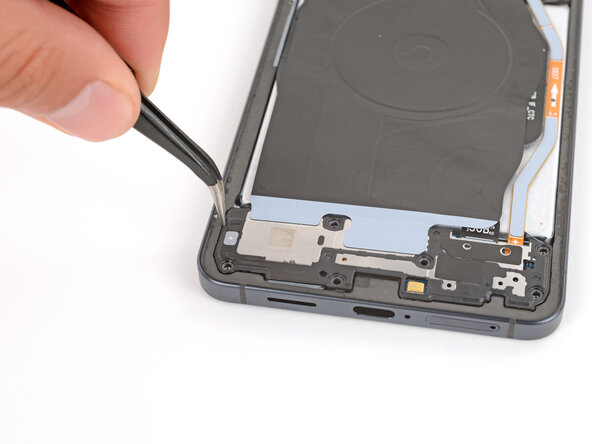
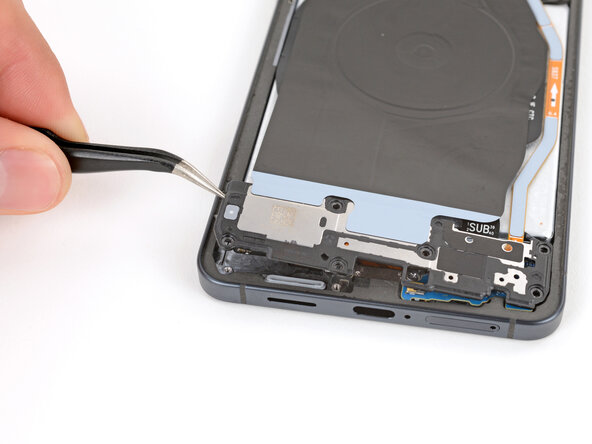
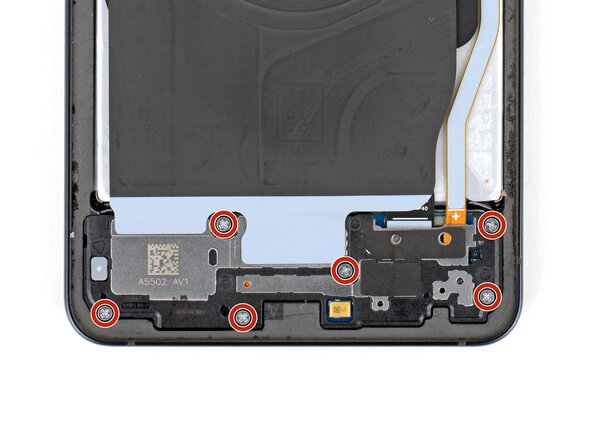
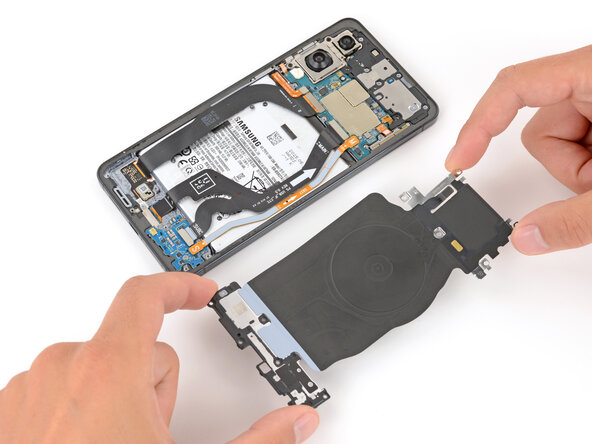
The wireless charging coil and loudspeaker are joined together with some delicate tape. To keep things smooth and avoid any mishaps, just lift them out as one unit.
- Grab those angled tweezers and gently lift up the loudspeaker by the little notch on its left edge. You got this!
- When you're putting it back together, make sure to press down firmly around the edges of the loudspeaker to make those clips snap into place. Easy peasy!
Tools Used

Step 12
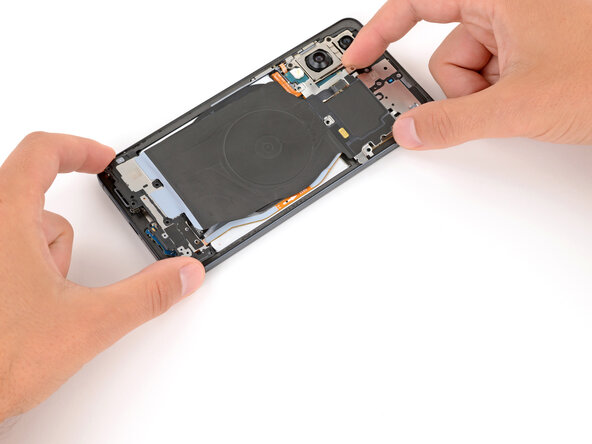
- Time to get a grip - literally! Use both hands to carefully lift and remove the wireless charging and loudspeaker assembly.
Step 13
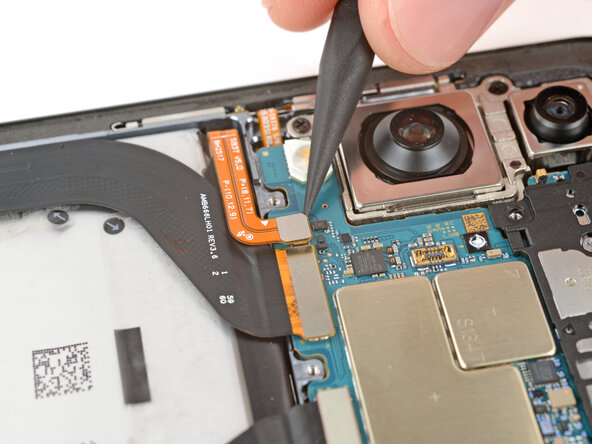
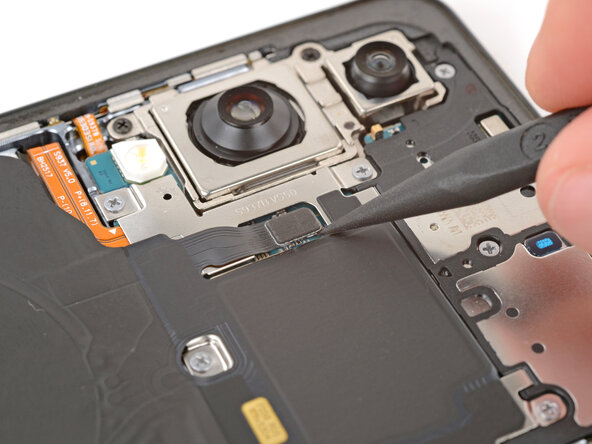
Each press connector comes with its own gold arrow on the board, pointing to the safe spot for prying—pretty neat, right? Stick to these spots to avoid messing with those delicate surface-mounted parts nearby.
- Grab your spudger and gently pry up the connector that links the battery press. Carefully disconnect it to keep everything safe and sound. If you need help along the way, you can always schedule a repair.
Tools Used
Step 14
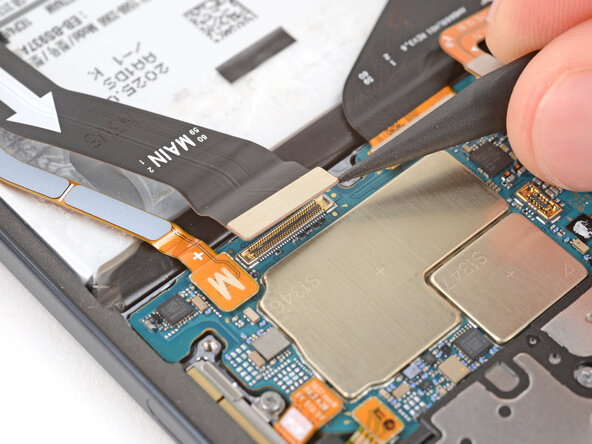
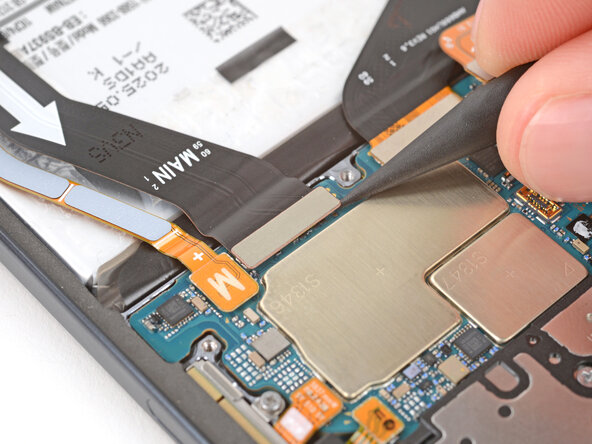
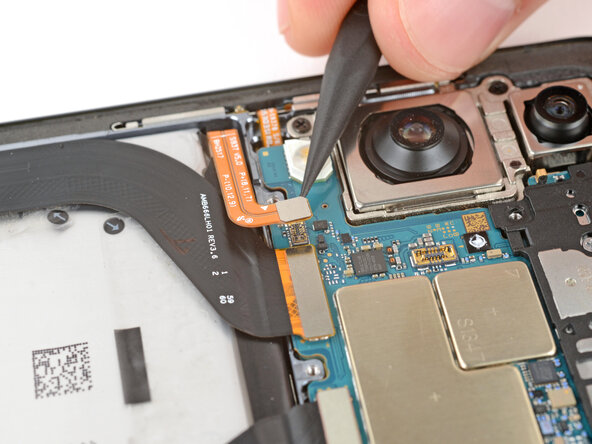
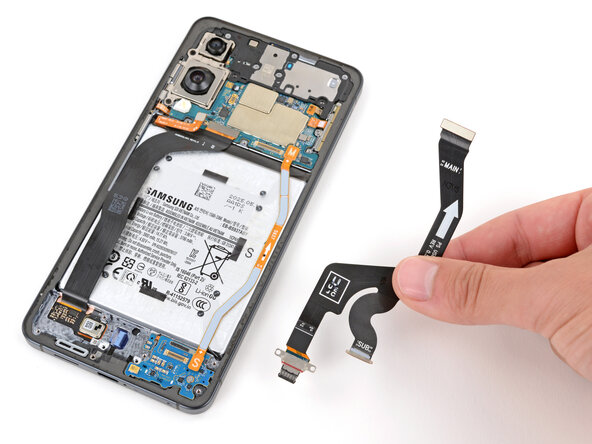
- Grab your trusty spudger and gently pry up the USB‑C port cable's press connector (that's the one labeled MAIN) from the logic board. You've got this!
Tools Used
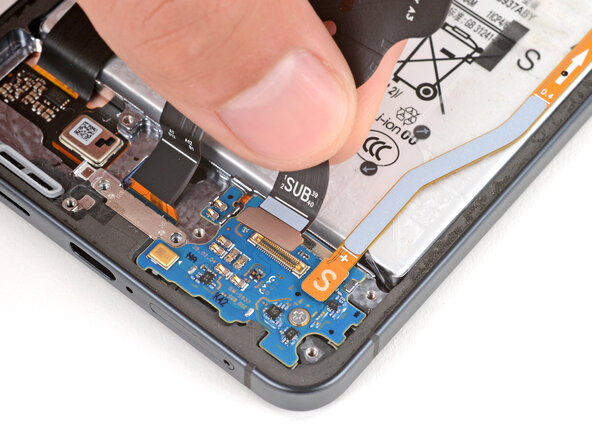
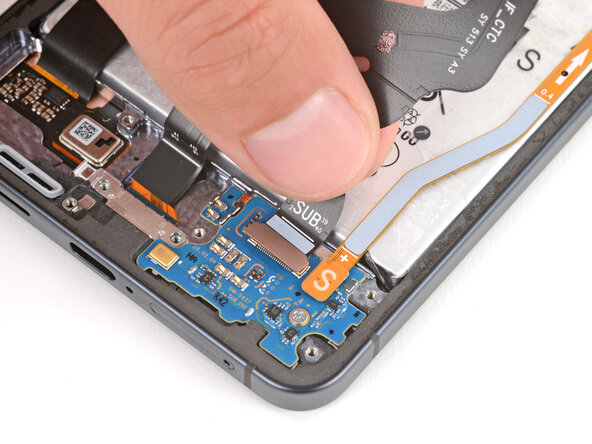
Step 15
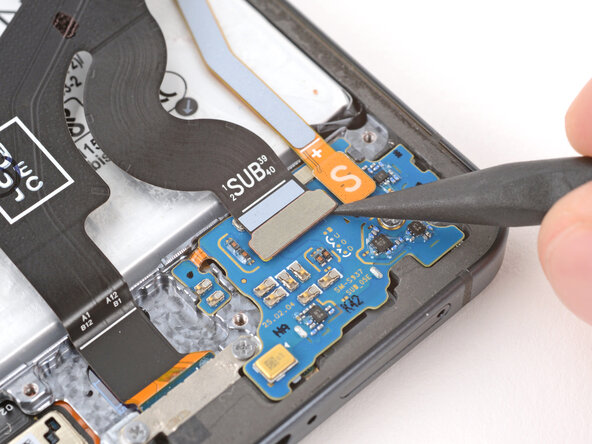
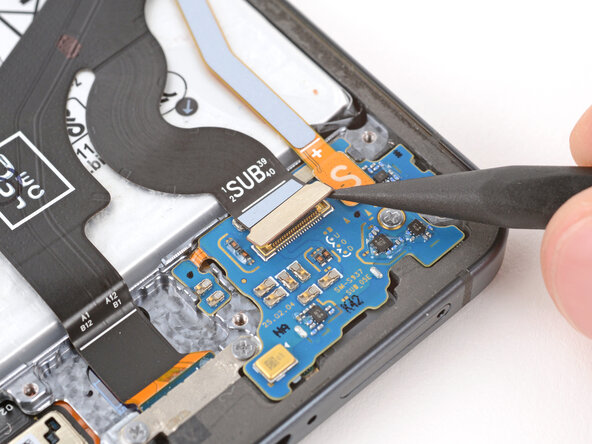
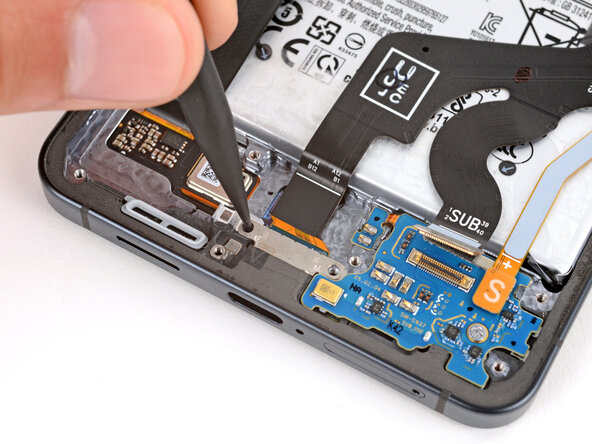
- Grab your spudger and gently pop off the USB-C port cable's press connector (labeled SUB) from the sub board.
Tools Used
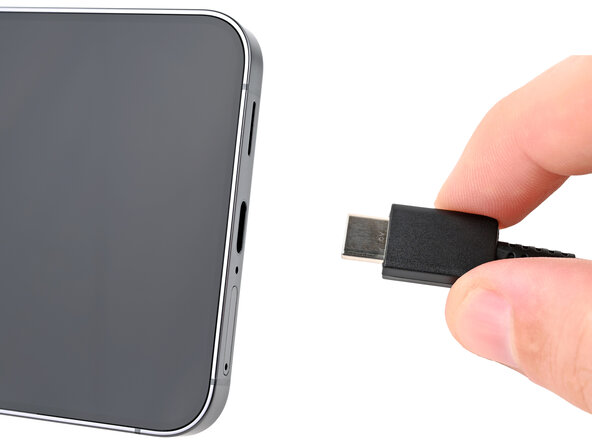
Step 16
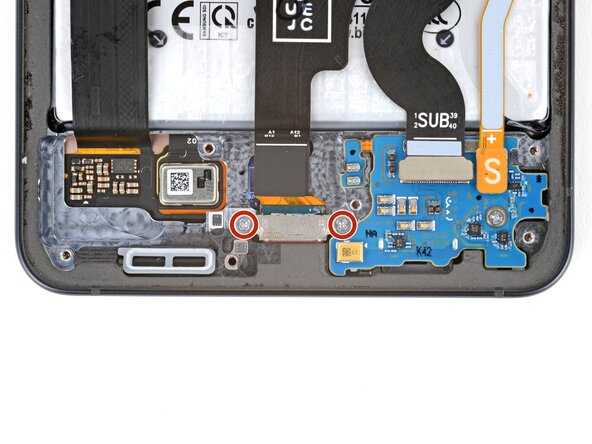
- Grab your Phillips screwdriver and confidently unscrew those two 2.3 mm long screws that are keeping that USB-C port under wraps! It's time to give your device the love and care it deserves.
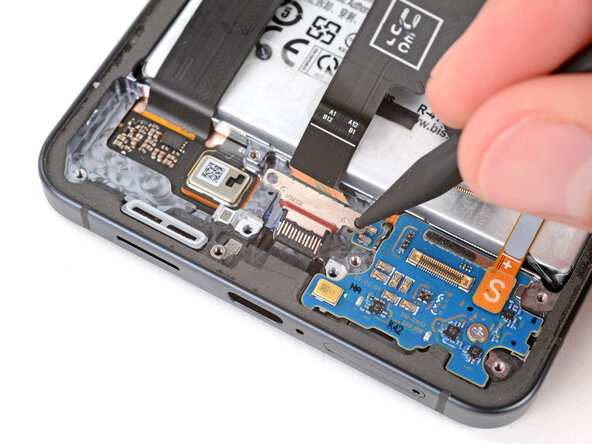
Step 17
If the cable is being stubborn, try using a hair dryer or heat gun to give it a little warmth and coax it into place.
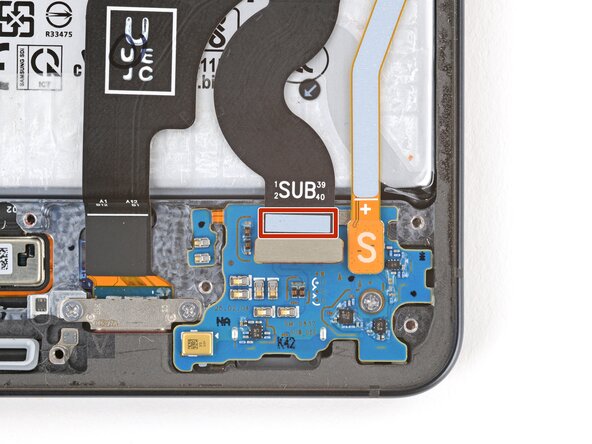
- A touch of mild adhesive is holding the USB‑C port cable snugly to the sub board, right by that little white section below the SUB text. No biggie!
- Give that USB‑C port cable a warm hug with a heated iOpener for about two minutes to melt away the adhesive. You'll be on your way to a smooth repair in no time!
Tools Used
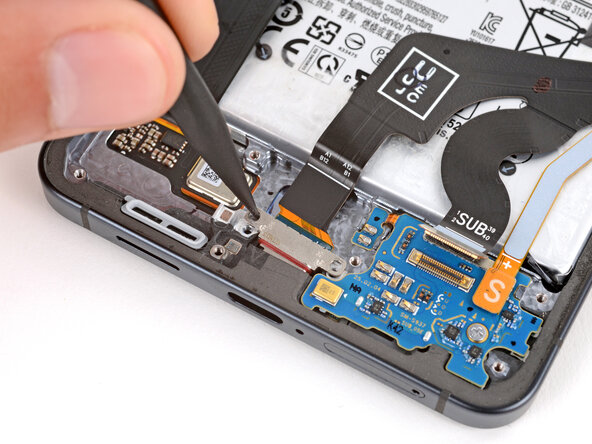
Step 18
Handle the USB‑C port cable with care—no creasing or tearing allowed!
- Gently lift the USB-C port cable off the sub board using your fingers—think of it as a delicate peel, not a rip. Take your time, and if you need a hand, you can always schedule a repair.
Step 19
- Take your trusty spudger and gently insert the tip into one of the screw holes on the USB‑C port. Give it a little push to nudge the port away from the bottom edge of your device.
- Switch things up between the screw holes as you go, until that port slides out nice and easy from its snug little home.
Tools Used
Step 20
- Check out your shiny new part and make sure it matches the original—you might need to move over a few bits or peel off any protective adhesives before you lock it in.
- To put everything back together, just reverse these steps and you’ll be up and running.
- When it’s time to part ways with your old electronics, drop them off at an R2 or e-Stewards certified recycler and keep things green.
- If things didn’t go to plan, try some good old troubleshooting—or reach out to our Answers Community for some tips.
- Still stuck? You can always schedule a repair and we’ll get you sorted.