Samsung Galaxy S4 Active Front-Facing Camera Replacement Guide DIY Tutorial
Duration: 45 minutes
Steps: 9 Steps
Hey there, repair rockstar! Just a friendly reminder to be careful while you work on your device. It’s super important to follow each step closely and handle everything with care. If you find yourself in a jam, don’t hesitate to reach out for help. You can always schedule a repair if you need it!
If your selfies are looking a bit cloudy or dim, don’t worry! This guide will help you swap out the front-facing camera on your Samsung Galaxy S4 Active. Just a heads up: tinkering with waterproof devices might affect their water resistance, so proceed with care. If you need help, you can always schedule a repair.
Step 1


– Use a plastic opening tool or even your trusty fingernail to gently pry into the little notch just to the left of the rear camera, right near the power button. It’s like unlocking a secret door!
– Now, grab the corner nearest to our secret notch and lift the rear case right off. Voila! The back is off, just like that!
Step 2

– Pop open the battery compartment with a plastic opening tool or just use your finger. Lift the battery up and away you go!
Step 3

– Hey, tech fan! Get ready to dive into this microSD card adventure. Use your cool opening tool or trusty fingernail to send that card on a little journey into its slot. When you hear that satisfying click, give it a friendly release and watch it pop out, ready for its close-up!
Step 4

– Grab a plastic opening tool or use your superhero fingernail to gently push the SIM card deeper into its slot until you hear a satisfying click.
– Once you hear that click, let go of the card and watch it spring out of its slot like a jack-in-the-box.
– Now, just remove the SIM card and voila!
Step 5

– Grab your spudger and playfully pry off those four shiny metallic pads hiding in each corner. They can’t stay there forever!
– Time to unscrew some secrets! Whip out your Phillips #00 screwdriver and twist out the 12 screws that are keeping the midframe cozy with the device.
Tools Used


Step 6

– Grab your plastic opening tool and let’s give the midframe a little nudge. Gently pry around the edges to free it from the clutches of the front case. It’s like opening a treasure chest, but cooler because you’re fixing tech!
Step 7
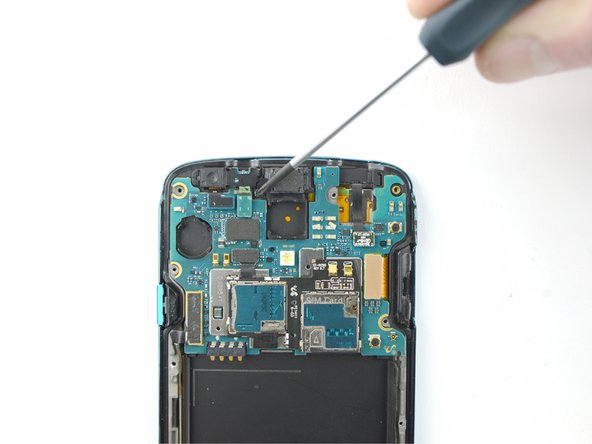

– Grab your trusty Phillips #00 screwdriver and gently loosen the tiny 0.3mm screw holding down the mysterious black cover that houses the camera sensor.
Tools Used
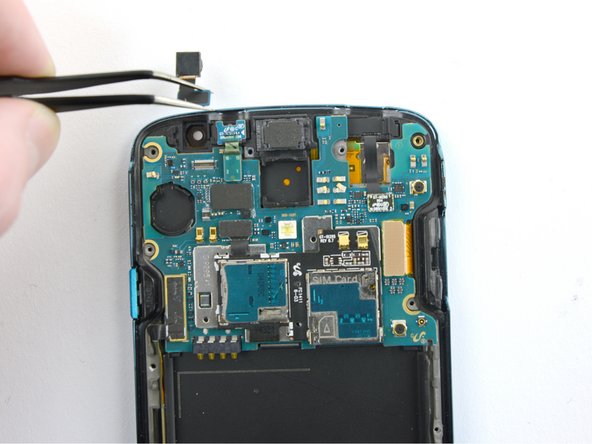
Step 8


– Time to bust out those precision tweezers and stylishly remove the sleek black camera backing.