Samsung Galaxy S4 Active Motherboard Replacement Guide: Step-by-Step DIY
Duration: 45 minutes
Steps: 9 Steps
Hey there! If you’re feeling stuck, remember that our expert technicians at Salvation Repair are always here to help. Don’t hesitate to reach out and schedule a repair for some extra assistance!
Follow this fabulous guide to swap out a wonky motherboard in your Samsung Galaxy S4 Active. Let’s bring your gadget back to life!
Step 1


– Use a plastic opening tool or your own fingernail to gently pry near the little notch to the left of the rear camera, close to the power button. Feels like opening a treasure chest, right?
– Now lift the rear case from the corner near our little opening spot and wave it goodbye as you remove it from the phone.
Step 2

– Grab your trusty plastic opening tool or just your fingernail, and give that microSD card a gentle nudge deeper into its cozy slot until you hear a satisfying click.
– Once you hear that click, let go of the card and watch it spring right out of its snug little home!
– Now, go ahead and take out the microSD card with a smile!
Step 3

– Grab a plastic opening tool or just use your finger to pop into the notch of the battery compartment. Give it a gentle lift and voila, the battery comes right out!
Step 4

– Grab a plastic opening tool or use your ninja-like fingernails to gently press the SIM card a tad deeper into its slot until you hear a satisfying click.
– Once you hear that sweet click, let go of the card and watch it spring out of its slot like a toast from a toaster.
– Go ahead and pluck the SIM card out. Voila!
Step 5

– Grab your spudger and playfully pry off the four shiny metallic pads chilling in each corner. They’re just hanging out there!
– Now, whip out your trusty Phillips #00 screwdriver and show those 12 screws who’s boss! Unscrew them to detach the midframe from the party.
Tools Used


Step 6

– Grab your plastic opening tool and let’s play a little pry-and-seek around the edge of the midframe to pop it free from the front case. It’s like unlocking a treasure chest, but, you know, with electronics!
Step 7


– Pop off the USB board connector with the flat end of a plastic opening tool. Easy does it!
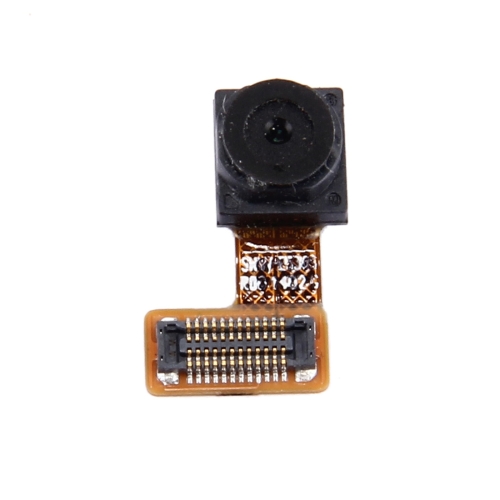
– Unplug the front-facing camera cable connector. Just a little nudge!
– Detach the earpiece speaker assembly cable connector. You got this!
– Unhook the headphone jack assembly cable connector. Almost there!
– Disconnect the display/digitizer cable connector. Nice and gentle!
– Remove the antenna cable connector. You’re doing great!
Step 8

– Unscrew the lone 2.4 mm Phillips #00 screw securing the motherboard assembly. You’re doing great!