Samsung Galaxy S5 Display Assembly Replacement
Duration: 45 minutes
Steps: 20 Steps
Follow this guide to swap out your display assembly, which has the front glass, digitizer, and home button cable all bundled together. You've got this! And if you hit a snag, don't hesitate to schedule a repair for a little extra help.
Step 1


- Pop in a fingernail or grab a plastic opening tool and slide it into the little groove next to the rear-facing camera.
- Carefully nudge and twist to detach the flexible rear cover from the back of your phone. You've got this!
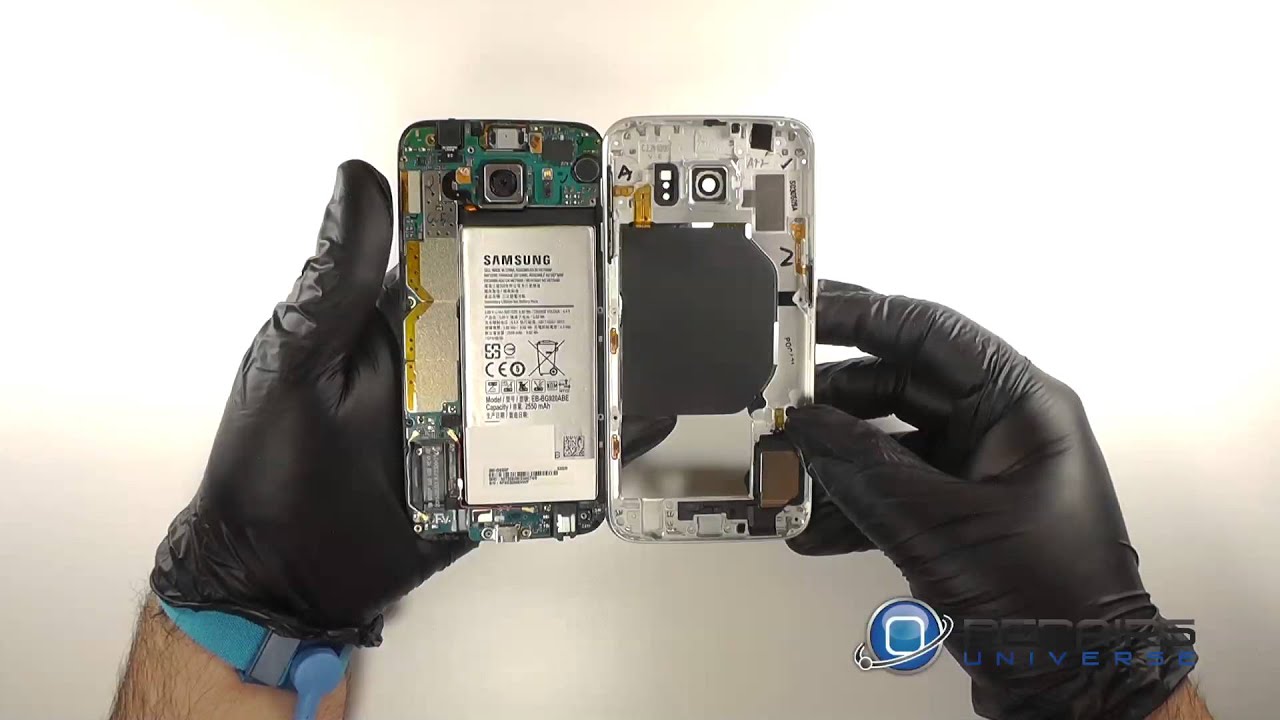
Step 2


- Slide a fingernail or a plastic opening tool into the little groove at the bottom right corner of the battery and gently pry it up.
- Lift the battery out and set it aside.
Step 3


- Gently use your fingertip to slide the microSD card straight down and out of its slot.
- Carefully take the microSD card out of the phone.
Step 4

- Follow the same steps as before to carefully remove the SIM card. Keep it smooth and steady—you're doing great!
Step 5


- Grab a plastic opening tool and gently pop up the plastic midframe connector panel.
- Use tweezers to lift the panel out—easy does it.
- When putting things back together, the original adhesive should do the trick, but if it’s not sticking, a bit of double-sided tape will keep everything in place.
Step 6


- Grab that trusty spudger's pointy end and gently lift the home button cable connector straight up from its socket. Keep it careful and steady—no rush needed. If you need a hand, you can always schedule a repair.
Tools Used

Step 7


Next up, you'll use an iOpener to soften the glue holding your screen to the rest of your phone. Heating things up makes the screen much easier (and safer) to remove. For tips on using your iOpener, check out our heating guide and keep an eye out for the safety notes.
- Grab your trusty heated iOpener and set it down on the left side of your phone for a solid 90 seconds. Let that heat do its magic!
- Give that iOpener another round of heat, then place it on the right half of your phone. We're almost there!
Tools Used

Step 8


Get ready to tackle the next steps! You'll be using an opening pick to gently separate the adhesive holding that front panel glass in place. Remember, only pry where we guide you! If you feel any resistance, just pause and reapply some heat before continuing. You're doing great!
- Slide the tip of your opening pick under the bottom right corner of the front glass—like you’re sneaking a backstage pass.
Step 9


- Gently glide the opening pick along the right edge of the display.
Step 10


- Gently glide the pick around the corner, pausing just before reaching the speaker grille at the top of the phone.
Step 11


The adhesive holding down the top of the phone is just a thin strip right above the earpiece speaker. Glide your pick carefully along the top of the speaker to keep from messing up any internal parts.
- Glide the opening pick along the top edge of your phone—keep it shallow, no deep dives!
Step 12


If that cooling adhesive is putting up a fight, just heat up your iOpener again and show the left side of your phone who’s boss.
- Glide your pick with style around that upper left corner—nice and easy!
Tools Used
Step 13


- Gently glide that opening pick down the left side of your phone, stopping just shy of the lower left corner. You've got this!
Step 14


Next up, you’ll be setting a toasty iOpener on the home button side of your phone—just keep an eye on your opening pick so it doesn’t make a break for it.
- Gently slide that opening pick all the way down to the bottom left corner of your phone, and make sure it's snug in there like it belongs!
Tools Used
Step 15

This area has some sensitive parts, so make sure the adhesive is nice and warm—soft glue means less risk for your phone. Easy does it!
- Grab your reheated iOpener and lay it across the bottom part of the screen. Give it a minute to work its magic on that adhesive.
Tools Used
Step 16


Hey there! Just a heads up: the bottom part of your phone is home to those delicate soft button and home button ribbon cables. If you push the opening pick in too deep, you might accidentally snip those cables. So, be gentle and take it easy while you work!
- Glide the tip of your opening pick along the bottom edge of the screen to gently free up the last bits of stubborn adhesive.
Step 17


If the front panel is being stubborn, you might need to carefully slice through some extra adhesive.
- Give that opening pick a little twist to pop the glass off your phone like a pro!
Step 18


Be gentle with those cables! They're super thin and can get damaged easily. When peeling them off the display assembly, make sure to handle them with care so you don't accidentally slice them.
If the front panel is sticking, you might need to gently coax the adhesive on the soft button cable to let go.
- Gently slide an opening pick under the soft button icons on the display. Once you're in, carefully lift the button cables away from the inside of the front panel like a pro!
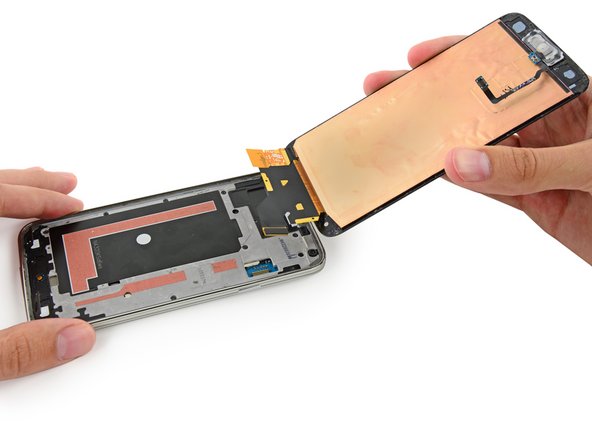
Step 19


Don't pull the front panel off just yet—it's still hanging on by a connector. Patience, friend!
If you're keeping the home button flex cable, handle it gently. That sticky adhesive loves to grab, and if the cable rips away from the button, you'll lose fingerprint scanning (even though the button will still click).
- Gently lift the home button end of the display assembly, but leave it attached for now. You're doing great!
Step 20


- Ready to put everything back together? Just follow these steps in reverse and your device will be good as new.
- If you run into trouble or want the pros to handle it, you can always schedule a repair.