Samsung Galaxy S5 Front Facing Camera Replacement
Duration: 45 minutes
Steps: 30 Steps
Got a front-facing camera that's not facing the facts? Replace it with this easy-to-follow guide from Salvation Repair and get back to snapping selfies in no time. Follow these steps to swap out the faulty camera and get your device working like new again.
Step 1


- Slide a fingernail or plastic opening tool into the notch just to the left of the rear camera. Gently pry and twist to lift the flexible rear cover away from the back of the phone. If you need help, you can always schedule a repair.
Step 2


- Gently slide a fingernail or a trusty plastic opening tool into the little gap at the bottom right corner of the battery and give it a lift. You've got this!
- Carefully pull the battery away from the phone. Easy peasy!
Step 3


- Gently slide your fingertip down to pop the microSD card out of its slot.
- Take out the microSD card and set it aside for safekeeping.
Step 4

- Go ahead and repeat the previous steps to safely pop out the SIM card.
Step 5


- Grab your trusty plastic opening tool and gently pry up that plastic midframe connector panel—think of it as coaxing it to come out and play!
- Once you've got it loose, use a pair of tweezers to lift out the connector panel. It's like a delicate dance, so take your time!
- When it's time to put everything back together, there should be enough adhesive to stick the panel back on. If it's feeling a bit shy, just add a tiny bit of double-stick tape for support!
Tools Used

Step 6


- Now it's time to carefully pry the home button cable connector straight up off its socket using the sharp tip of a spudger. Take your time and be gentle, you've got this!
Tools Used

Step 7


Get ready to unlock your phone's display assembly! In the following steps, you'll be using an iOpener to loosen the adhesive that's holding it in place. This nifty tool will make the screen removal process a whole lot safer and easier. To get the most out of your iOpener, be sure to check out our handy heating guide and take note of the important warnings.
- Warm up your iOpener and let it hang out on the left edge of your phone for a solid 90 seconds.
- Give your iOpener a quick reheat, then move it over to the right side for equal treatment.
Tools Used

Step 8


Get ready to dive into the next steps! You'll be using an opening pick to gently break the bond of the adhesive that’s keeping the front panel glass intact. Remember, only pry where we guide you. If you hit a snag, just pause and reheat that area before continuing with the pick. You’ve got this!
- Slide the edge of your trusty opening pick beneath the bottom right corner of the front glass and get ready to make some magic happen.
Step 9


- Gently glide the opening pick along the right edge of the display.
Step 10


- Gently glide that pick around the corner, but hold up right before you hit the speaker grille at the top of the phone!
Step 11


Let's get started with the repair! The adhesive at the top of the phone is only a narrow strip above the earpiece speaker, so be careful. To avoid damaging any internal components, gently slide the pick along the top of the speaker. You're doing great!
- Gently glide the opening pick along the top edge of the phone, taking care not to push it in too far.
Step 12


If you hit any stubborn resistance from the cooling adhesive, just rewarm that iOpener and give the left side of the phone another gentle press. Persistence pays off—keep at it, and if you need a hand, schedule a repair.
- Gently maneuver that pick around the upper left corner like a pro!
Tools Used
Step 13


- Gently slide the opening pick down the left side of your phone, taking a little pause when you reach the lower left corner.
Step 14


Next up, gently place an iOpener over the home button area of the phone. Just keep an eye on your opening pick—it’s a slippery little bugger and might slip out. Take your time and keep everything steady.
- Glide the opening pick all the way down to the bottom left corner of your phone—make sure it’s snug and holding strong.
Tools Used
Step 15

Be gentle with this part of the phone - warm up that adhesive and loosen it with care to keep your phone safe and sound.
- Grab that warmed-up iOpener and gently place it on the bottom part of your display assembly. You've got this!
Tools Used
Step 16


Heads up! The bottom end of your phone is where the soft and home button cables live. Slide that opening pick in just a little—go too deep and you’ll slice those cables, and nobody wants that kind of drama!
- Gently glide the tip of the opening pick along the bottom edge of the display to break free the last bits of stubborn adhesive. Time to set that screen loose!
Step 17


If the front panel is hanging on for dear life, it might need a little more gentle work with your adhesive cutter.
- Give that opening pick a twist to gently pop the glass away from your phone. You've got this!
Step 18


These cables are like delicate little noodles, so be super careful when you're peeling them away from the display assembly. You want to avoid slicing them up like a pizza!
If the front panel is playing hard to get, it might be time to gently separate the adhesive on the soft button cable. No worries, you've got this!
- Slide an opening pick under the soft button icons on the display, and gently nudge those button cables away from the inside of the front panel.
Step 19


Hey there! Just a heads up: keep that front panel in place! It's still connected by a little cable friend.
If you're giving the home button flex cable another chance, be super gentle! That adhesive can be sneaky and might try to separate the cable from the home button. It’ll still work like a champ, but the fingerprint scanner? Not so much.
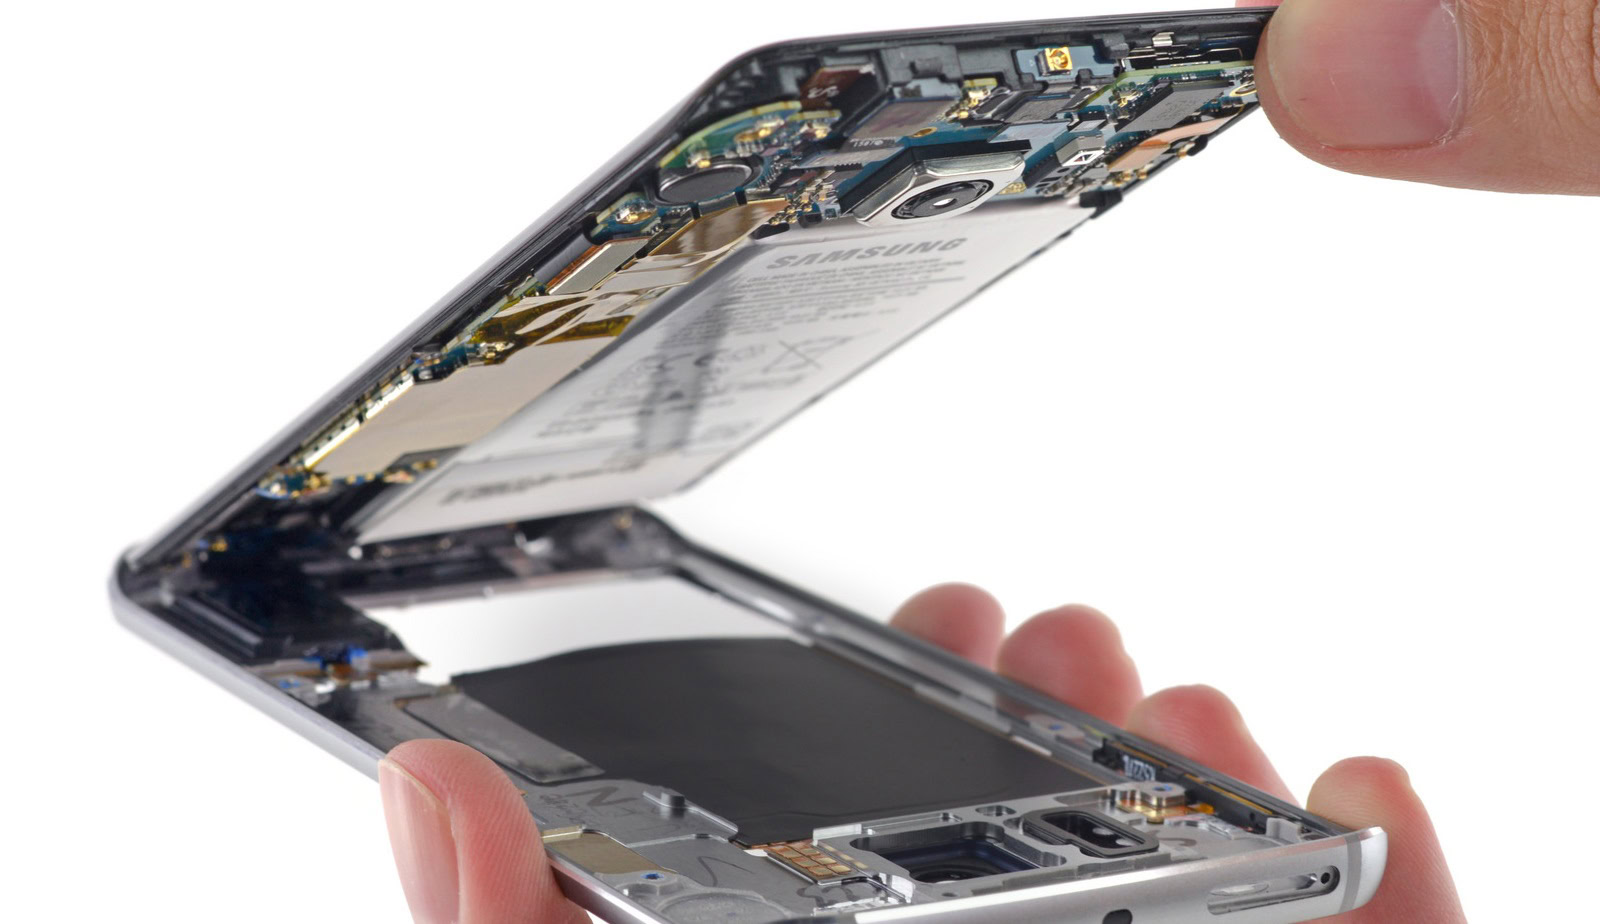
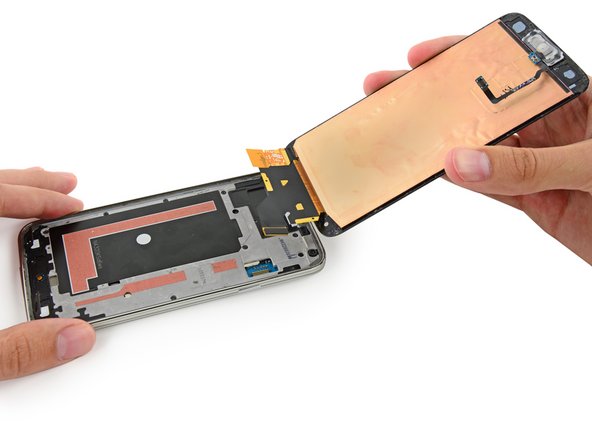
- Carefully pry up the display assembly from the home button end, but don't completely remove it just yet.
Step 20


- Grab your trusty spudger and gently nudge the front panel assembly cable connector straight up and away from its cozy home on the motherboard.
- Carefully lift the front panel assembly off the phone, making sure to do it safely.
- If your shiny new display is missing a home button, no worries! Check out our Home Button Assembly guide to swap your old button onto the new display or pop in a brand new one.
Tools Used
Step 21

- Time to get your tools ready! Unscrew those ten 3.4 mm Phillips #000 screws from the display side of the midframe. You've got this!
Step 22

Alright, time to get that phone flipped over and ready! Now, go ahead and take out those screws from the battery side of the midframe. You've got this!
- Let's get started by removing the two 4.4 mm Phillips #000 screws located near the USB port on the battery side of your phone - this will help you gain access to the inside
- Next, take out the single 4.4 mm Phillips #000 screw, and you'll be one step closer to fixing your device
Step 23


- Take your trusty plastic opening tool and gently glide it down the left inner side of the interior frame. This will help you pop open those three white plastic clips with ease!
Step 24


Gently nudging from the inside of the battery compartment can work wonders, but tread carefully! We wouldn't want to flex the midframe too much since the motherboard is cozy there. Keep it safe and sound!
The midframe is made up of two parts that snugly fit around the motherboard, providing support and protection. Keep it together, and your device will be happier for it!
- Carefully flex the long sides of the silver bezel outward to pop apart the two halves of the midframe.
Step 25


- Move on to the right side of the silver bezel and gently pull it away from the inside part of the midframe—just keep going until the two halves come apart.
Step 26


- Grab your trusty plastic opening tool and gently work it into the corners of that shiny silver bezel. It's time to pop those last stubborn bits free!
Step 27


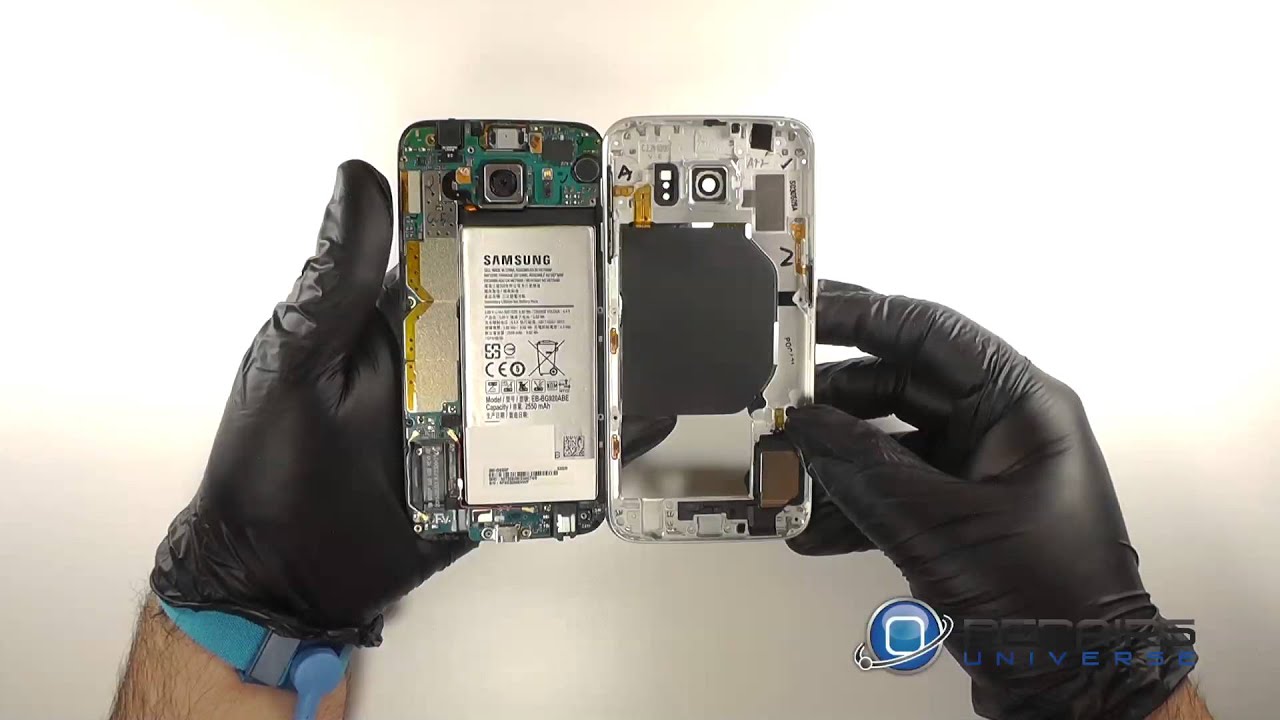
- Gently lift out the interior midframe and motherboard assembly from the white inner midframe, like you’re unveiling a surprise gift!
Step 28

- Let's get started by removing the single 3.0 mm Phillips #00 screw that holds the motherboard in place to the midframe.
Step 29


Be careful not to fully remove the motherboard just yet, since it's still connected to the midframe via the Micro-USB port daughterboard connector. Take your time and work carefully to avoid any damage.
- Gently pull the motherboard away from the midframe just enough to reach the connectors on the back. Don’t yank it all the way out just yet!
- Rest the motherboard on a clean, flat surface. Use one hand to steady the inside of the midframe, so your other hand is free to work some motherboard magic.
Step 30


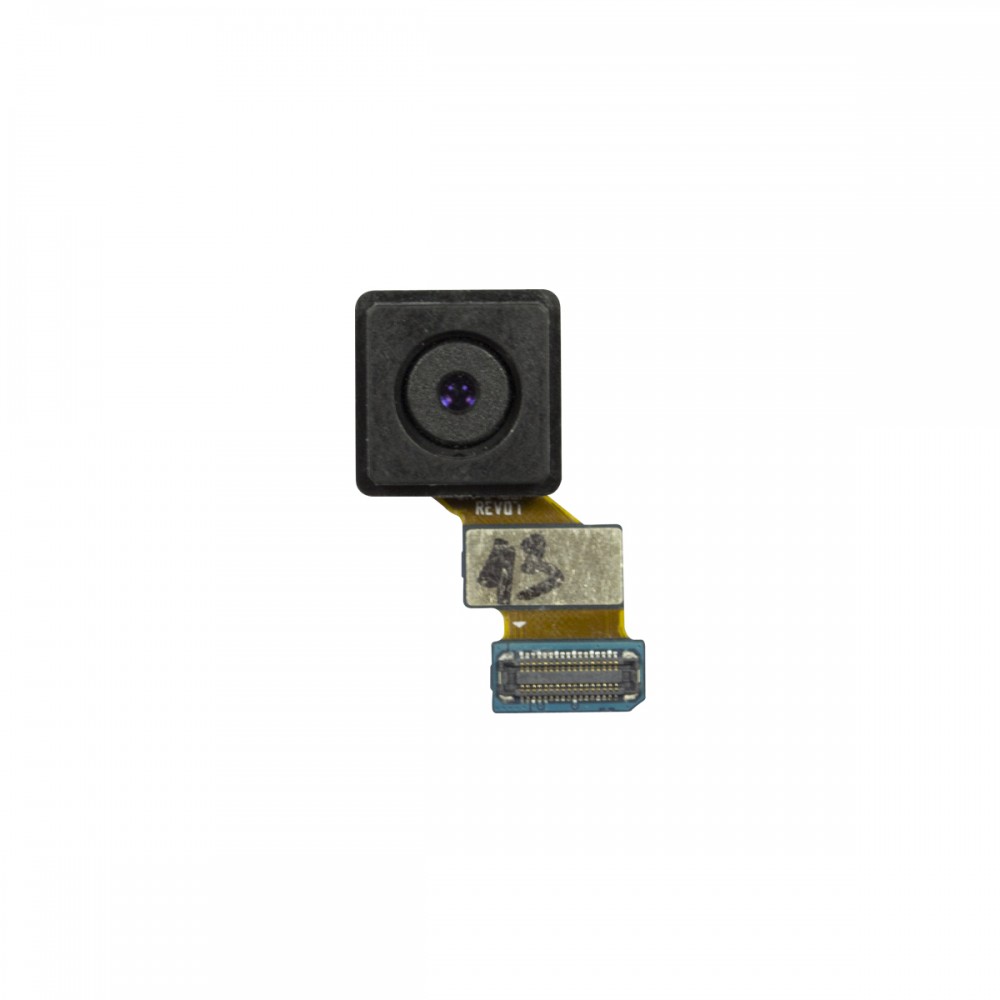
- Gently pop the front-facing camera connector straight up from its spot on the motherboard using the flat end of a spudger—think of it as giving the connector a little lift.
- Grab a pair of tweezers and carefully remove the front-facing camera from the motherboard. Easy does it!