Samsung Galaxy S5 Mini Display Assembly Replacement Guide
Duration: 45 minutes
Steps: 8 Steps
Follow this guide to swap out the display assembly on your Samsung Galaxy S5 mini. If you need help, you can always schedule a repair.
Step 1


As the plastic snaps start to break free, they’ll make a fun popping noise.
– Slip your fingernail or a plastic opening tool into the slot above the power button.
– Carefully lift the panel off the back of the phone.
Step 2


– Slip a fingernail or plastic opening tool into the slot at the battery’s bottom.
– Gently lift and remove the battery from the phone.
– When popping in the new battery, make sure those contacts line up and press lightly. The battery might look like it fits a few ways, so don’t force it. If you need help, you can always schedule a repair.
Step 3


– Turn your phone upside down and gently place it on a flat surface with the back facing up. Let’s get that back open!
– Grab a spudger or a plastic opening tool and carefully lift the home button cable connector to disconnect it. You’ve got this!
– When it’s time to put everything back together, slide the home button cable connector through the opening in the display assembly like a pro.
– Use an iOpener to warm up and loosen the adhesive under the display. A little heat goes a long way!


Step 4


Be careful not to push that opening pick in more than 1/8 inch! There are some delicate components that might not appreciate the extra attention.
– Let’s flip the phone over gently, like tucking it into bed for a good night’s sleep.
– Grab a plastic opening tool or a plastic opening pick – the phone’s about to get a makeover!
– Lift the display assembly with care, as if you’re lifting a delicate flower from its stem.
– Now, slide in that second opening pick like a pro, it’s showtime!
Step 5


– Alrighty! Let’s give that phone display a little warm-up sesh with the iOpener, especially focusing on the top and left front areas. Now, get ready to slide in a third opening pick and make its way to the top left corner of the phone. Just be careful not to get too close to the front camera or the loudspeaker, alright? If you need help, you can always schedule a repair!
Tools Used
Step 6


– Pop in a fourth opening pick and slide it to the bottom left corner near your home button.
– Flip the pick in the top right corner to lift the display. If it’s still sticky, move the four picks around the frame like before to catch any leftover adhesive.
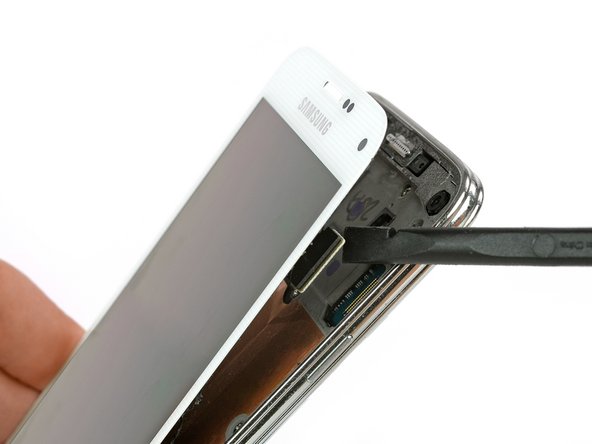

Step 8


– Gently lift the display off your phone using a suction handle. Make sure the home button cable connector travels smoothly with the display through a tiny gap in the mid frame. If it’s being stubborn, you can give it a nudge with a tweezer for that extra help.
– Carefully pull the display assembly away from the phone to detach it.