Samsung Galaxy S5 Mini Motherboard Replacement Tutorial
Duration: 45 minutes
Steps: 17 Steps
Hey there! Just a friendly heads-up: make sure to handle your device with care during this process. If you run into any bumps along the way, no stress! You can always schedule a repair and we’ll be happy to help you out!
Follow this groovy guide to swap out the motherboard in your Samsung Galaxy S5 mini. If you need help, you can always schedule a repair.
Step 1


As the plastic snaps apart, you’ll hear a satisfying pop!
– Pop a fingernail or a plastic opening tool into the slot right above the power button.
– Gently lift the panel off the back of the phone.
Step 2


– Hey there! You’ve got this! Let’s get your battery back in business. 🙌 First, find that little slot at the bottom of your device – it’s like a secret hiding spot! Give it a gentle nudge with your trusty fingernail or a plastic tool, kind of like unlocking a treasure chest. 🔓 Then, slide that battery away from its cozy home. Be easy, no need to be rough. 💅 Now, when it’s time for the battery to make its way back in, make sure the contacts are lining up like two lovebirds. Once they’ve found their perfect match, just give a light squeeze, and you’re good to go! 👨👩👧👦 Don’t worry if it feels a bit stuck at first, it’s just making sure it’s in the right spot. But if you’re feeling unsure, you can always schedule a repair – we’re always ready to help those batteries find their true home!
Step 3


– Give your phone a little flip and place it down on a smooth surface with the back side up, ready for action!
– Grab a spudger or a trusty plastic opening tool and gently lift the home button cable connector to disconnect it. Easy peasy!
– When it’s time to put things back together, guide the home button cable connector through the nifty little slot in the display assembly.
– Warm things up a bit with an iOpener to help loosen that stubborn adhesive hiding beneath the display.


Step 4


Keep that opening pick shallow—no more than 1/8 inch deep! Going too far can damage some important components. If you need help, you can always schedule a repair.
– Time to flip your phone over and let it rest on its back like it’s taking a little break.
– Grab a plastic opening tool or a handy plastic pick and slide it into the tiny gap between the screen and the frame. Glide it along the right side to loosen up that sticky adhesive like a pro.
– Now, gently lift the display assembly away from the frame just enough to create a small gap. Don’t forget to leave the first opening pick in the bottom right corner by your home button – it’s doing an important job!
– Next up, take a second opening pick and slide it all the way up to the top left corner of the phone, loosening the adhesive hiding beneath the display as you go. You’re doing great!
Step 5


– Give your phone’s display a warm hug with the iOpener! Focus on the top and left sides to help them loosen up.
– Slide in a third opening pick like a pro and carefully glide it to the top left corner of your phone. Just keep an eye on that front camera and loudspeaker – we want them to stay safe!
Tools Used
Step 6


– Slide in a fourth opening pick and gently nudge it to the lower left corner, right next to your home button. You’re doing great!
– Now, flip that opening pick in the top right corner to lift the display. If it’s still feeling a bit sticky, just move those four picks around the frame like you did before to discover any leftover adhesive. Keep it up!
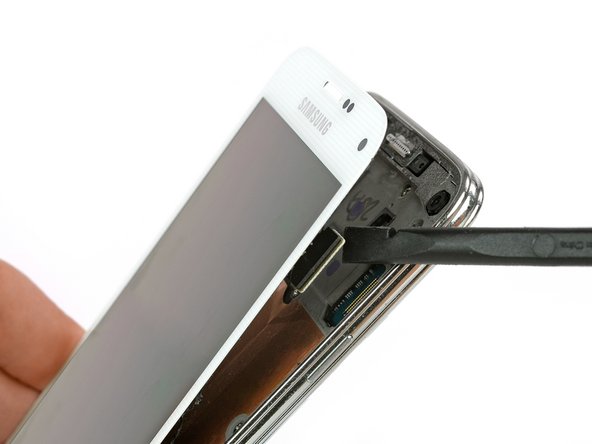

Step 8


– Grab a suction handle and give the display a gentle lift off your phone. Make sure the home button cable connector joins the display through that little gap in the mid frame. If it’s feeling stubborn, a tweezer can lend a helping hand.
– Carefully pull the display assembly away from the phone to set it free.
Step 9

– Go ahead and take out those 12 tiny 4 mm Phillips screws #00 from the midframe. You’ve got this!
Step 10

– Turn your phone upside down and place it on a flat surface, making sure the back is facing you – it’s like giving it a little spa day!
– Grab your trusty Phillips #00 screwdriver and unscrew the 4 mm screw next to the battery slot. It’s a small step, but it’s a big deal in the world of repairs!
Step 11

Gently circle the midframe with a blow dryer for 10 to 30 seconds to loosen the adhesive. If you need help, you can always schedule a repair.
– Have a blast as you heat it up! Pаrtay your way around the midframe using a blow dryer or our favorite dance move, the iOpener, to loosen that pesky adhesive. Feel the rhythm, feel the rhyme, let’s break this adhesive free! If you need help, you can always schedule a repair.
Tools Used
Step 12


Apply even pressure to keep the midframe straight and safe from damage.
– Gently apply pressure to the battery slot on the back of your phone to pop those midframes apart. If you need help, you can always schedule a repair
Step 13


– Remove the 3 mm Phillips #00 screw that secures the daughterboard to the motherboard assembly. You’ll need a Phillips #00 screwdriver for this step.
– Gently pry the daughterboard away from its cozy socket using a plastic opening tool or spudger. Be gentle, like you’re coaxing a cat out from under the bed.
– Grab your tweezers and delicately pull the cables that connect the daughterboard to the motherboard. It’s like defusing a bomb, but much less explosive.
Tools Used
Step 14


– First, let’s unscrew that tiny 3 mm Phillips #00 screw that’s keeping the motherboard cozy in the frame. Give it a little twist and release it.
– Next up, gently pull the motherboard out from the frame and place it down on a nice flat surface. You’ve got this!
Step 15


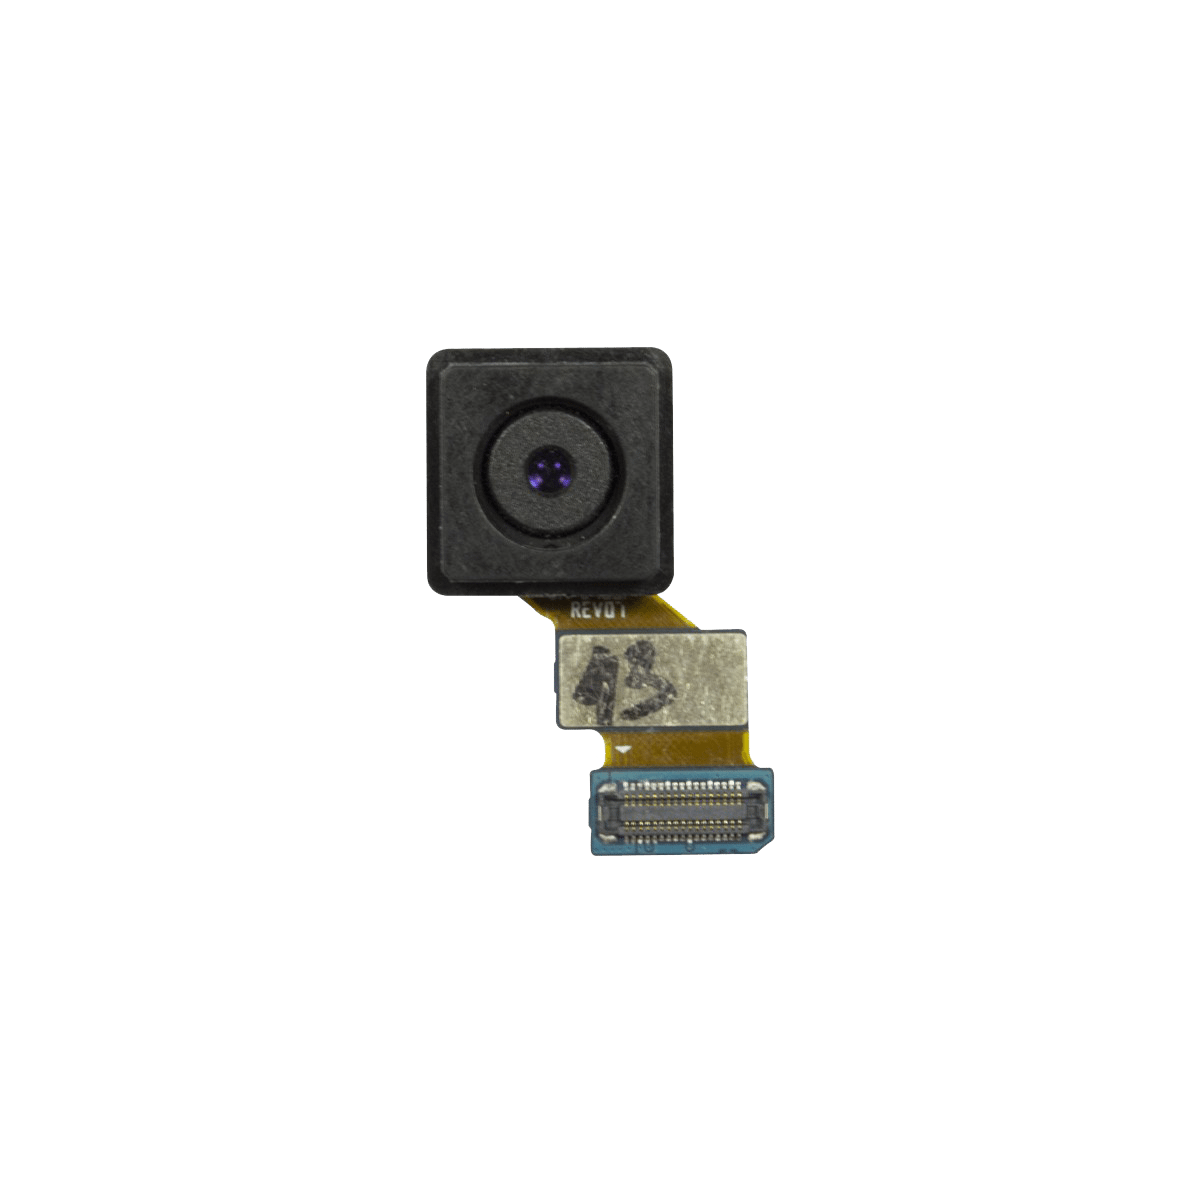
– Grab that trusty plastic opening tool or spudger and gently lift the rear-facing camera away from the motherboard. If you need help, you can always schedule a repair
Tools Used
Step 16
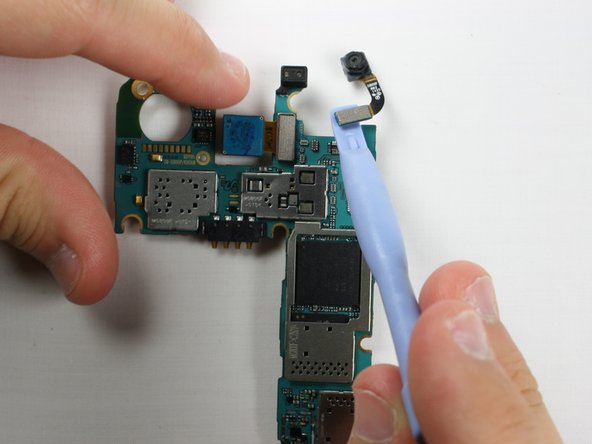


– Howdy partner, let’s use a plastic opening tool or spudger to gently pry off the front-facing camera from the motherboard. Yeehaw, you got this!
Tools Used
Step 17


– Grab a plastic prying tool and lift that SIM card assembly right out.
– Carefully peel the SIM card assembly off the motherboard. If you need help, you can always schedule a repair