Samsung Galaxy S5 Sport Rear Camera Replacement Guide
Duration: 45 minutes
Steps: 7 Steps
Hey there! If you run into any trouble during the repair process, don’t sweat it! Just reach out and schedule a repair with our friendly experts at Salvation Repair. We’ve got your back every step of the way!
Welcome to the exciting world of repair with Salvation Repair! In this adventure, you’ll be swapping out the back facing camera on your device. As part of this journey, get ready to bid farewell to the screen, buttons, battery, and protective plate. Remember, taking on this challenge might lead to the need for a few other parts to join the replacement party. If you need help along the way, you can always schedule a repair with us. Let’s dive in and make your device camera-ready again!
Step 1


– Alrighty, let’s kick it into gear! Groovy news, our buddy schedule a repair will help anytime you need! So, let’s uncover the groovy space behind the casing. Here’s a fun fact: you’ll find the secret clue at the top. Just follow the path of the notch, and voila! You’re in business. Ready to rock it, my friend?
Step 2


Remember, taking good care of the battery is key to keeping your device safe and sound!
– Gently lift the battery using a handy plastic spudger or your trusty fingernail.
Tools Used

Step 3


When it comes to working with electronics, it’s key to pick the right tool that’s ESD-safe to prevent any mishaps with your device. The metal spudger is your go-to for heavy-duty prying, but opt for the trusty black nylon spudger or a plastic opening tool whenever you can.
– Hey there, tech enthusiast! Put on that fun, nerdy smile and let’s tackle this together. Unleash your inner fixer and grab a plastic tool or spudger to gently lift the screen. Don’t worry if you accidentally melt some adhesive; mistakes are totally okay and part of the learning process. Remember, you’re not alone! If things ever get a bit tricky, you can always schedule a repair to get that expert guidance and support you deserve.
Tools Used
Step 4


Hey there! Keep the phone at a safe distance from your face and eyes. Tiny glass shards might pop out, or the metal spudger could go rogue. If you need help, you can always schedule a repair.
Peek around the upper right corner of the LCD screen where you’ll find a connecting ribbon. Take it easy to avoid any unexpected disconnections to the motherboard.
– Whoopsie daisy! If your phone’s plastic cover and LCD screen broke up, it’s no biggie. Just use that friendly nylon spudger to gently remove the LCD screen too. Keeping it chill and not applying too much pressure will make sure everything stays copacetic. If you need help, you can always schedule a repair!
Tools Used
Step 5

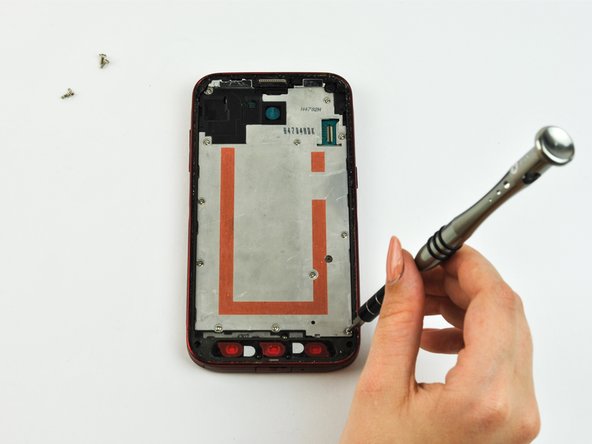

– Unscrew those seventeen screws surrounding the plate like a pro!


Step 7


Gently press down with a light touch.
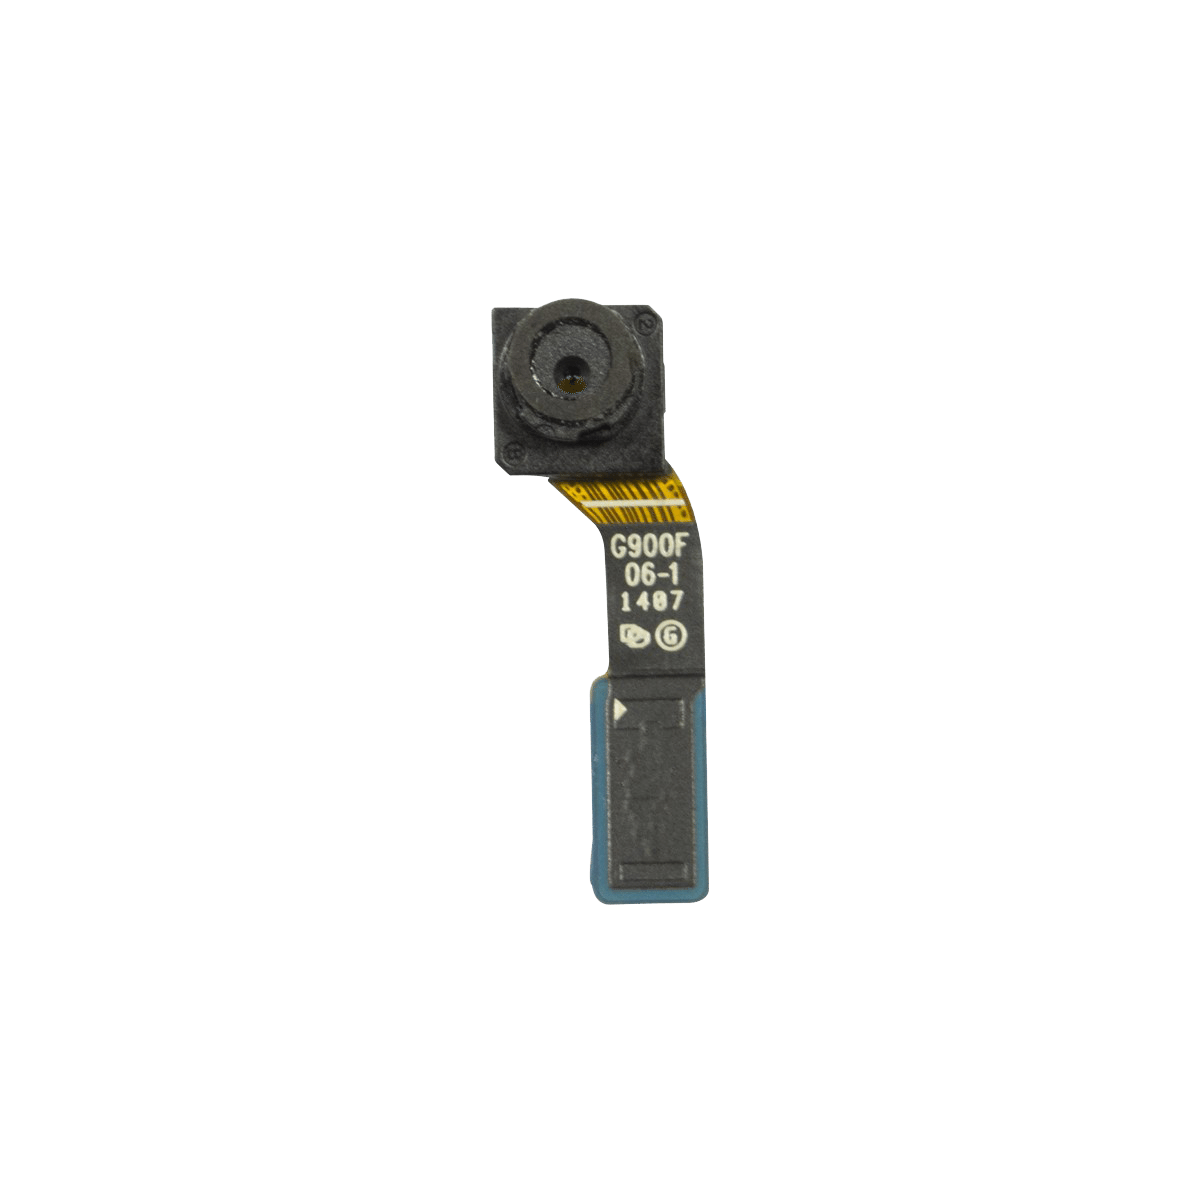
– Gently pop off the back-facing camera from the top of your phone by carefully detaching the ribbon cable from the connector using a spudger or tweezers. You’ve got this!