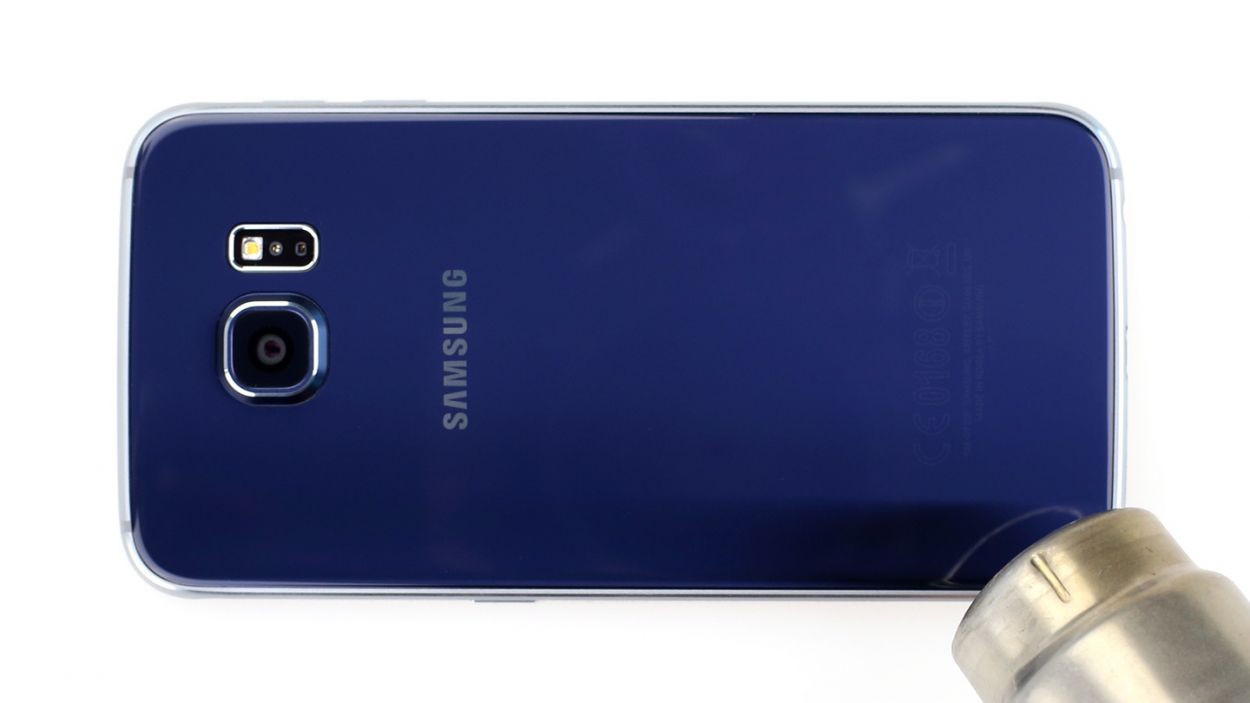
Samsung Galaxy S6 Display Frame Replacement Guide
Duration: 45 minutes
Steps: 49 Steps
Peeling off the rear glass means bidding adieu to the original adhesive. But no worries! Just swing by this guide to stick it back on like a pro.
Ready to give your Samsung Galaxy S6 a makeover? Let’s replace that display frame! We’re talking about separating the frame from the display assembly and carefully removing the earpiece speaker, motherboard, daughterboard, and vibrator. Heads up: removing the rear glass will wreck the adhesive, so you’ll need to reinstall the rear glass too. If you need help, you can always schedule a repair.
Step 1


– Grab a paper clip or your trusty SIM eject tool and locate the tiny hole on the power button side of your phone.
– Give it a gentle push to pop the SIM card tray right out. Easy-peasy!
Step 2

– Alright, let’s slide out that SIM card tray from your phone!
Step 3


Before we dive in, give your microwave a quick spa day by cleaning it out. Trust us, you don’t want yesterday’s leftovers becoming today’s repair sidekicks!
– Position the iOpener right in the middle of your microwave.
Tools Used

Step 4

Hey there! Just a friendly reminder to keep an eye on the iOpener while you’re repairing. Going overboard on the heat might make it pop, and nobody wants that! Remember, no heating above 100˚C (212˚F).
If the iOpener looks a little puffy, give it some space; it’s not feeling too good!
Still feeling a bit too warm to touch in the middle? No worries! Just keep using it until it cools down a bit before you heat it again. A well-heated iOpener should stay toasty for up to 10 minutes.
– Nuke the iOpener for a zippy thirty seconds.
– Keep the mojo going! As the iOpener loses its sizzle, zap it again for another thirty seconds whenever needed.
Tools Used
Step 5

Heads up! The iOpener gets pretty toasty, so handle with care. Maybe grab an oven mitt to keep those digits cool.
– Grab the iOpener from the microwave by its cool ends—stay away from that toasty middle!
Tools Used
Step 6


No microwave? No problem! Just heat your iOpener in some boiling water and keep the repair vibe alive!
– Grab a pot or pan and fill it with enough water to completely cover the iOpener.
– Bring the water to a boil and then switch off the heat.
– Submerge the iOpener in the hot water for 2-3 minutes, making sure it stays underwater.
– Use tongs to carefully lift the heated iOpener from the water.
– Dry the iOpener thoroughly with a towel.
– Your iOpener is good to go! If you need to reheat it, just boil the water again, turn off the heat, and leave the iOpener in the water for another 2-3 minutes.
Tools Used
Step 7


You can totally use a hair dryer, heat gun, or hot plate to help out, just be sure to keep the heat in check! Both the OLED display and the internal battery are a bit sensitive to heat, so let’s not turn them into puddles. Stay cool while you heat things up!
Opening up your phone might let the water gods in, so be sure to have some replacement adhesive ready before diving in. If you choose to reassemble without it, just keep your device away from any liquids to avoid a splash disaster!
If your glass is looking like a jigsaw puzzle, toss some packing tape over the whole panel. It’ll keep everything together while you work your magic during the removal process.
– Place the heated iOpener on the back panel for around two minutes to soften the adhesive along the glass edges.
– Move the iOpener to warm up the rest of the panel for another two minutes.
Tools Used
Step 8


Step it up a notch, my friend! Pop in the pick and consider adding a few drops of isopropyl alcohol to the mix. This magic potion will work its charm by weakening that stubborn adhesive in the upcoming steps. Get ready to roll!
– When the rear glass feels warm and toasty, grab your trusty suction cup and place it near the bottom edge of that glass.
– Give the suction cup a little lift to create a tiny gap beneath the rear glass, then slide in an opening pick to get things started.
Step 9


After you finish this step, it’s a good idea to leave the pick in place and grab another pick for the next part. This helps keep the glue you just separated from sticking back together.
Reheat the rear glass if needed to keep the glue from getting too cool and hardening up.
– Gently glide the pick along the bottom edge of your phone to carefully cut through the adhesive holding the rear glass in place. Remember, slow and steady wins the race!
Step 10


– Keep that momentum going! Just like before, heat things up and slice away at the other three sides of your phone.
– Don’t forget to slide an opening pick under each edge—it’s your secret weapon to stop that pesky adhesive from sealing back up.
Step 11


– Get ready to rock by using an opening pick to groove through any remaining adhesive.
– Now it’s time to be a hero – pull off the rear glass.
Step 12


– Ready to jazz up your device with some new rear glass? If you’re putting back the original rear glass or rocking a new one without adhesive, check out this guide!
Step 13

– Let’s get those thirteen 3.5mm Phillips #00 screws out of the midframe so we can dive deeper into the phone’s innards!
Step 14


Before you dive in, just a heads up: make sure you’ve removed the SIM card tray to avoid any potential issues.
– Grab the edge of the midframe assembly with a firm grip—you’re in control!
– Gently lift the midframe assembly while giving the battery a little push downwards to help separate it from the rest of the phone. You’ve got this!
– If you’re finding it tough to get that midframe loose, a little heat can work wonders! Try using an iOpener on the edges of the display to soften that sticky adhesive.
Tools Used

Step 16


– Grab your trusty spudger and gently slide the flat end under the battery connector. With a little finesse, pop it out of its cozy spot on the motherboard. You’re doing great!
Tools Used

Step 17


– Slide a plastic opening pick into the gap between the case and the battery.
– Gently wiggle the pick to further separate the battery from your device.


Step 19


– Grab your trusty spudger and gently use its pointed edge to unplug the Bluetooth and Wi-Fi antenna cable connectors from their cozy little sockets on the motherboard. You’ve got this!
Tools Used
Step 20


– Get ready to rock n’ roll by using the flat end of the spudger to gently disconnect the home button connector.
Tools Used
Step 21


– Grab the flat end of a spudger and gently pop that display assembly cable right off the motherboard. If you need help, you can always schedule a repair
Tools Used


Step 23


Hold your horses! Don’t yank the motherboard out just yet—it’s still connected to the daughterboard by a ribbon cable hiding on the underside of the motherboard.
– Carefully lift the camera side of the motherboard to detach it from the display frame.
Step 24


– Now it’s time to disconnect the daughterboard ribbon cable connector from its socket on the underside of the motherboard. Use the flat end of a spudger to gently pry it loose – you got this! If you need help, you can always schedule a repair
Tools Used


Step 26


– Gently slide the opening pick into the battery-side edge of the phone, right between the frame and display, keeping it at a nice, upward angle.
Step 27


If you’re finding it tough to cut through, just give the iOpener another warm hug and stick it back on!
– Glide that pick down the display’s edge to loosen up the sticky stuff underneath.
– Once you’ve cut through the adhesive, keep the pick in place to stop the display from sticking back to the frame.
Tools Used
Step 28


– Gently glide the pick along the bottom edge of your phone, starting from the headphone jack and continuing just past the charging port. You’re doing great!
Step 29


In case you accidentally break any of the capacitive buttons or ribbon cables, don’t worry! You have the option to replace the daughterboard assembly, which comes with brand new capacitive buttons. If you need assistance, feel free to schedule a repair.
– Slide an opening pick about half an inch (around 12mm) beneath the bottom corner of the display, right by the headphone jack.
– Keep that pick in there to stop the button from sticking back to the display. You’ve got this!
Step 30


– Slide an opening pick about 0.5 inches (~12mm) under the opposite bottom corner of the display.
– Keep the pick under the display to stop the button from sticking back to the display.
Step 31


– Alrighty, let’s get this show on the road! Slide your trusty opening pick along the side of your phone opposite the battery, like you’re dosing your buddy for a birthday party. After you’ve cut the adhesive, don’t forget to leave your pick bestie in the side of the display. We don’t want your display sneaking back into the frame like a true detective, now do we?
Step 32


– Glide a pick along the top of the phone towards the vibrator.
Step 33


– Use an opening pick to gently nudge the battery side of the frame away from the display.
– If the display and frame don’t come apart easily, use an opening pick to slice through any leftover adhesive. If it’s a tough cut, reheat and reapply an iOpener.
Tools Used
Step 34


– Guide that display’s flex cable through its designated hole in the frame so you can easily detach the right edge of the display.
Step 35

– Before popping in a new display, make sure to clear out all the old sticky stuff from the frame, and watch out for those sneaky glass bits!
– Once you’ve de-gunked and de-glassed the frame, give the sticky spots a good clean with 90% (or higher) isopropyl alcohol and a lint-free cloth or coffee filter. Swipe in one direction only, no back and forth!
– The pro move for attaching the new screen is using custom-cut double-sided tape. Stick the tape on the back of the screen, then carefully thread the display cable through the frame. Line it up and press into place.
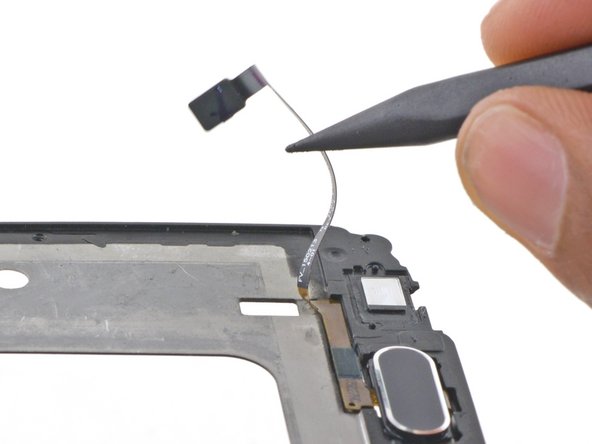
Step 36


– Get ready to rock and roll with the spudger! Use its pointed edge to lift that earpiece speaker assembly like a pro from the display frame.
Tools Used
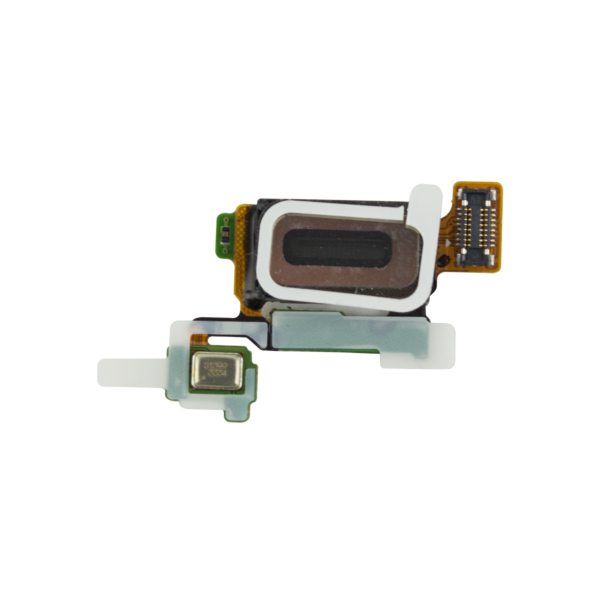
Step 37

This assembly is home to a speaker, microphone, IR blaster, and ambient light sensor—each cozy on its own little PCB. Before you lift the whole assembly out, make sure each component is ready to party and feeling loose!
– Gently coax the assembly out once it’s ready to make its grand exit.
Tools Used

Step 38


– Use a spudger to gently pop the vibrator out of the display assembly.
– Push to lift the vibrator and its spring-contact connector. If you need help, you can always schedule a repair.
Tools Used
Step 39

– Take out the vibrate module.


Step 44


Position the display frame so that the home button connector is facing you.
– Grab your trusty spudger and use its pointed edge to gently pry apart the home button ribbon cable from the display frame. You’re on the right track!
Tools Used
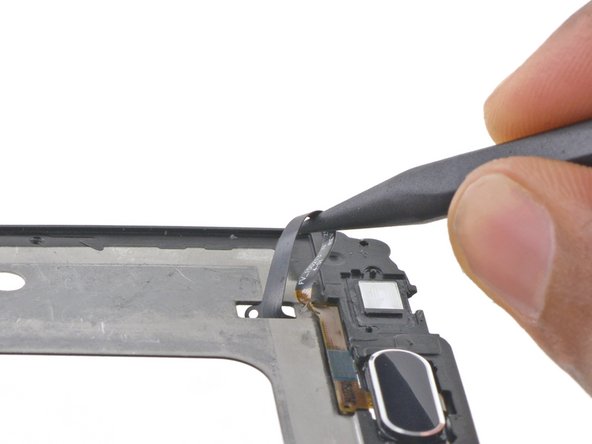
Step 45


– Grab that trusty spudger and use its pointed end to gently nudge the home button cable through the display frame. You’ve got this!
Tools Used
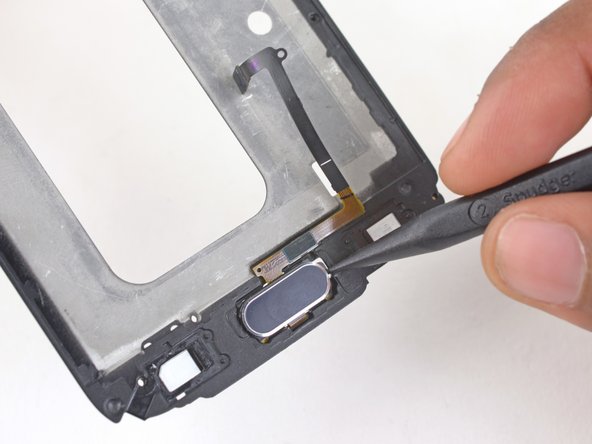
Step 46

– Turn the display frame and channel your inner superhero as you gracefully guide the home button cable through the heroic hole.
Tools Used


Step 48


The button is secured by a little tab on each side. To set it free, just give it a nudge far enough to slide past the edge of the bracket. You’ve got this!
– Once you’ve successfully detached the cable from the frame, grab that trusty spudger and gently nudge the home button all the way to the left side of its bracket.
– Now, with that same spudger, give the home button a little lift and pop it right out of its cozy bracket.
Tools Used
Step 49

– Looks like you’re feeling adventurous today! Don’t worry, everyone has to pop the bubble wrap at some point. To get to that pesky home button, follow our easy-peasy guide and show it who’s boss! Schedule a repair if you need help–no shame in that game!