Samsung Galaxy S6 Edge Charging Port Daughterboard Replacement
Duration: 45 minutes
Steps: 23 Steps
Get ready to breathe new life into your Samsung Galaxy S6 by replacing that defective or damaged charging port daughterboard. This vital component includes the audio jack, charging port, and side buttons, so let's get started! Please note that this guide involves removing the rear glass, which will damage the adhesive holding it in place. But don't worry, we've got you covered - just follow these steps to remove and reinstall the rear glass with ease.
Step 1


Be careful not to poke the tool into the microphone hole, or you might end up causing some damage. Instead, look for the outline of the SIM tray and use that as your guide.
- Grab a paper clip or that trusty SIM eject tool and gently poke it into the hole on the SIM card slot located at the top of your phone.
- Give it a little push to pop the SIM card tray right out.
- Carefully pull that SIM card tray from the phone and voilà!
Step 2


For carousel microwaves: Ensure that the plate can twirl like a pro! If your iOpener gets jammed, it might start to overheat and could end up burning. Keep it spinning and happy!
Give your microwave a quick clean before you start—any leftover grime on the bottom might hitch a ride on your iOpener.
- Pop the iOpener right in the center of the microwave like it’s ready for a spa day.
Tools Used

Step 3

Keep things cool—don’t overheat the iOpener, or you might end up with a surprise pop! Never go above 100˚C (212˚F).
If the iOpener starts looking puffy, hands off!
If it feels way too hot to handle in the middle, let it chill for a bit before reheating. When it’s just right, it’ll stay warm for up to 10 minutes.
Your microwave's wattage can change the heating time, so keep an eye on it! The iOpener is ready to go when it's just about too hot to handle.
- Give that iOpener a warm-up in the microwave for thirty seconds.
- As you tackle the repair, keep an eye on the iOpener. When it starts to chill, pop it back in the microwave for another thirty seconds to keep the heat flowing.
Tools Used
Step 4

The iOpener is going to be hotter than a summer day, so handle it with care! Grab an oven mitt if you need to, and keep those fingers safe!
- Grab the iOpener from the microwave by one of the flat ends—those sides stay cooler, so your fingers will thank you.
Tools Used
Step 5


Be careful when handling the iOpener, it's gonna be scorching hot! Make sure to hold it by the end tabs to avoid any ouchies.
No microwave? No problem! Just pop your iOpener into boiling water to get it nice and hot.
- Let's get started! Fill a pot or pan with enough water to completely cover an iOpener.
- Now, bring the water to a boil, then turn off the heat - we don't want any accidents!
- Next, carefully place the iOpener into the hot water for 2-3 minutes. Make sure it's fully submerged.
- Use some tongs to gently pull the heated iOpener out of the water.
- Dry the iOpener thoroughly with a towel - we're almost ready to go!
- Your iOpener is now ready to use! If you need to reheat it, just repeat the process: boil some water, turn off the heat, and soak the iOpener for 2-3 minutes. And remember, if you need help with anything, you can always schedule a repair.
Tools Used
Step 6


A hair dryer, heat gun, or hot plate will do the trick, but keep it cool—too much heat can mess with the OLED display or battery. Gentle warming is your friend here!
Opening your phone? Just a heads up: it’ll mess with those waterproof seals. Be sure to have some replacement adhesive on hand before diving in, or be extra cautious to keep it away from liquids when putting it back together without the new adhesive.
If you're dealing with a shattered screen, a little packing tape goes a long way! Stick it over the entire panel to keep everything together while you work your magic.
You might find yourself reheating and reapplying the iOpener a couple of times to get your phone nice and toasty. Just follow the iOpener instructions, and steer clear of overheating. You've got this!
- Place the warmed iOpener on the back panel for about two minutes to help loosen the adhesive hugging the glass edges.
- Move the iOpener to warm up the rest of the panel for another two minutes.
Tools Used
Step 7


To make things easier, try adding a few drops of isopropyl alcohol into the gap once the pick is inserted. This will help loosen the adhesive, making the next steps a breeze. If you're not comfortable with this step, don't worry, you can always schedule a repair
- When the rear glass feels nice and warm to the touch, grab a suction cup and stick it close to the bottom edge of the glass.
- Gently pull on the suction cup to make a tiny opening beneath the rear glass, then slide in an opening pick to keep that gap open.
Step 8


Once you’ve made some progress, it’s a good move to leave the pick parked in place and grab a second one for the next spot. Keeping the pick wedged in stops that stubborn glue from sticking back together.
If the rear glass starts to cool and the adhesive gets tough, give it another round of heat to keep things smooth.
- Gently glide the pick along the bottom edge of the phone to cut through the sticky adhesive holding the rear glass in place.
Step 9


- Keep the momentum going by heating and gently cutting along the remaining three edges of the phone, just like you did before.
- To keep things smooth, slide an opening pick under each edge — this helps stop the adhesive from sealing back up as you work.
Step 10


- Grab your trusty opening pick and gently glide it through any stubborn adhesive that might still be hanging on.
- Carefully lift off the rear glass like it's the lid of a treasure chest!
Step 11


- Installing a new rear glass? Let's get it done smoothly!
- If you're reusing the old rear glass or going with a glass that doesn't have adhesive already, check out this guide for some extra tips.
- Start by using tweezers to gently peel off any leftover adhesive from the phone's chassis.
- Next, clean up the adhesion areas with some high-concentration isopropyl alcohol (at least 90%) and a lint-free cloth. Remember to swipe in one direction only — no back-and-forth action here. This helps prep everything for the new adhesive.
- Peel the backing off the new rear glass, carefully line up one edge against the phone chassis, and press it down firmly. You’ve got this!
Tools Used

Step 12

- Time to unleash your inner tech wizard! Carefully take out the thirteen 3.3 mm Phillips #00 screws from the midframe. You've got this!
Step 13


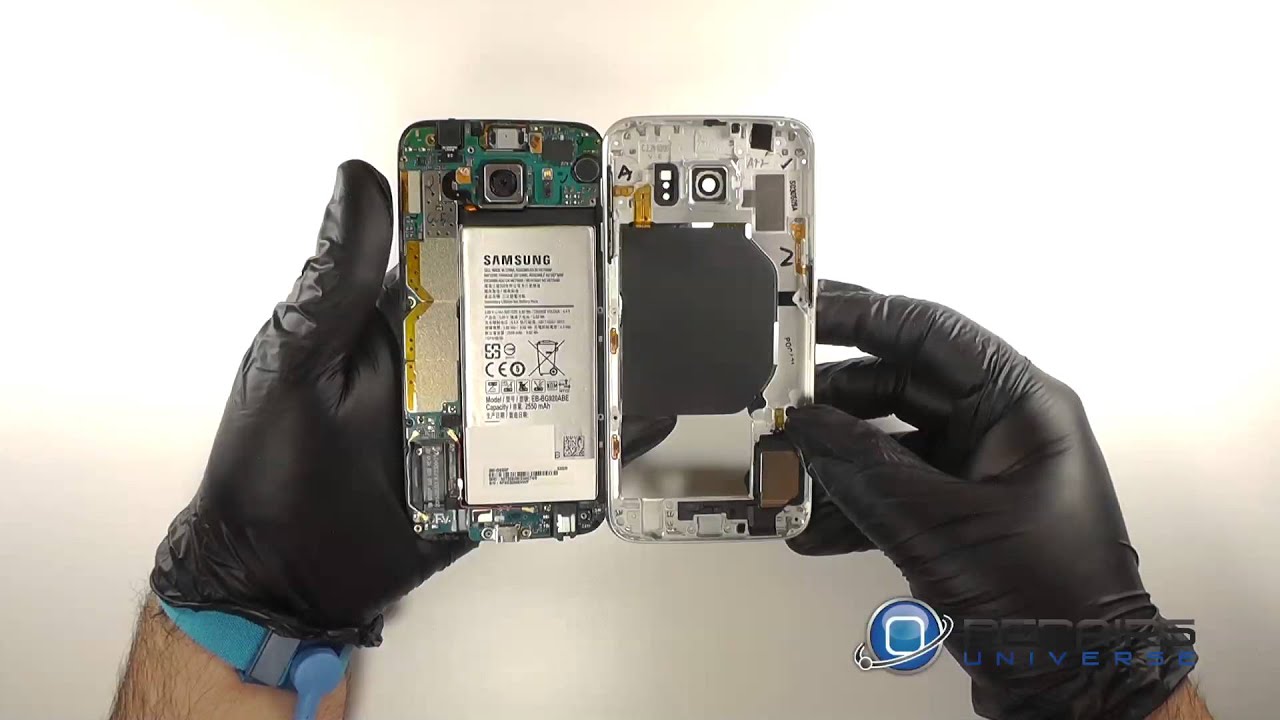
- Give a little push on the back of that battery and then gently lift the edges of the midframe to pop it away from the rest of your phone. You're doing great!
Step 14


- Grab the flat end of your spudger and gently disconnect the battery ribbon cable from the motherboard. Easy does it—just a smooth lift to keep everything in good shape. If you need a hand, remember you can always schedule a repair with Salvation Repair.
Tools Used

Step 15


- Gently unplug the home button ribbon cable from the motherboard—like you're taking out a tiny, delicate plug from a wall.
Step 16


- Grab that trusty spudger and use its sharp end to gently unplug the two antenna interconnect cables from the motherboard. You've got this!
Tools Used
Step 17


- Gently detach the display ribbon cable from the motherboard using the flat end of your trusty spudger. You've got this!
Tools Used
Step 18


- Gently disconnect the earpiece ribbon cable from the motherboard. It’s a simple step, but make sure you’re careful not to damage anything along the way. Take your time, and if you need assistance, don’t hesitate to schedule a repair.
Step 19


The motherboard is super sensitive to static, so be sure to treat it with care. A little static shock can cause big problems! Make sure you’re using an anti-static bracelet when handling it, just to be safe.
Don’t try to yank the motherboard out just yet! The ribbon cable on the underside is still connected and needs to be unplugged first. A little patience goes a long way here.
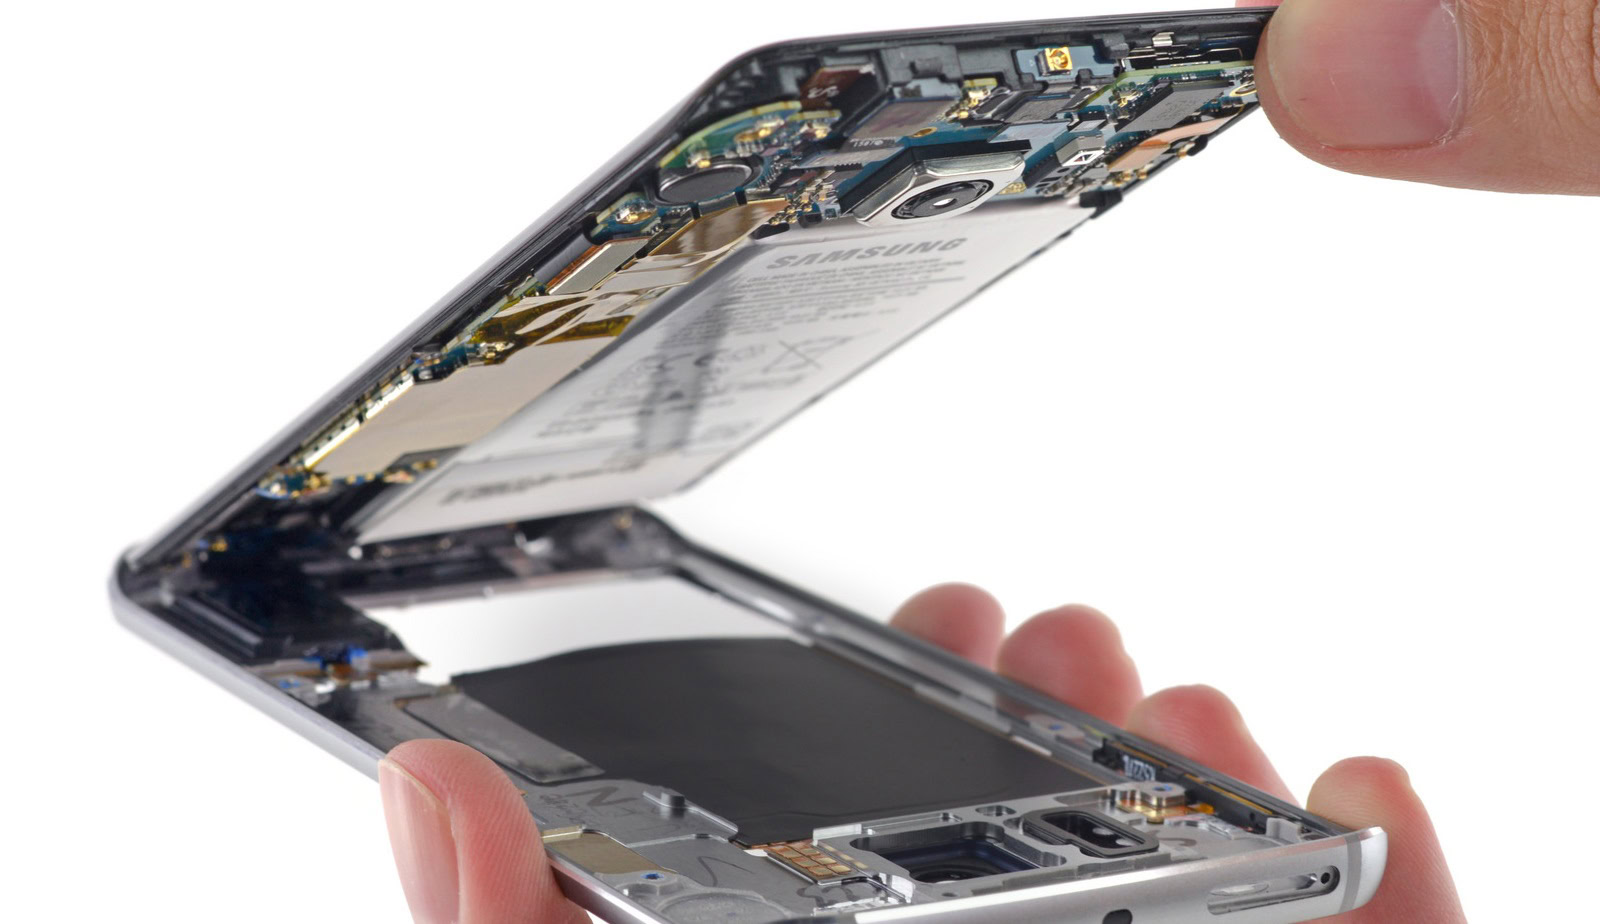
- Get a good grip on the motherboard by holding it firmly on both edges near the top of the device.
- Carefully lift the motherboard up and away from the display. Be gentle with the daughterboard ribbon cable to avoid putting too much stress on it.
Step 20


- Gently unplug the daughterboard ribbon cable from the bottom side of the motherboard. You've got this!
Step 21

- Unscrew those two 2.5mm Phillips #00 screws like a pro! You've got this!
Step 22


- Grab your trusty spudger and use its pointed tip to gently lift the small section of the daughterboard that's got a bit of adhesive holding it down. You've got this!
Tools Used
Step 23


- Gently lift the daughterboard away from the phone's body and set it free!